
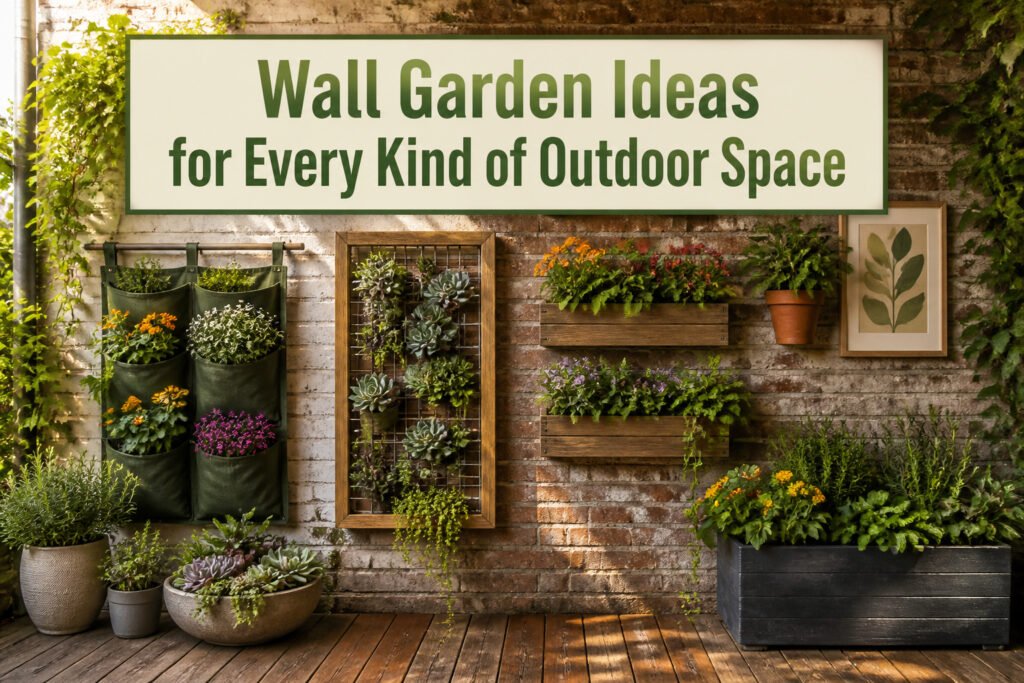
Wall garden ideas run from a tension rod and six fabric pockets to modular living-wall kits with timed drip lines, and the right one depends on whether you own the wall or just the lease. Rental siding taught me that the hanging method matters more than the plants: my first pocket planters hung from a braced tension rod because screws were forbidden, and they moved with me when the lease ended. The condition that changes everything is drainage, or the lack of it. A succulent frame I built with pine and wire mesh slumped in three weeks because moisture stayed too long, and that same mistake kills strawberries in bottle planters when drainage holes are forgotten.
1. Vertical Herb Garden With Pocket Planters
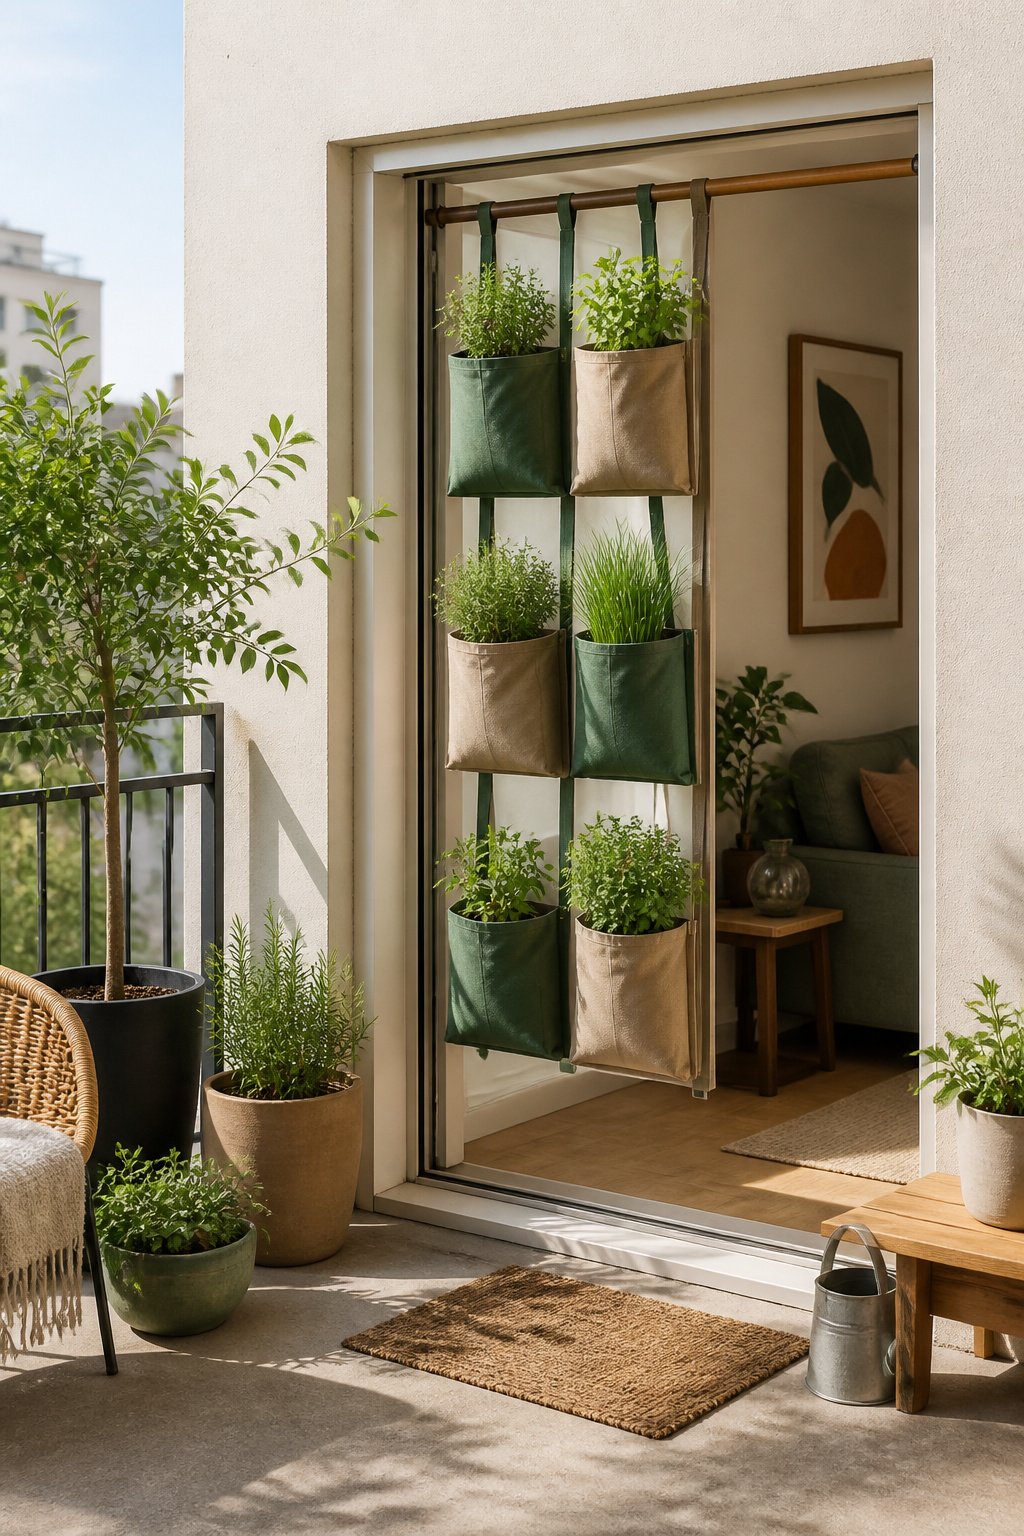
Pocket planters turn a blank vertical surface into growing space without eating the floor area you do not have. The fabric pouches stay light even when wet, which matters on a balcony where every pound tests the railing. I started with six pockets across two columns, enough for thyme, oregano, and chives without crowding the shallow roots. Those three survived my early overwatering and a week of forgetting to check them; strawberries would have rotted in the same conditions.
The hanging method mattered more than the herbs. My rental siding could not take screws, so I ran a tension rod through the top grommets and braced it inside the door frame of my patio. For a narrow wall, a pair of adhesive hooks rated for outdoor load works if the planter stays under about four pockets wide. Five separate roundups list pocket planters among the top wall garden ideas, and the pattern makes sense: they cost less than modular living-wall systems and move with you when the lease ends.
2. Climbing Plants on Trellises and Arbors
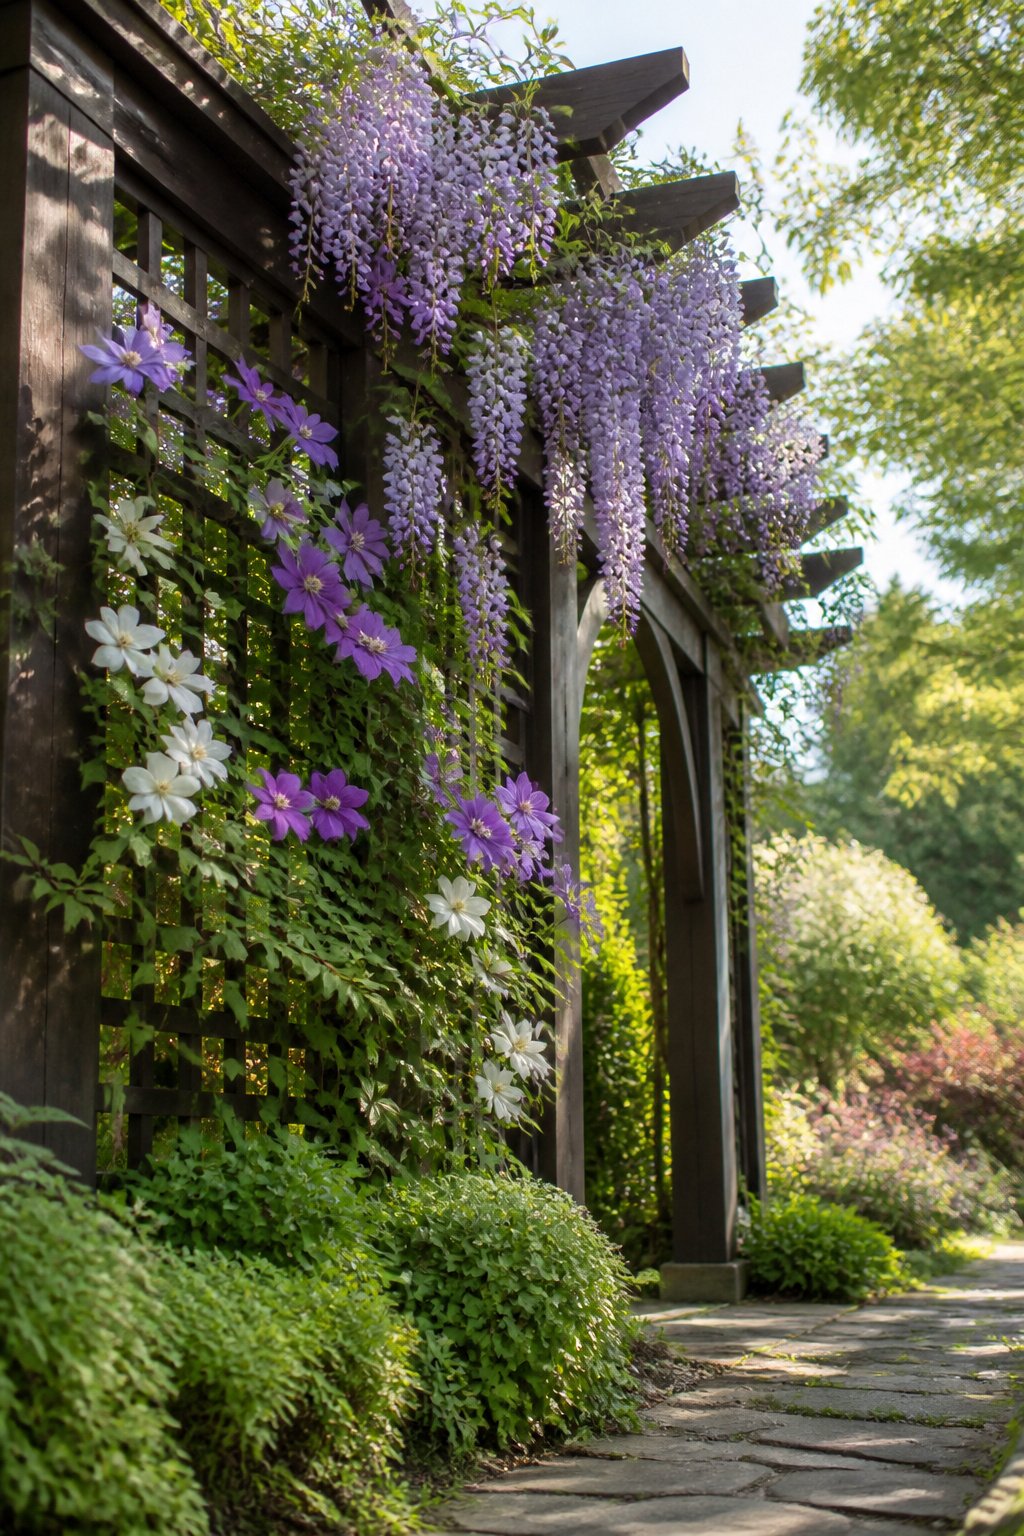
Wisteria and clematis belong on trellises and arbors, not just because they climb, but because they need the right structure to stay healthy. I learned that the hard way with a wisteria I planted against a garage wall. The trellis sat only six inches out, and within two years the root crown had pushed against the siding. Trellis depth matters: give climbing plants at least 12 to 18 inches of clear space behind the growth so roots can spread and air circulates. The trellis itself cost about $45 in cedar slats and brackets, plus another $20 for concrete screws that actually held in the stucco. That wisteria bloomed in year three, which felt like forever. A clematis I started the same spring flowered the first season, though it took two years to cover its arbor fully. The real mistake was planting too close to the wall. I set the root ball eight inches out and still had to transplant it after the first winter. The heat reflecting off the siding cooked the early buds on the south face. Wall gardens with climbing plants on supports count as a distinct approach, separate from pocket planters or living walls, because the plant stays in the ground and the structure does the vertical work.
3. Wall-Mounted Planters and Shelves
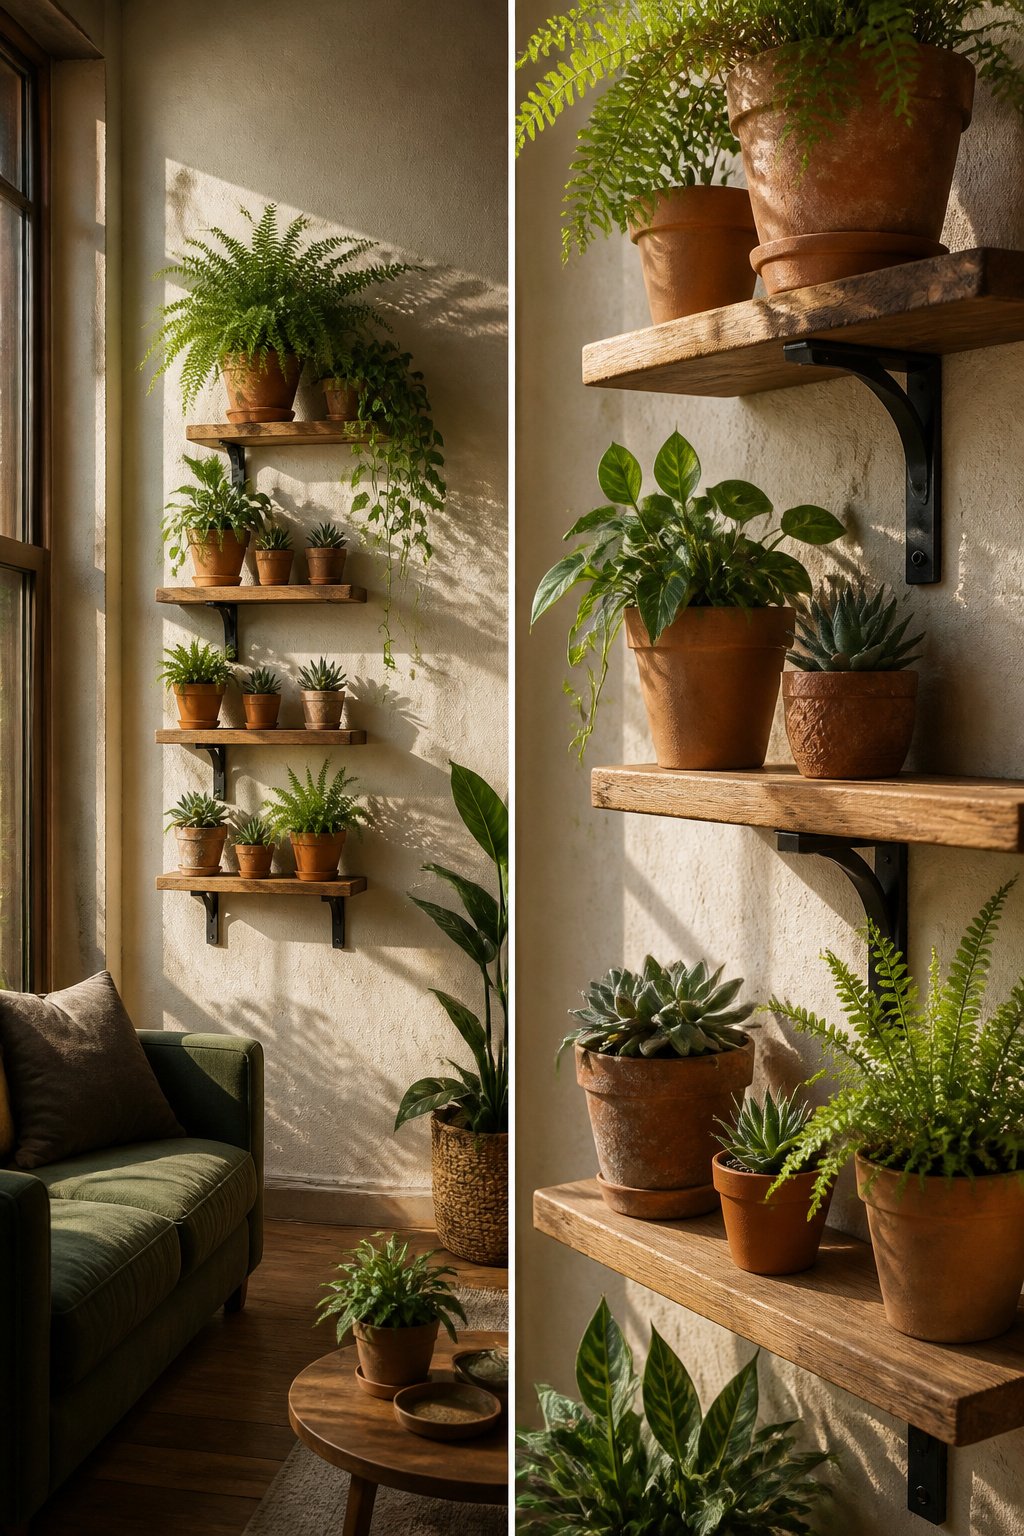
Wall-mounted planters and shelves are the easiest place to start if you rent or just want to test vertical gardening without committing to a full installation. I spent a season with adhesive hooks and tension rods before I ever touched a drill, and that hesitation saved me from mistakes I would have made on someone else’s brick.
The weight limit matters more than the bracket style. A saturated 6-inch terracotta pot runs heavier than most people guess, and a shelf that lists 25 pounds total fills fast once you add soil, water, and a plant pushing past its nursery size. A depth of at least 8 inches keeps a standard 6-inch pot from tipping forward when the plant leans toward light or catches rain at an angle. Anything shallower looks fine in the product photo and fails by July.
Drill-free options have improved. I tried adhesive strips rated for outdoor use, then switched to rail systems that hang from a gutter or fence top, and finally landed on brackets that slot into a deck railing without hardware. Each step taught me what I actually needed versus what I thought would look tidy.
Pocket planters, which I’ll get to elsewhere, hang differently. Their felt or plastic cells drain through the back and suit shallow-rooted herbs or strawberries. Wall-mounted shelves give you full pot depth, real drainage holes, and the option to swap in a 1-gallon container when your starter outgrows its space. That difference in plant size and drainage is why shelves still outrank pockets for anyone growing vegetables or perennials.
4. Living Walls With Built-In Irrigation
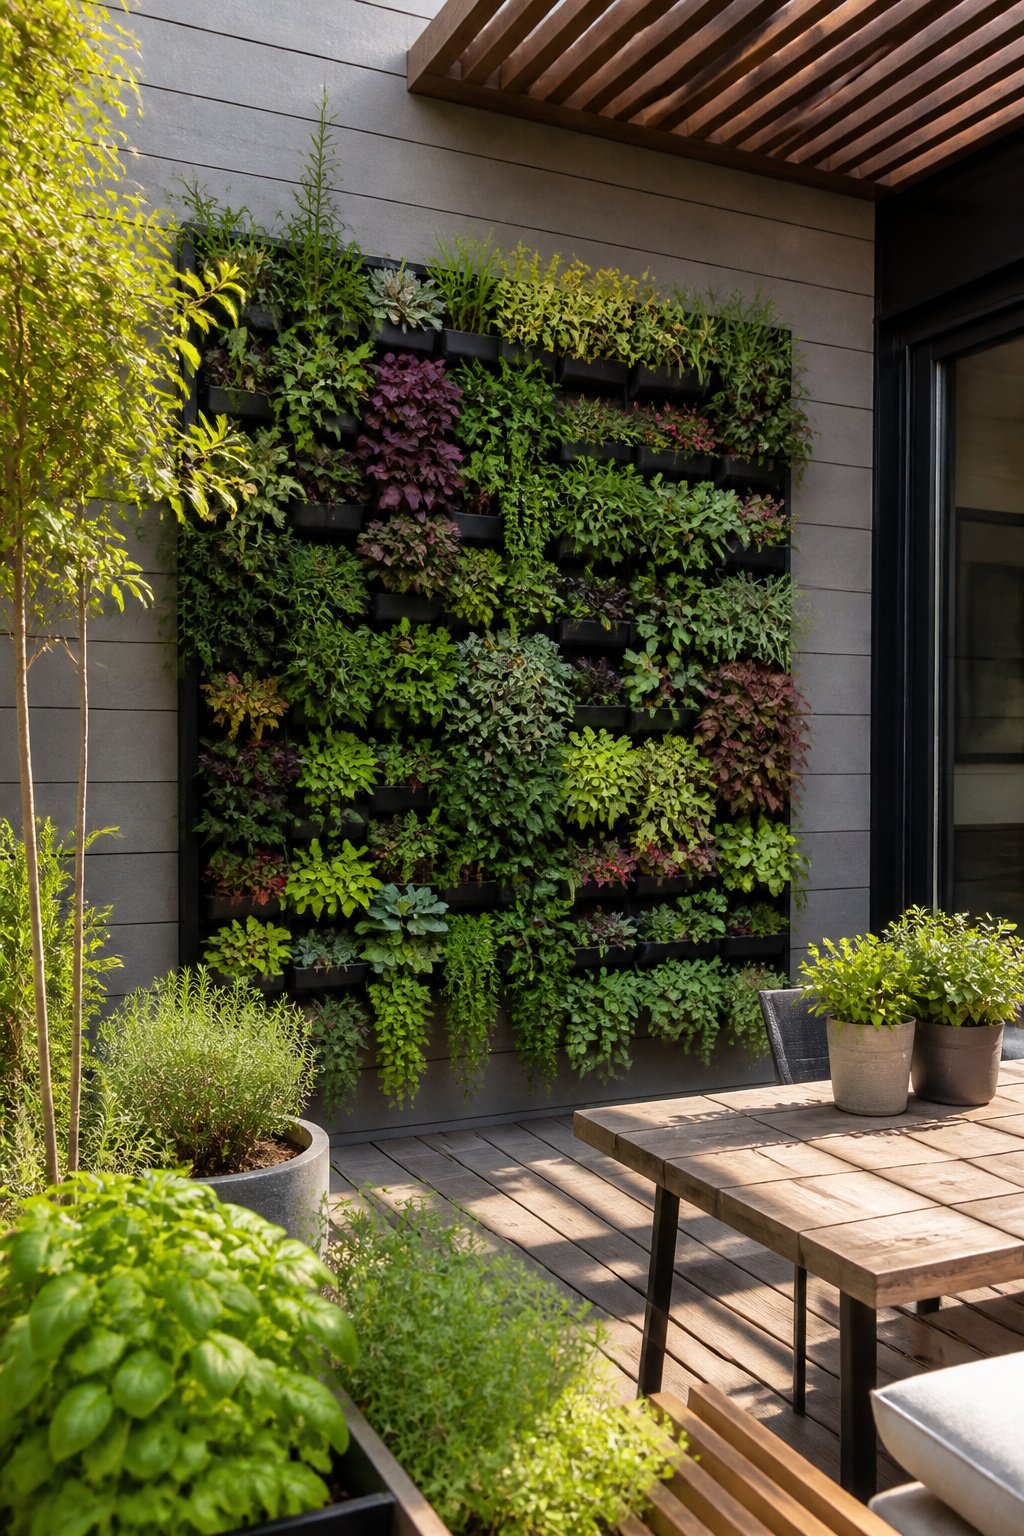
Built-in irrigation sounds like the luxury tier of wall gardens, and for good reason. The upfront cost stopped me cold the first time I priced a modular living wall kit with a drip line and timer. Four sources describe these systems as typical for living walls, but "typical" does not mean "accessible." For a gardener running a $500–$800 annual budget, the kit alone can eat half a year or more.
I installed my first drip line wrong by running it level across the top instead of angling it so gravity helped the flow. The middle pockets stayed soggy while the edges dried to dust. Drought-tolerant plants survived that unevenness better than thirsty ones. Compact, fairly drought-tolerant varieties handle the dry pockets; anything needing steady moisture wants a more precise setup or hand-watering backup.
Two ways to play this: connect to mains water with a simple timed drip system you can DIY, or choose a kit with a top-fill reservoir for watering-can duty. The mains route wins only if you already have the spigot and the budget. For most beginners on a tight annual spend, a hand-filled top box is the honest starting point, not the full built-in irrigation the brochures show.
5. Upcycled Planters From Pallets and Bottles
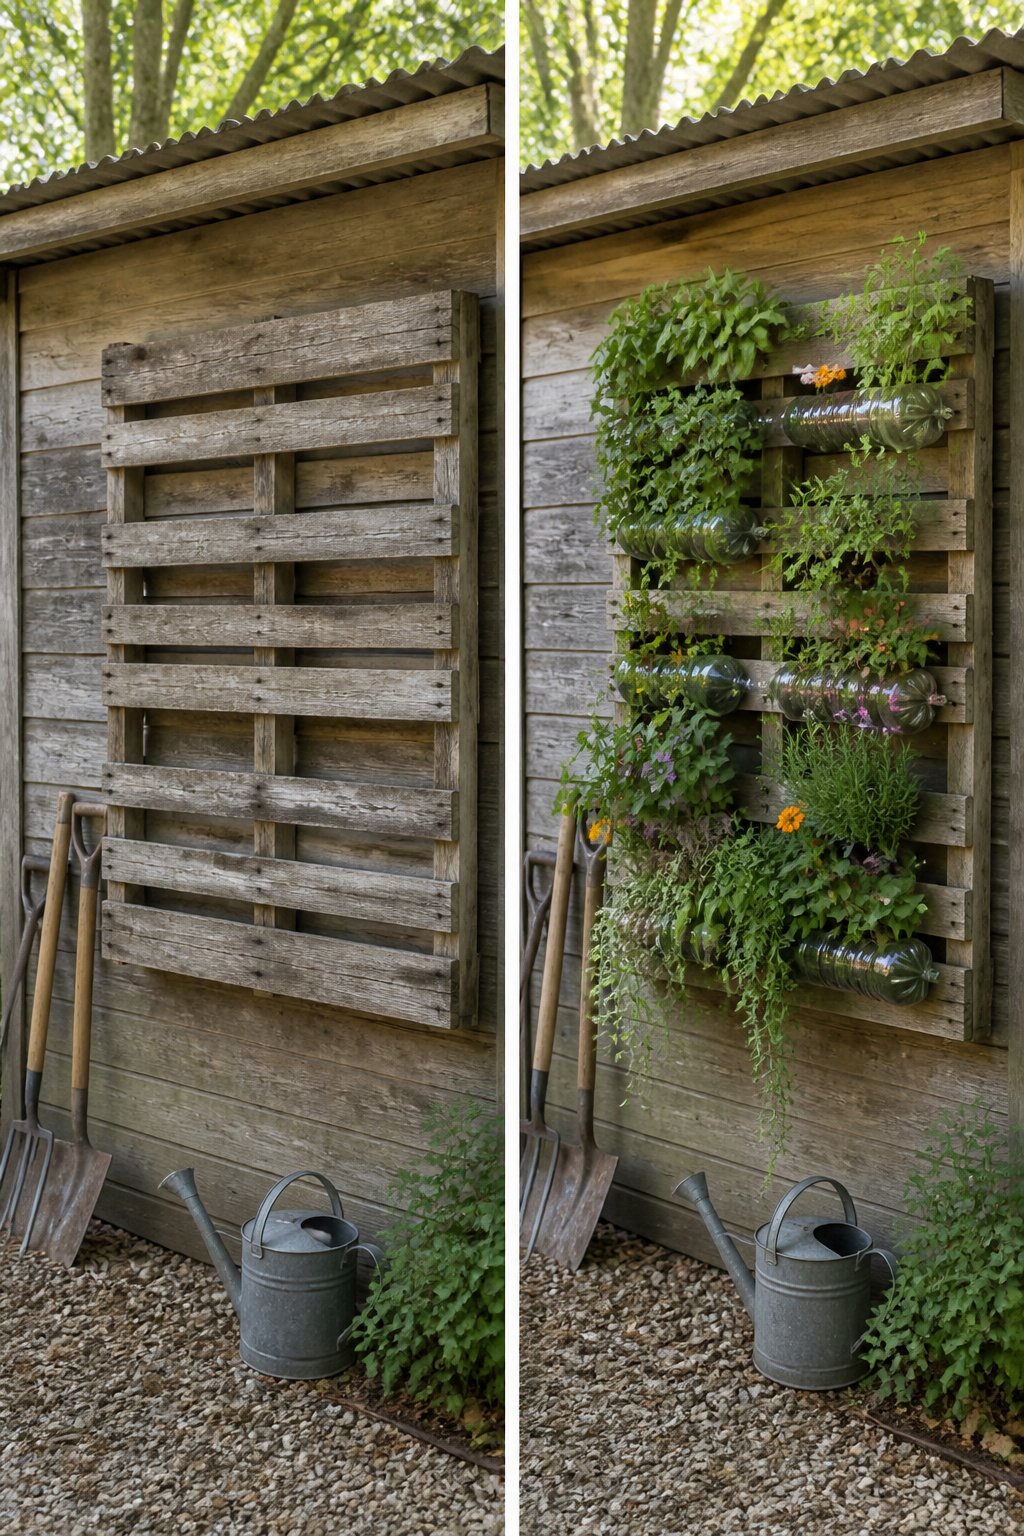
Pallets and plastic bottles dominate every upcycled wall garden search, and both have real limits that the finished photos rarely show.
The pallet safety check I skipped the first time still annoys me. Look for the "HT" stamp: heat-treated, not chemically fumigated with MB (methyl bromide). The HT mark means the wood was baked to kill pests; MB means it was gassed, and that residue does not belong near food or roots you will handle weekly. I built a whole herb wall from an unmarked pallet before I learned to flip it and check the center slat. The herbs grew, but I replaced the soil the next season once I knew what to look for.
Bottles are faster than pallets by hours. The method that actually worked was scoring around the circumference with a box cutter, dipping the plastic in boiling water for ten seconds to soften it, then snapping the top half clean. Twelve planters in an hour, hung with two holes punched near the cut edge. What grew well: compact basil, trailing nasturtiums, and shallow-rooted lettuce through spring. What rotted: anything that needed drainage I forgot to add, and cherry tomatoes that outgrew the root space before July.
The gap between the Pinterest shot and my wall was light. Those perfect pallet gardens are staged at peak morning sun with annuals just bought from the nursery. My north-facing bottles stretched for leggy weeks, and the pallet soil dried unevenly, top row crisp while the bottom stayed soggy. Plan for the wall you have, not the one in the photo.
6. Vertical Vegetable Gardens With Tiered Planters
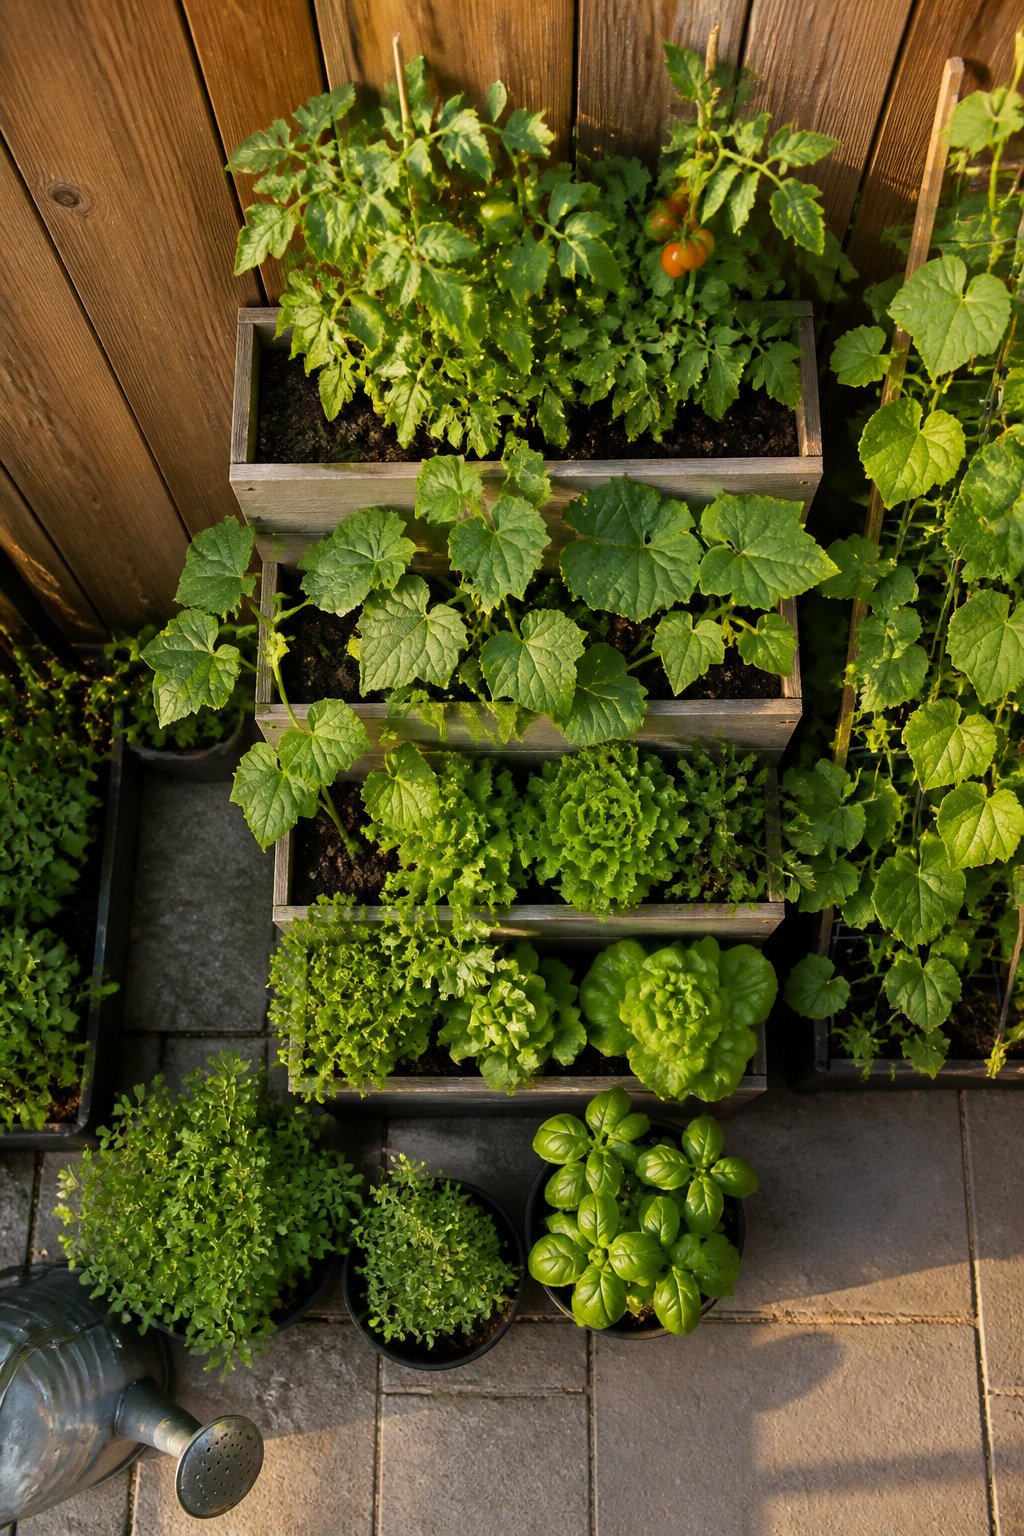
Climbing tomatoes, cucumbers, and squash were the three vegetables I built my first tiered planter around, and they all made it. The seed packets called for six to eight hours of sun, but the wall I chose only catches about five and a half in midsummer, angled through a neighbor’s oak. The tomatoes and cucumbers still produced; the squash sulked and never fruited, which taught me that vertical space does not cancel out light requirements.
My real mistake was soil depth. I filled each tier with only six inches of mix because the whole unit felt heavy enough already. Pole beans and the smaller cucumbers managed, but a summer squash I’d wedged into the bottom tier stalled out at six inches tall, its taproot hitting the liner. Most vegetables can grow in vertical or hanging setups, but root depth is the limit you do not get to ignore.
"Vertical gardening allows you to produce more food per square foot compared to traditional methods, making it ideal if you have limited growing space."
That square-foot efficiency only holds if your supports are sturdy enough. My first planter leaned three degrees by August under the weight of two tomato vines. I added a bracket to the wall in year two and have had no trouble since.
7. Succulent Wall Art in Wooden Frames
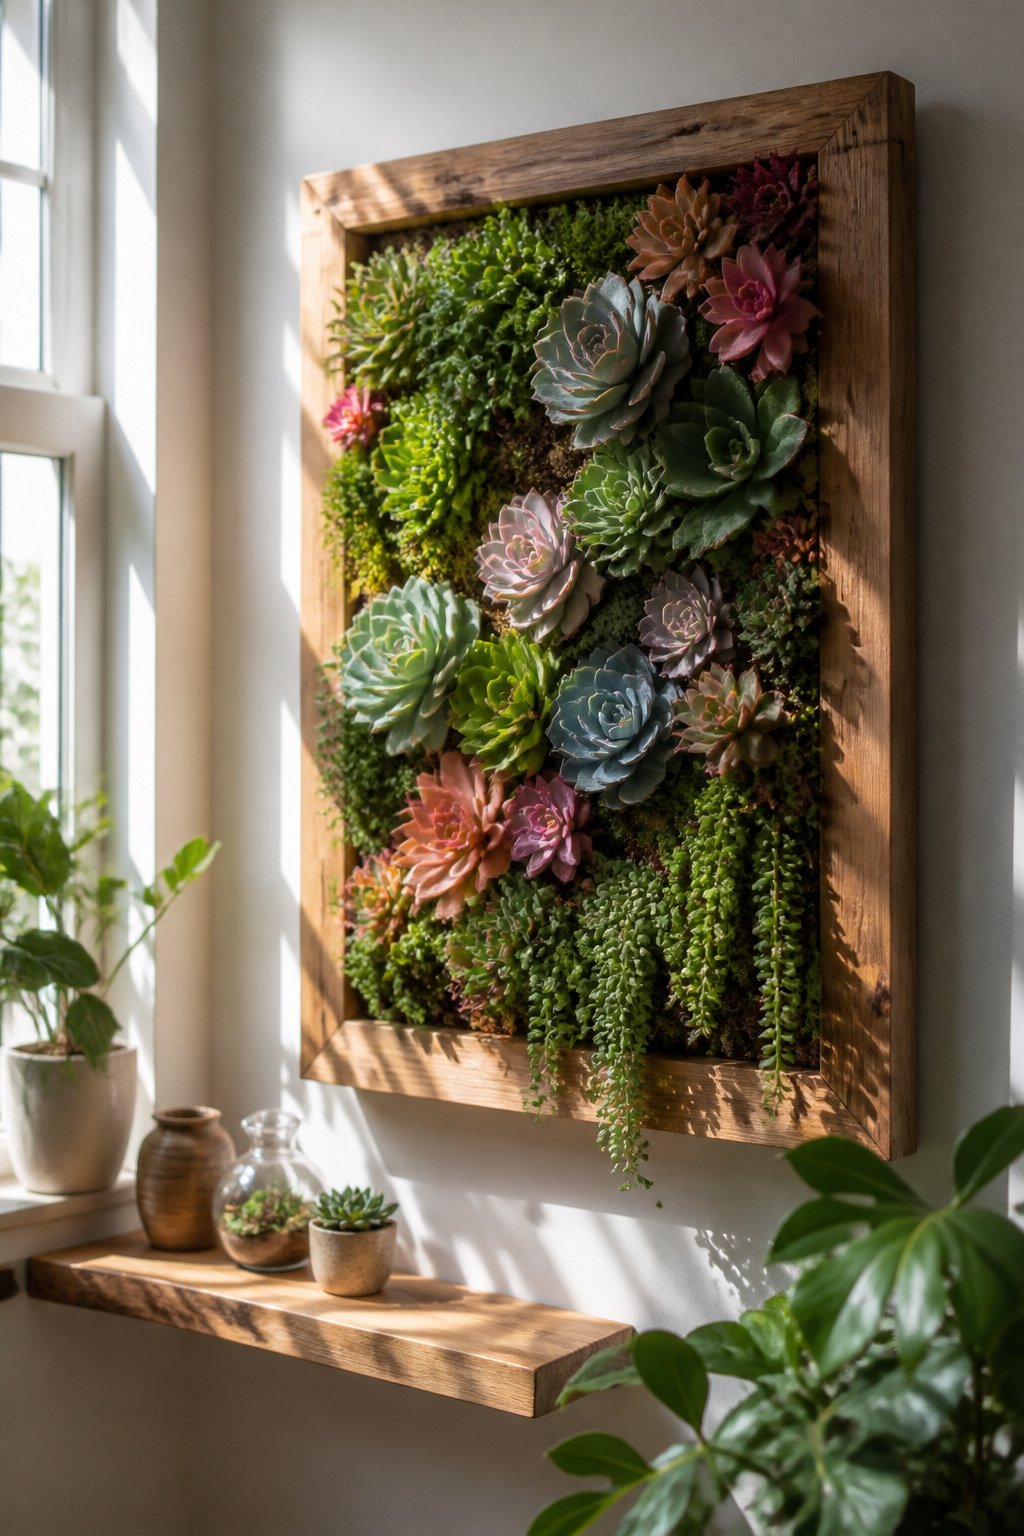
Wooden frames look simple until the backing fails. I built mine with pine shadow-box sides and stapled wire mesh across the back, thinking the tension would hold. Three weeks hung vertical, the mesh sagged and the whole arrangement slumped like a tired painting. The fix was a tighter weave, doubled back at the edges, or switching to hardware cloth with a finer grid.
Succulent choice mattered more than arrangement. Echeveria and sedum held their shape; the graptoveria stretched hard for light within two weeks and never recovered that compact rosette look. Plants in wall frames dry out faster than pots on a table, something I learned after watering on the same ten-day summer schedule I used for my potted collection. Half the frame browned before I stepped it up to twice a week in July heat.
Indoor placement extends the life of the piece but demands a south-facing window or supplemental light; the stretching happens faster inside with weaker sun. Outdoor walls in zone-appropriate climates handle the drainage better, though afternoon shade prevents the soil from baking to dust between waterings.
8. Vertical Garden Towers and Stacked Planters
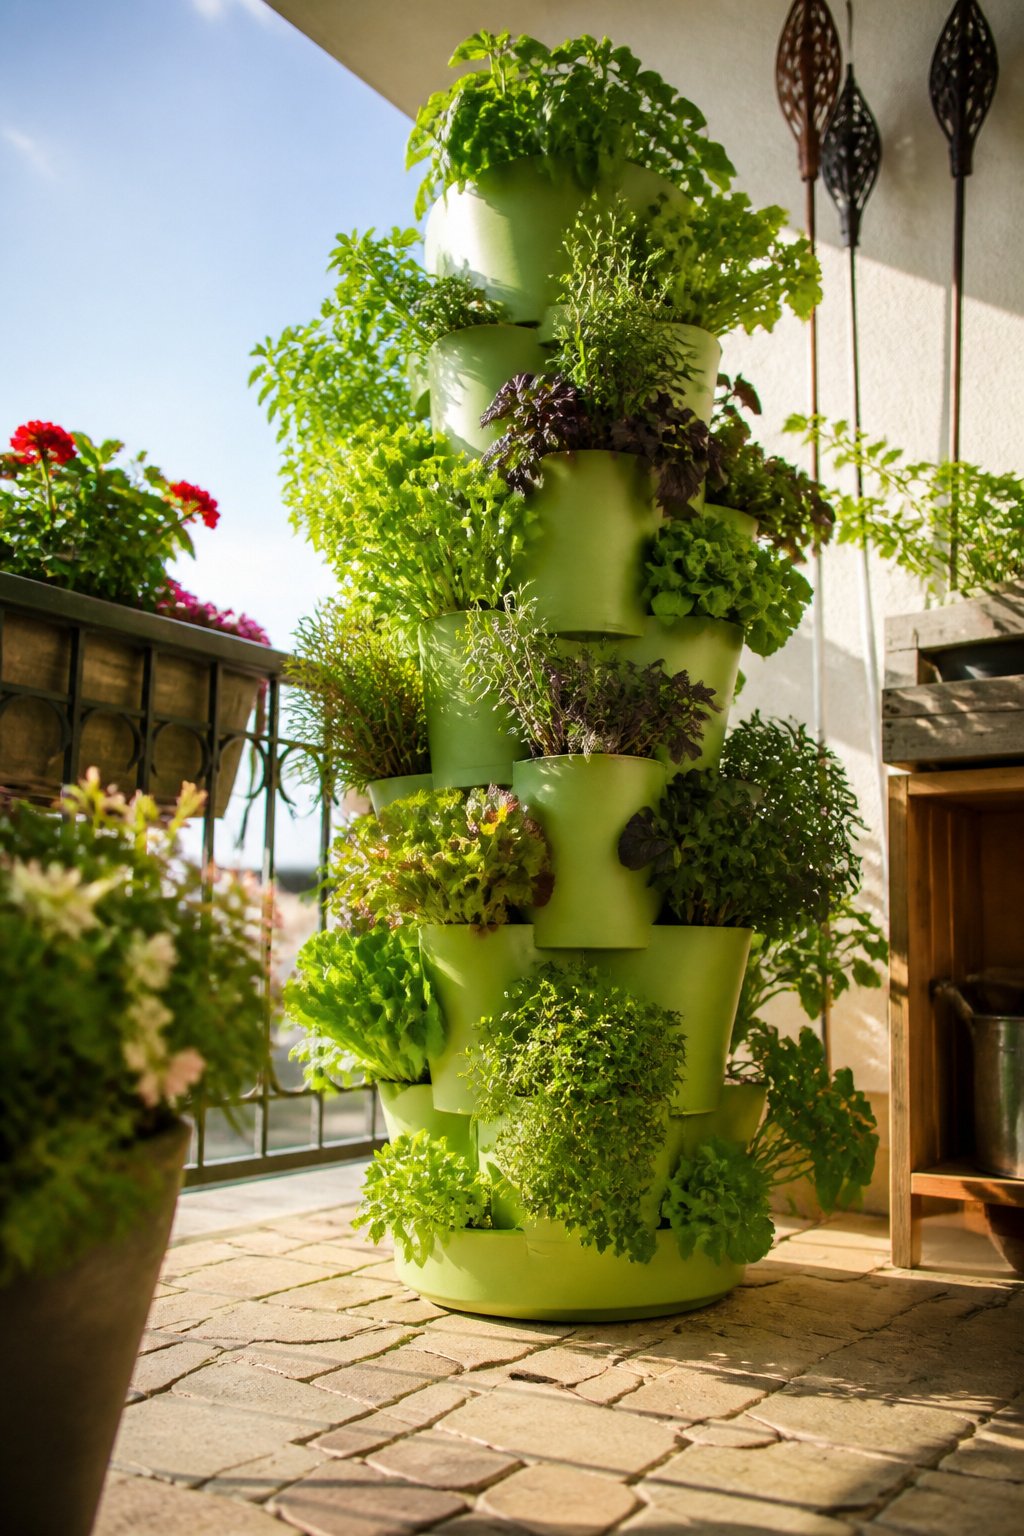
A five-tier tower fits compactly against a wall or railing and still leaves room to move. The top two tiers catch the strongest light, so I put basil, dill, and the herbs that sulk in shade up there. Leafy greens and compact lettuce handle the lower levels where light drops off.
The tower came with a fixed base, which meant one side baked in morning sun while the other sat in shadow half the day. A spinning base changed that. Now I give it a quarter-turn with my coffee and even out the exposure without unstacking anything.
Tiered planters run cheaper upfront and move as one piece, but they are heavier once filled and harder to rotate. Towers cost more and need that base added, yet spinning them takes one hand and ten seconds. For a balcony where you step around the furniture, that mobility matters more than the price gap.
9. Hanging Gardens With Pots and Baskets
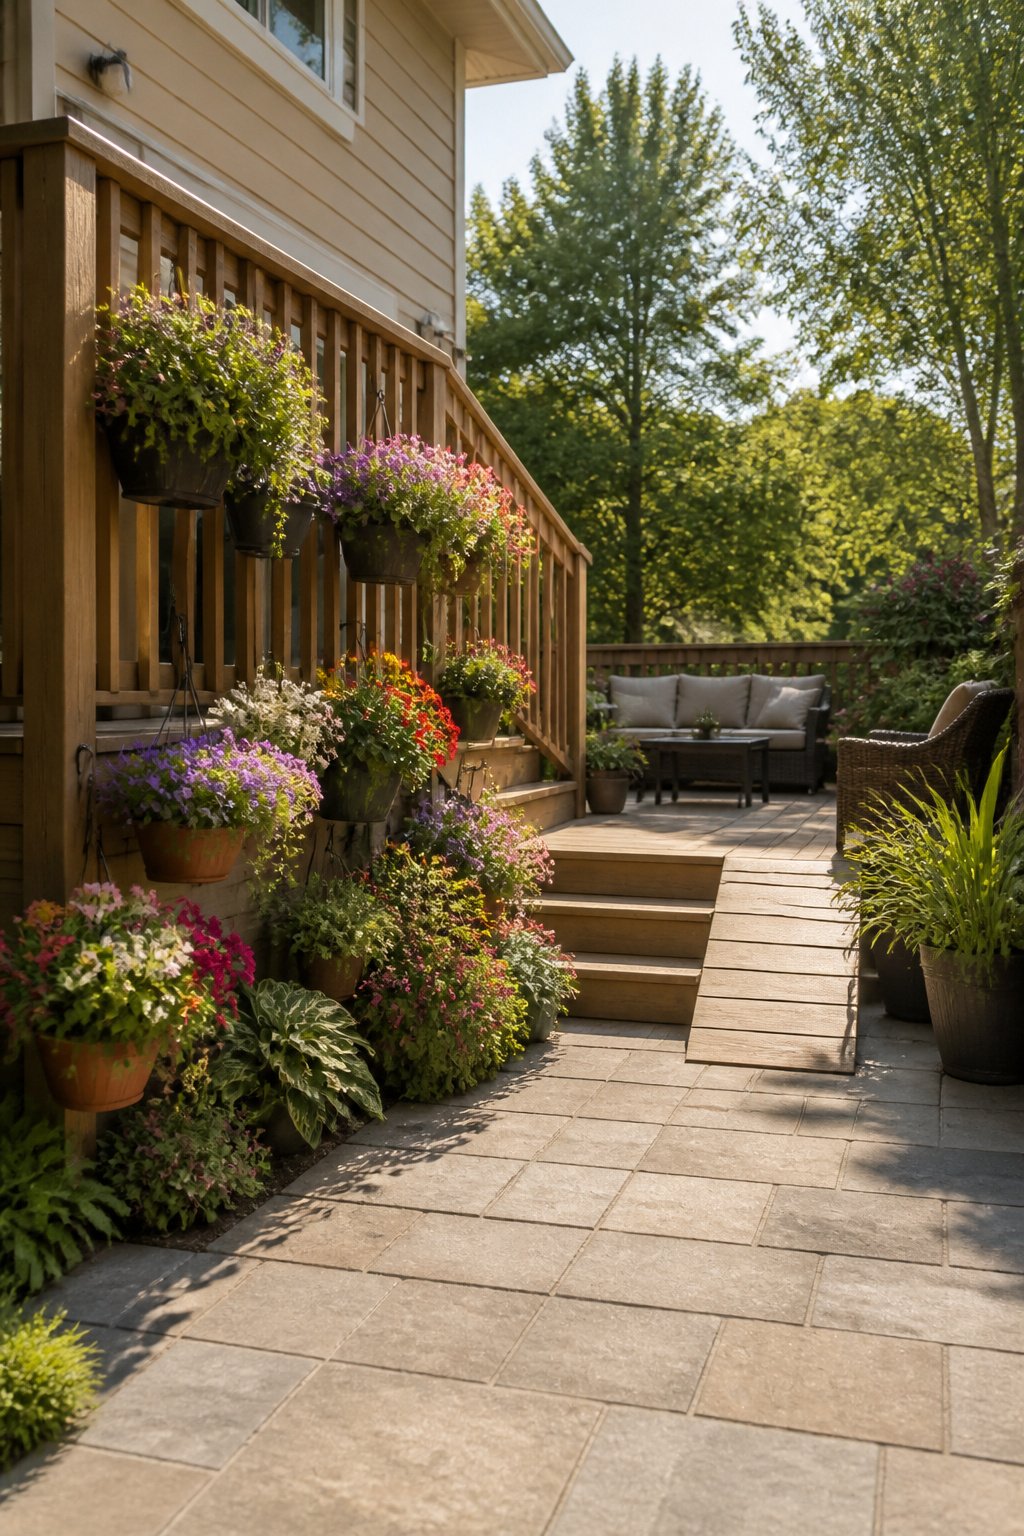
The first hanging basket I hung was a disaster because the shepherd’s hook bent halfway through the season under the weight of wet soil and a full-grown fuchsia. A $12 shepherd’s hook rated for 15 pounds will fail; the $40 wall-mounted bracket I switched to never wobbled, and four years later it is still on my balcony rail. The liner mattered almost as much as the bracket. I started with a basic coconut liner that dried out in a single afternoon of sun and wind, so now I use a thick felt liner or double-line with plastic sheeting poked with drainage holes, which buys me a day between waterings. Wind is the overlooked killer on balconies. Petunias and trailing lobelia shredded their petals within a week; geraniums, trailing nasturtiums, and anything with small, waxy leaves like portulaca handled the gusts without complaint. What I like about pots and baskets versus fixed wall planters is the movement. I can shift a basket to track the sun as the season changes, or move it under the eave when a storm warning hits. A wall-mounted planter stays where you bolted it, which is stable but rigid. For renters or anyone still learning their light patterns, the basket’s ability to travel is worth the extra watering vigilance.
10. Decorative Flower Walls for Color
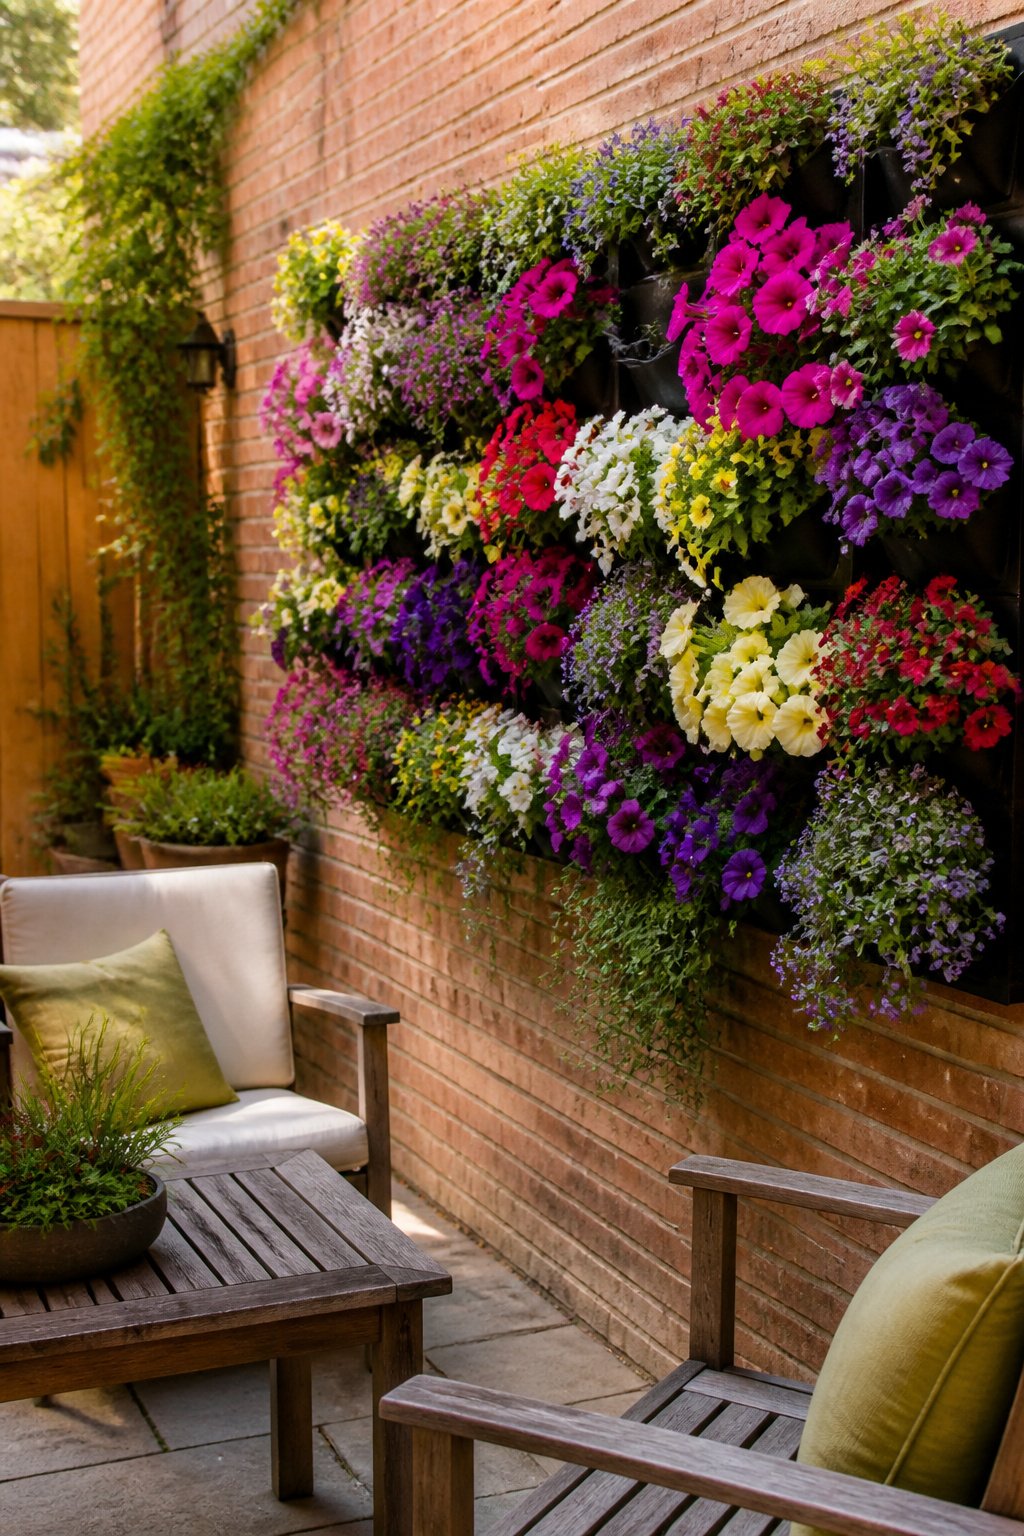
Annuals give you the faster payoff for a flower wall, which is why most of my first attempt was petunias, calibrachoa, and a trailing verbena I found on clearance. Perennials like creeping phlox or wall cress will come back, but in a vertical setup they take longer to knit together and the first spring looks like you hung up a few sad plugs in a grid. I was in zone 7b, and that wall stayed embarrassingly patchy until late July because I had underestimated how long it takes root-bound annuals to spill over the edges of a pocket planter. The flowering window I actually got ran from mid-August to first frost, not the May-to-September look I had pictured.
The calibrachoa never stopped, and a purple wave petunia I bought in a four-pack turned into a solid curtain. The mistake was a mandevilla I tried in the top row. It grew woody and heavy, pulled its mount screws halfway out of the fence by September, and I had to cut it back before the whole assembly tore loose. Deadheading at six feet with a stepstool got old fast; by late summer I mostly just snipped spent blooms when I happened to be up there watering, which meant the lower halves of the pockets looked better than the top. A pole pruner with a snip head would have been worth buying.
Why Vertical Gardening Works in Small Yards
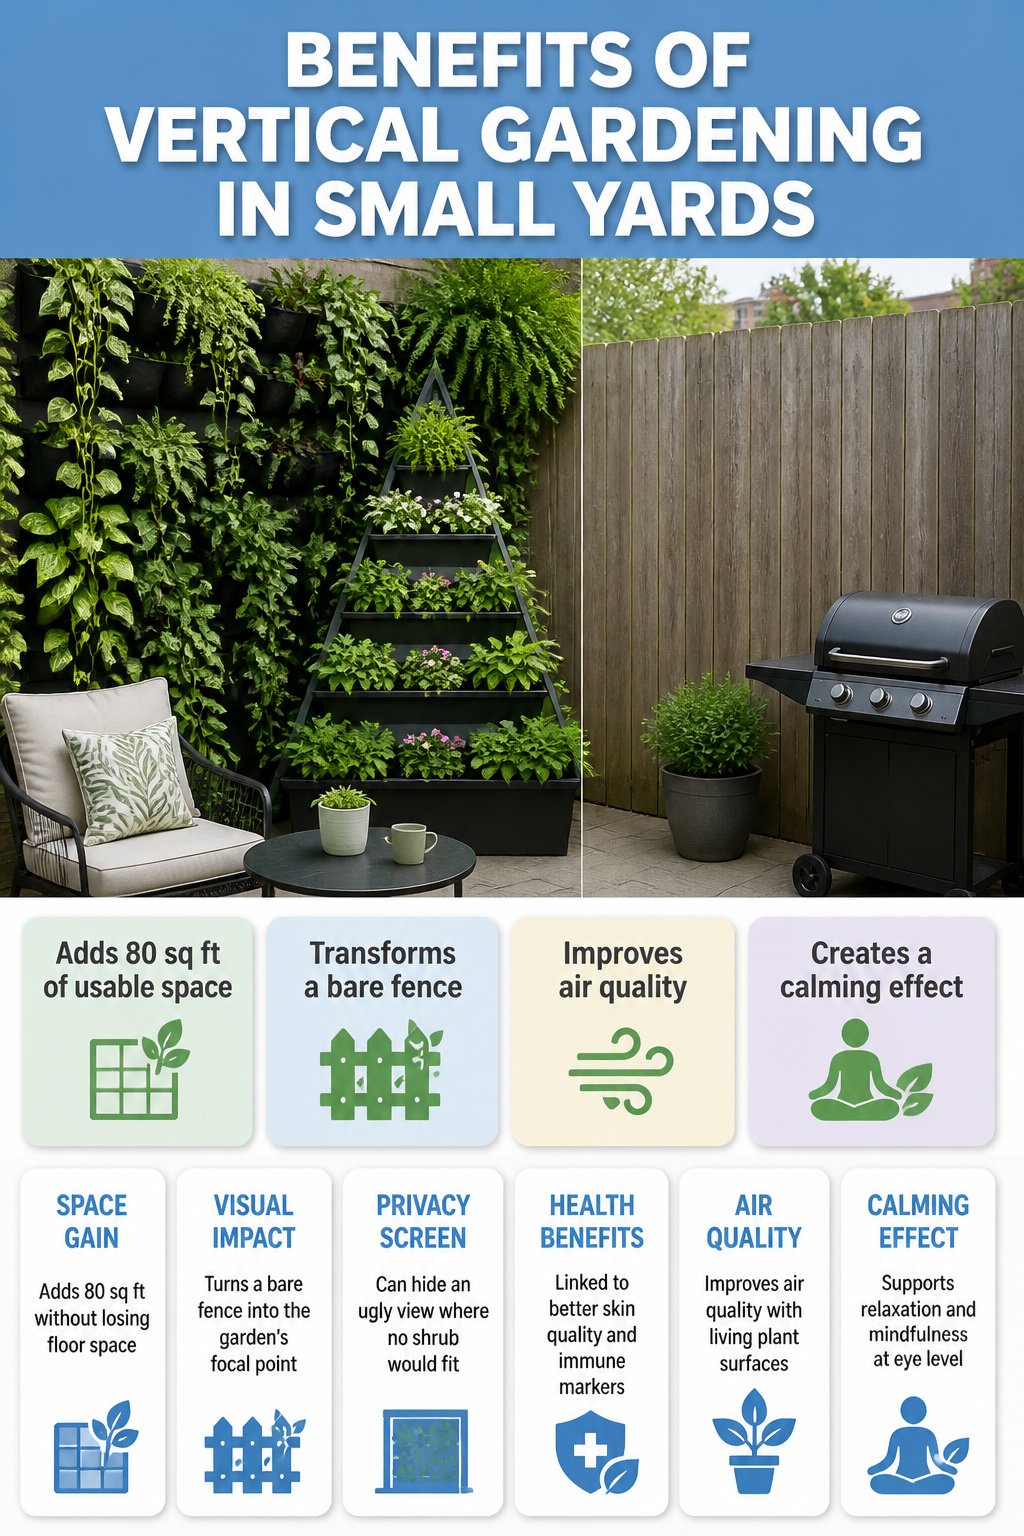
A 12-by-10 patio gives you 120 square feet of ground, which starts feeling tight fast once you add a chair and a grill. Going vertical bought me back roughly another 80 square feet of usable growing area without stealing floor space. That is the first reason wall gardens matter in small yards: space you already own but never planted.
The visual shift is just as real. A bare fence reads as a dead end; the same fence lined with trailing pothos or a tiered pyramid planter turns into the garden’s focal point. Todd Haiman, a New York designer, notes that vertical planting can hide an ugly view outright where no shrub would fit.
Then there is the air side. Research on office green walls has tied living plant surfaces to measurable improvements in skin quality and immune markers, plus the calming effect that explains why meditation studios keep installing them. In a compact yard, that benefit sits right at eye level instead of somewhere across a lawn you do not have.
Plant Selection for Vertical Growing Conditions
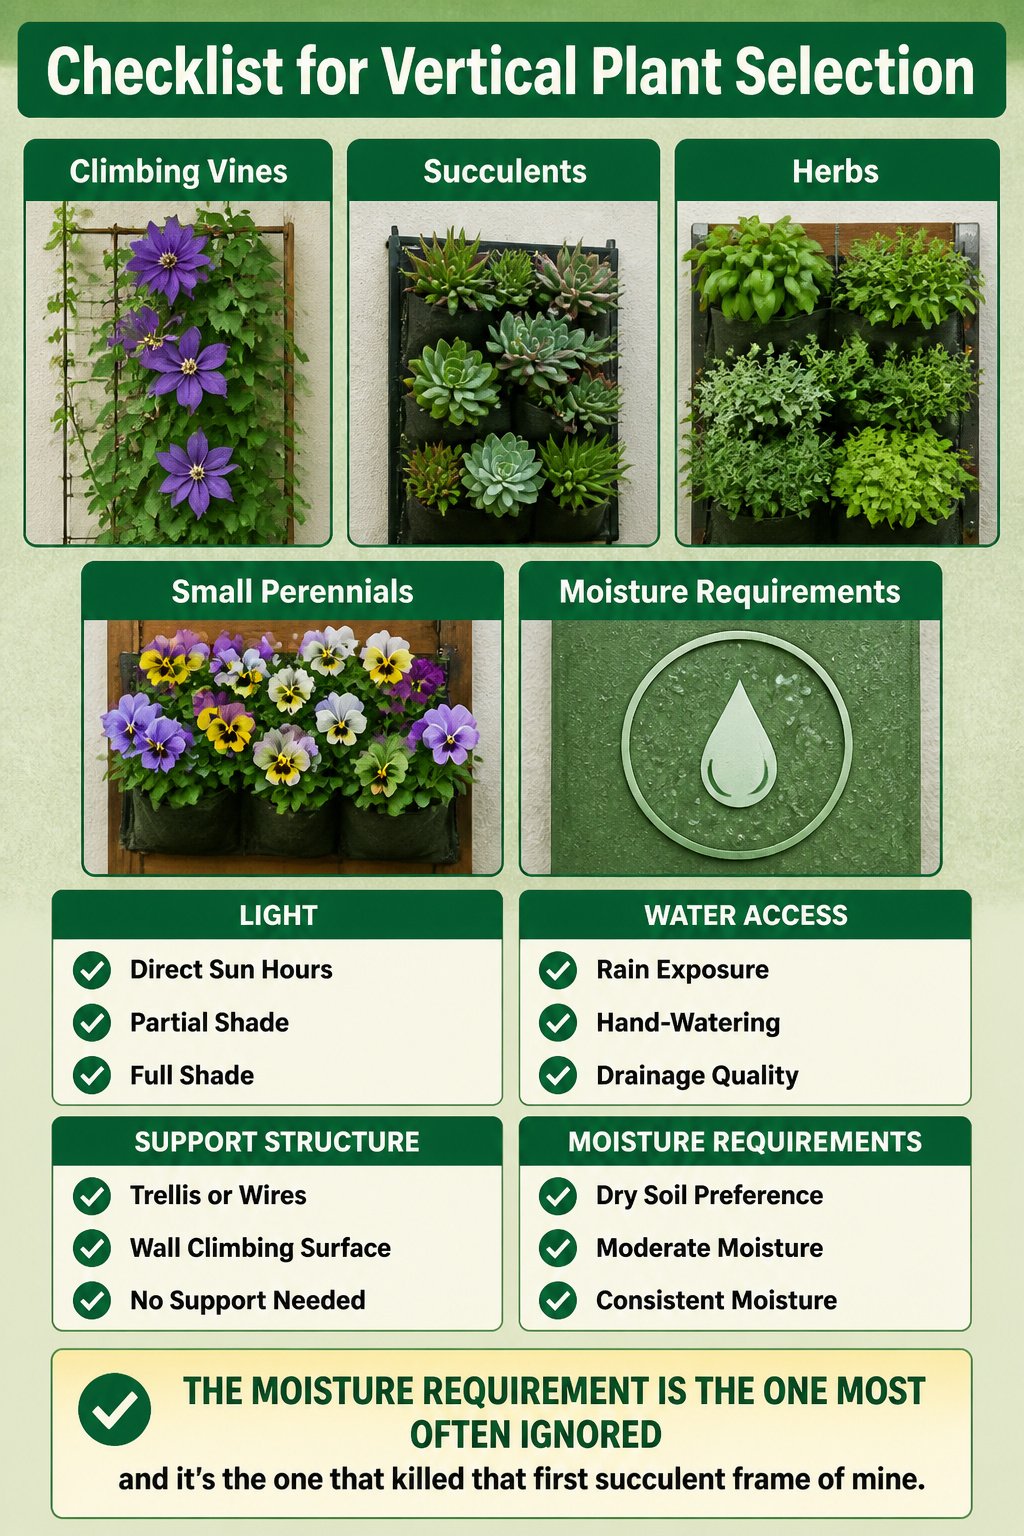
Climbing vines, succulents, herbs, and small perennials form the backbone of most wall gardens, though each group asks for different things from a vertical setup. Vines like clematis or black-eyed Susan vine need something to grab, whether that’s a trellis, wires, or the wall itself in the case of climbing fig with its aerial roots. Succulents, meanwhile, want sharp drainage and a frame or pocket that lets water escape fast. I learned that the hard way with a shadow-box arrangement that held moisture too long; the soil stayed damp and the roots rotted before I understood what was wrong.
For herbs, shallow pockets suit thyme and oregano fine since their roots don’t run deep, and the same planters work for salad greens or strawberries if the sun hits them. Small perennials such as violas or pansies fill gaps without the weight of larger plants. Before I buy anything now, I check three things against the wall’s actual conditions: how many hours of direct light the spot receives, whether rain reaches it or I’ll be hand-watering, and what support structure the plant needs to climb or sprawl. The moisture requirement is the one most often ignored, and it’s the one that killed that first succulent frame of mine.
Watering and Maintenance Without a Ladder
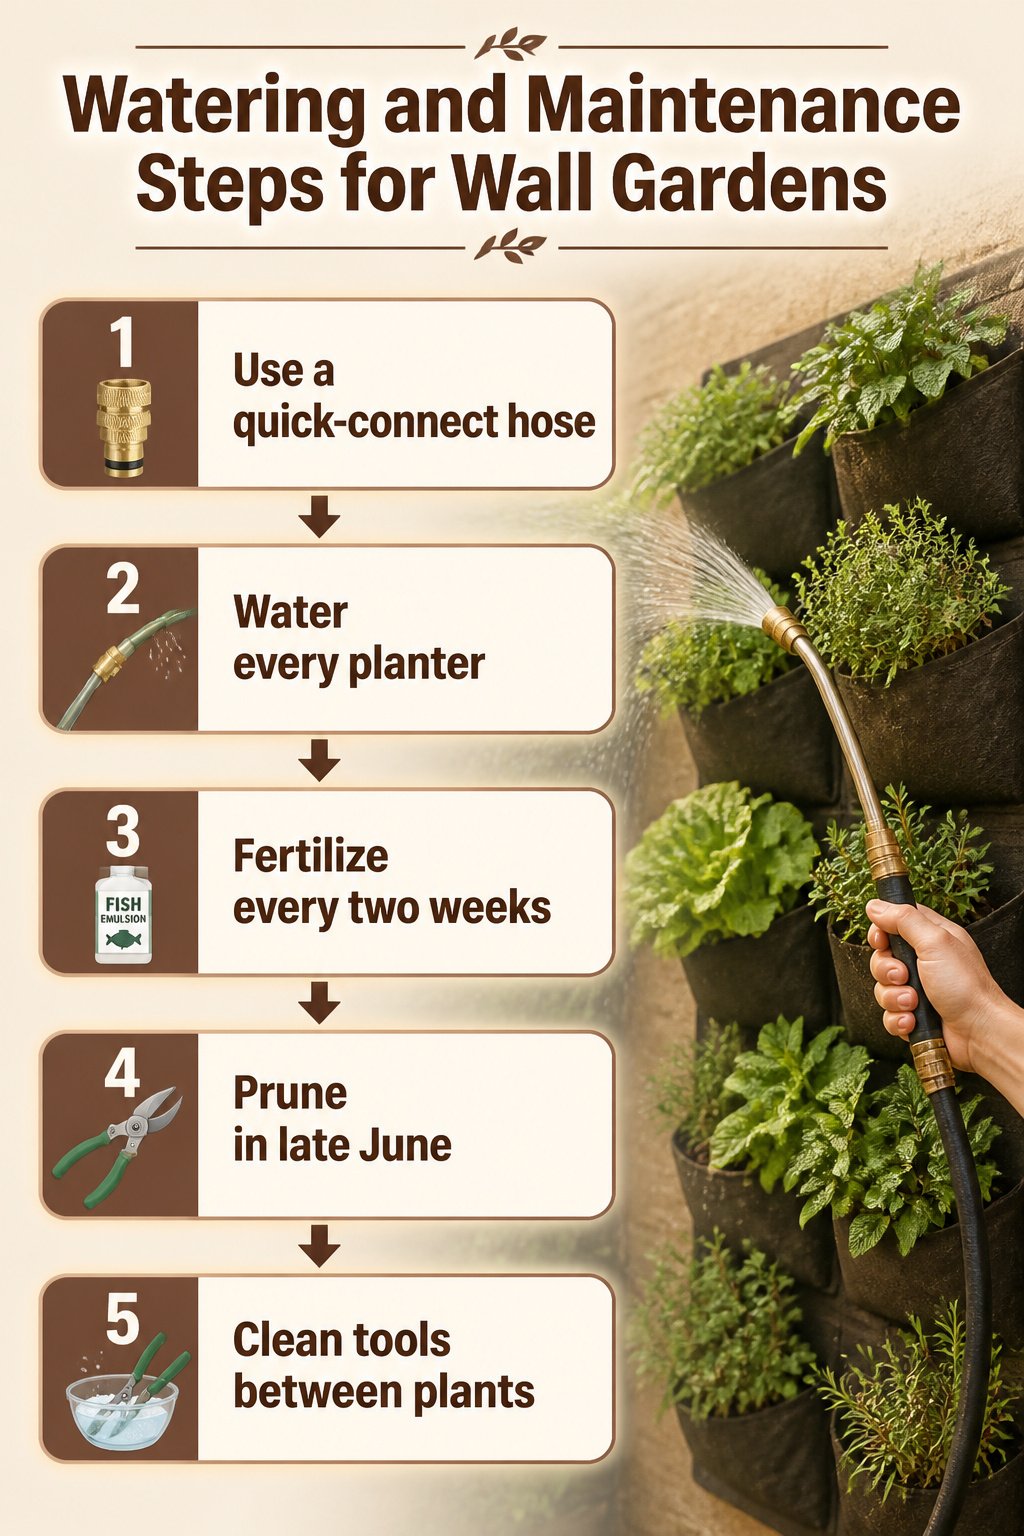
Containers on a wall dry out faster than anything at ground level, and by the first July heat wave I was carrying a watering can up and down a stepladder twice a day. A brass quick-connect hose end and a six-foot flexible wand changed the whole routine. I could stand on the patio and hit every pocket planter without the climb.
Fish emulsion every two weeks through summer kept the leafy greens from going pale, though the smell meant watering in the morning so the afternoon sun burned it off. I learned that pruning harder in late June exposed bare stems that scorched by August. Now I take less off the top and let the lower growth stay dense for shade, cleaning my shears with hot soapy water between plants so I’m not dragging whatever was on the mint over to the thyme.
Texture and Color Combinations That Read From Below
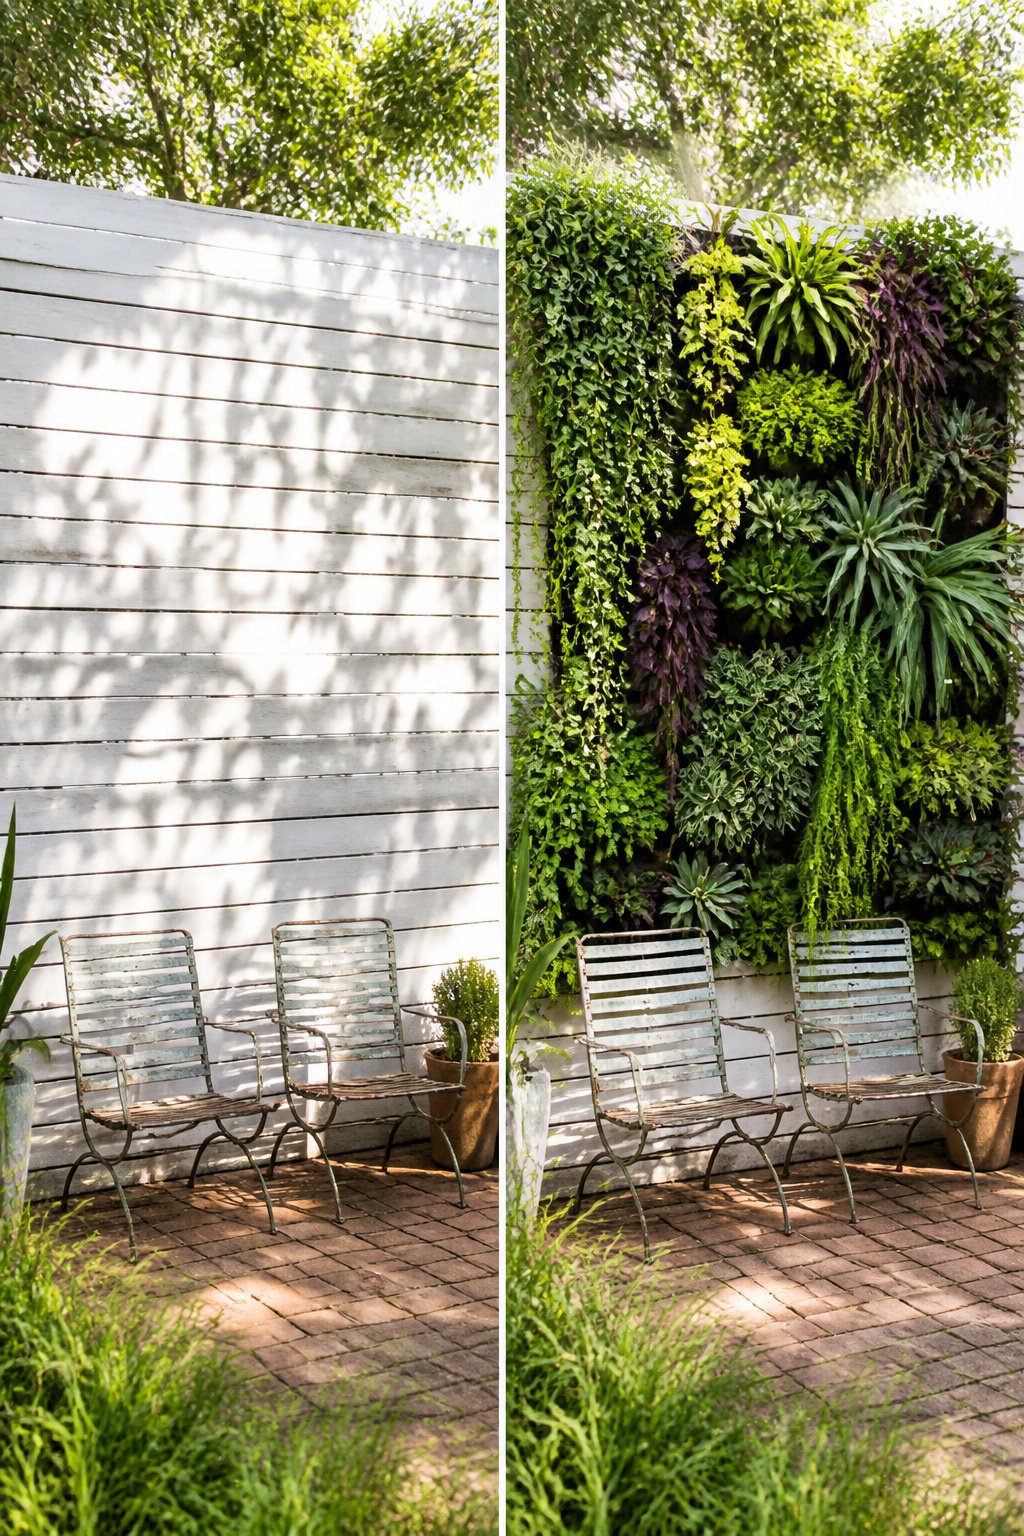
My first living wall was a wash of green on green. The sedum, ivy, and creeping fig all survived, but from the patio below they dissolved into the same painted siding behind them. Nothing popped because nothing contrasted.
That mistake taught me to build every wall garden around three textures at minimum: something fine and trailing, something broad-leaved and sculptural, and something stiff or spiky to catch light from below. Fine foliage reads as shadow, broad leaves as mass, and stiff points as highlights. Without all three, the eye slides right past.
The background color matters more than the plants themselves. I finally repainted that siding a crisp white, the same choice that lets desert agaves read against adobe or stone. Against white, even muted greens separate into distinct shapes. Red brick does similar work for traditional plantings, though painted brick gives you control if your house color fights your foliage.
Variegated leaves earn their keep in vertical gardens in a way they never did in my flat beds. In a ground border, a cream-edged hosta is a nice accent. Hung five feet up, that same variegation is the only thing that keeps the plant from disappearing into shadow. The light catches the pale edges first, so the whole shape registers before the color does. I now lead with variegation on upper tiers and save solid greens for lower ones where the eye already knows where to look.
Frequently Asked Questions
What plants grow well in vertical gardens?
Nearly any trailing or climbing plant can grow vertically if it has the right conditions and support. Vines like clematis and wisteria need trellises or wires, succulents want sharp drainage, and herbs such as thyme and oregano handle shallow pockets fine. Check your wall’s light hours, rain exposure, and whether the plant needs to climb or sprawl before buying.
How do I care for a vertical garden?
The two essentials are enough growing media for the roots and efficient watering that keeps soil from drying too fast. Containers on a wall dry faster than ground beds, so plan to water more often; a quick-connect hose end with a flexible wand lets you reach high pockets without a ladder. Feed leafy greens every two weeks through summer, and prune less aggressively in late June so lower growth shades exposed stems.
Can I grow vegetables in a vertical garden?
Yes. Vining tomatoes, cucumbers, and squash can thrive vertically, and pole beans, peas, and lettuce also work in wall planters or hanging setups. Root depth is the hard limit: most vegetables need more than six inches of soil, and light requirements still apply even when you are growing upward instead of outward. Make sure your supports can handle the full weight of mature plants.