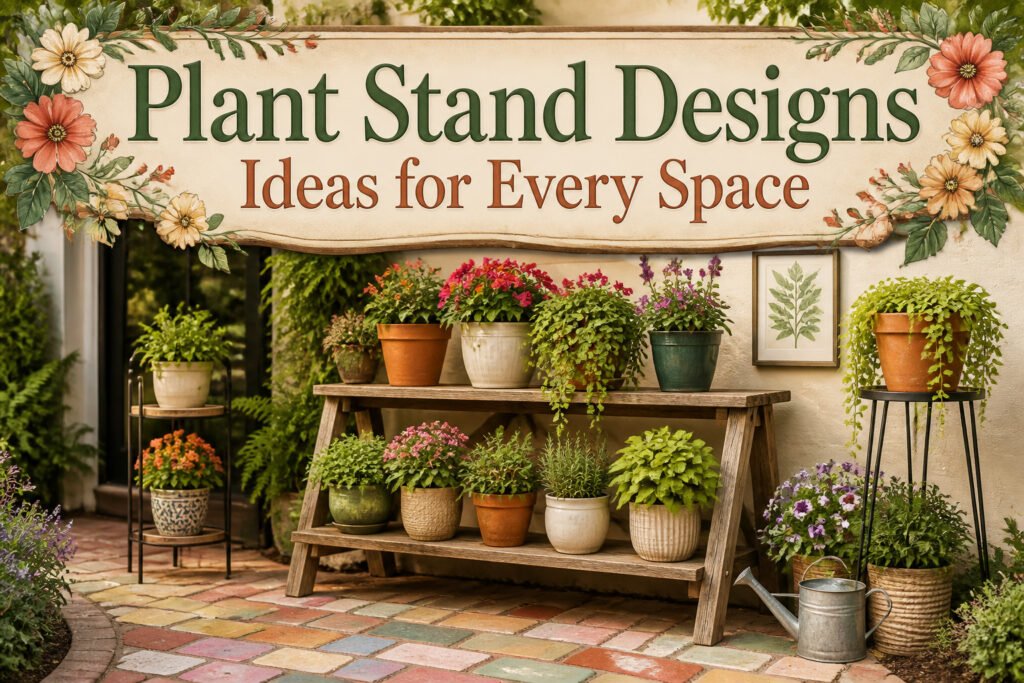
Plant stand designs ideas range from a $15 cinder block stack to poured concrete you will not move again, and the right choice depends on whether you need to roll it indoors before frost or leave it through winter. Weight is the detail that trips up most builds: a mid-size ceramic pot with wet soil runs 5–8 lbs, but larger planters hit 20–30 lbs, and a narrow-based tomato cage or hairpin leg will not handle that without help.
1. Outdoor Stand With Arbor
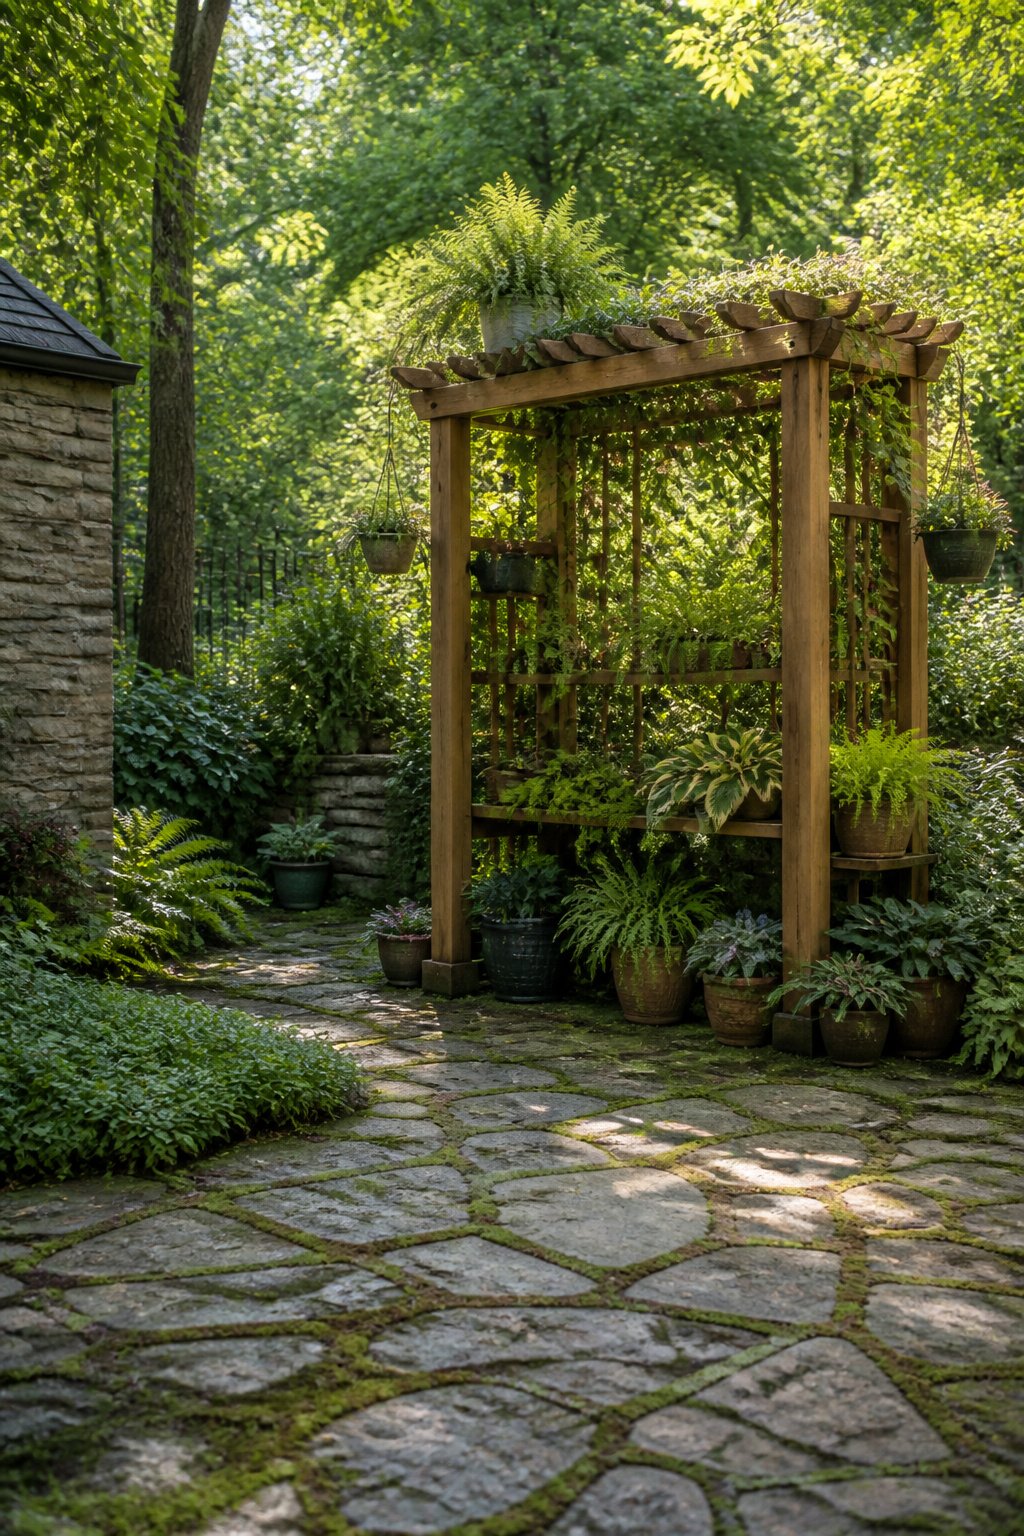
An arbor with a built-in plant stand turns vertical space into usable growing room without eating the footprint beneath it. Shelves or ledges set into the posts or tucked just under the overhead lattice give shade-loving plants like ferns and hostas the cover they need while keeping them off the damp ground. Two approaches back this setup: one treats the arbor frame itself as the stand, with boards notched between the posts at staggered heights; the other adds a narrow bench or shelf unit underneath the arch, so climbers get the sun up top and potted shade plants sit below.
Cedar or treated wood holds up to weather without turning into an annual repair project. Cedar contains natural oils that repel moisture, and pressure-treated lumber resists rot long enough to outlast several seasons of heavy rain. Either way, lifting pots off bare soil helps drainage after a hard rain, which matters more than most beginners expect. Metal brackets or hardware should be galvanized or powder-coated, since rust stains on wood are difficult to remove once they set.
2. Ladder Plant Stand
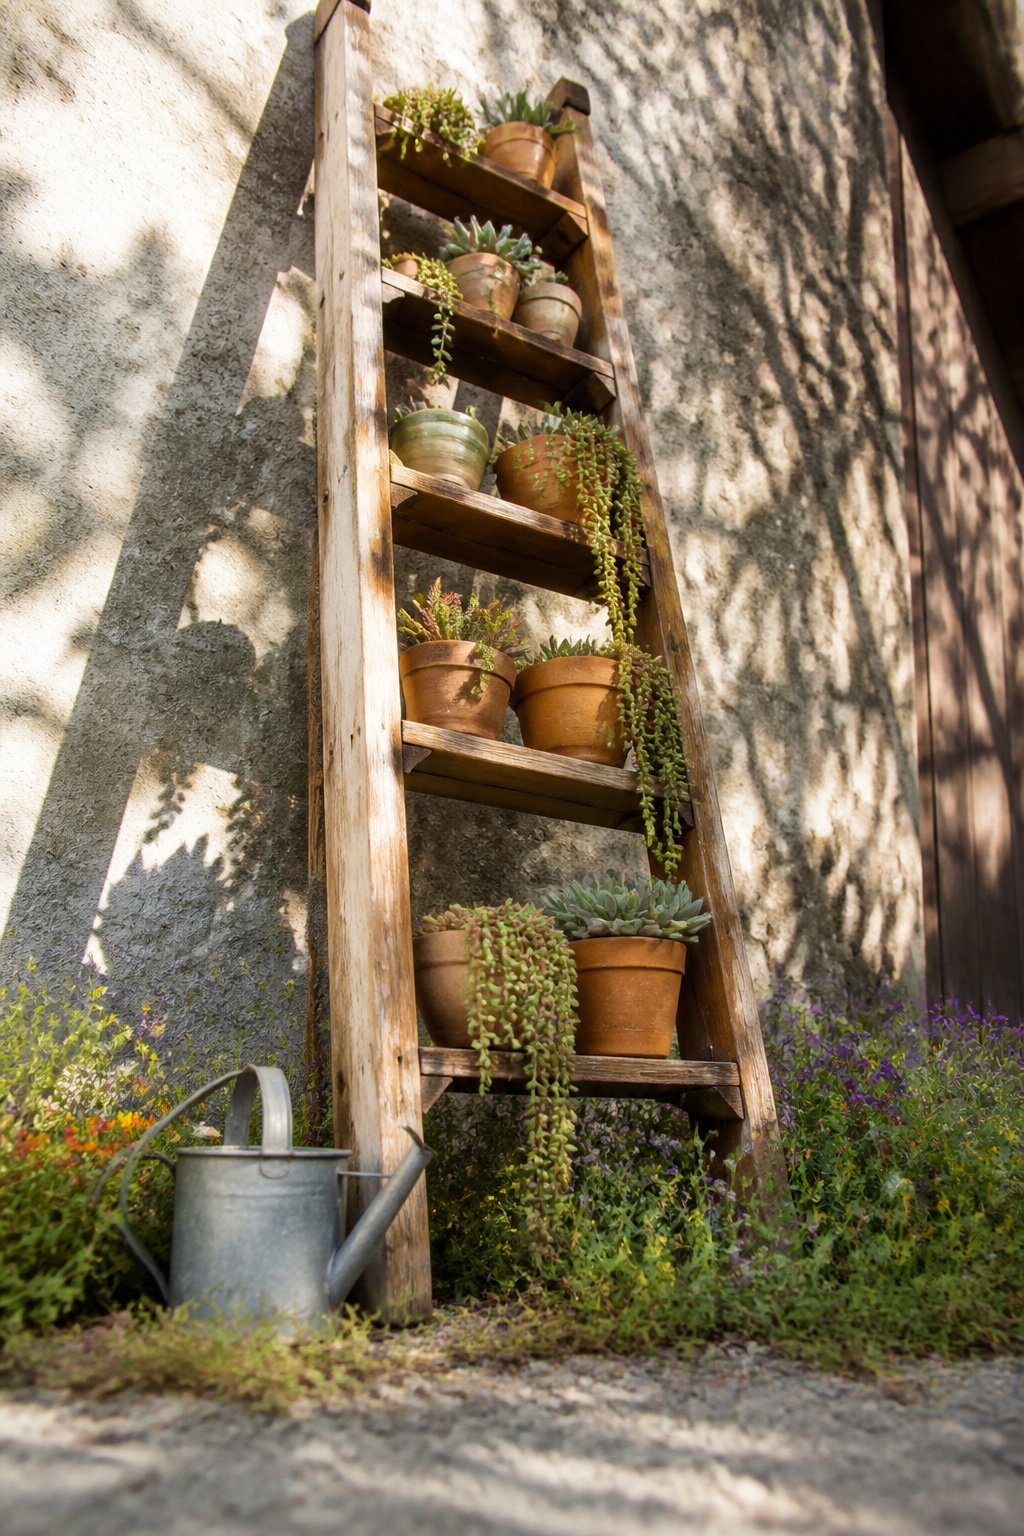
A wooden ladder, leaned against a wall or secured upright in a corner, turns each rung into its own shelf for potted plants. The cross-sections give you a multi-tier surface without any building, and the open frame keeps light hitting every leaf rather than boxing plants in shadow.
Before loading it up, check what your rungs can actually hold. A mid-weight ceramic pot with wet soil runs 5–8 lbs, and larger filled planters hit 20–30 lbs. Old ladders in particular may have dry rot or weakened joints where the rung meets the rail, so test with your weight first or reinforce with screws. Steel or iron frames handle moisture better if you are working in a humid spot like a bathroom, though a wooden ladder’s country look is hard to beat for a patio or dry living room.
The repurposing angle is where this idea earns its keep. A pallet or two can recreate the same stepped profile if a full ladder never turns up at the curb. Either way, you are working with something that was already built to carry a person, which is more than most craft-store stands can say.
3. Mid-Century Modern Plant Stand
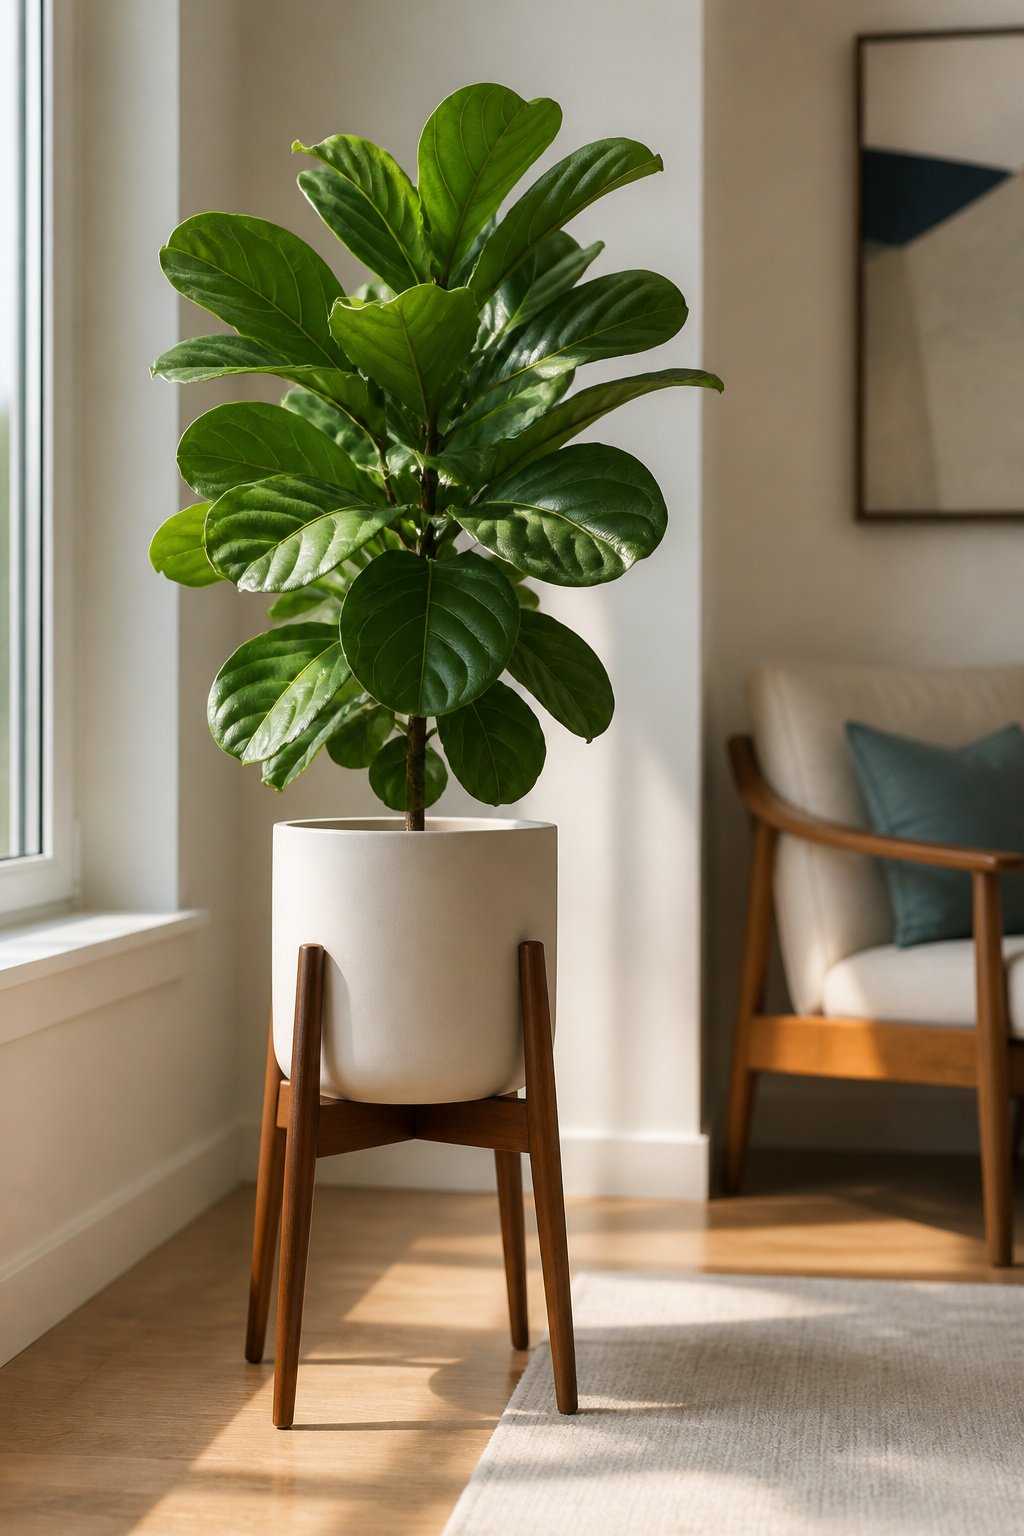
Tapered legs and clean lines mark the mid-century modern plant stand, usually finished in walnut or teak tones that warm up a room without shouting for attention. The build itself is straightforward: square dowels cut to twice the height of your planter, with width set at the planter’s widest point. Dowel pins and wood glue hold the frame together, and the stain can be adjusted to whatever wood tone already lives in your space.
Indoor stands have more freedom with wood choice since weather resistance is not the battle it would be outside. That said, bitumen rubber on the legs or base adds moisture protection if you are prone to overwatering or using a saucer that sometimes overflows. A single wide-leaf plant, a fiddle leaf fig or monstera, fills the vertical space and turns an unfinished corner into something intentional. The dipped-leg look, painted in a contrasting color at the bottom, borrows from retail versions at a fraction of the cost and works with scrap wood you may already have on hand.
4. Concrete Plant Stand
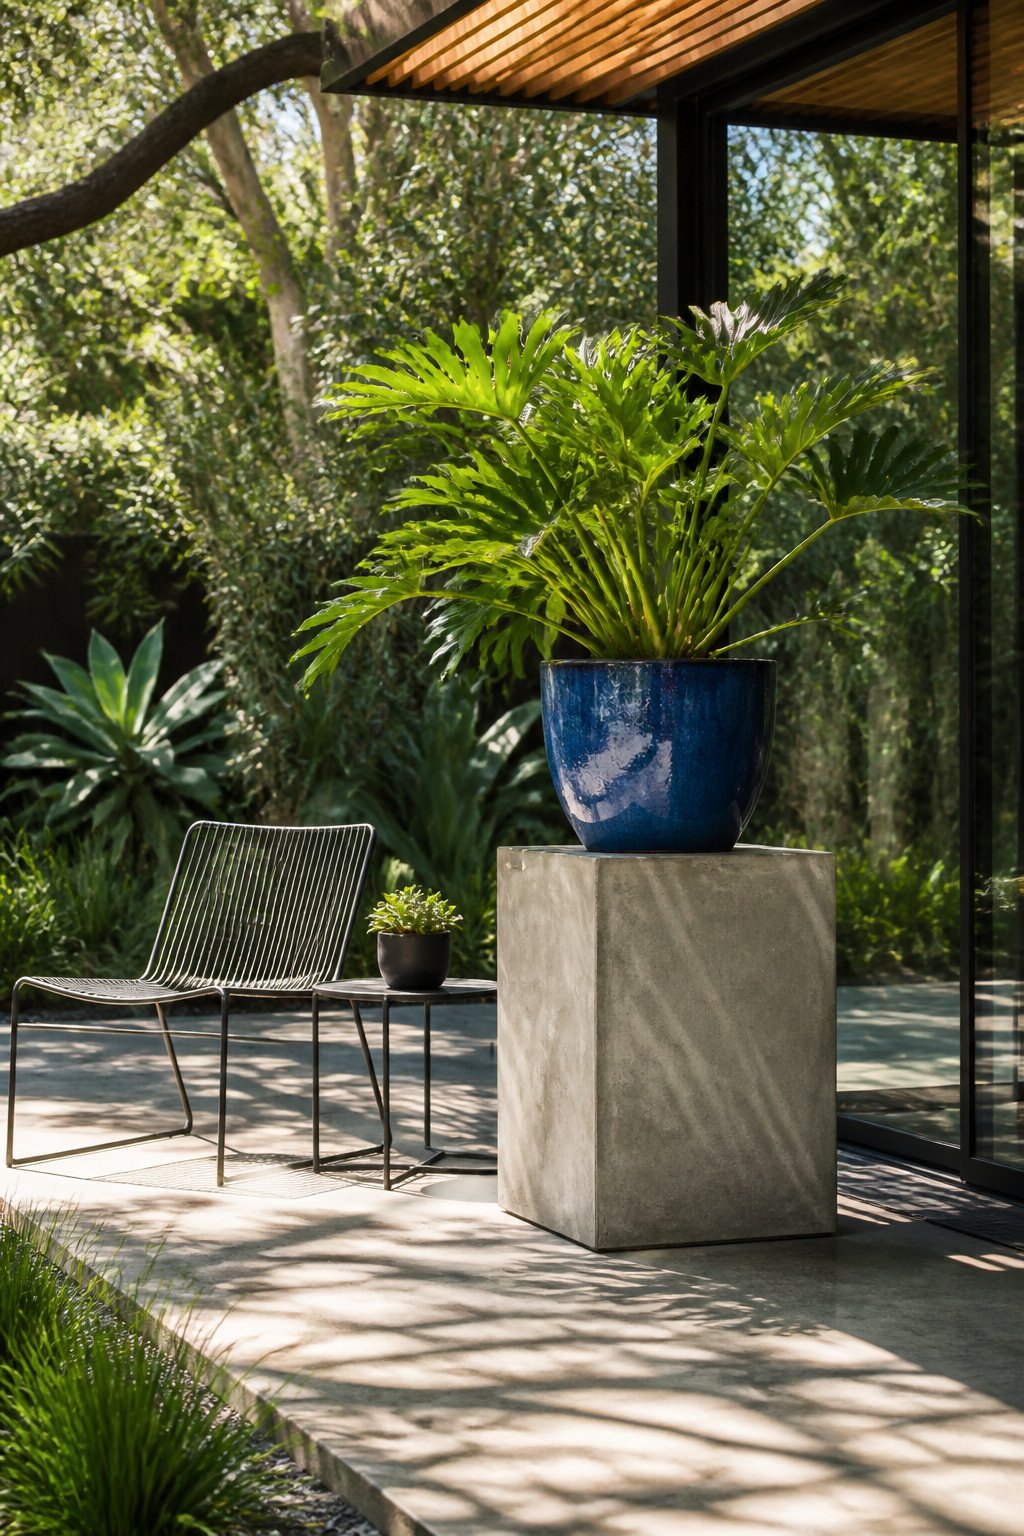
Poured concrete stands start with a simple mold and a quick-set mix, giving a patio that clean, architectural look store-bought versions rarely match. The weight keeps them stable in wind, which matters if your outdoor space is exposed. Concrete also works indoors, though you’ll want to think through placement first: once that stand is set, it is not moving.
The material molds into nearly any shape and takes imprints easily, so personalization is straightforward. Dwelling Happiness has a full tutorial if you want to see the process start to finish. Among DIY builds, concrete handles heavy pots better than lighter options like repurposed stools, which are better suited to small or medium containers. This is one of the sturdier weekend projects to attempt at home.
5. Tiered Plant Stand
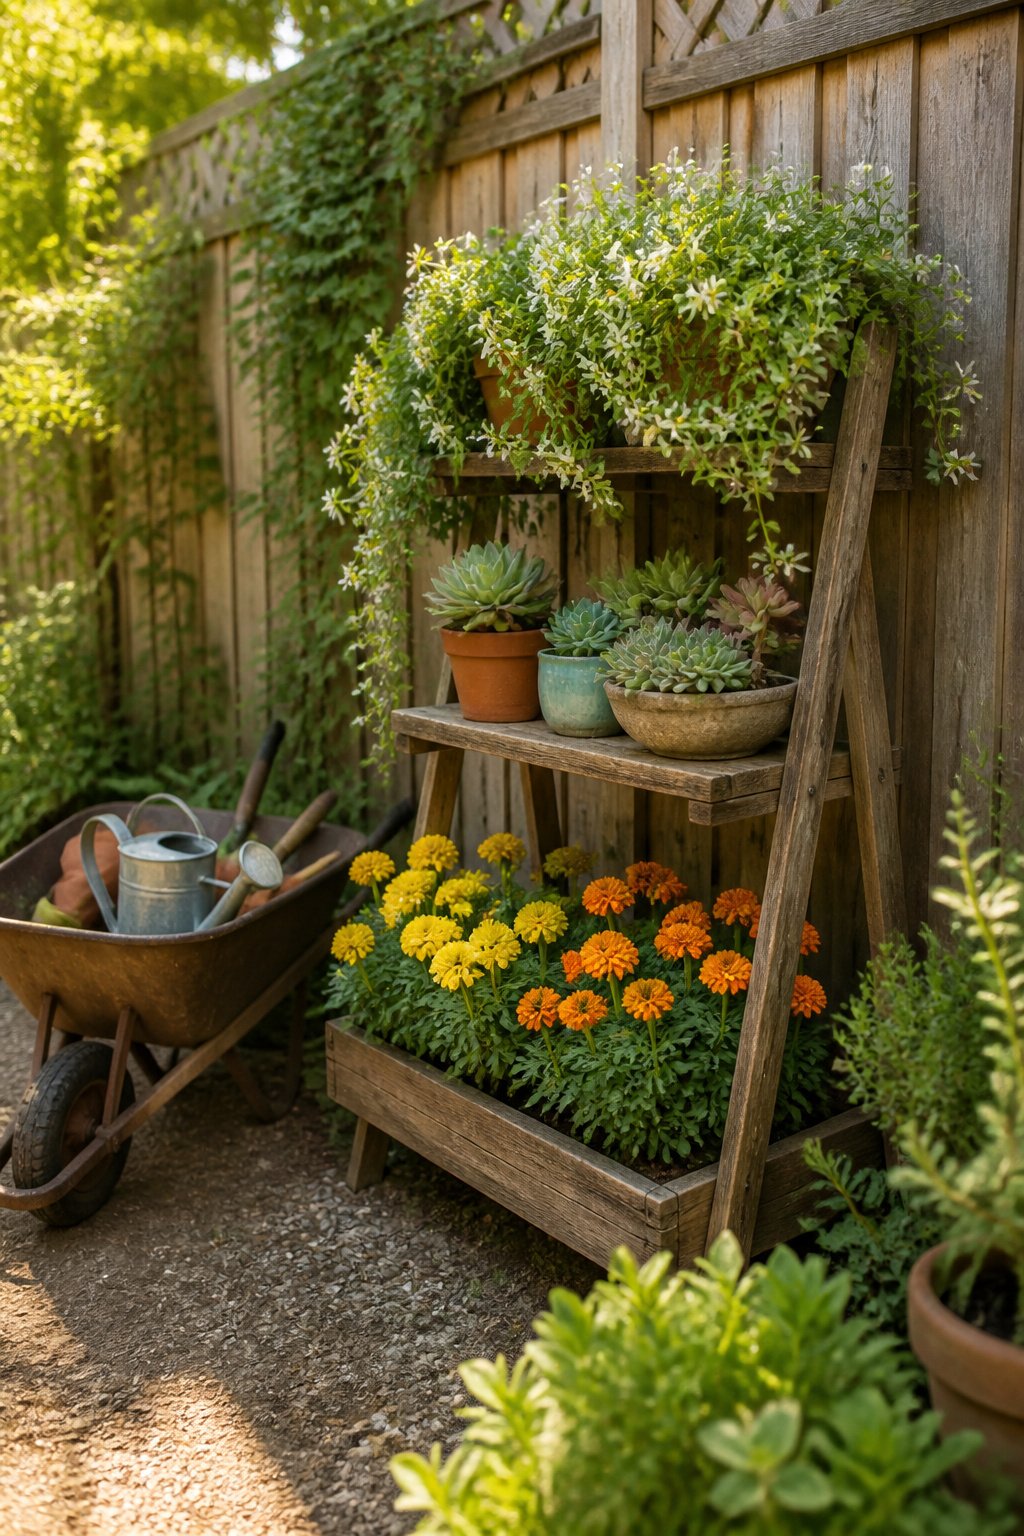
A tiered plant stand packs three to five shelves into the same footprint as a side table, which is why it keeps coming up as the first move for small yards, patios, or balconies. You mix trailing plants on upper levels with upright growers below, and the whole thing reads as layered rather than crowded.
I built my first one from cedar scraps after realizing my balcony floor space was gone but the railing height was untouched. The boards held up fine without resealing every season, though I learned to check the hard way: after a heavy rain, water pooled on a flat shelf and a pot sat in it for two days. Now I drill drainage holes through each tier or set pots on spacers so runoff actually runs off.
Stability matters more as you stack higher. A leaning ladder style against a wall or railing is forgiving because the wall takes the torque, but a freestanding unit needs a wider base than you think. I have knocked one over reaching for a top-heavy fern; the pot survived, my pride did not.
6. Nesting Plant Stands
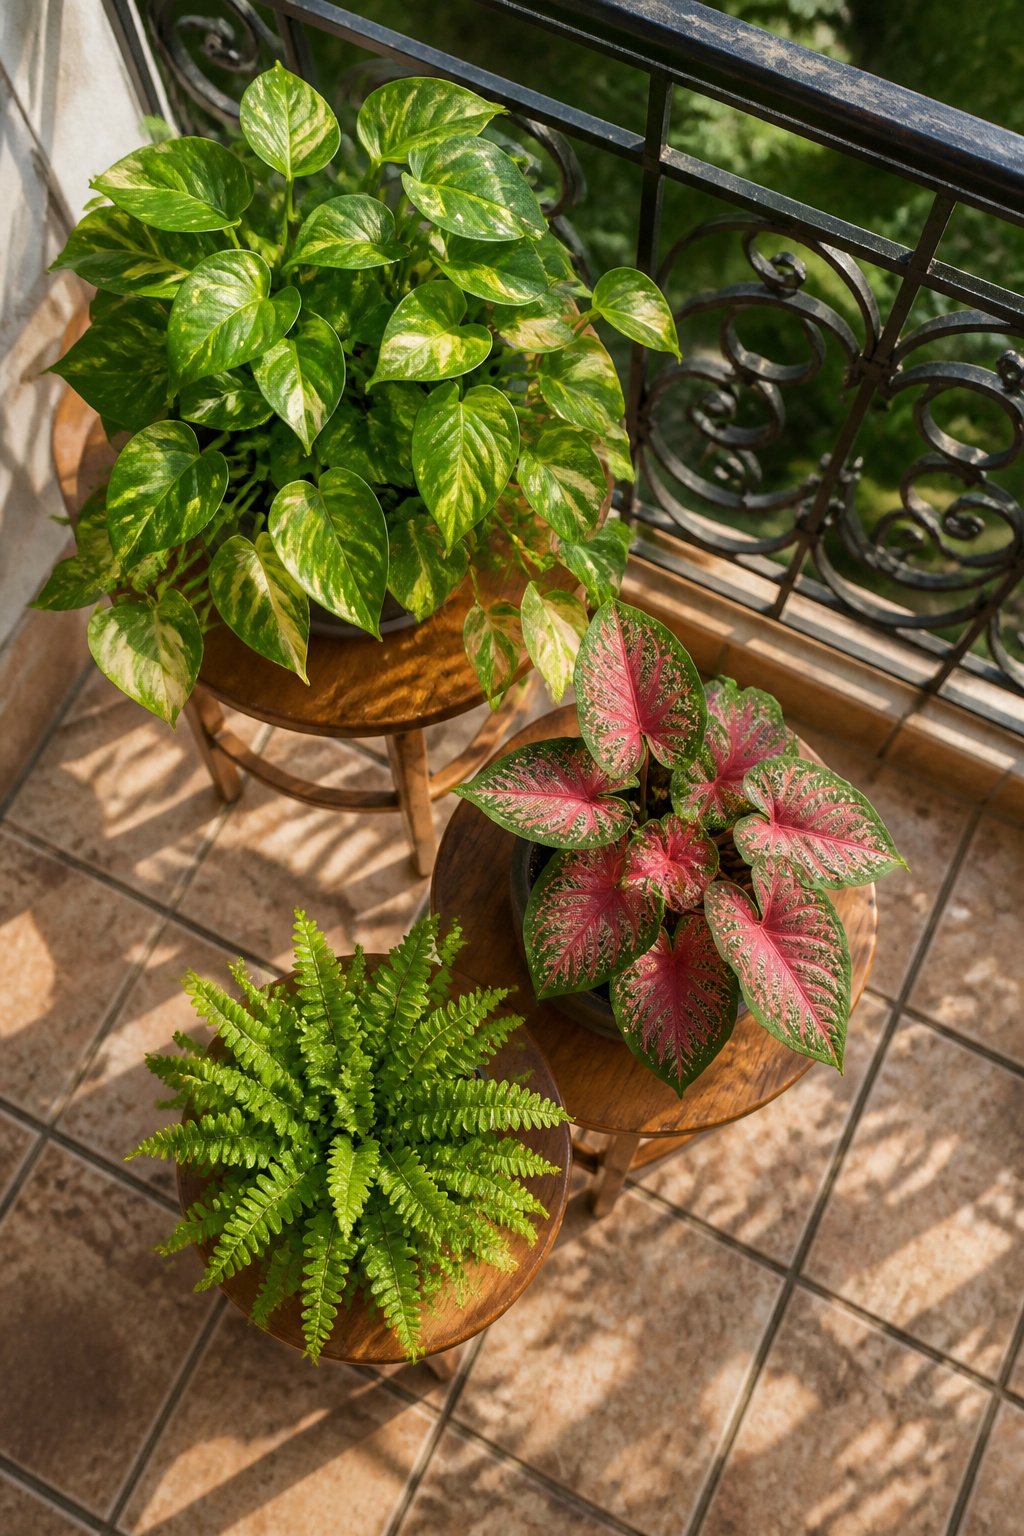
Nesting plant stands solve the storage problem most of us pretend doesn’t exist. Three graduated sizes slide together into one footprint when your collection shrinks, then spread back out when spring cuttings root or you bring home something new. The Houseful of Handmade plans build a set that works indoors as a side table cluster or out on the patio, so the same hardware earns its keep year-round.
What sold me on the idea is the diagonal line you get by staggering them. A tall stand at the back, a mid-height one offset to the side, and the smallest pulled forward with a trailing pothos spilling over: the eye moves through it instead of flattening against a wall of equal heights. The sources all point to the same trick. Vary the heights, leave open space for rest, and the grouping reads as intentional rather than crowded.
For renters or anyone working a balcony that doubles as storage half the year, the tucked stack fits in a closet corner until the first frost-warning plants come back inside. No single stand that size gives you that flexibility.
7. Cinder Block Plant Stand
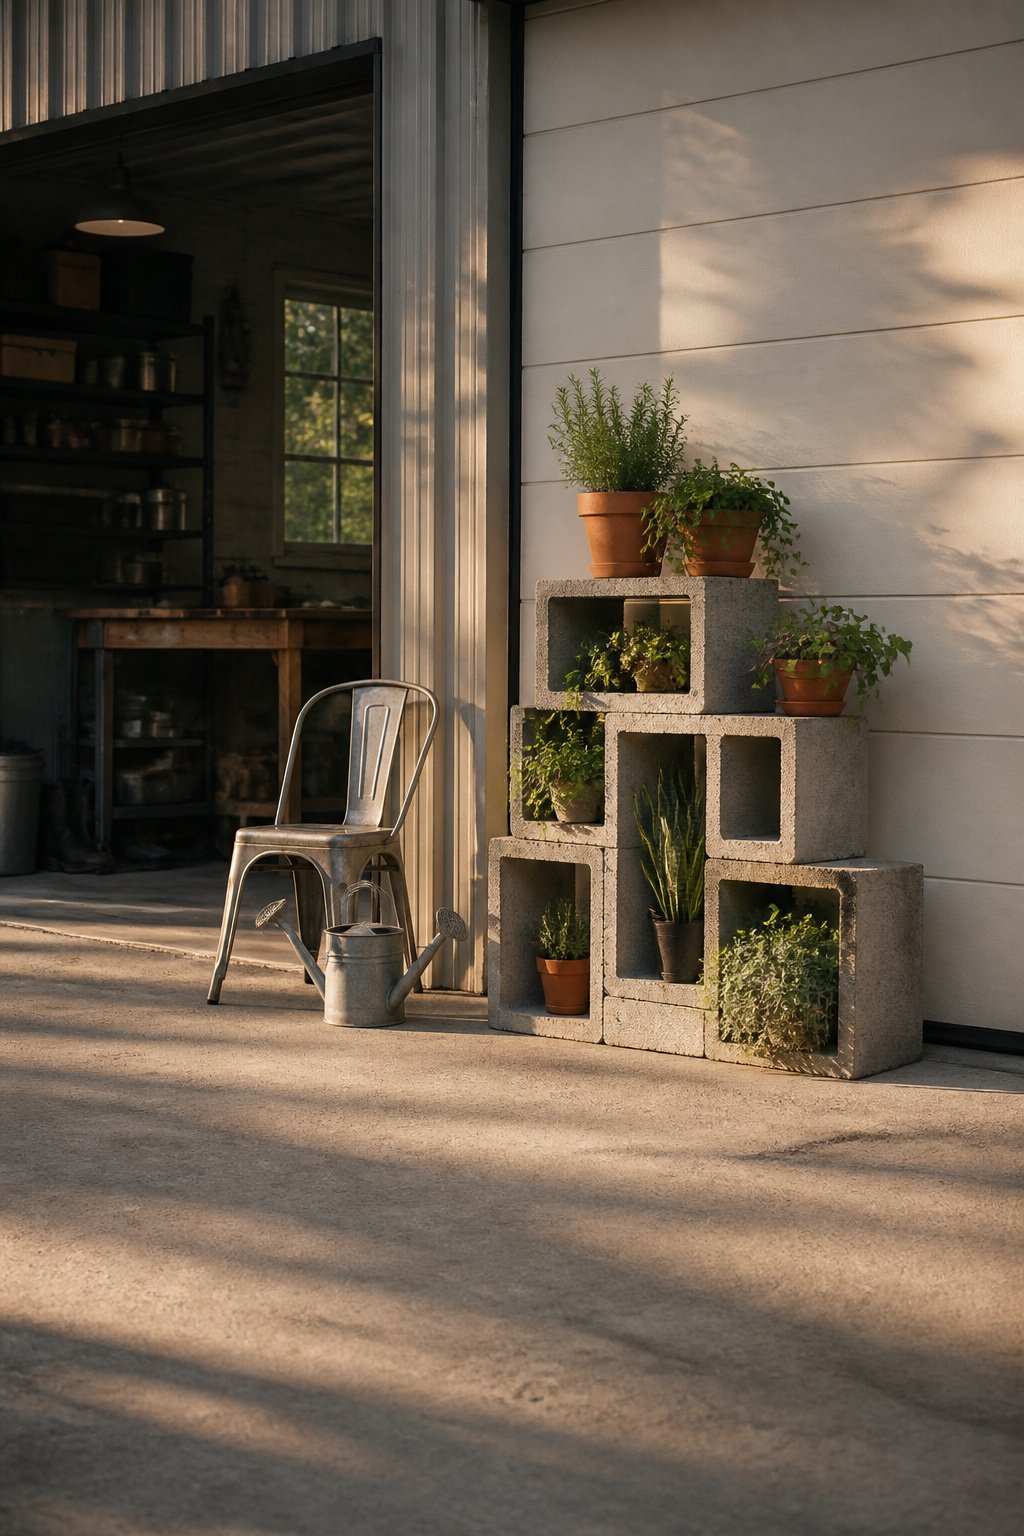
Stacked cinder blocks give you a modular plant stand that reads industrial rather than homemade. The weight alone keeps heavy pots stable in wind or after a soaking, something lighter DIY builds struggle with once a terra-cotta pot hits its wet weight. I like that the open cavities in each block can cradle a second, smaller plant, so you get two heights from one structure without planning for it.
Raw concrete works if your deck or patio already leans minimalist; paint them if the gray feels too cold against softer foliage. A single shelf runs under $15, using one standard block and a scrap or big-box plank, against $40 to $80 for a retail stand of similar capacity. The catch is moisture: concrete wicks water, so drainage trays matter more here than with wood or metal. Without them, the block stains and the soil stays wetter than your plant wants.
8. Repurposed Items
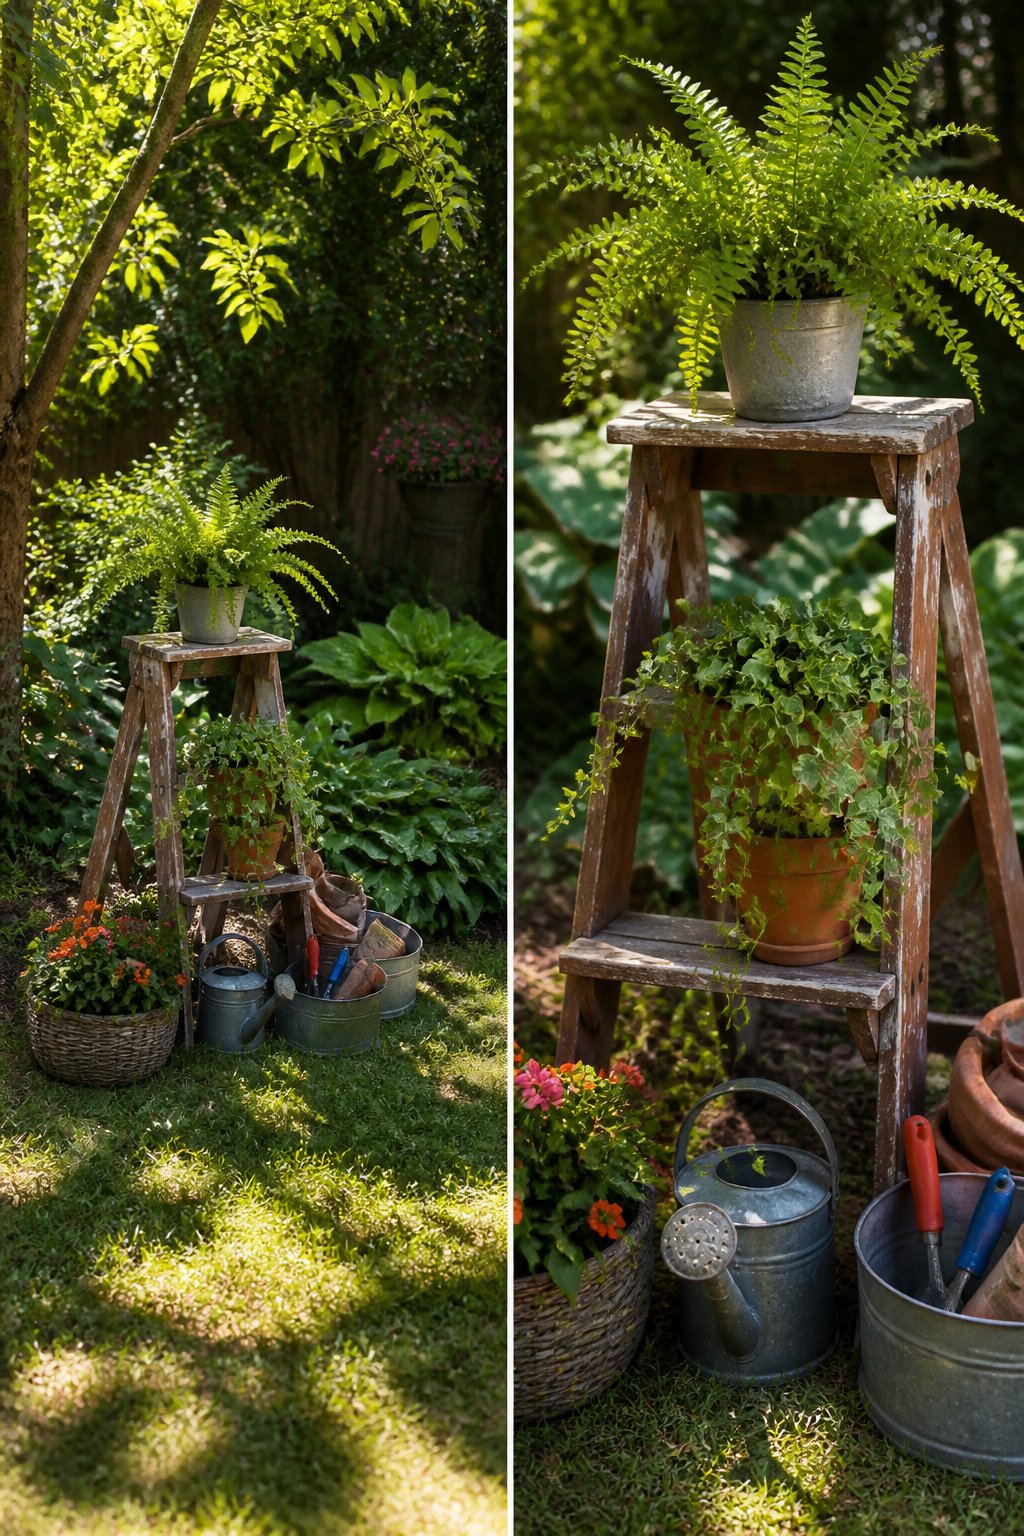
The best plant stand might already be in your garage. An old wooden step stool, sanded and painted, gives you a two-tier display without building anything new. I like this because the step creates natural height variation, and most of us have one gathering dust or can grab one cheap at a thrift shop.
A rattan bistro chair on a balcony works the same way: the seat becomes a shelf, the back adds visual interest. Check the weight before you commit. A mid-weight ceramic pot with wet soil runs 5 to 8 lbs, and larger planters hit 20 to 30 lbs. Solid joints and a wide base matter more than looks here. Bamboo and rattan charm in dry rooms but warp or mold in humid bathrooms; steel or iron handles moisture better and carries heavier loads. For anything over 20 lbs, look for frames rated 50 lbs or more, the kind of wide-base industrial shelving used in garage storage. Rolling utility carts, shoe benches, bookcases, even bar carts all work if the design stays open enough for light and tight enough that a wet pot won’t tip.
9. Hanging Plant Stand
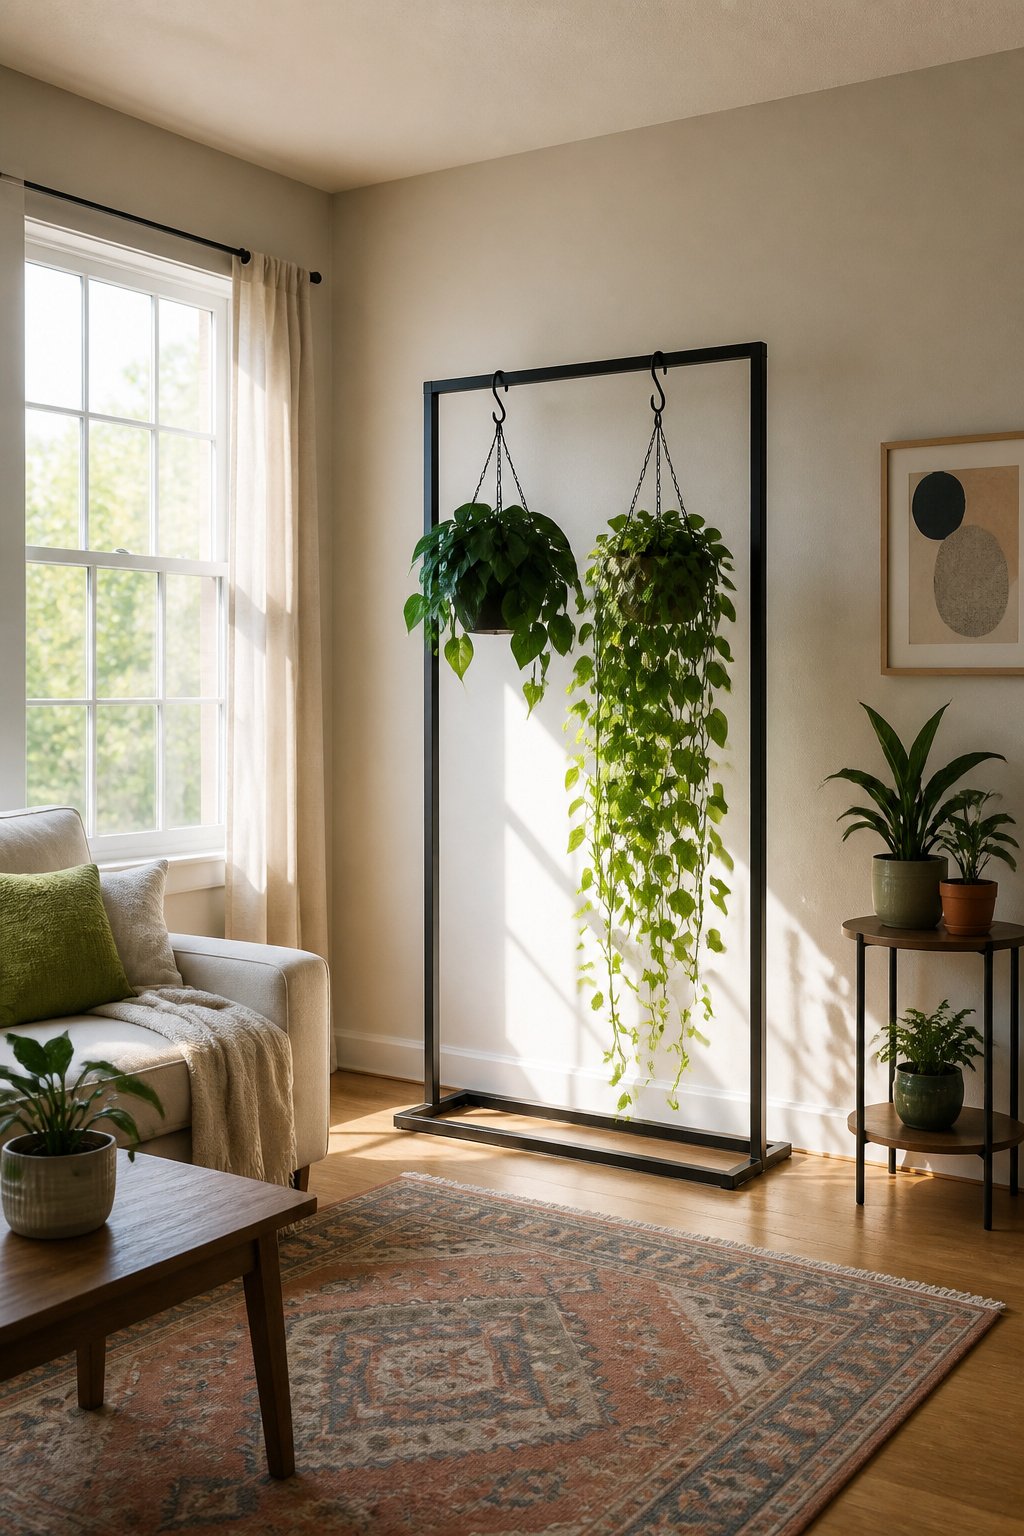
A freestanding frame with hooks or bars turns any corner into hanging space without touching the ceiling or the walls. I like this option for renters because it skips the drill entirely, and the plant stand designs ideas that work best for small apartments often run parallel to floor stands rather than competing with them for square footage.
The catch is physics. A loaded 8 to 10 inch ceramic pot runs 5 to 8 lbs wet, and a mature tropical in a 12 to 14 inch pot hits 15 to 20 lbs. A frame that looks airy with one fern starts to sway once you add a second or third. The base needs real width, steel or iron construction, and a rating that covers each hook, not just the total load printed on the box. I have seen narrow-based models tip when a trailing pothos catches a door draft, so I now check the footprint before the finish.
For tight rooms, a pair of macrame hangers at different lengths hung from the same frame catches light at two levels and reads fuller than a single plant at one height. The frame does the work of furniture; the hangers do the work of display. Neither touches open floor space, which matters when your garden budget is $500–800 a year and every square foot counts.
10. DIY Plant Stand from Tomato Cage
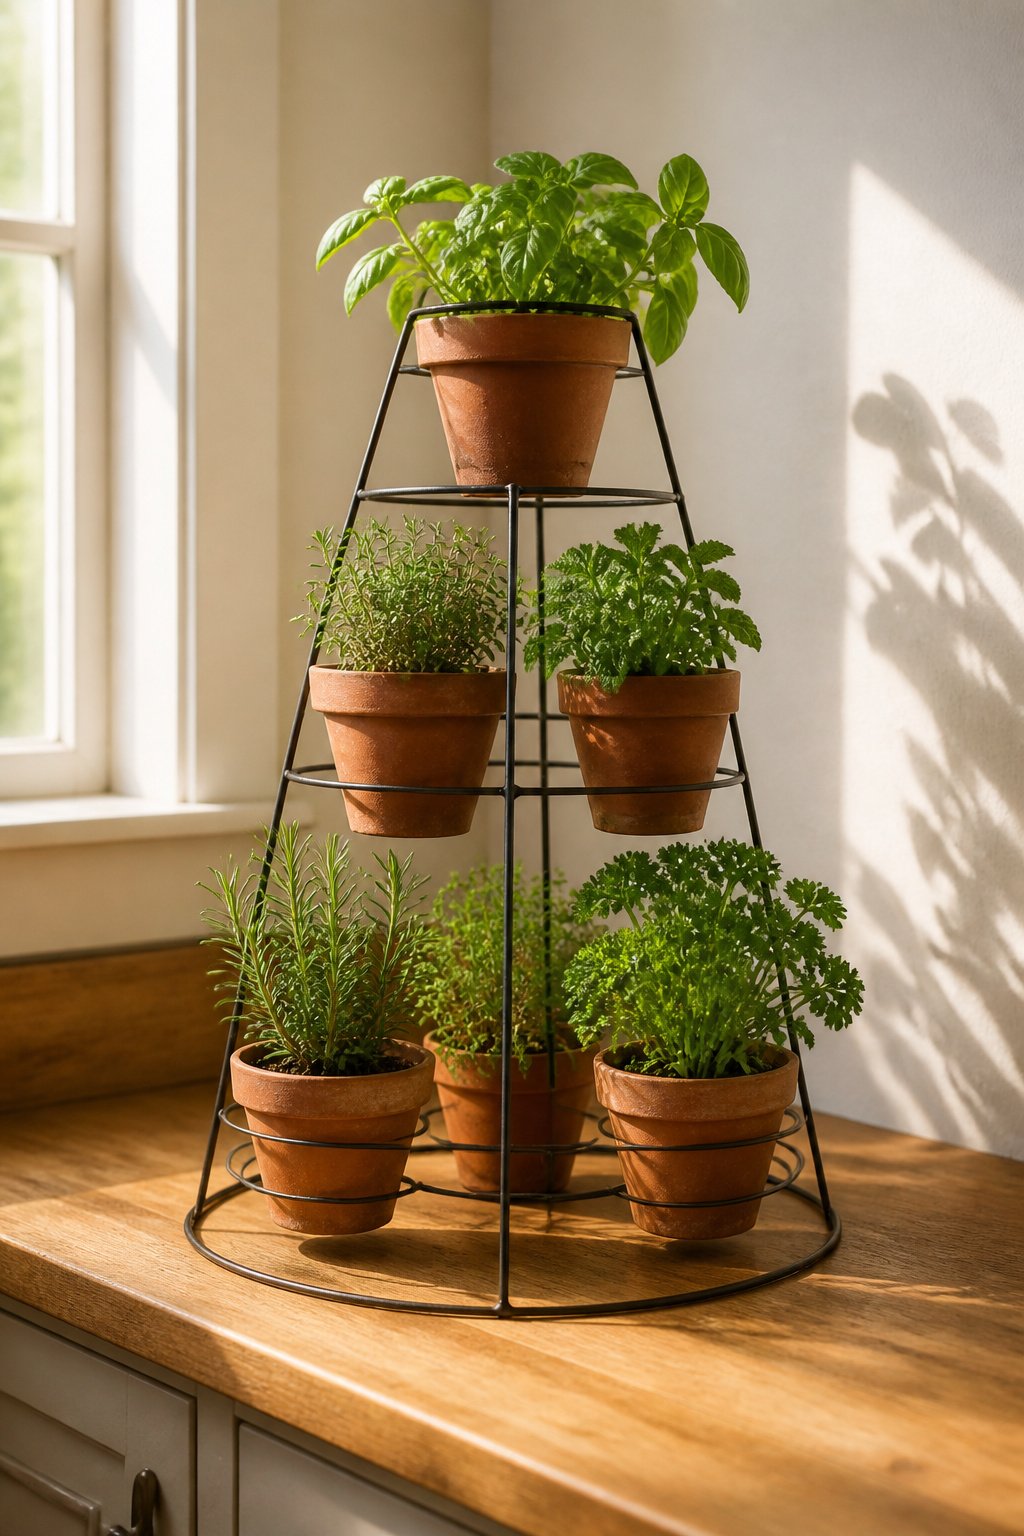
An upside-down tomato cage makes a conical plant stand with almost no work. The wire rings, normally meant to hold a tomato upright, become graduated shelves when you flip the cage over and trim the legs so it sits level. I have seen this done with a single cage for a lightweight pot and with three cages wired together for a heavier gabion-style column filled with stone. The single-cage version is the one to try first. It costs little, stores flat in winter, and the open wire keeps air moving around the pot.
Heavier ceramics will need help. The narrow base of a standard cage tapers too sharply for a dense clay pot full of damp soil. Either choose a lightweight plastic or fiber pot, or widen the footprint by splaying the legs outward before you bend them flat. For a softer look, wrap rope around the tiered rings. The mixed material hides the utility-wire finish and gives the stand enough grip that a pot is less likely to shift in a breeze.
11. Hairpin-Leg Plant Stand
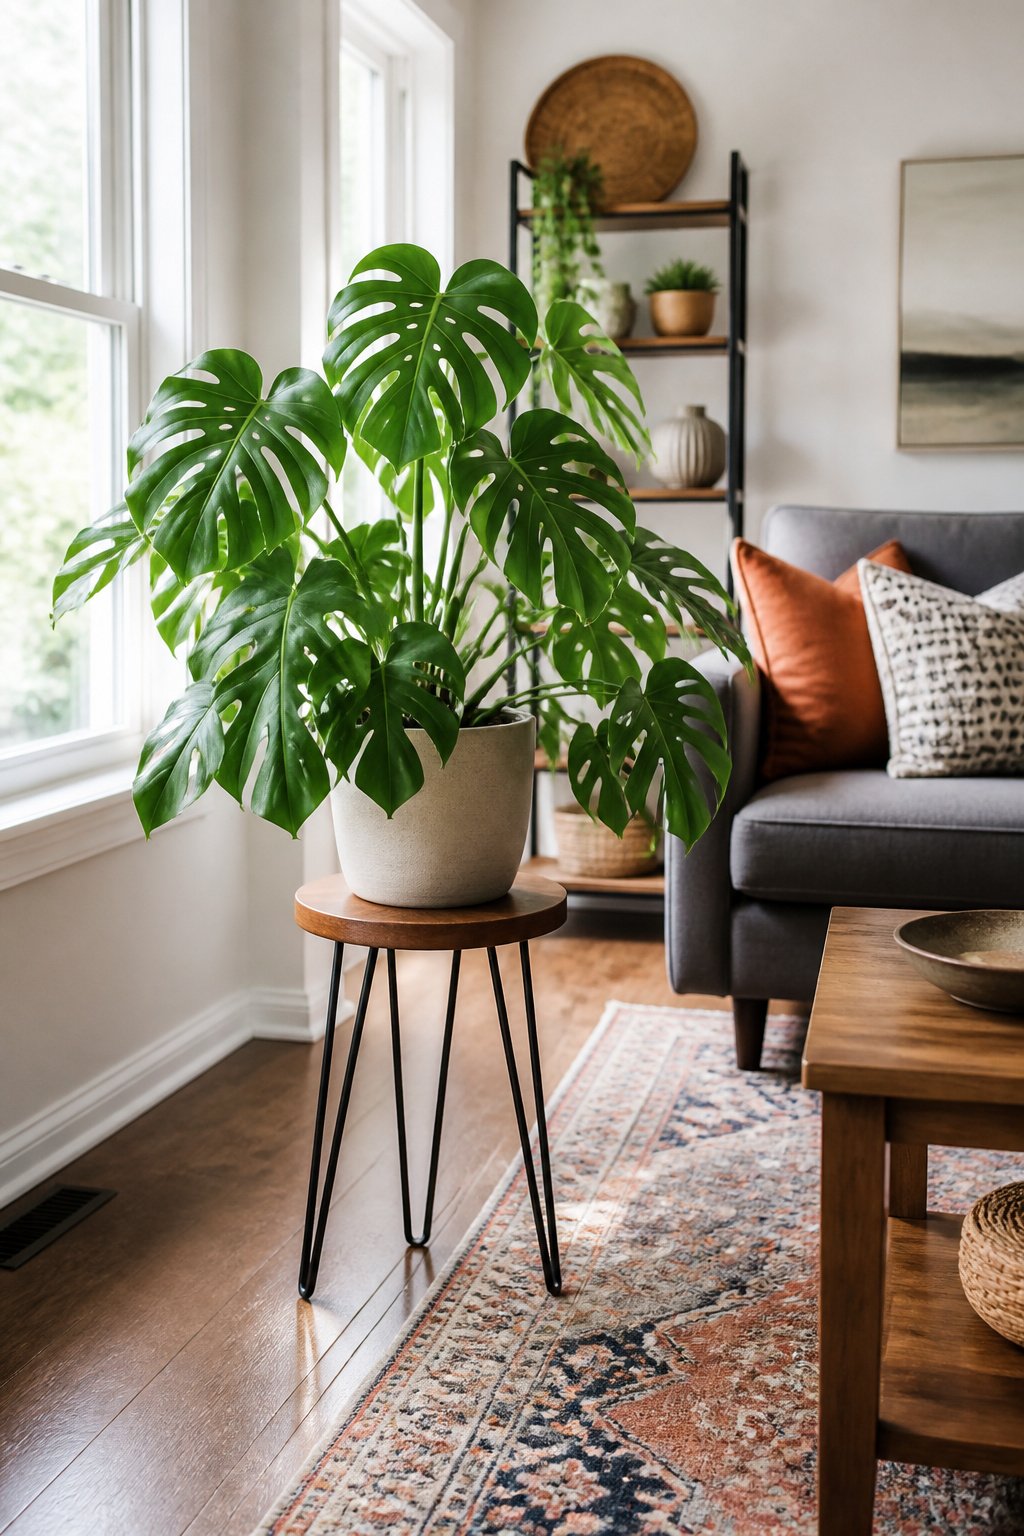
A hairpin-leg stand pairs a simple wood or metal top with thin steel legs that barely register visually, which is exactly why it works in a living room that already has enough going on. Black legs with a light wood top lean mid-century; brass legs push it slightly more glam. Either way, the small footprint makes a genuinely big visual difference.
The narrow leg footprint also means weight distribution matters more than it looks. A single wide-leaf plant like a fiddle leaf fig or monstera sits well at this height and fills a corner that would otherwise feel unfinished. Keep heavier pots on lower shelves rather than up top, and if the total load starts pushing 20–30 lb, check what those legs can actually handle. On hard floors, rubber feet or non-slip pads under the legs help a lot.
12. Vintage Wrought-Iron Stand
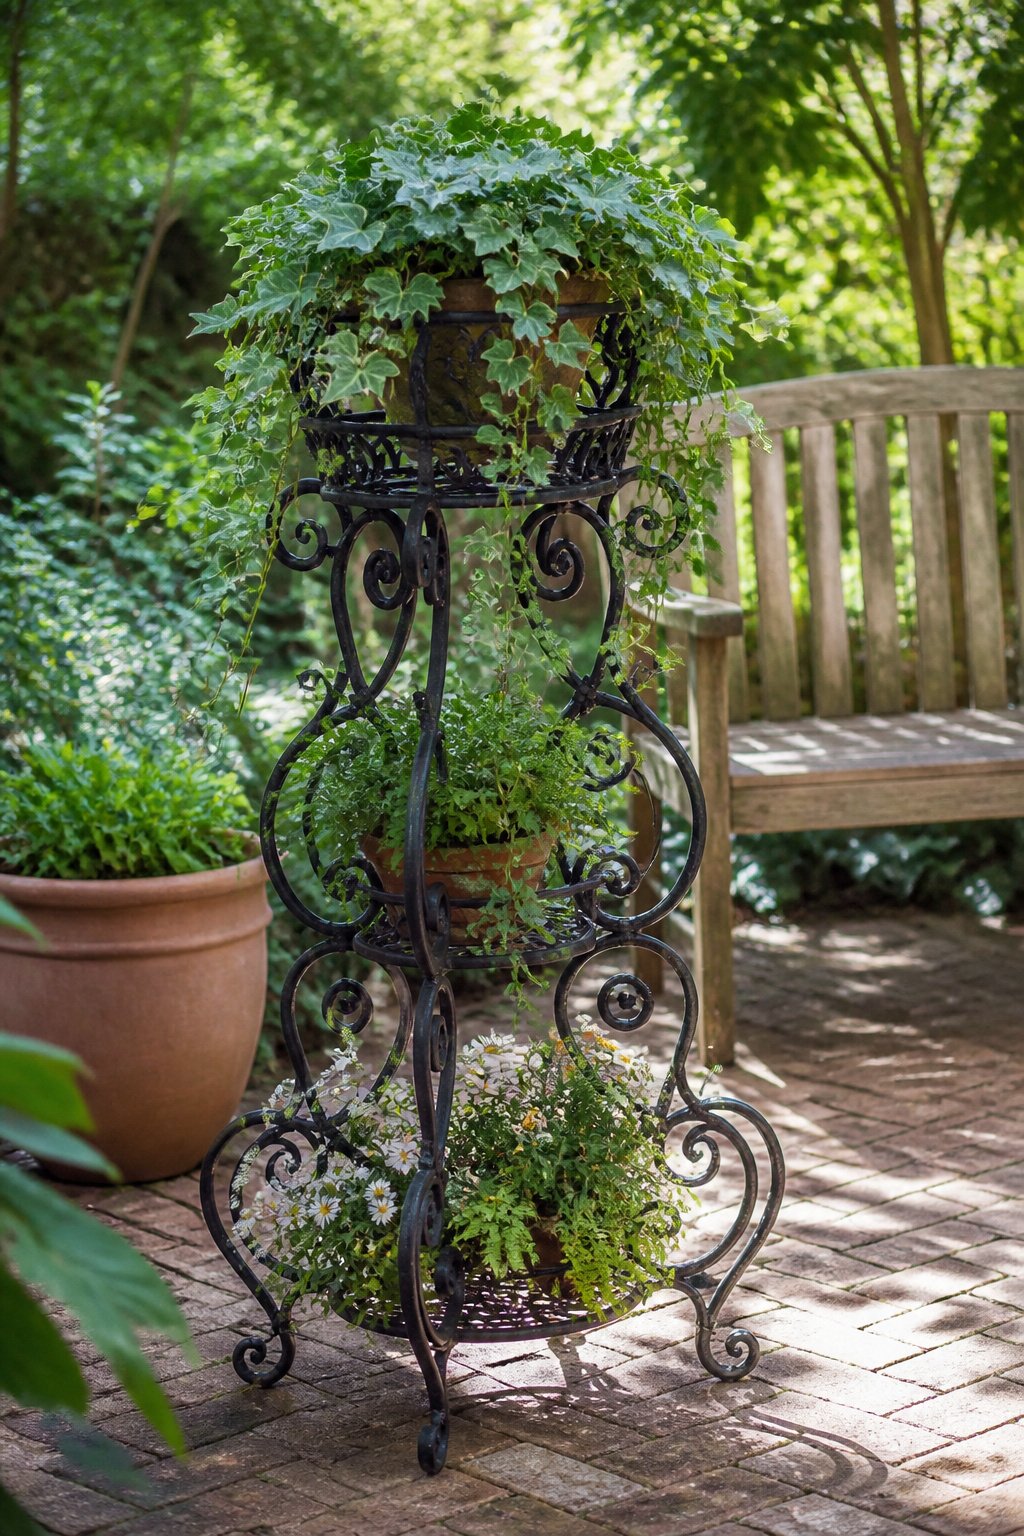
Wrought-iron stands with their curled and scrolled legs turn up reliably at estate sales and flea markets, usually priced by the seller’s patience rather than any catalog. The metal tolerates weather better than wood, which outdoors can rot or draw termites, but check the joints for rust and wobble before you buy. A stand that looks solid on grass often rocks on concrete once the weight shifts.
The decorative scrollwork that makes these pieces attractive also limits what fits inside the frame. A pot that measures fine at the rim can catch on an interior curl and sit crooked, or not sit at all. Bring a tape measure and test the opening at its narrowest point, not just the top. For a garden bed edge, the old-world formality pairs best with trailing plants like ivy or ferns that thread through the metal and soften the lines. The scrollwork throws shadows flat shelves never produce, so the stand reads as texture even before anything is planted in it. This is a traditional look, and it works where the rest of the space already leans that way rather than fighting a modern patio.
13. Macrame Hanging Plant Stand
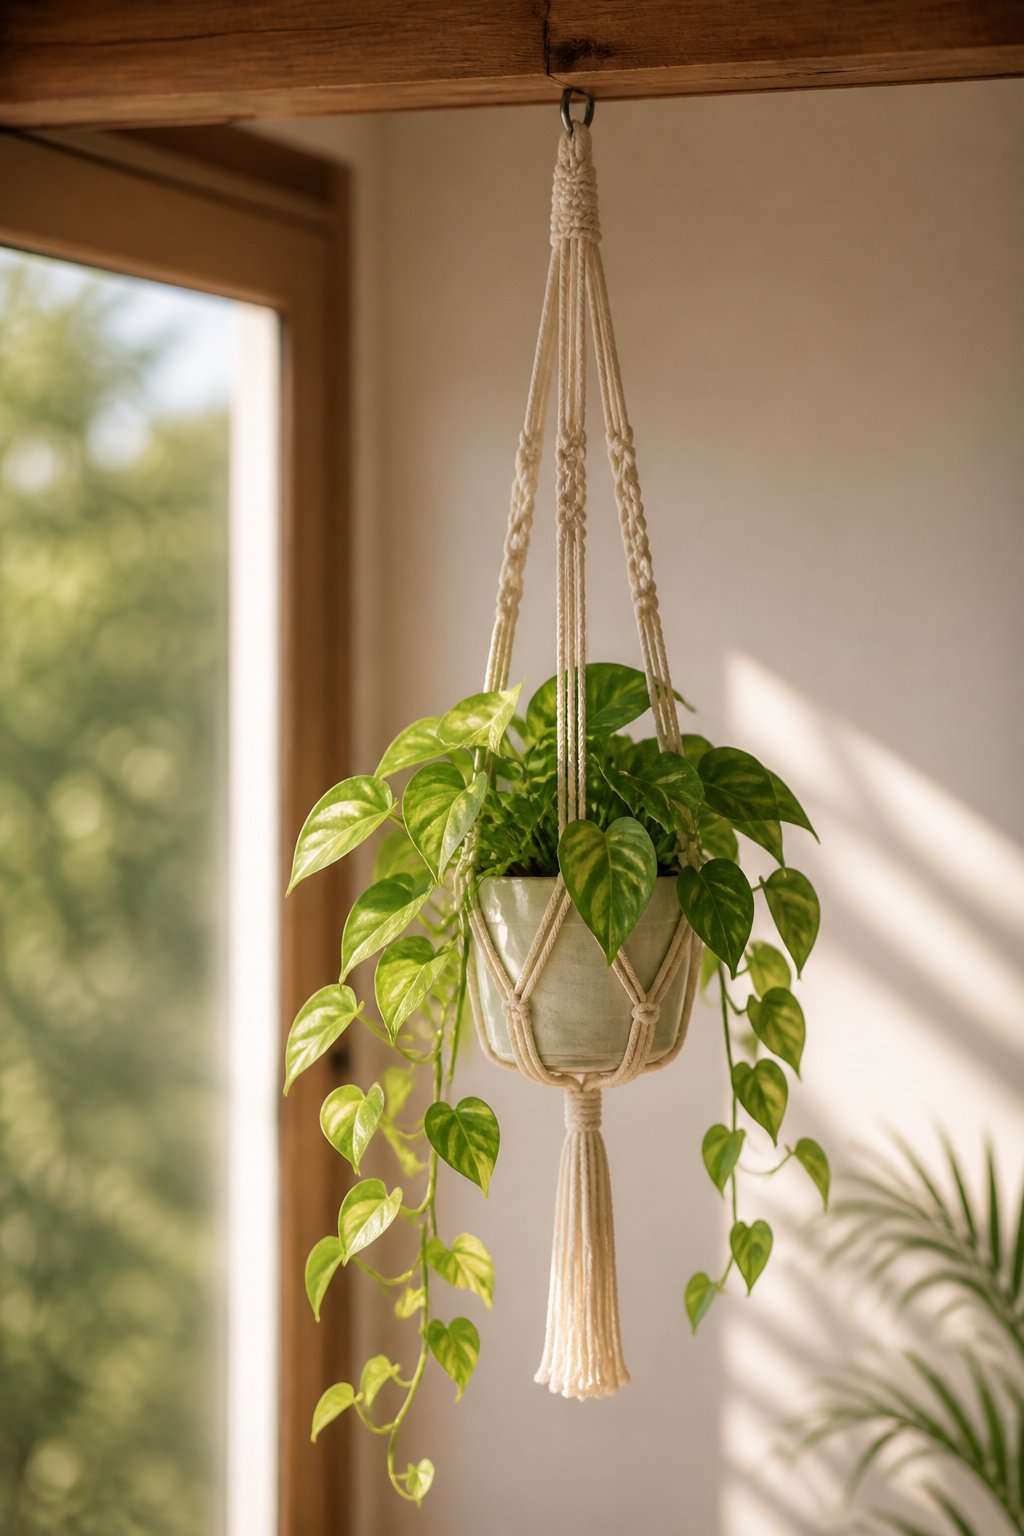
Macrame hanging plant stands solve the floor-space problem by staying off it entirely. A pair of hangers set at different lengths catches window light at two levels, which makes even one plant type read as a fuller display than a single pot on the ground. The knotting itself is straightforward once you learn a few basic patterns, though the finished piece is only as strong as what you hang it from.
Weight limits depend on cord strength and anchor point, not the macrame alone. A wet 4-to-6-inch pot weighs 2 to 4 pounds, well within what most cotton cord handles, but a 12-to-14-inch tropical in ceramic can hit 15 to 20 pounds and needs both heavier cord and a ceiling hook rated for the load. Material choice matters if the hanger lives outside. Cotton cord degrades in direct sun; synthetic holds up better there and is the safer pick for a covered porch or balcony.
14. Wooden Crate Plant Stand
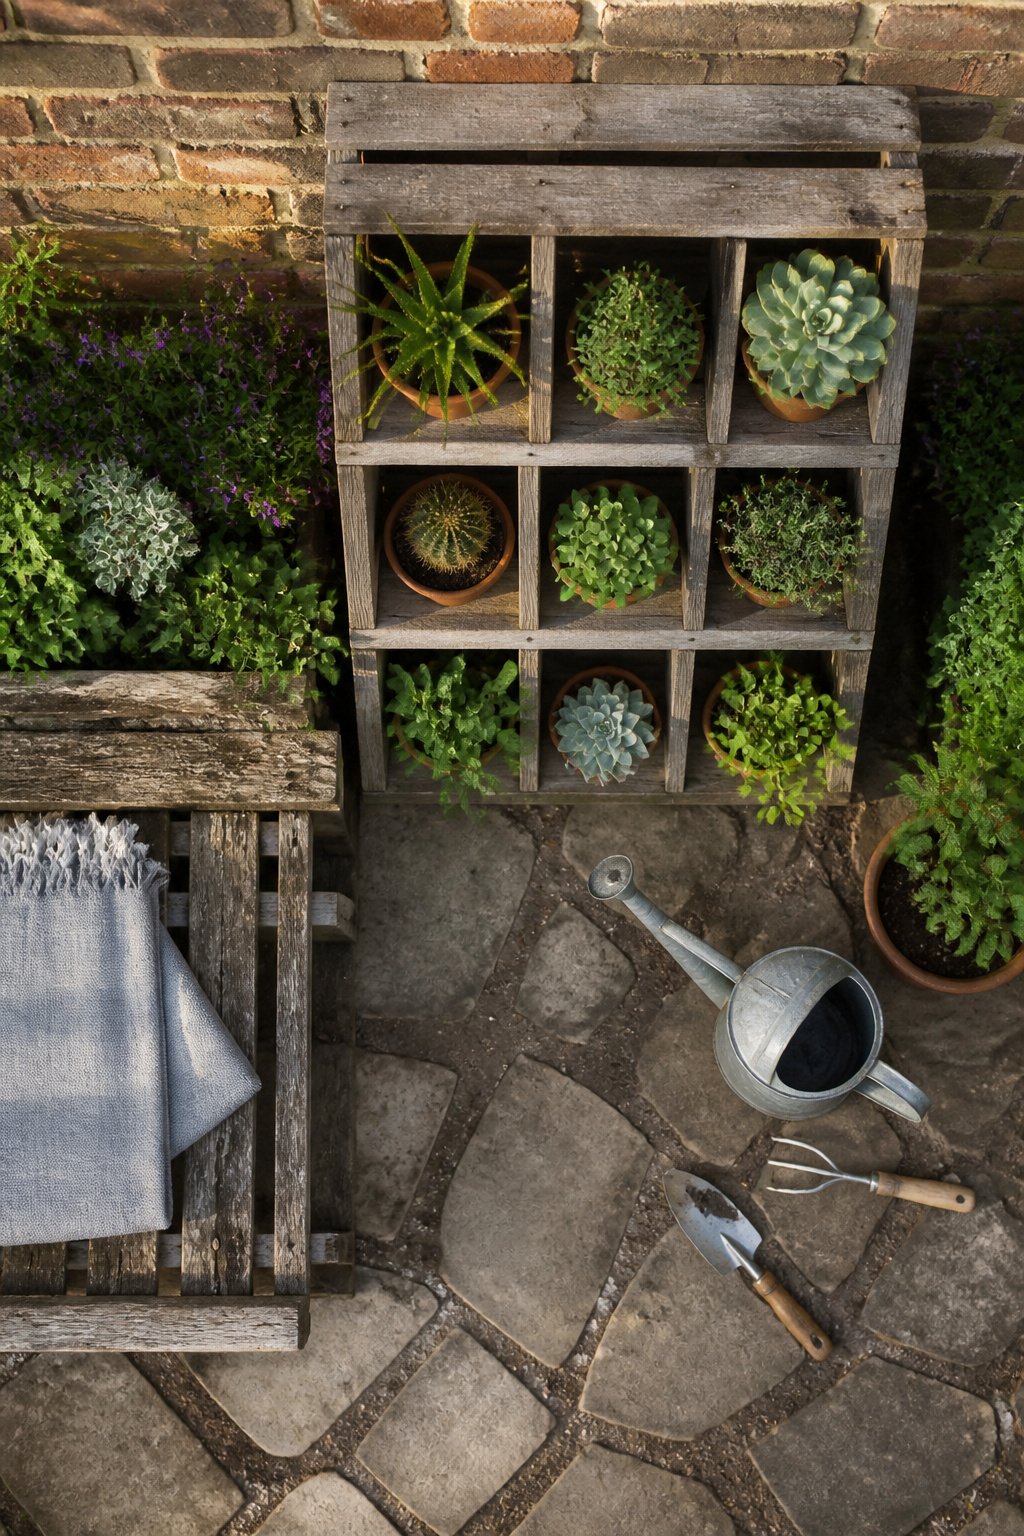
Wooden crates stack two ways for plant storage: laid flat as cubby shelves or stood on end as vertical towers. Either layout gives you six to eight square compartments per standard shipping crate, enough room for a 6-inch pot in each slot. The slats matter more than the label. Vintage orchard crates often have wider gaps between boards than modern shipping crates, so a 4-inch terra-cotta saucer can slip right through. Test the bottom before you load it up.
Seal the wood with exterior-grade finish if the stand lives outside, even under a covered porch. Untreated pine or pallet wood softens fast with direct rain, and rattan or bamboo joinery falls apart in a single wet season. Indoors, almost any crate works: pine, plywood, even the battered ones from the grocery store loading dock. Drill drainage holes if you are planting directly inside the crate rather than sliding in potted plants. Prop the whole unit on bricks or shorter crates underneath to keep air moving and prevent the rot that starts at the ground contact point.
15. Tree Stump Plant Stand
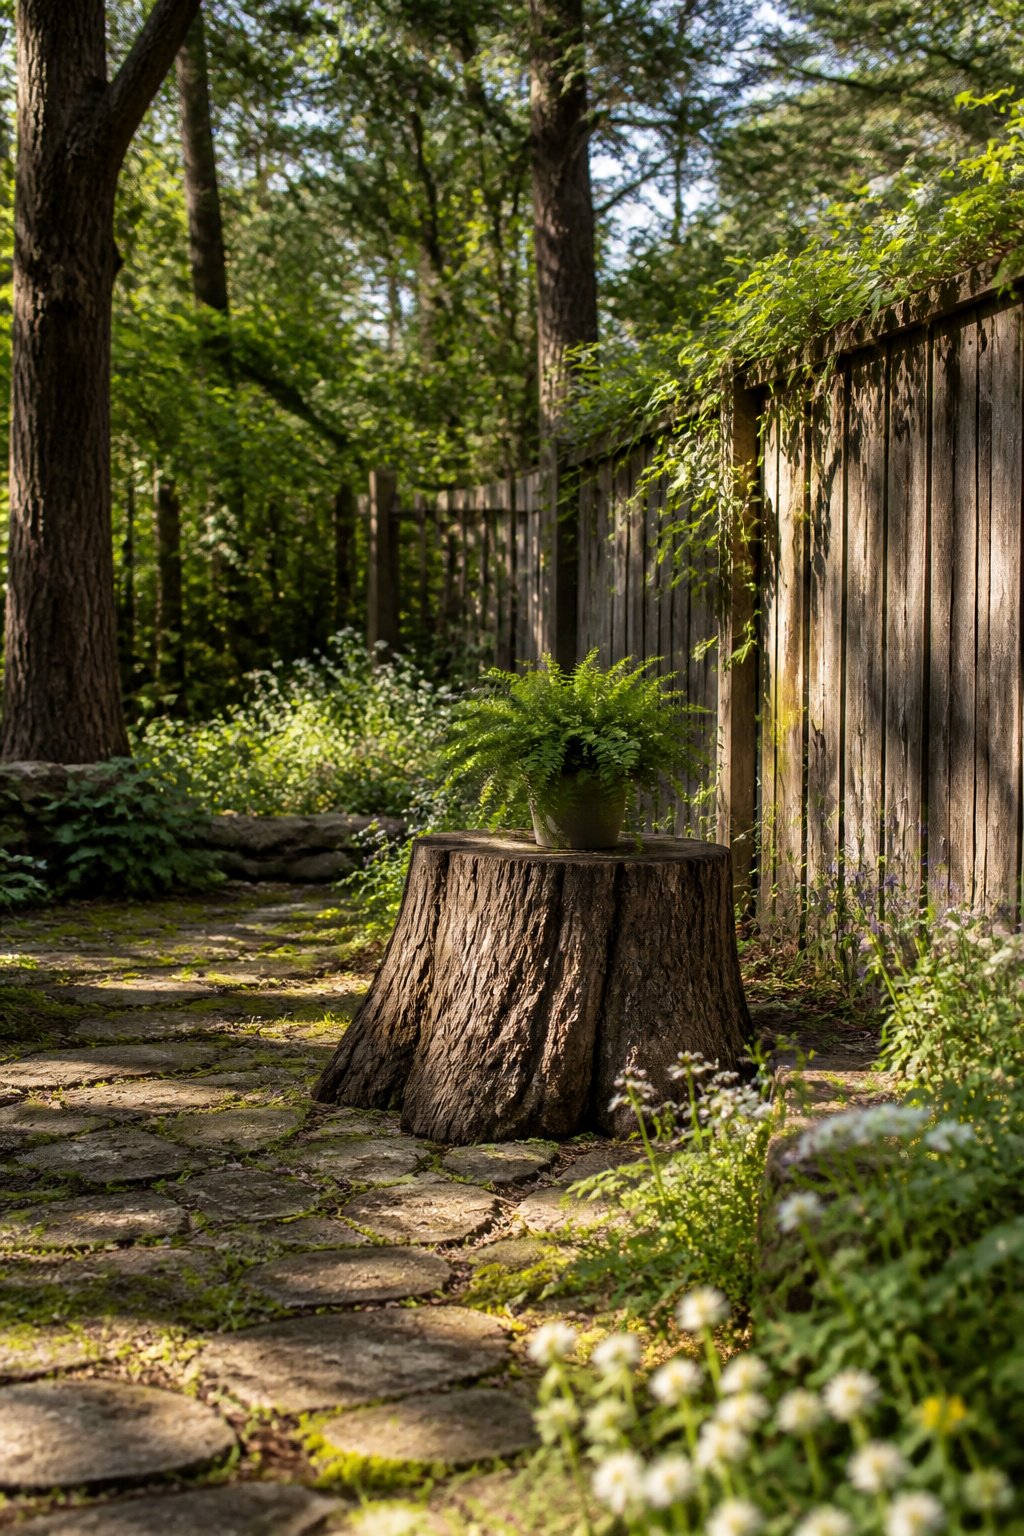
A leftover section of log or stump makes one of the most organic plant stand designs ideas you can set your hands on, and it costs nothing if you know someone with a chainsaw. The height depends entirely on where the cut falls; the diameter simply needs to accommodate your pot base without overhang. I like grouping three stumps at differing heights in a corner, which builds depth in a way a single pedestal cannot manage.
Bark may shed over time, especially indoors where dry heating seasons accelerate it. Sealing the stump or removing the bark entirely keeps the mess off your floor. Outdoors, the same rot that gives a stump its character will eventually win: decay is guaranteed, though a sealed cut buys you seasons of delay. For a garden that already reads woodsy or rustic, the irregular shape and visible rings give it a one-of-a-kind character no manufactured stand matches.
16. Rolling Plant Stand
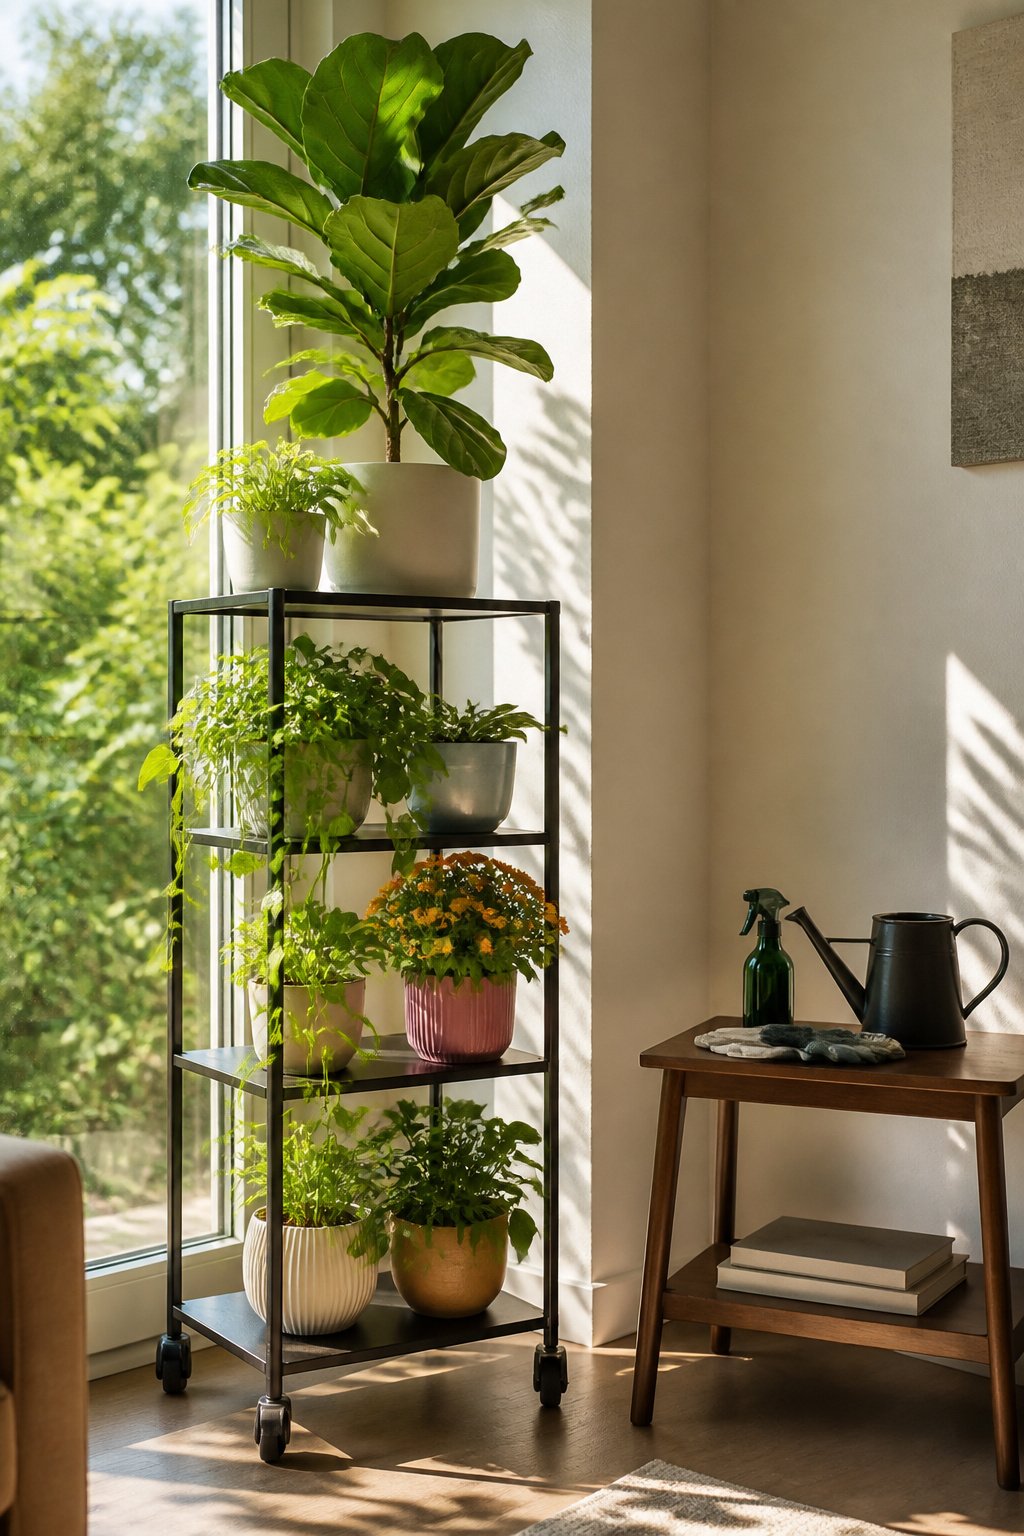
A rolling plant stand with lockable casters solves the problem of a plant that needs different light from one season to the next, or a pot that has to come indoors before frost. The wheels add three to four inches of height, which helps air circulation underneath, but they also introduce wobble on uneven patio stones or threshold strips. Locking casters fix that; just remember to check them before you bump the stand with a hose.
Wet soil changes the math on weight. A mid-size ceramic pot already runs five to eight pounds before you water it, and saturated mix can double that. The stand’s rating needs to cover the loaded pot, not the empty frame. I have seen plywood builds with four two-inch casters handle a loaded collection fine, and the mobility matters more than I expected. Rolling a heavy ficus to follow a bright window across the room, or shifting the whole stand onto the porch in May and back through the door in October, beats lifting it twice a year.
17. DIY Plant Stand with Wheels
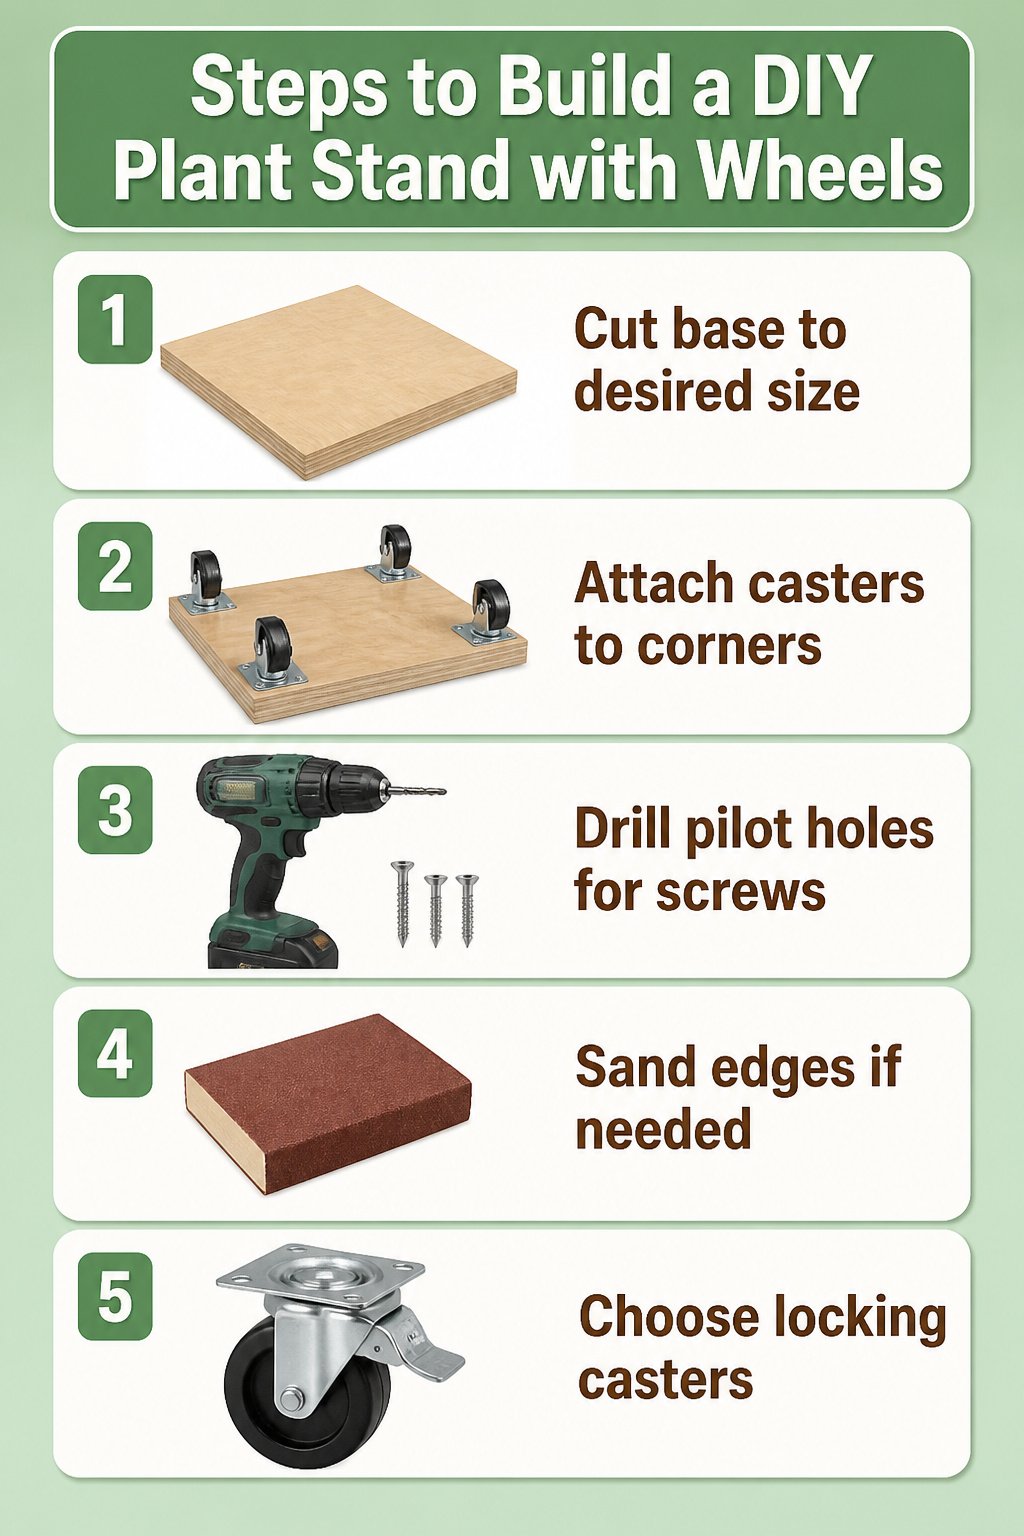
A DIY plant stand with wheels starts with a simple base, plywood or a scrap of lumber, and four casters screwed to the corners. The casters need a rating that covers the loaded weight; a 16-inch ceramic planter filled with wet soil runs 20 to 30 lbs, so anything that size or larger calls for hardware rated to 50 lbs or more. I built one last spring for a front porch fiddle-leaf fig that chased the morning sun, and mobility mattered more than looks.
The tool list stays short: a saw for cutting the base to size, a drill for pilot holes, and screws to lock the casters down. A Kreg Jig helps if you want a tiered version, but a single flat platform is enough for most balcony gardens. Plywood warps less than solid boards once it gets damp from drainage, so I favor that even when scrap pine is free. Sand the edges, or don’t; the plant covers most of it anyway.
The mistake to avoid is skimping on the caster lock. A rolling stand that drifts every time you water turns into a nuisance fast. Spend the extra dollar per wheel on ones that brake.
18. DIY Plant Risers
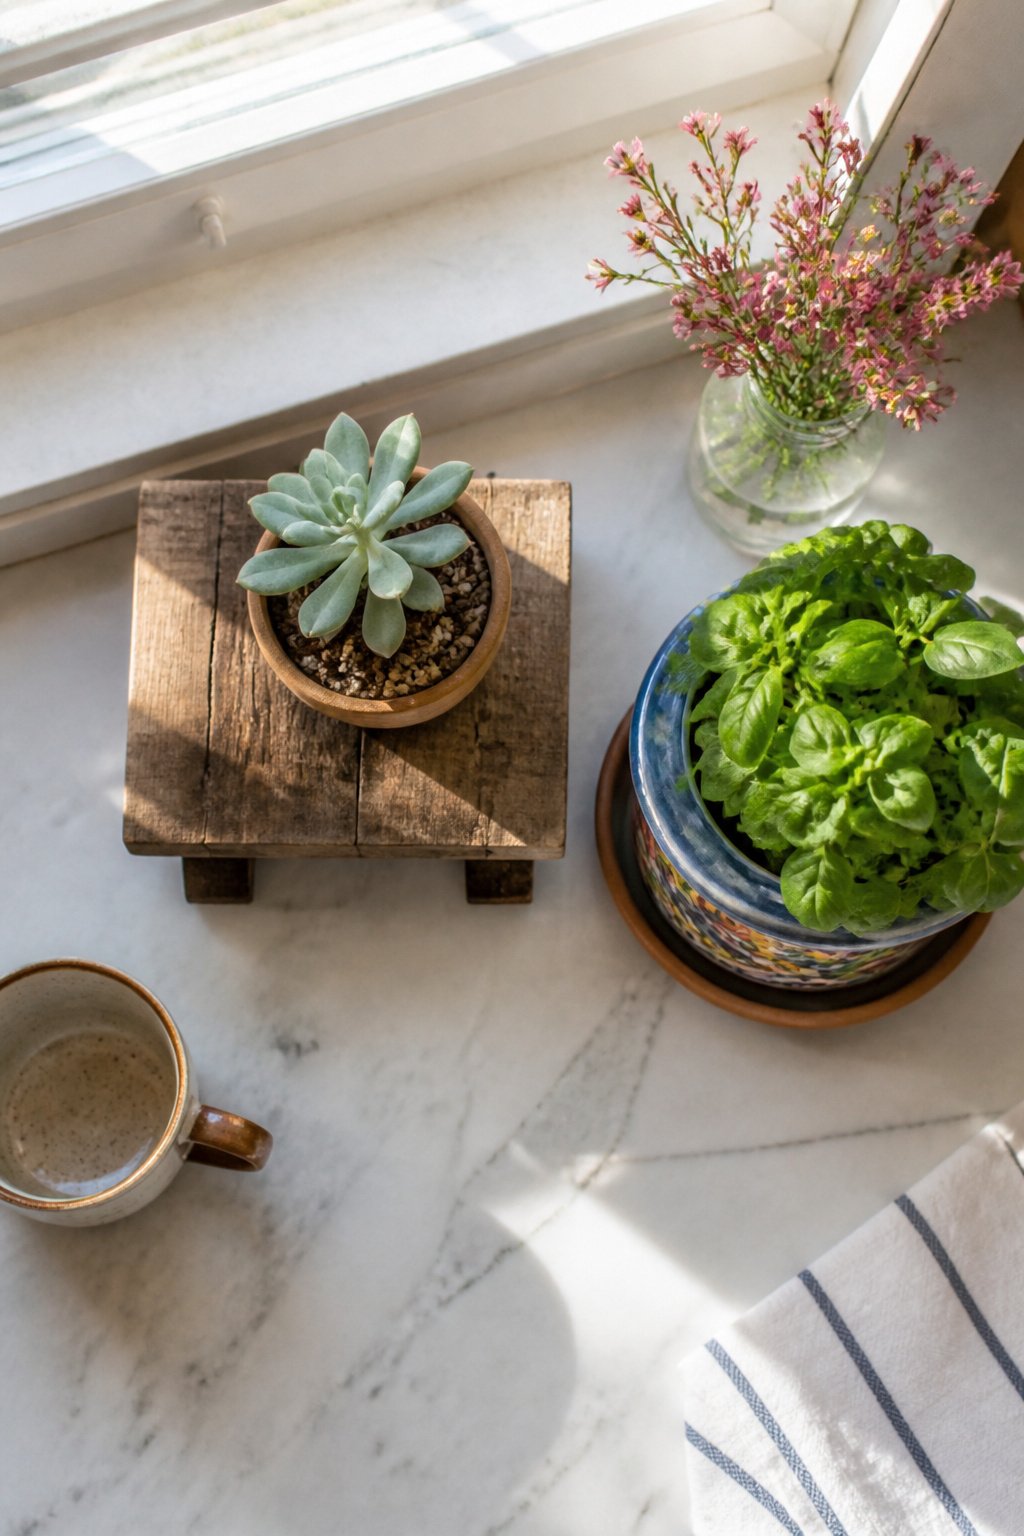
The smallest lift in a plant stand design can be the most useful one. A four-inch scrap-pine block with a couple of wooden toy wheels glued underneath raises a single pot just enough to let water run through instead of pooling on the table. That gap also reads as a design choice on a flat surface, breaking a long countertop into staggered heights without stacking anything.
Pre-cut wood rounds from the craft store and toy wheels from the hardware store are the usual pairing, though any scrap square will do. No cuts needed if you start with a round or a square already in hand. A quick sand and a coat of paint, and the thing looks intentional rather than leftover.
The real payoff is drainage on a wooden dresser or a kitchen counter where a saucer still leaves rings. Bricks work outside for the same lift, but indoors a finished riser keeps the plant from looking like an afterthought. Two tiers happen naturally if you set one pot on the riser and another beside it on the bare surface. That is often enough height variation for a windowsill collection, and it costs whatever scrap you already own.
19. DIY Plant Stand with Craft Store Supplies
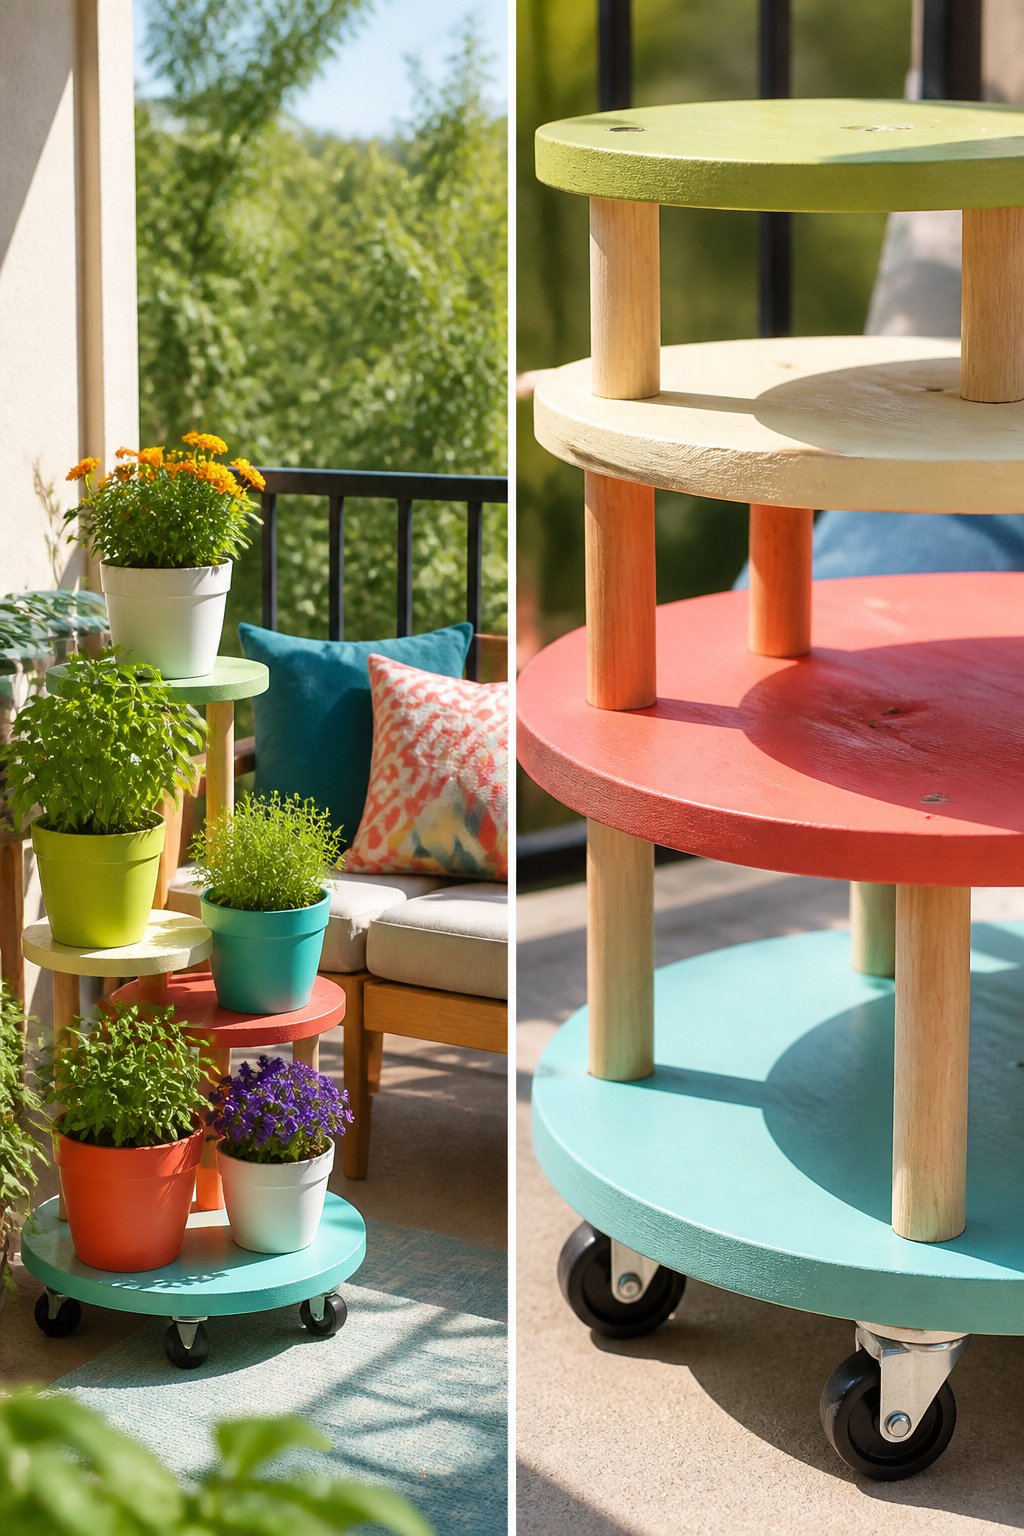
Pre-cut wood rounds and wooden toy wheels from the craft aisle can become simple risers that lift a pot an inch or two off the table, which is often enough to protect a surface from water rings and to let a trailing plant spill where you want it. Kacie of The Woodworker’s Daughter built a full stand from dollar-store dowels for $35, so the whole project stayed inside a single season’s budget. PVC pipe is another hardware-store route: 1-inch diameter holds small to medium pots, and it wipes clean when soil spills, which wood will not do without sanding later. Spray-paint it black or white before you connect the pieces, or the stand reads as leftover plumbing. The dowel version looks warmer; the pipe version survives watering mistakes. For a renter on a balcony, either beats hauling home a finished stand that may not fit through the door.
20. DIY Concrete Plant Stand
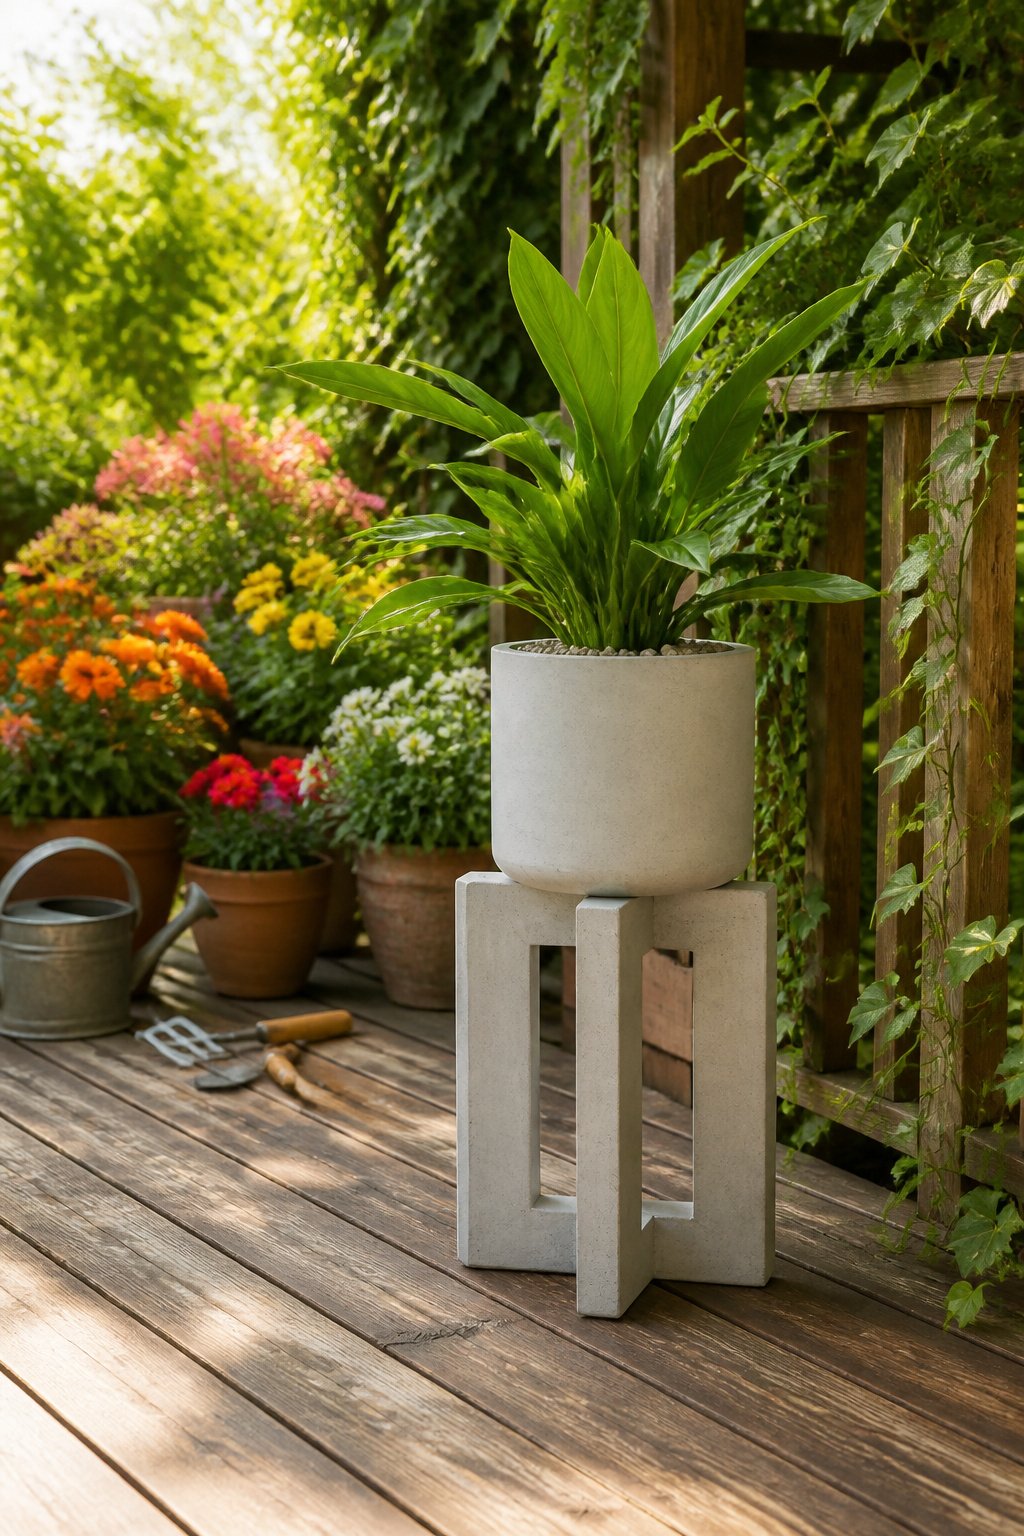
Poured concrete stands start with a form built from melamine board or a sturdy plastic tub, whatever shape matches the gap you are trying to fill. Quick-set concrete mix goes in, tapped to release air pockets, then left to cure for the full time the bag specifies even if the surface looks hard after a few hours. The finished piece will be heavy enough that moving it later is not really an option, so the form stage is when you decide exactly where it lives. Wind stability is the payoff for that weight, especially on an exposed patio where lighter stands shift or tip. Customizing the shape is the reason to bother with the mess and the wait, and it is a satisfying weekend project if you have the space to work and no rush on the timeline.
21. DIY Plant Stand from a Bar Stool
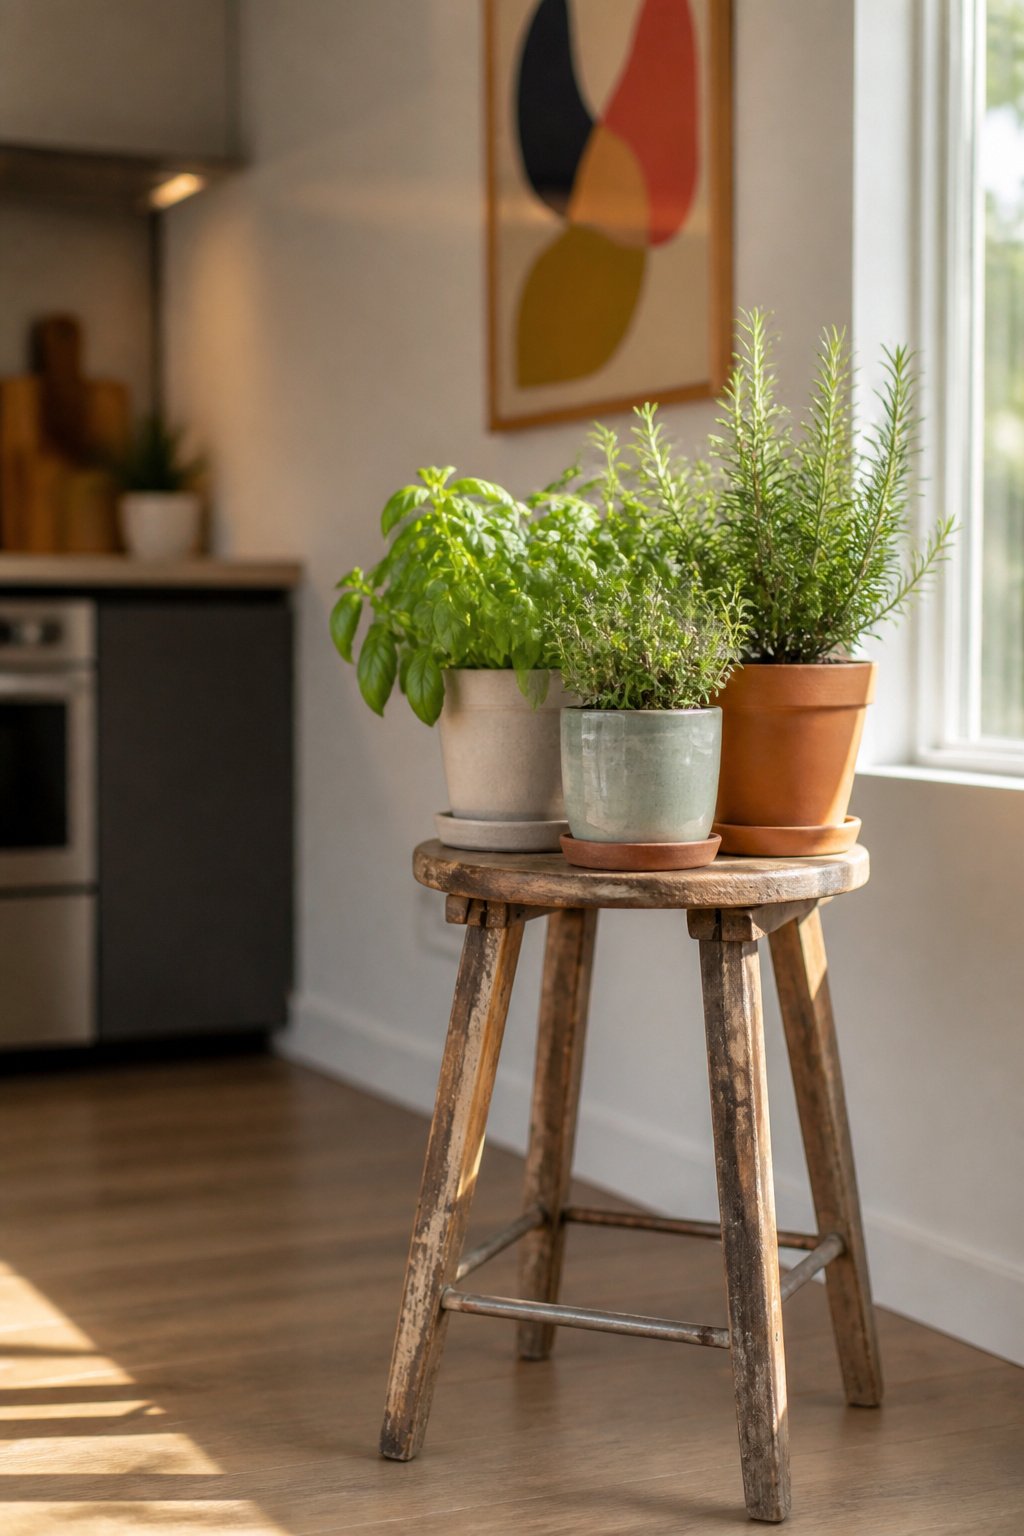
A bar stool frame already gives you the height; the work is swapping the seat for something that can hold wet soil and drainage. Plywood cut to the ring diameter works, or a slatted wooden top if you want runoff to fall through. Either way, the base needs to be wide enough relative to the height or a top-heavy plant in a ceramic pot will tip it. Most bar stools run 24–30 inches tall, so the footprint underneath should feel substantial, not tippy, when you press down on the rim. For hard floors, rubber feet or non-slip pads under the legs keep the stand from sliding when you bump it watering. A filled large ceramic planter can hit 20 to 30 lbs, so test the frame for wobble before you commit a plant to it. If the stool wiggles under your hand, it will wiggle worse under twenty pounds of damp soil.
22. DIY Plant Stand with Hanging Rod
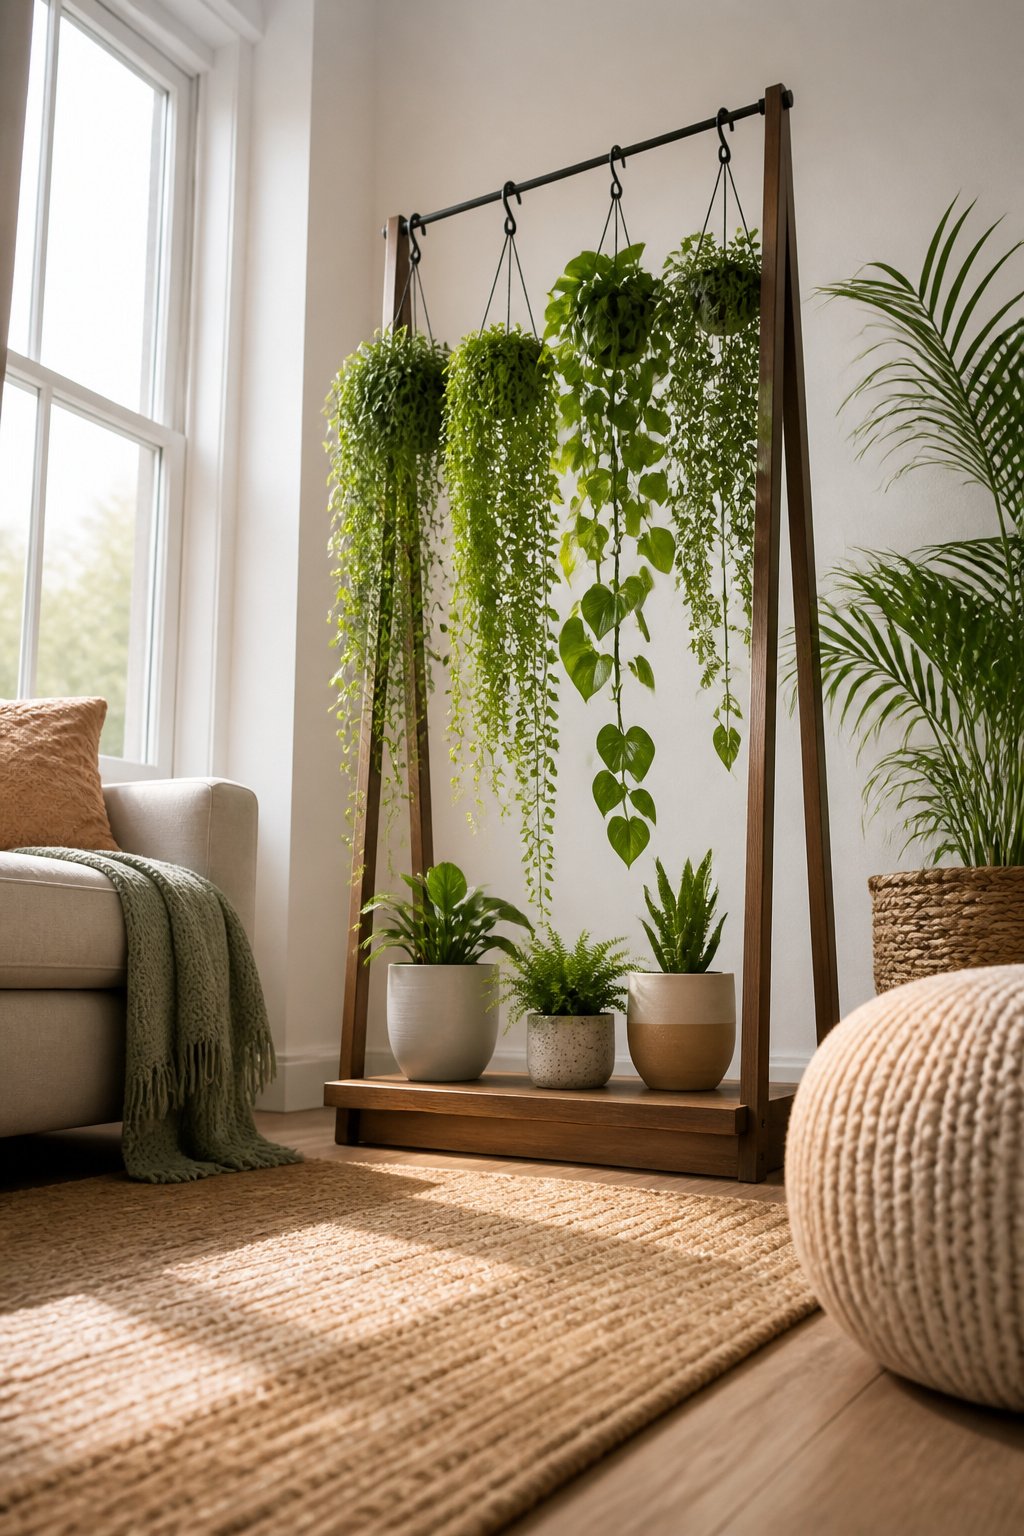
A vertical plant stand with a hanging rod marries the stability of a freestanding frame with the drama of suspended greenery. The base has to earn its keep: a loaded rod at the top acts like a lever, and a too-light footprint will tip the moment you hang a wet 8-inch ceramic pot weighing 5 to 8 pounds. I look for steel or iron down below and a span wide enough that the center of gravity stays low even when the bar is full.
Rod height sets your plant count. A taller bar gives more vertical room for trailing stems, but every extra inch adds leverage working against that base. Strength matters in the same direction: a 1x wood dowel suits lighter hangers, while steel tubing handles the 15 to 20 pounds of a large tropical in a 12 to 14 inch pot without bowing. The slatted shelf plans I have seen use the lower half for potted plants and the upper rod for baskets, which keeps heavy loads close to the ground and displays the hangers at eye level where they belong.
23. DIY Corner Plant Stand
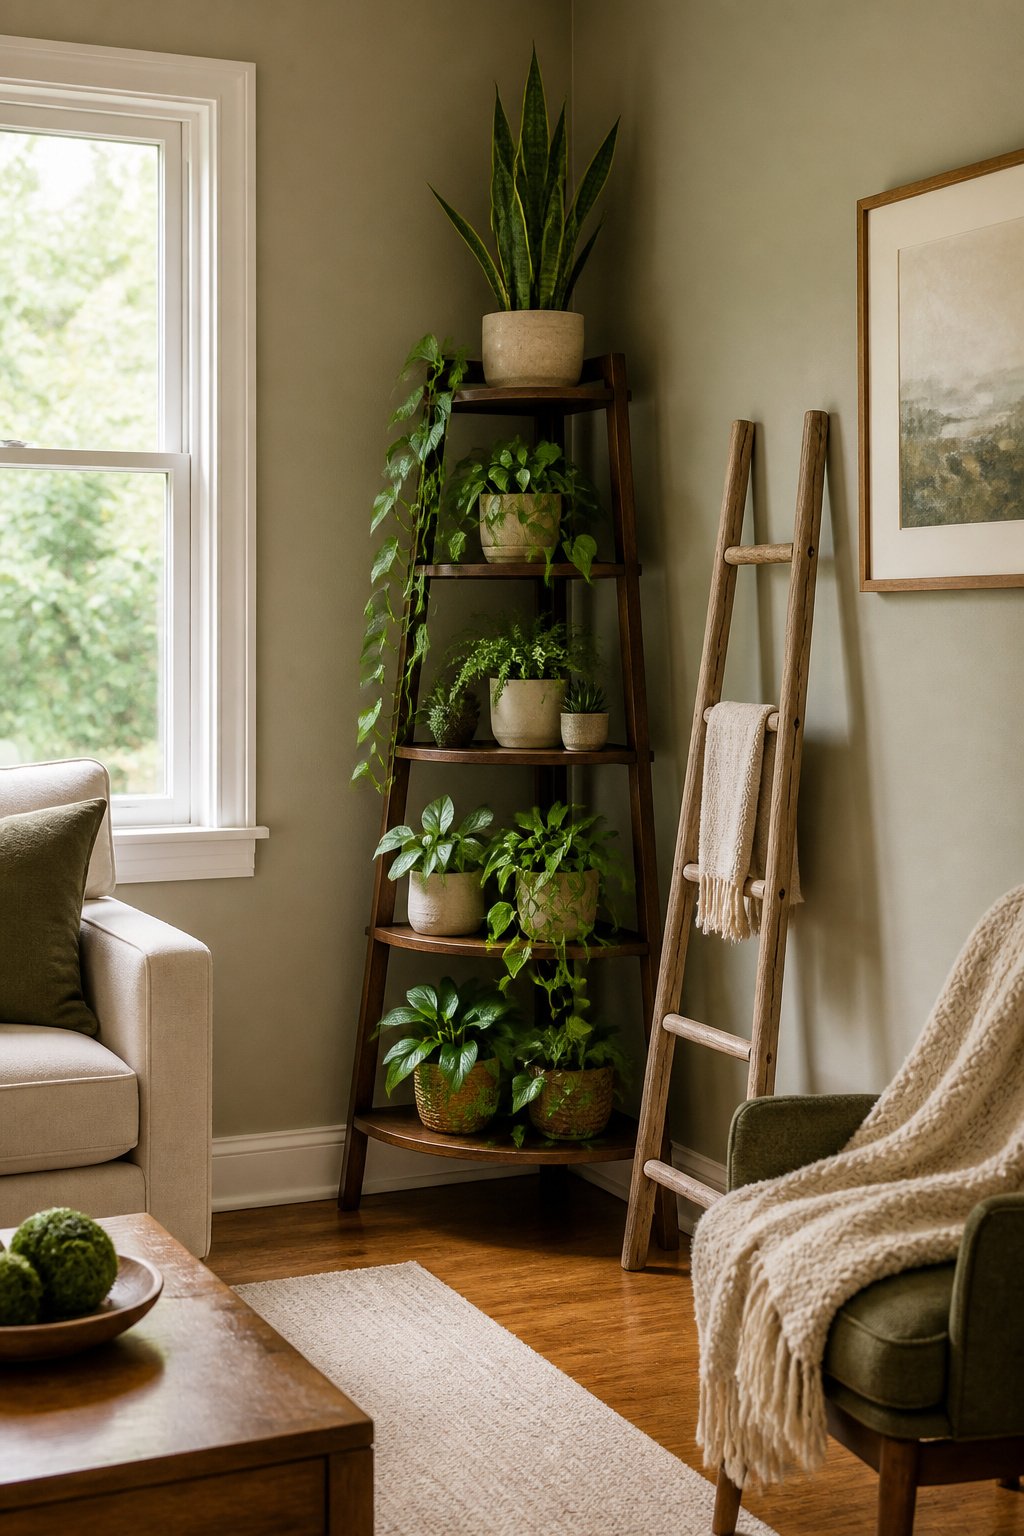
A narrow wooden stand cut to fit a corner triangle solves the awkward gap where two walls meet. Two sides press against drywall or siding, so the thing does not wobble the way a single-legged pedestal can, and the open front leaves room to water and rotate pots without dragging the whole unit out. Two or three shelves let you stagger plant sizes, trailing pothos or philodendron up top where vines can spill down, sturdier snake plants or compact succulents below where the base feels solid. On a compact patio or a small living room, this is dead space turned into the most useful real estate in the room. Tall corner stands run 4 to 6 feet high if you want vertical presence without blocking window light, though a narrow pedestal that high needs checking: top-heavy pots with dry soil and a tall plant tip easily, so keep weight low or anchor the base before you walk away.
24. DIY Plant Display Bookshelves
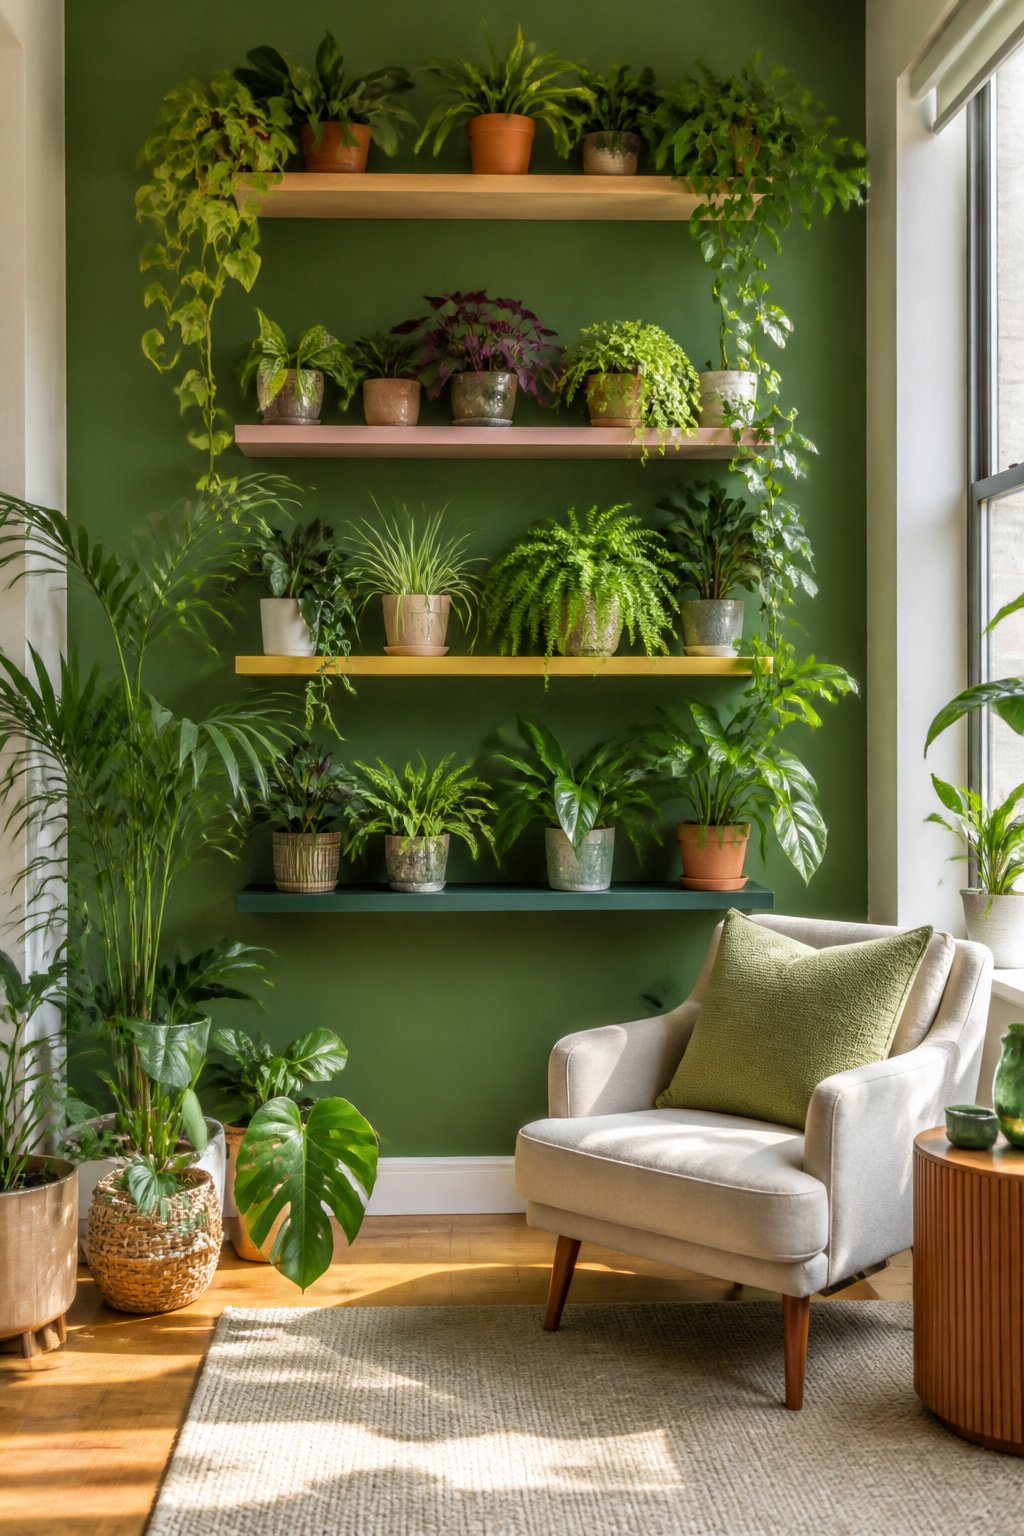
Standard bookshelves sit too deep for most potted plants. At 24 inches front to back, a pot disappears and the shelf behind it becomes dead space. Plant shelves work better at 8–12 inches deep, which keeps the pot near the front edge and leaves room for trailing stems to spill without hitting a back panel.
I learned this after moving a trailing pothos onto a deep bookcase and watching it tangle against the rear wall instead of falling free. Shallow shelves fix that. Stacked three to five levels high, they turn a narrow footprint into something that reads like a green wall: upright growers such as small ferns or peperomias on top, cascading varieties below where light is softer. The upper tiers do steal some light from the lower ones, so the bottom shelf is the place for a ZZ plant or peace lily rather than something that wants direct sun.
Ana White has a beginner-friendly build using 1x and 2x material plus plywood, sized for exactly this purpose. A Kreg jig and a basic saw get it done. The finished unit costs little more than the raw lumber and takes up about the same floor space as a side table.
25. DIY Mini Plant Ladder
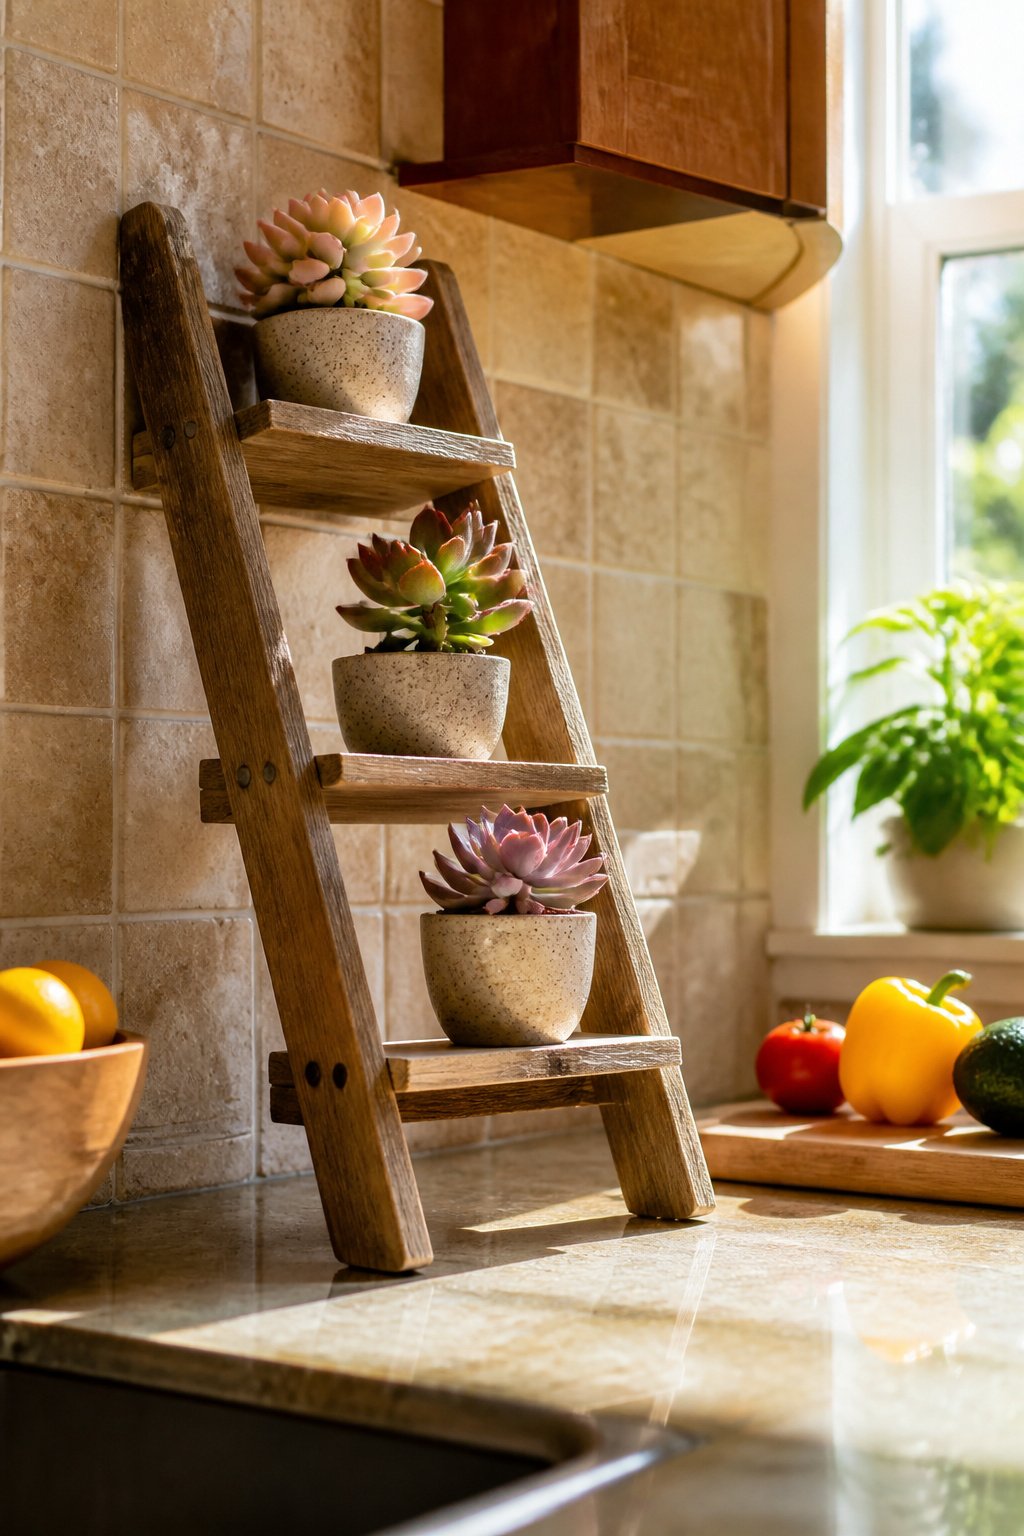
A three- to four-rung ladder built from 1x material fits on a countertop or narrow tabletop where a full ladder stand would overhang. The rung width is the hard limit: most finished rungs sit around 3.5 inches across, so a 4-inch pot base will teeter. Test your actual pots on a scrap piece before cutting final lengths. I learned this the hard way after building one to what looked like generous proportions, then watching my favorite terra-cotta wobble every time the AC kicked on.
Succulents and other small plants under six inches tall suit this scale best. The staggered heights give you a little visual movement without demanding the wall space or outdoor anchoring of a patio ladder stand. Built with basic tools, a tape measure, saw, drill, sander, and nailer handle the whole job; safety glasses are non-negotiable when you’re ripping narrow stock that close to your fingers.
Leave breathing room between plants. Crowding turns the rungs into a humidity trap, and the whole point of a ladder is air circulation at every level. Drought-tolerant varieties up top make sense if that rung sits near a high shelf or under a vent where watering becomes a hassle.
26. DIY Plant Stand Wall
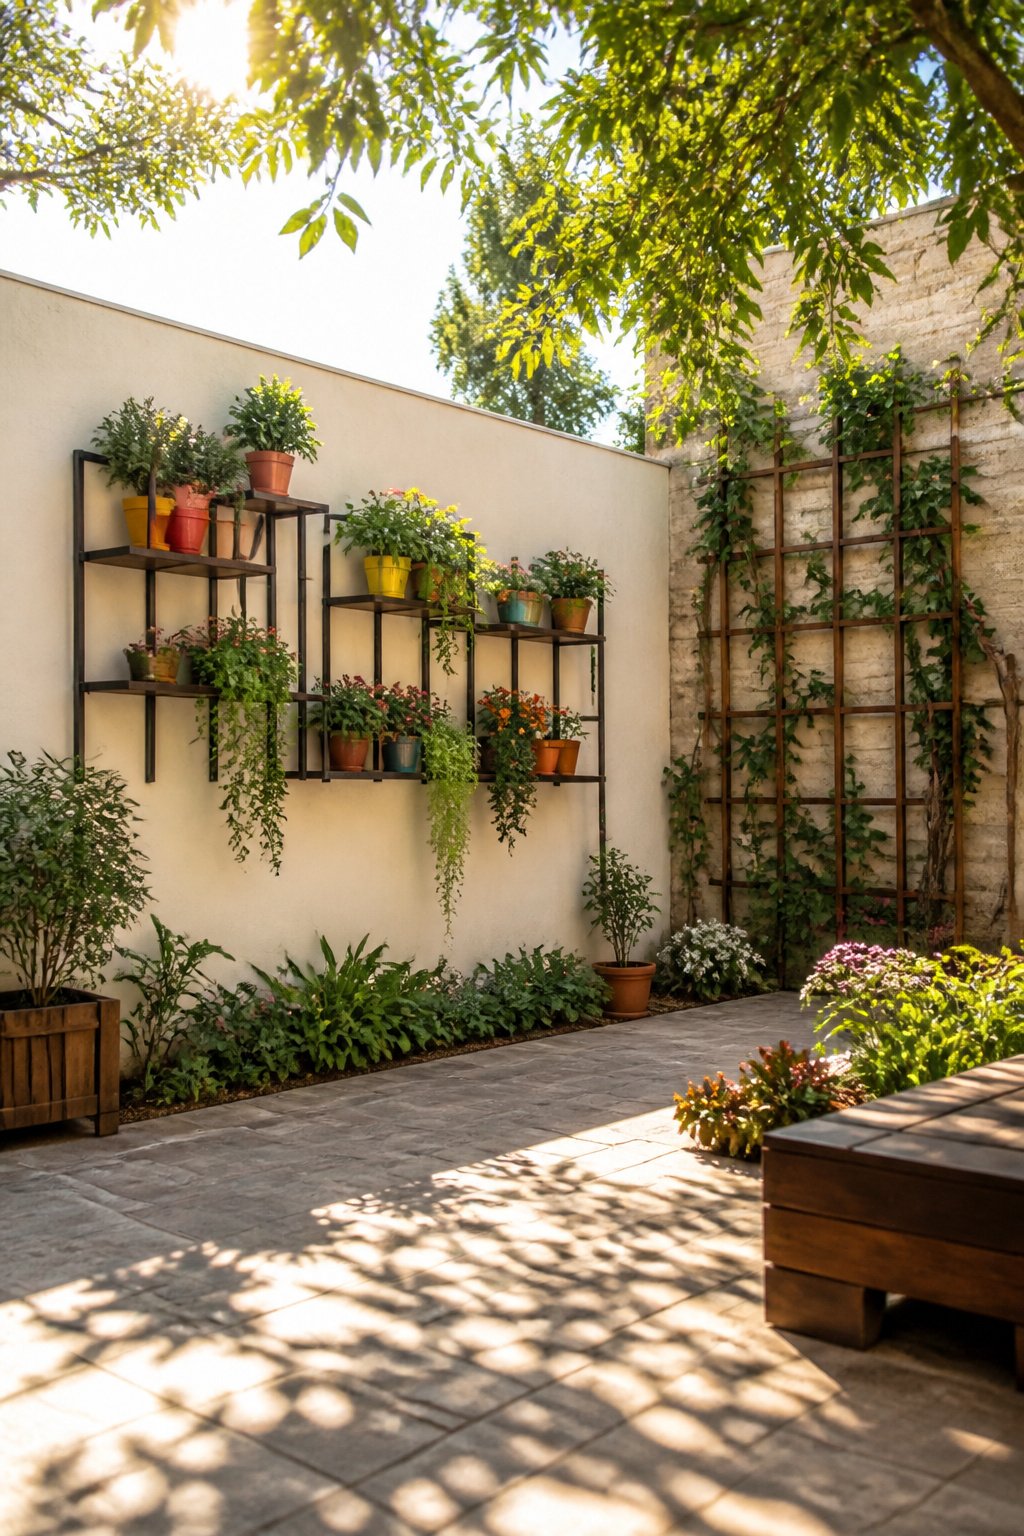
A vertical panel or grid mounted with multiple plants turns a blank wall into living storage, and the weight sneaks up faster than most people expect. A wet 12-to-14-inch ceramic pot with a tropical can hit 15 to 20 pounds, and a 16-inch floor planter runs 20 to 30. Wall-mounted versions need solid anchoring into studs, not just drywall anchors, or the whole display ends up on the floor. Freestanding grids solve the stud-hunting problem but need a heavy base; a narrow frame loaded top-heavy will tip the first time someone brushes past it.
The simplest builds use painted boards with hooks or a grid of wire baskets. Paint cans with labeled herbs work for a kitchen wall, and the whole thing reads as art from across the room. For renters or anyone nervous about holes, a leaning freestanding panel against the wall gives the same look with zero drilling, though it eats a few inches of floor space you might not have on a balcony. Light matters too: a plant shelf against a dark interior wall is a graveyard, while the same build on a sun-facing patio wall thrives. I would rather mount fewer plants in good light than fill a shadowed grid and watch them stretch and yellow.
27. DIY Vertical Herb Shelf
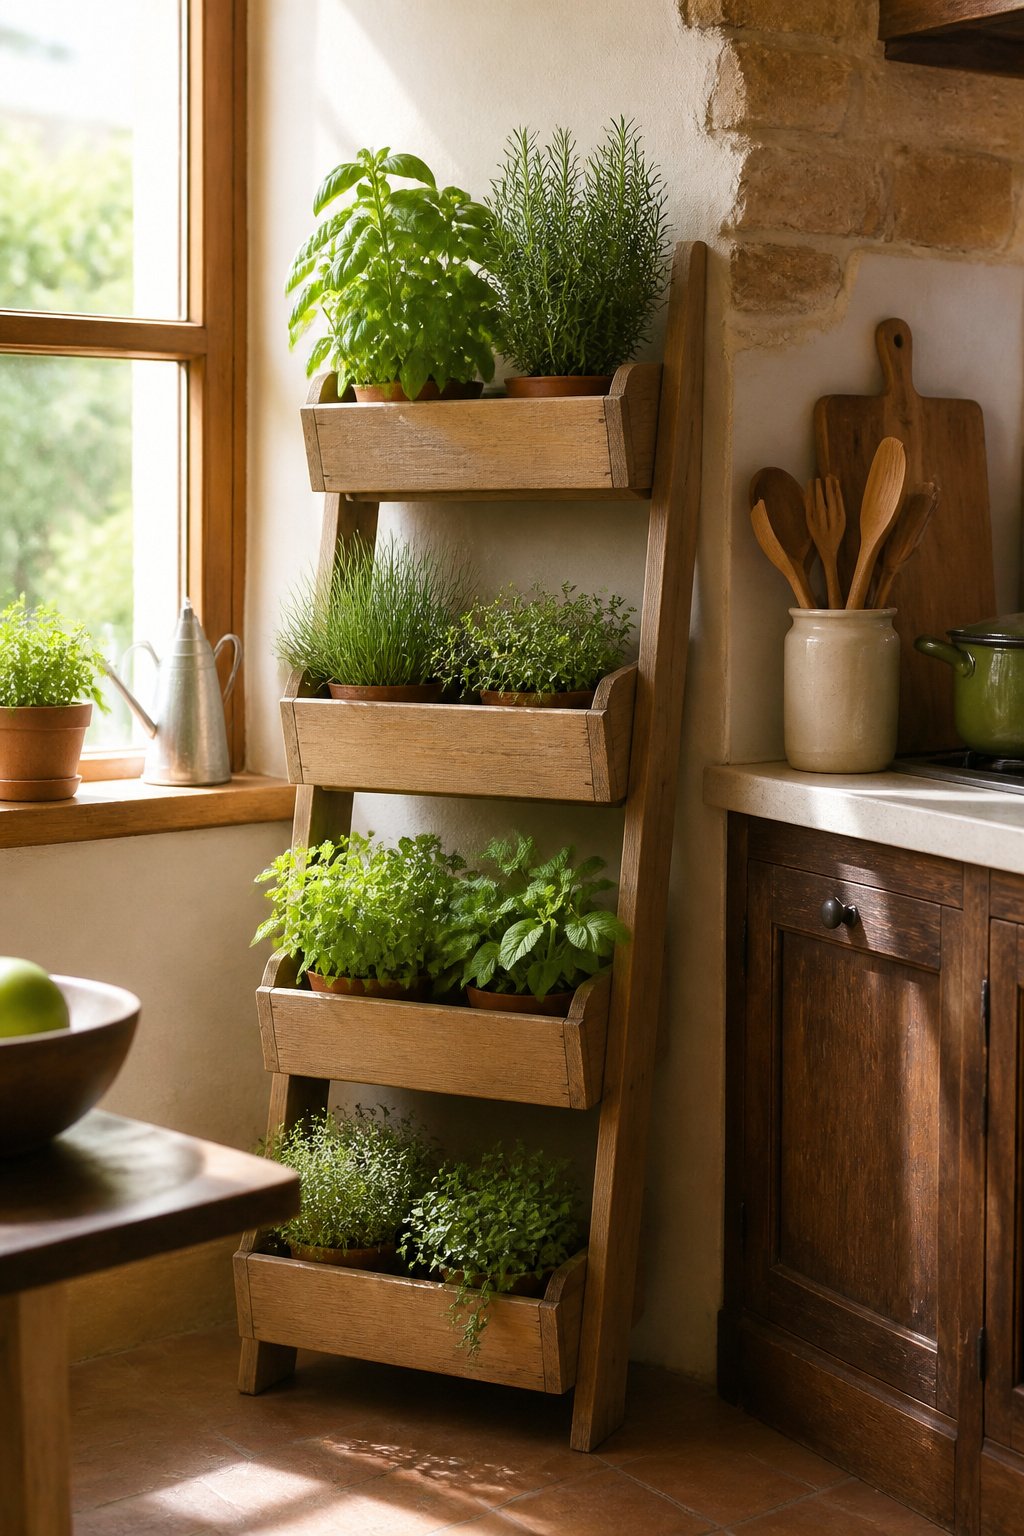
A tall, narrow shelf built for herbs lives best where you already cook. Mine sits against the wall beside my stove, four levels deep enough for a 4-inch nursery pot and nothing more. Shelf depth is the make-or-break detail here: too wide, and the unit steals counter space it promised to save; too shallow, and pots tip when you brush past with a cutting board.
The vertical format buys back about two square feet of counter in a galley kitchen, which matters when your "garden" is a balcony three floors up. Herbs need light, so the unit wants placement near a window or under a cheap clip-on grow light you run while dinner simmers. Lower shelves hold basil and rosemary, which grow larger and need grabbing often; upper tiers keep thyme and mint where the light stays stronger and the leaves don’t trail into your sink.
Chalkboard tags or plain wooden labels keep the pots straight when everything looks like green stems at 6 a.m. A leaning ladder style works for renters, no wall holes needed; a wall-mounted version stays put if you own the place and trust your studs. Either way, check the base before you walk away, especially after watering. Narrow footprints and wet soil tip easier than you’d think, and a falling pot of oregano makes a mess you smell for a week.
28. DIY Plant Stand with Space for Hanging Plant
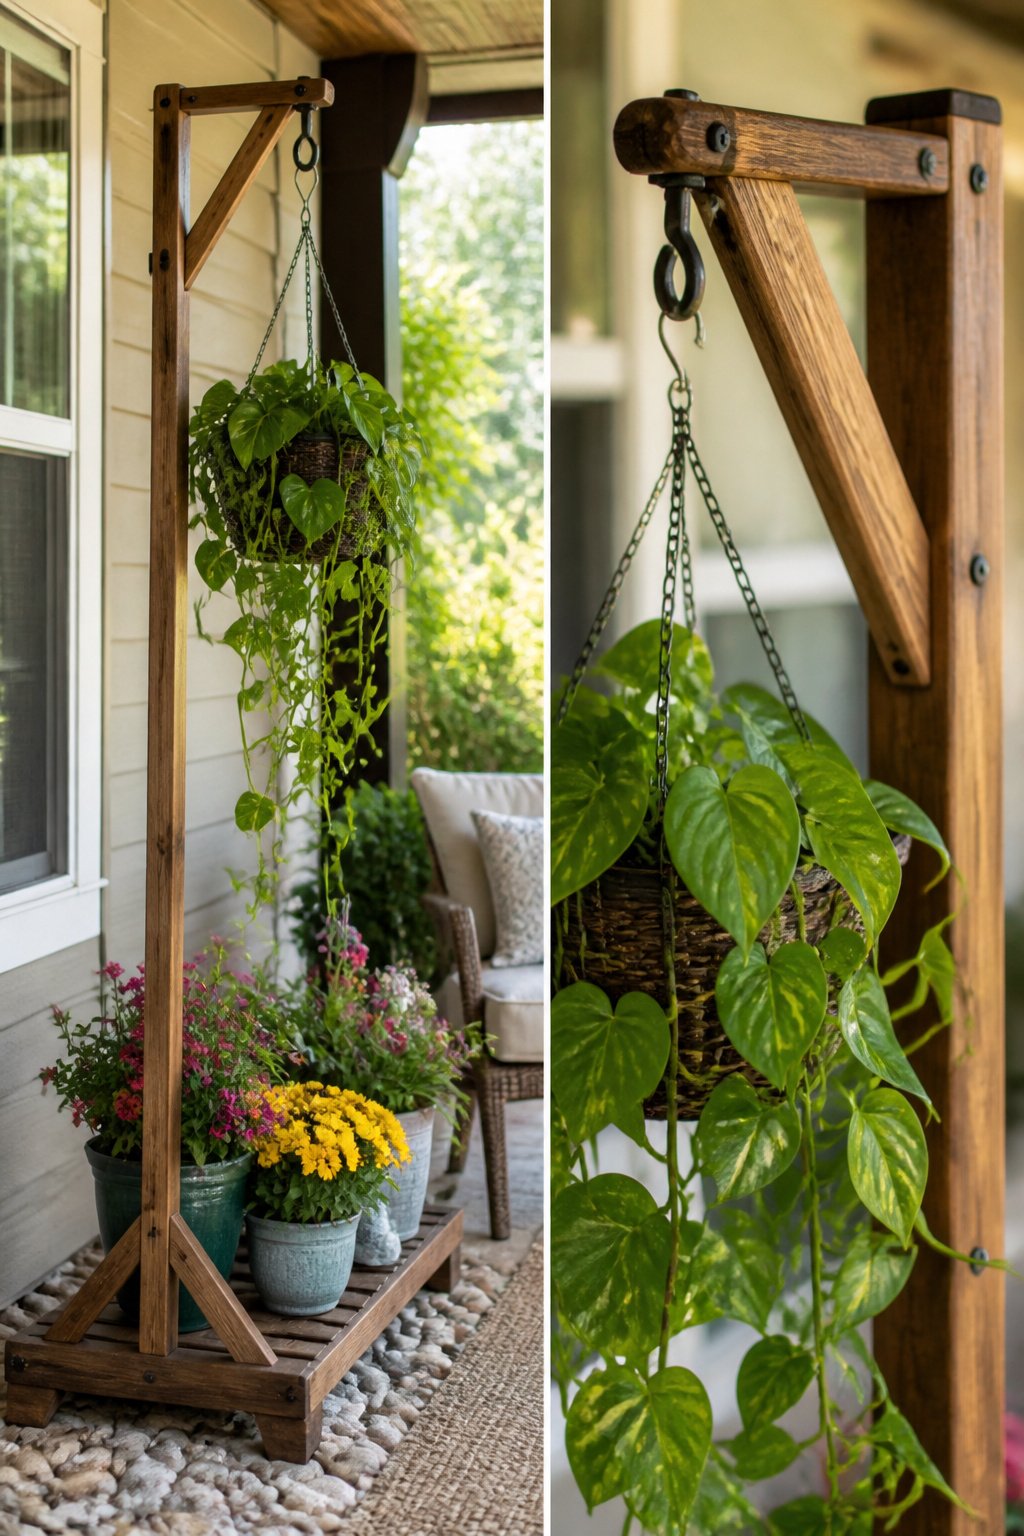
A simple shelf with a hook overhead turns one footprint into two plant spots, and that matters when floor space is tight. I built one last spring from cedar fence boards and a steel plant hanger screwed into the top rail, and the whole thing took an afternoon.
The lower shelf needs clearance so the hanging plant’s drip does not land on whatever sits below. Leave 8 to 12 inches between the shelf surface and the bottom of the hanging pot, more for pothos or philodendron that will fill that gap within a season. A wet 8 to 10 inch ceramic pot weighs 5 to 8 lbs, and a hanging basket at saturation adds another 4 to 6 lbs easy. The base has to handle both at once, so a wide stance or a cross-brace on the legs keeps the stand from tipping when someone bumps it carrying groceries.
29. DIY Plant Stand with Decorative Accents
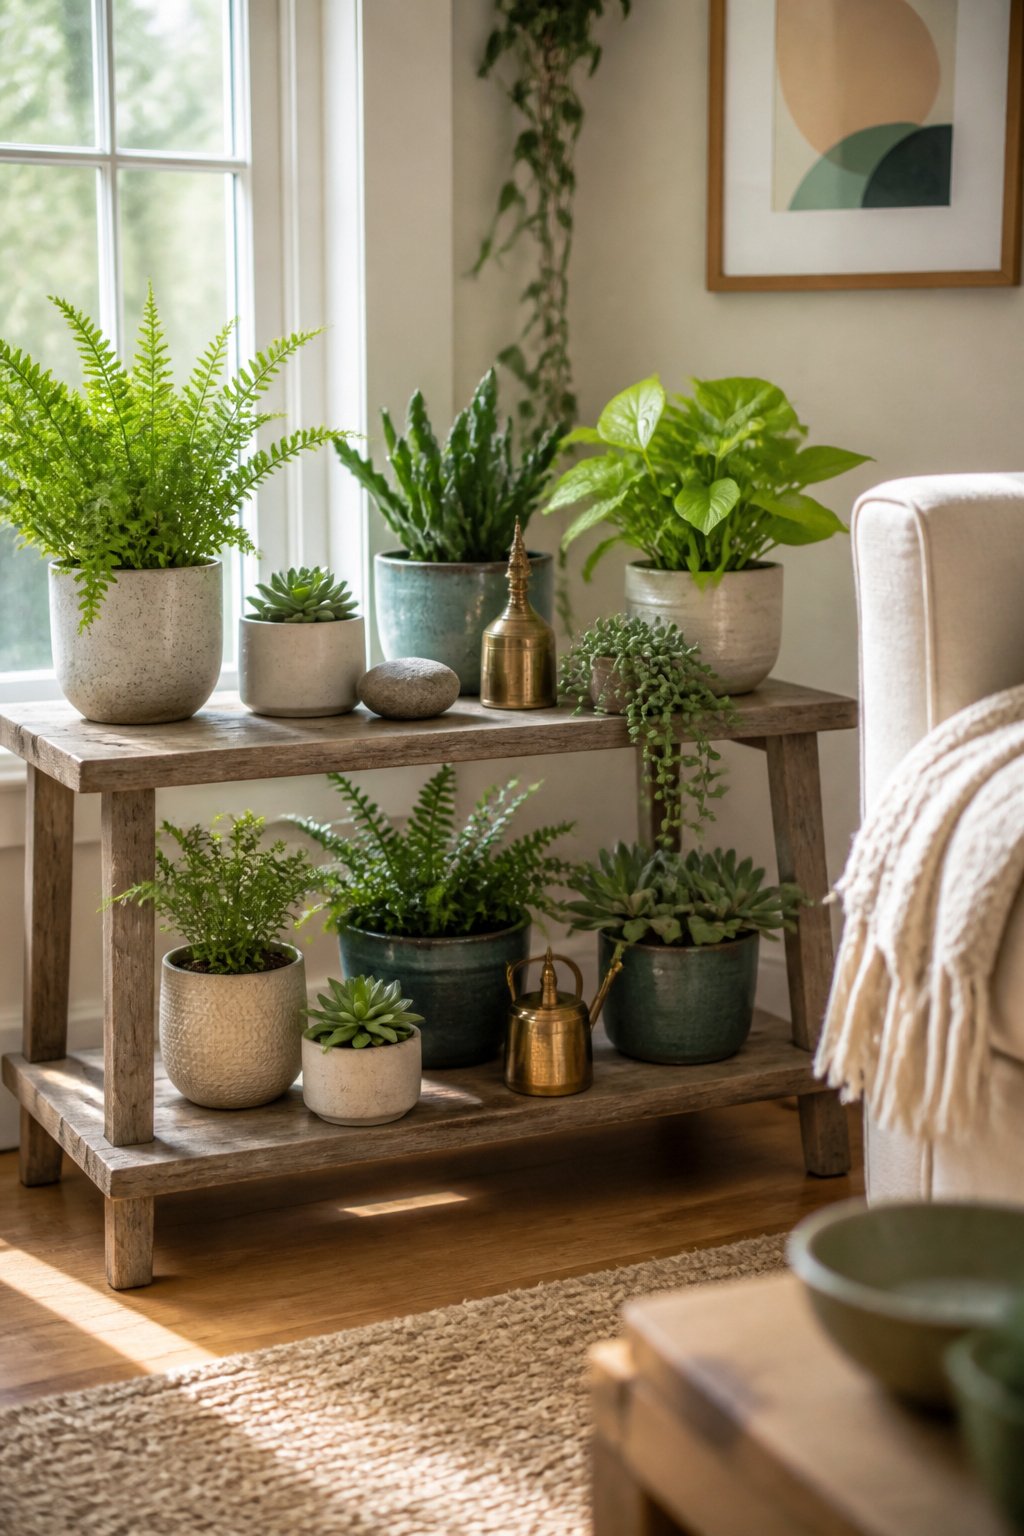
Small gaps between pots on a plant stand look unfinished, and that is where accents in wood, metal, or stone do their best work. A smooth river stone tucked beside a terracotta pot, a tiny brass figurine catching light between leaves, or a weathered shell on a lower shelf gives the eye somewhere to rest without competing with the plants themselves. The trick is keeping the material honest to where the stand lives. Outdoor stands need accents that can take rain and sun: raw stone, unfinished wood, or rust-friendly metals. Indoor stands get away with more delicate pieces, small lanterns or candles if the shelf is wide enough to keep flame away from foliage. Cement columns used as plant stands already carry that heavy, neutral presence, and they pair naturally with bamboo fencing or other raw textures nearby. The weight keeps them upright in wind, and the gray tone never clashes with whatever you stack on top. One judgment call worth making: leave at least an inch of breathing room around any accent so water or soil does not stain it, and so you can still lift the pot when you need to.
30. DIY Plant Stand with Seasonal Decorations
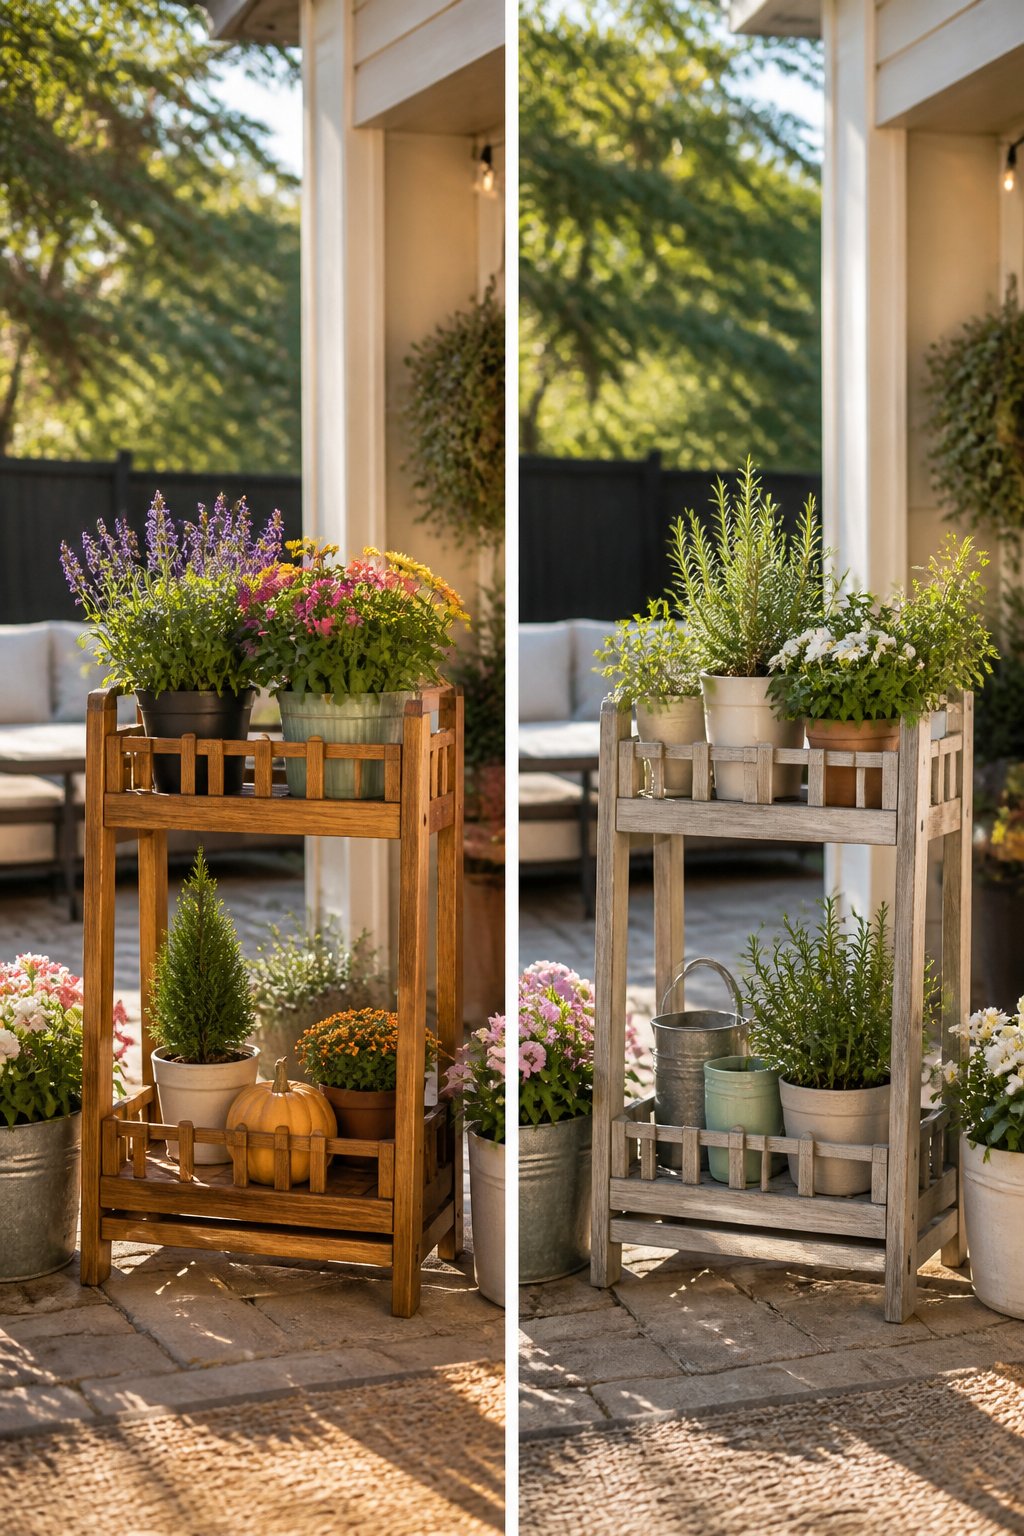
A plant stand that earns its keep year-round needs more than a flat surface. The front-porch design I keep coming back to uses 2-by lumber and a Kreg jig for a frame with open rails and a lower shelf, both sized to hold small seasonal items without crowding the pots above. Spring bulbs in paperwhites or grape hyacinths sit on the top rail in March. By June, a narrow summer flag slips through a pair of cup hooks screwed into the side posts. Fall means mini gourds and a pie pumpkin on that lower shelf, and in December the same spot fits a potted spruce or cluster of cut greens in wet florist foam.
The attachment points matter more than the decorations themselves. Cup hooks, small eye bolts, or even a shallow ledge with a 1-inch lip give you places to clip, lean, or nestle items that would otherwise roll off or blow away. I have tried balancing things on plain flat shelves, and the first windy day sorts that out fast.
Herbs rotate through the pots to match the display, which keeps the whole setup practical instead of purely decorative. Lemongrass and dill handle the warm months; chives and parsley survive the shift indoors when the spruce moves in. The stand stays useful, and the seasonal swap takes maybe twenty minutes.
31. DIY Plant Stand with Color Story
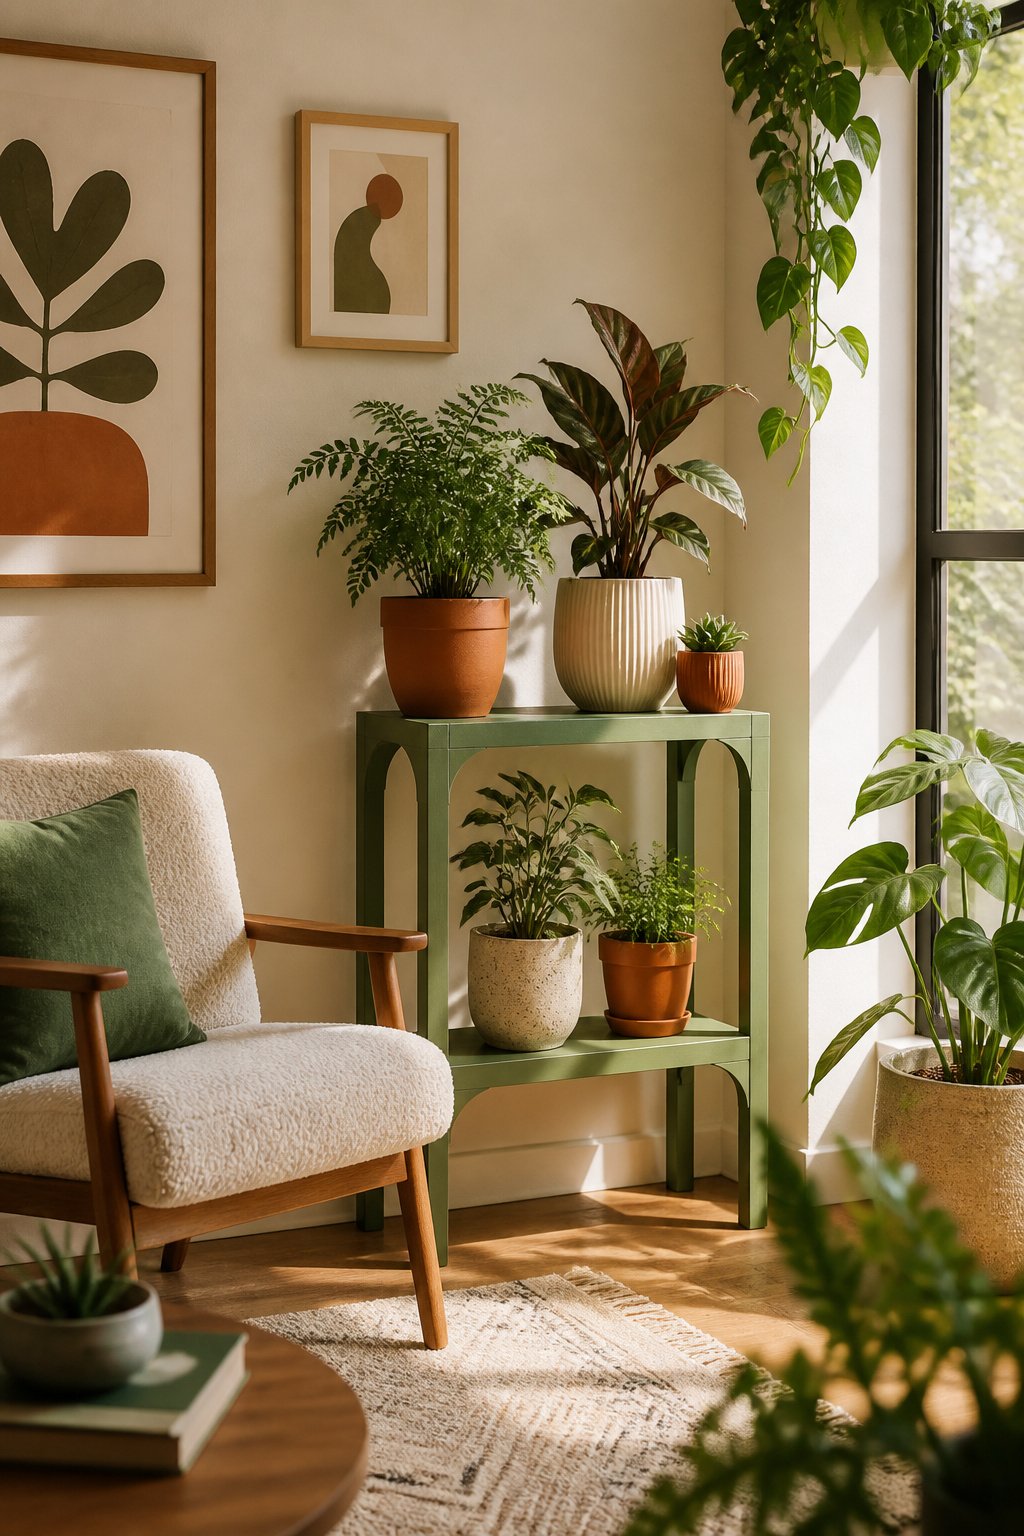
A coat of paint turns the cheapest pine stand into something that looks intentional. I learned this after buying three mismatched pots in terracotta, sage, and cream, then realizing they fought with each other on my patio. Painting the stand itself in the sage green pulled the whole grouping together; the terracotta and cream pots suddenly read as accents rather than clutter.
Exterior paint or exterior-grade stain is non-negotiable for outdoor stands, even on a covered porch. Untreated wood, bamboo, or rattan softens and warps the first season it sees direct rain. Solid iron or properly treated wood holds up fine outside, but anything less needs to come in before freezing temperatures hit. Indoors, the finish is wide open: latex wall paint, milk paint, stain, even leftover cabinet enamel. The pot color matters more than the room walls, since the stand sits at plant level where the eye already lands. Match the stand to the pot that repeats most, or to the one you want to feature.
32. DIY Plant Stand with Art
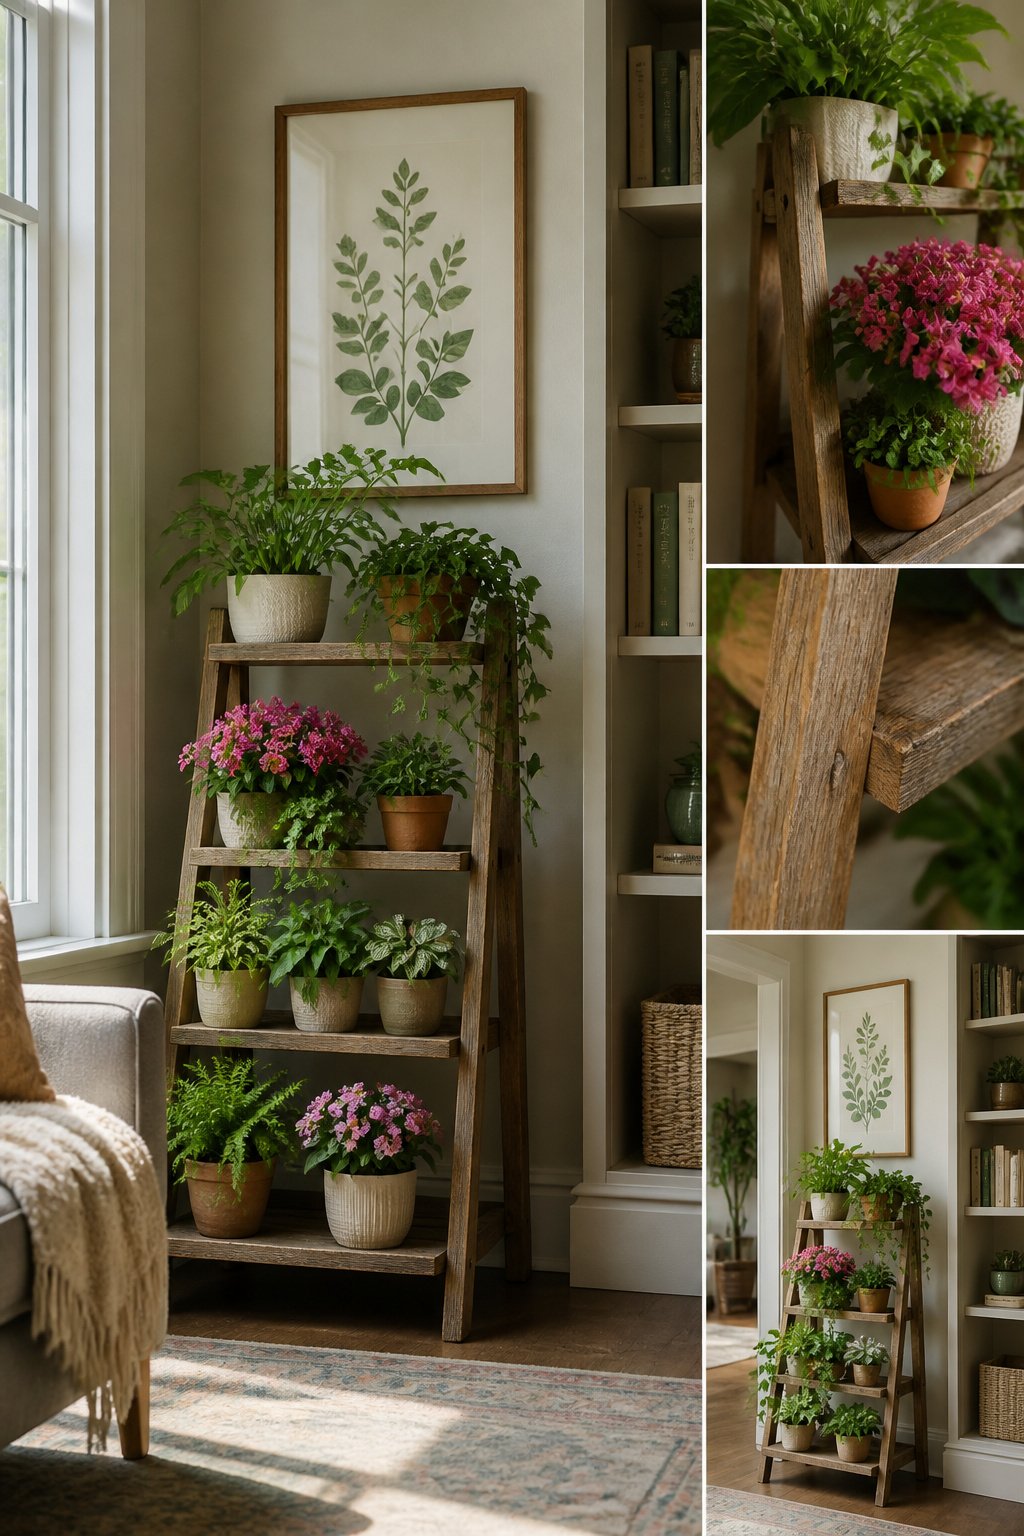
A small framed print hung behind the stand draws the eye upward and frames the whole setup like a gallery exhibit. The art does not have to sit on the wall alone. Sealed frames or outdoor-rated prints last longer when water and soil splash, which they will. I have seen pieces mounted between tiers as well, so the plants step around the image rather than block it. Hand-painted ceramic pots work the same way, turning the containers themselves into the artwork. Pair them with solid-colored ones so the pattern has room to breathe. Two approaches, one idea: the stand becomes a vignette, not just storage.
33. DIY Plant Stand with Books
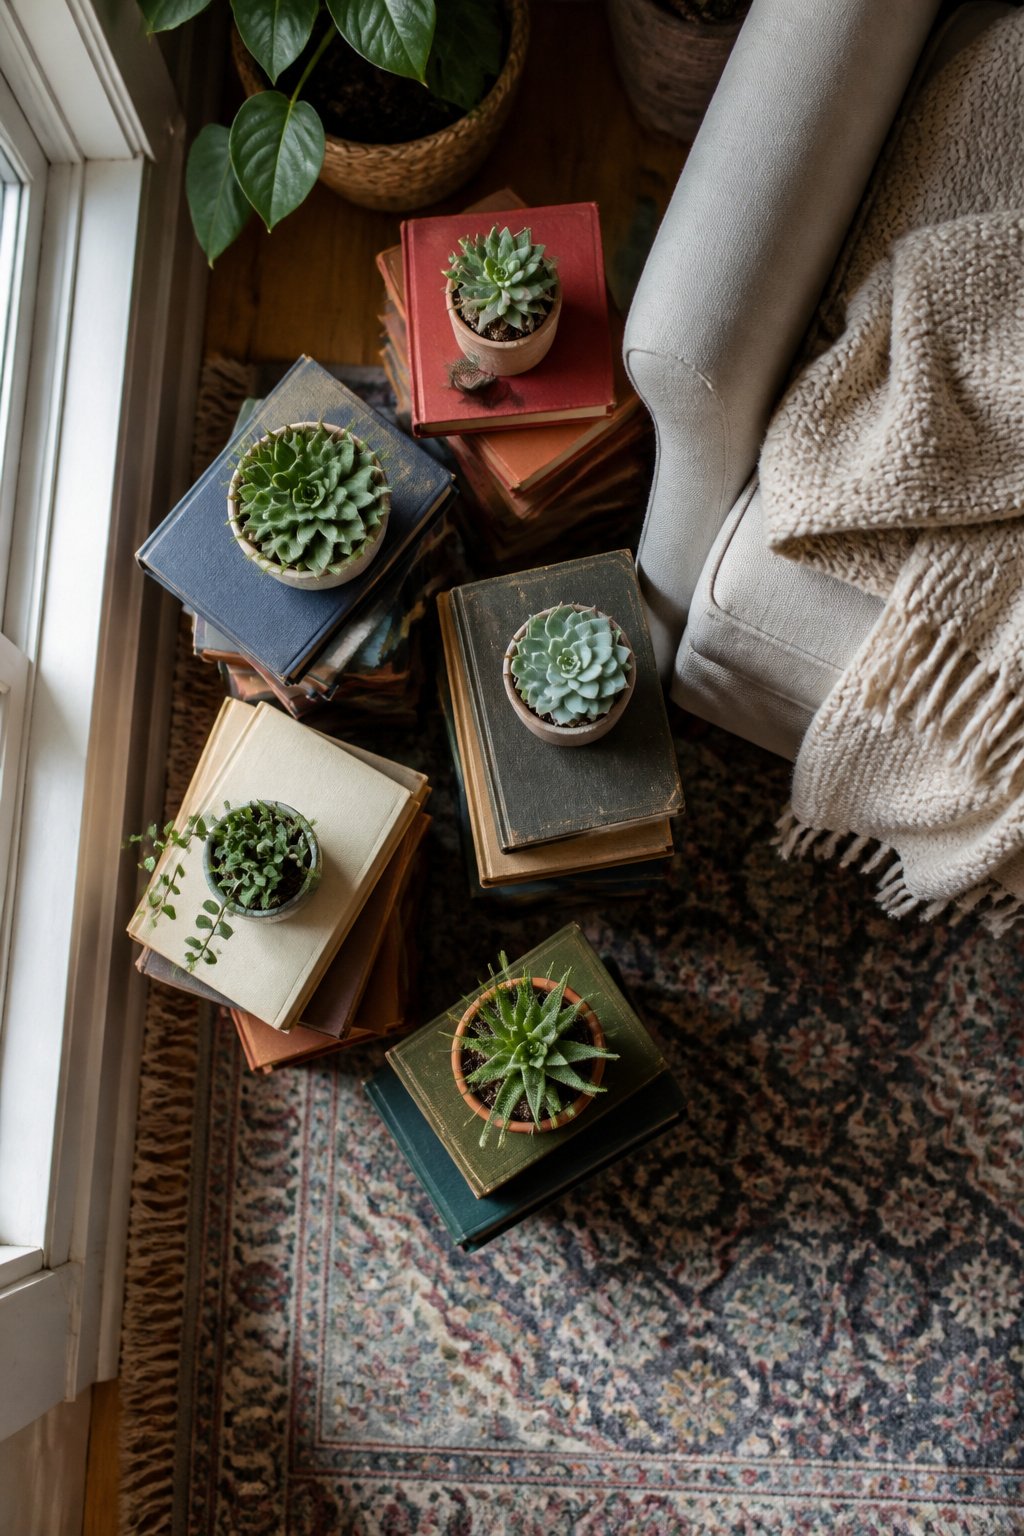
Stacked hardcovers can carry a small pot without drama, but paperbacks will sag under even light weight. I learned that the hard way when a neat tower of novels compressed into a wedge over one humid summer. Hardcovers hold their shape; paperbacks do not.
Color coordination between book covers and pots adds cohesion, though the real constraint is structural. A pocket-sized hardcover or lightweight paperback works for a 4-inch succulent; anything larger needs a proper stand. I keep the middle tier of a shelf for short gardening guides or nature essays slipped between small pots, which reads as a styled vignette rather than a storage solution.
Weight limits are real and unforgiving. A large ceramic pot on a stack of novels will crush spines and eventually topple. This approach wins for small, light containers only, and even then, the arrangement asks more of the books than they were built to give.
34. DIY Plant Stand with Contrast
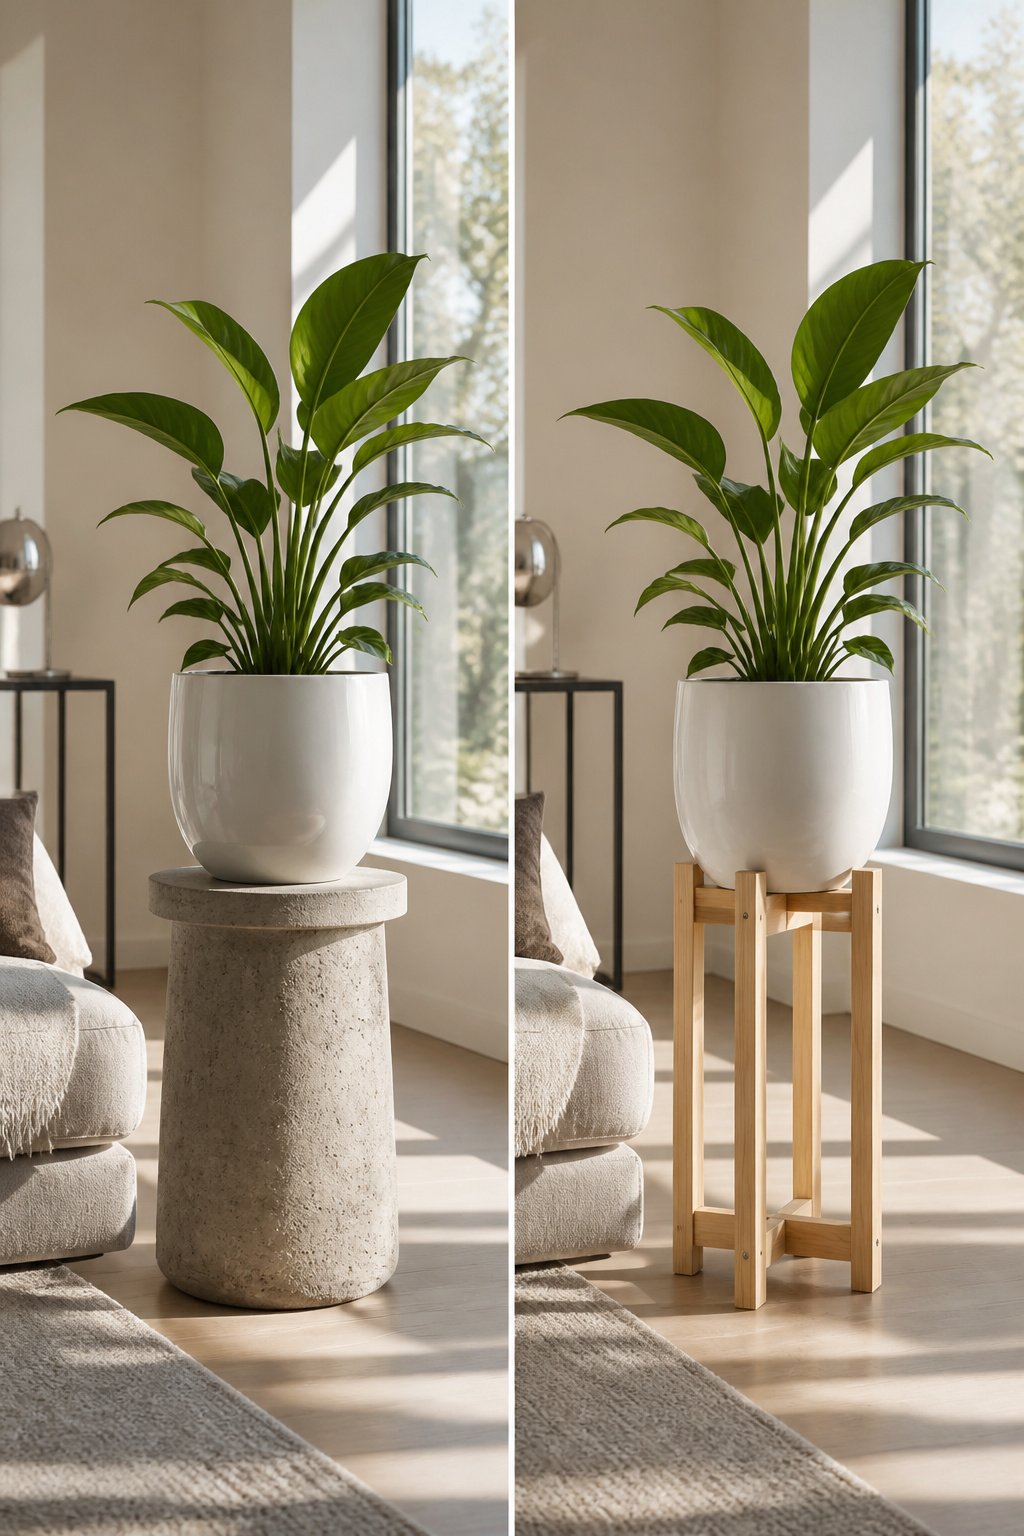
The best plant stand designs ideas often come down to one move: making the stand itself the contrast rather than just the plants on it. Last spring I tried pairing a rough, board-formed concrete pedestal with a glossy white ceramic planter I’d picked up on sale. The concrete had visible grain from the wood mold, and against that slick, bright pot the whole thing looked intentional rather than accidental.
Dark wood with white pots works the same way. A walnut-stained pine base makes cheap nursery pottery read as deliberate design. The Spruce featured a black iron stand against concrete planters with a painted rim; the metal’s thin, repeating lines against the solid, heavy block of concrete create tension that holds your eye.
Metal with natural fiber is the pairing I keep returning to. A simple steel frame, either raw or sprayed a flat color, with a woven jute or seagrass pot slipped inside. The industrial against the organic keeps either one from feeling too themed.
Where this goes wrong is matching too well. I once stained a wooden stand to "coordinate" with a terracotta pot and the whole thing went muddy and invisible. Contrast needs real opposition: rough against smooth, heavy against light, warm against cool. Pick one axis and push it hard.
35. DIY Plant Stand with Cascading Plants
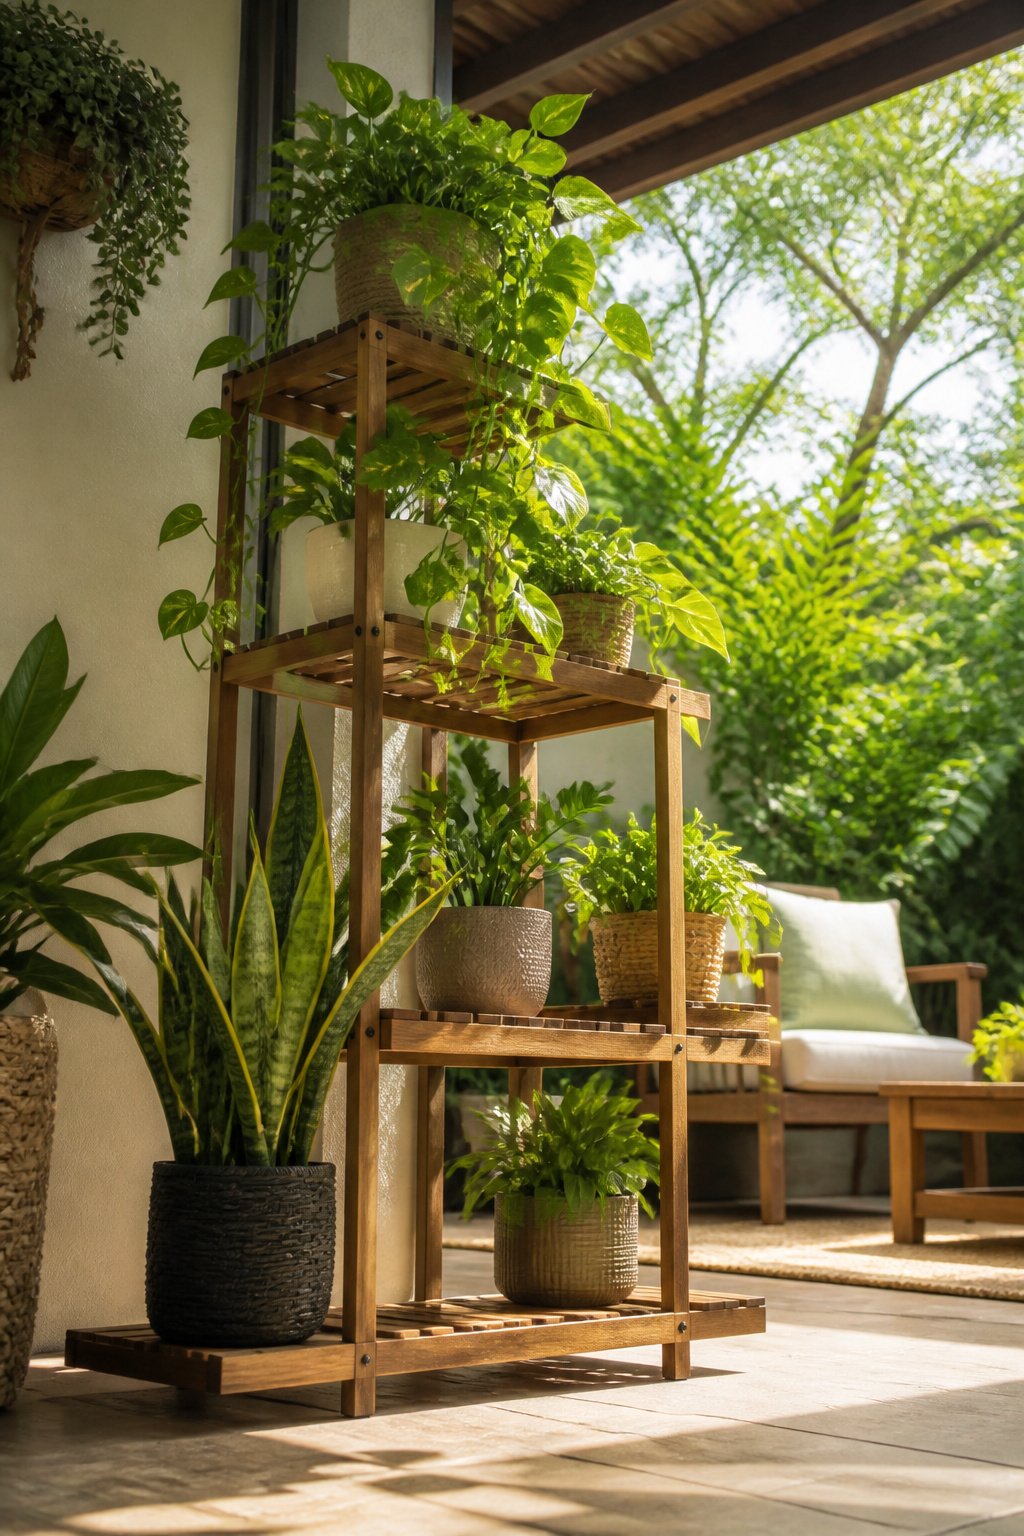
A DIY plant stand built for cascading plants lives or dies by what hangs off it. Leave 8 to 12 inches between the top of the plant and the shelf above, more if you are growing a fast filler like pothos or heartleaf philodendron that will bridge that gap within a season. I learned to watch for leaves brushing the shelf above; they get uneven light and soft spots from stagnant air, so either move the plant down a tier or trim.
Trailing plants belong on upper shelves where their vines hang freely. Pothos, string of pearls, and English ivy spill over each level in a visual waterfall that softens the structure and draws the eye downward. Compact uprights like snake plants or ZZ plants stay below, out of the way of the drapery.
Light gradients matter more on a tiered stand than in the room overall. Near a window, the top shelf can sit in 500 to 1,000 foot-candles while the bottom drops to 25 to 100. A succulent parked down low stretches and goes leggy trying to reach it. Match the plant to the tier, not just the room.
36. DIY Plant Stand with Monochrome Palette
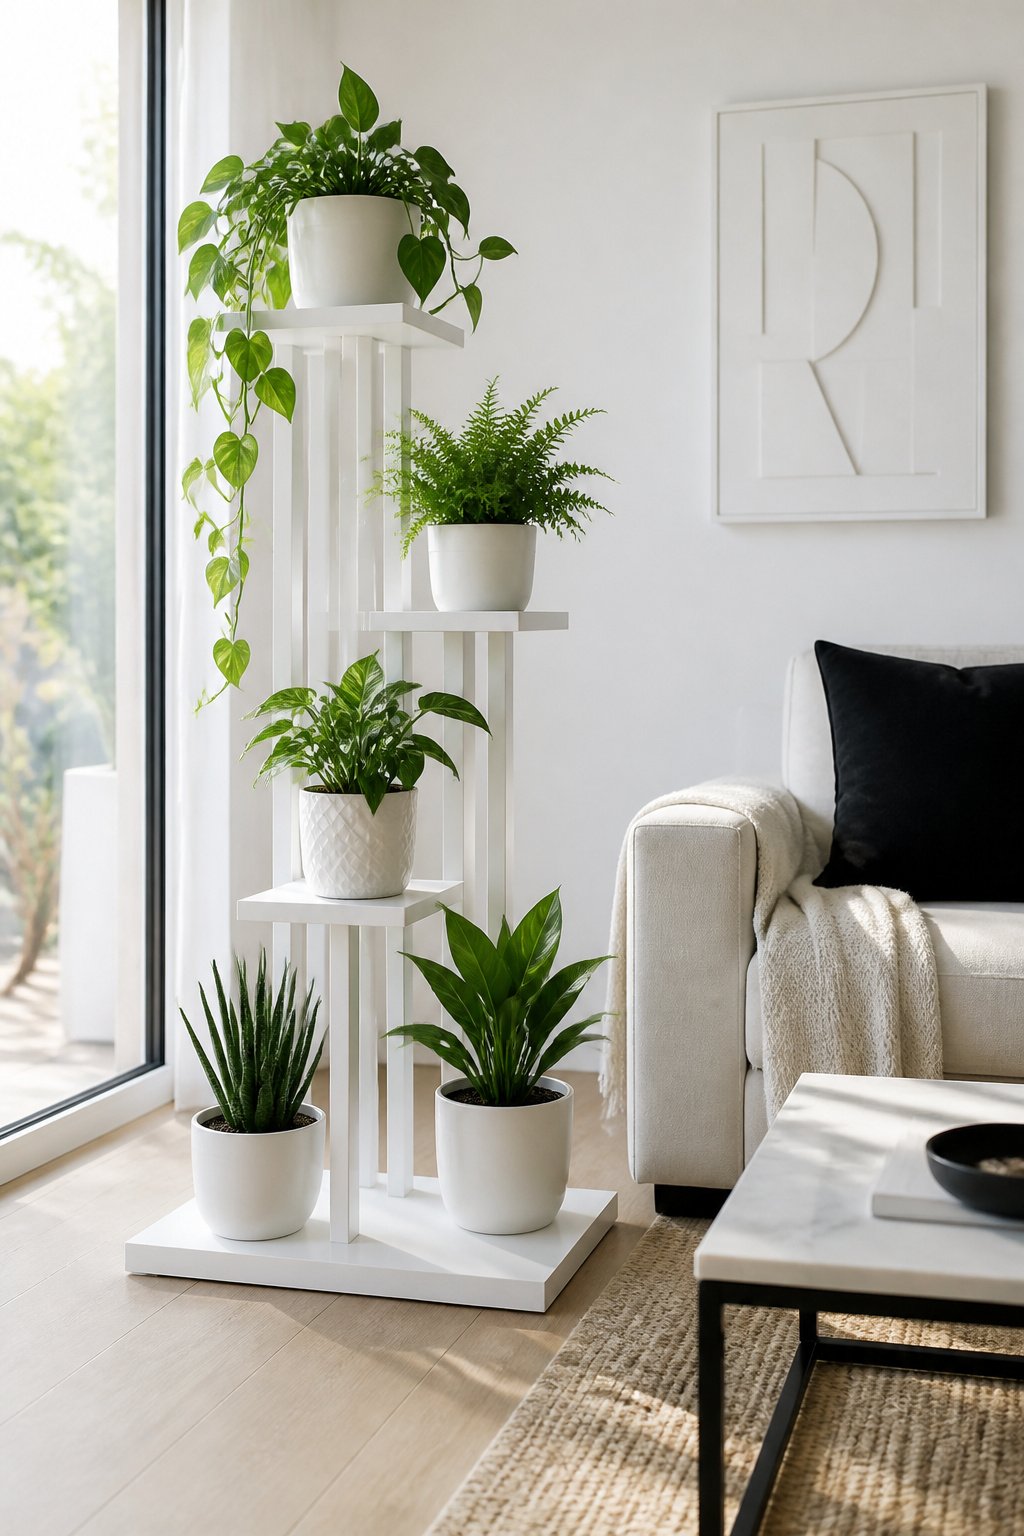
A monochrome plant stand lives or dies by how well you control the one color you picked. Green-on-green is the forgiving route: the stand, the pots, and the plants themselves already want to sit in the same family, so mismatches read as depth rather than mistakes. White or black demands more from you. Those read as graphic and deliberate, which means a single terracotta pot or a plant with warm undertones breaks the whole effect.
The sources push texture as the saving move when color stays flat. Matte, glossy, ribbed, smooth: mix these across your pots and the eye keeps busy even when everything reads as one tone. A ribbed white ceramic next to a smooth white lacquer stand gives you layering without a second hue.
What convinced me, reading through the guidance, is that sourcing or painting to match matters more than the initial choice of color. A Scandinavian clean look with all-white pots and silver-green foliage like eucalyptus or pilea only works if the whites are actually the same white under your light. Two whites with different undertones, or a black with brown cast against one with blue, and the monochrome intention collapses into accident.
37. DIY Plant Stand with Height Variation
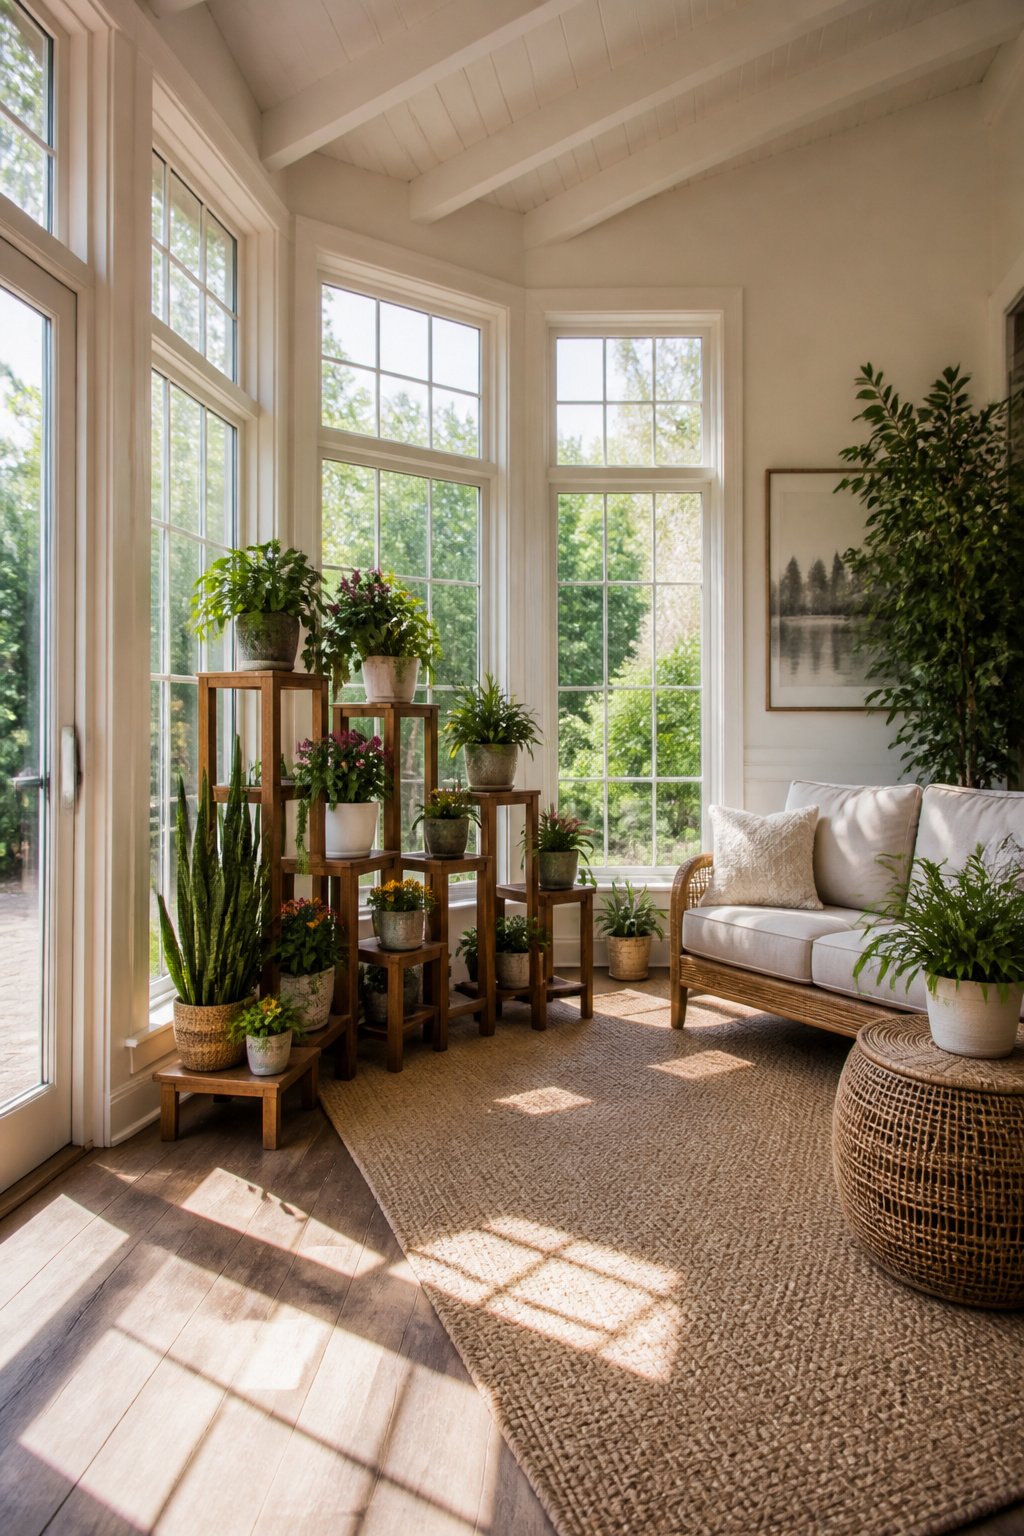
A single stand at one height flattens everything into a plane your eye crosses once and forgets. Height variation fixes that. In the corner of my living room last winter, I grouped three stands into a rough diagonal: a tall pedestal at about five feet holding one snake plant, a mid-height tiered stand with four smaller pots, and a trailing pothos in a low pot right on the floor. The line of height pulled the eye in a way a flat row never managed, and each plant got its own slice of window light.
The lower tiers will receive less light, especially a few feet from the glass, so the order matters. Pothos, peace lily, or ZZ plant belong underneath; anything that wants stronger light sits higher. For apartments without floor space, two macrame hangers at different lengths near a window does the same job without touching the ground, catching light at two levels so even one plant type reads as a fuller display. Wire, rattan, and wood stands mixed together add texture without fighting the height story.
38. DIY Plant Stand with Upcycled Materials
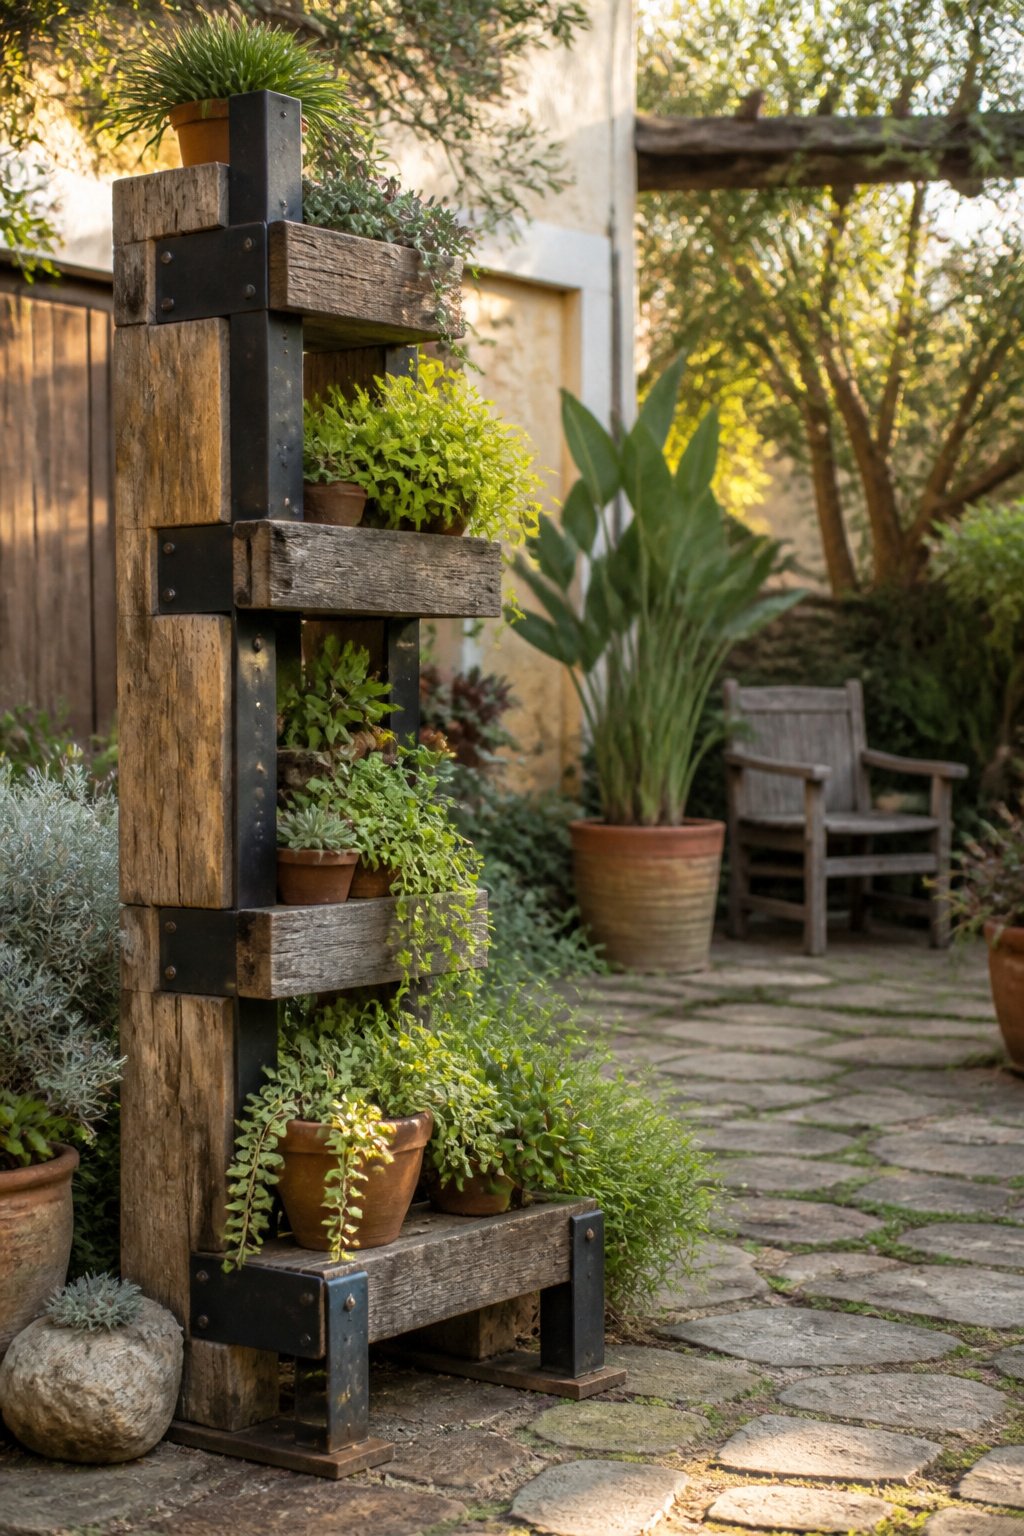
Pallet wood, scrap metal, leftover PVC pipe, and broken concrete chunks all land in the same pile: free material for a plant stand that costs essentially nothing to build. The trick is knowing what works for what, and what to avoid.
Scrub any reclaimed material before it touches soil. Pallet wood in particular carries warehouse grit and whatever the shipment sat in. A stiff brush and soapy water handle most of it. If herbs or vegetables will sit in the pot, skip treated lumber entirely; the chemicals in pressure-treated boards do not belong near anything you will eat. Untreated pallet slats, stripped and sanded, hold heavy pots well and weather to a soft gray over a season or two.
PVC pipe from a hardware run cuts down into an A-frame with basic connectors. A 1-inch diameter supports small to medium pots without rotting, and soil wipes off the plastic with a damp cloth. Spray it black or white first if you do not want the plumbing-aisle look.
Concrete offers the most weight and the most patience. Quick-set mix poured into a simple mold gives a clean, architectural base that store-bought stands rarely match. The mass keeps it upright in wind, which matters on an exposed patio. Broken concrete pieces stacked or molded work too, though the finish is rougher.
For height variation, upcycled porch posts or short pipe scraps at different lengths create levels without building a tiered frame. The look is collected rather than uniform, which suits a small space where everything already has to earn its spot.
39. DIY Plant Stand with Vintage Finds
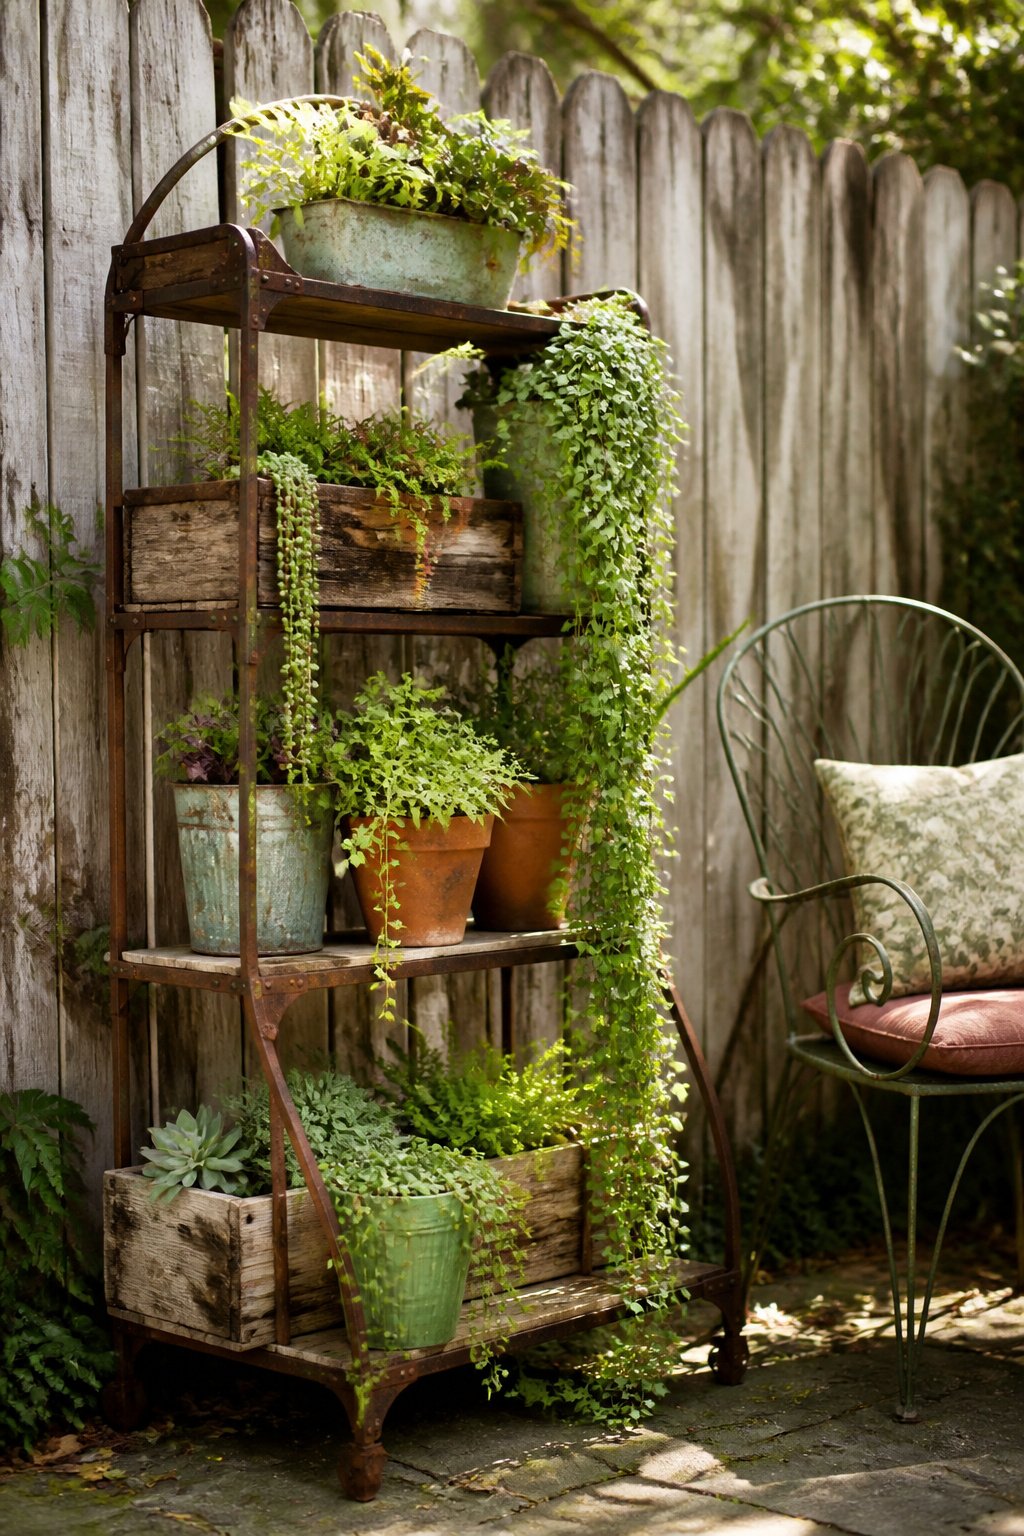
The hunt itself is half the point. Estate sales and thrift stores move fast, so I check the back corners where rusted metal and odd wooden shapes sit untouched. A bicycle frame with peeling paint and a seized chain becomes the bones of a plant stand once you strip the wheels and wire pots between the spokes. The rust stays; it is the feature.
Wooden crates follow the same rule. Holes drilled in the bottom handle drainage, and a few bricks underneath lift them to a better height. The wear marks from whatever they shipped decades ago read as history, not damage. I once passed on a crate because the corners were too clean, and I still think about it.
Porch posts turned upright give you height variation without building tiers. One post, a broad base, and a heavy pot on top takes maybe ten minutes to assemble. The paint leftover from its first life, usually cracked and sun-faded, does more than anything I could apply myself.
The limit is weight. A rusted frame or waterlogged crate will fail mid-season, so test the flex before you buy. Squeeze, lean, and if it groans, leave it.
40. DIY Plant Stand with Minimalist Design
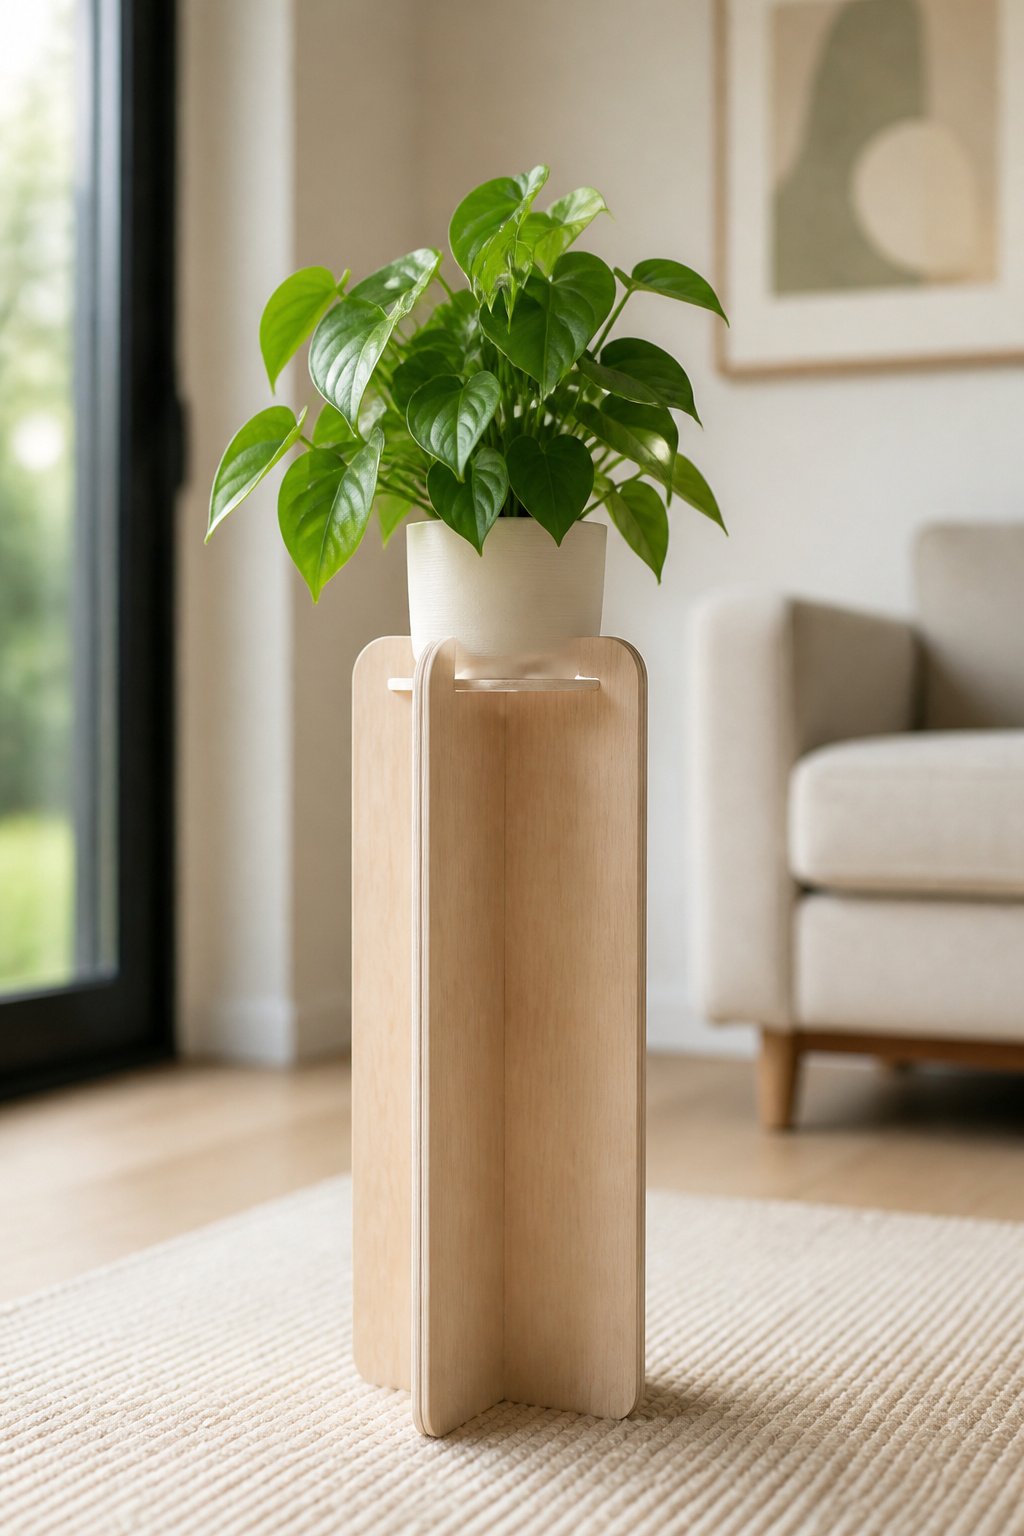
A true minimalist plant stand strips away everything that is not structural. One material, clean joints, no trim, no paint tricks, no hardware showing if you can help it. The form itself has to carry the whole design, which sounds simple until you try it. Every gap and every joint is visible, so a cut that is a sixteenth off or a glue line that squeezed out will read as a mistake from across the room.
Negative space does the decorative work. The plant sits in that emptiness and becomes the focal point by default, not because you framed it with scrollwork. I have seen birch plywood versions that disappear against pale walls and black steel frames that read as line drawings against concrete. Both work because the builder stopped adding before the stand started competing with the leaves.
The catch is that minimal tolerances require better tools, not worse. A pocket-hole jig and a speed square will get you square corners. A hand-cut dovetail in plain pine will telegraph every waver. If your saw leaves a rough edge, the stand looks rough; if your drill bit wanders, the hole becomes the ornament you did not want. Build it well and the plant is the decoration. Build it poorly and the flaws are the decoration instead.
Frequently Asked Questions
What are some creative DIY plant stand ideas?
Ladders, cinder blocks, concrete pours, tomato cages, wooden crates, and repurposed furniture like step stools or bar carts all work well. A ladder turns each rung into a shelf without building anything new, while stacked cinder blocks give you two display heights from one structure. Upside-down tomato cages become conical stands with graduated wire rings, and a simple plywood base on casters lets you roll heavy pots to follow the light.
What materials are best for plant stands?
Cedar and pressure-treated lumber resist rot outdoors, while concrete handles heavy pots better than lighter options. For indoor stands, almost any wood works since weather resistance is not a concern. Metal brackets or hardware should be galvanized or powder-coated to prevent rust stains. Macrame hangers use cotton cord indoors and synthetic cord outside where sun degrades natural fibers.
How do I make sure my plant stand is stable?
Check the weight rating against your loaded pot, not the empty frame. A mid-weight ceramic pot with wet soil runs 5 to 8 lbs, and larger filled planters hit 20 to 30 lbs. Freestanding units need a wider base than you expect; leaning styles against a wall or railing are more forgiving because the wall takes the torque. For hanging stands, check the footprint before the finish, since narrow-based frames tip when trailing plants catch a breeze.
Can I use repurposed items for plant stands?
Yes. Old wooden step stools, rattan bistro chairs, rolling utility carts, shoe benches, bookcases, and bar carts all work if the joints are solid and the base is wide enough. Check weight capacity before committing: anything over 20 lbs needs a frame rated 50 lbs or more. Bamboo and rattan charm in dry rooms but warp in humid bathrooms; steel or iron handles moisture better.
What tools do I need to build a plant stand?
A saw for cutting the base to size, a drill for pilot holes, and screws to lock hardware down are enough for most builds. A Kreg Jig helps for tiered versions but is not required. For concrete stands, you need a mold built from melamine board or a sturdy plastic tub, plus quick-set mix. Simple risers from pre-cut wood rounds and toy wheels need no cuts at all, just glue and paint.