
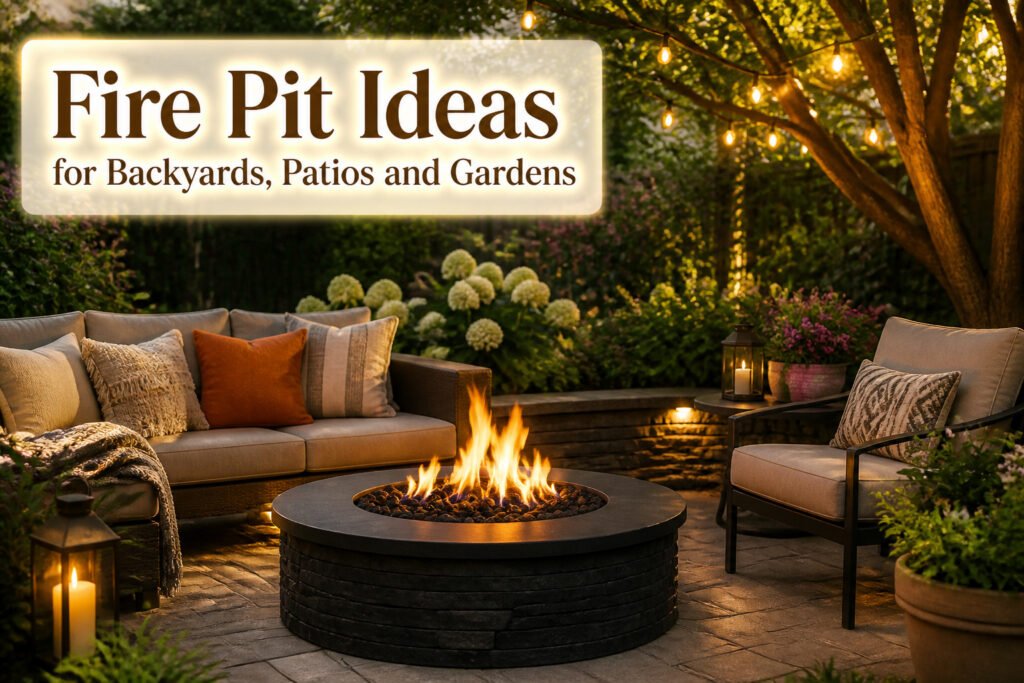
A fire pit can cost $50 or $5,000, take an afternoon or a month to build, and the right choice depends on whether you own your dirt or rent it, how often you rearrange furniture, and whether your town lets you dig below grade. The washer drum runs about $50 and an afternoon if you source clean steel, while the built-in masonry seat wall consumes several years of a typical outdoor budget and requires proper footings.
1. Classic Stone Circle
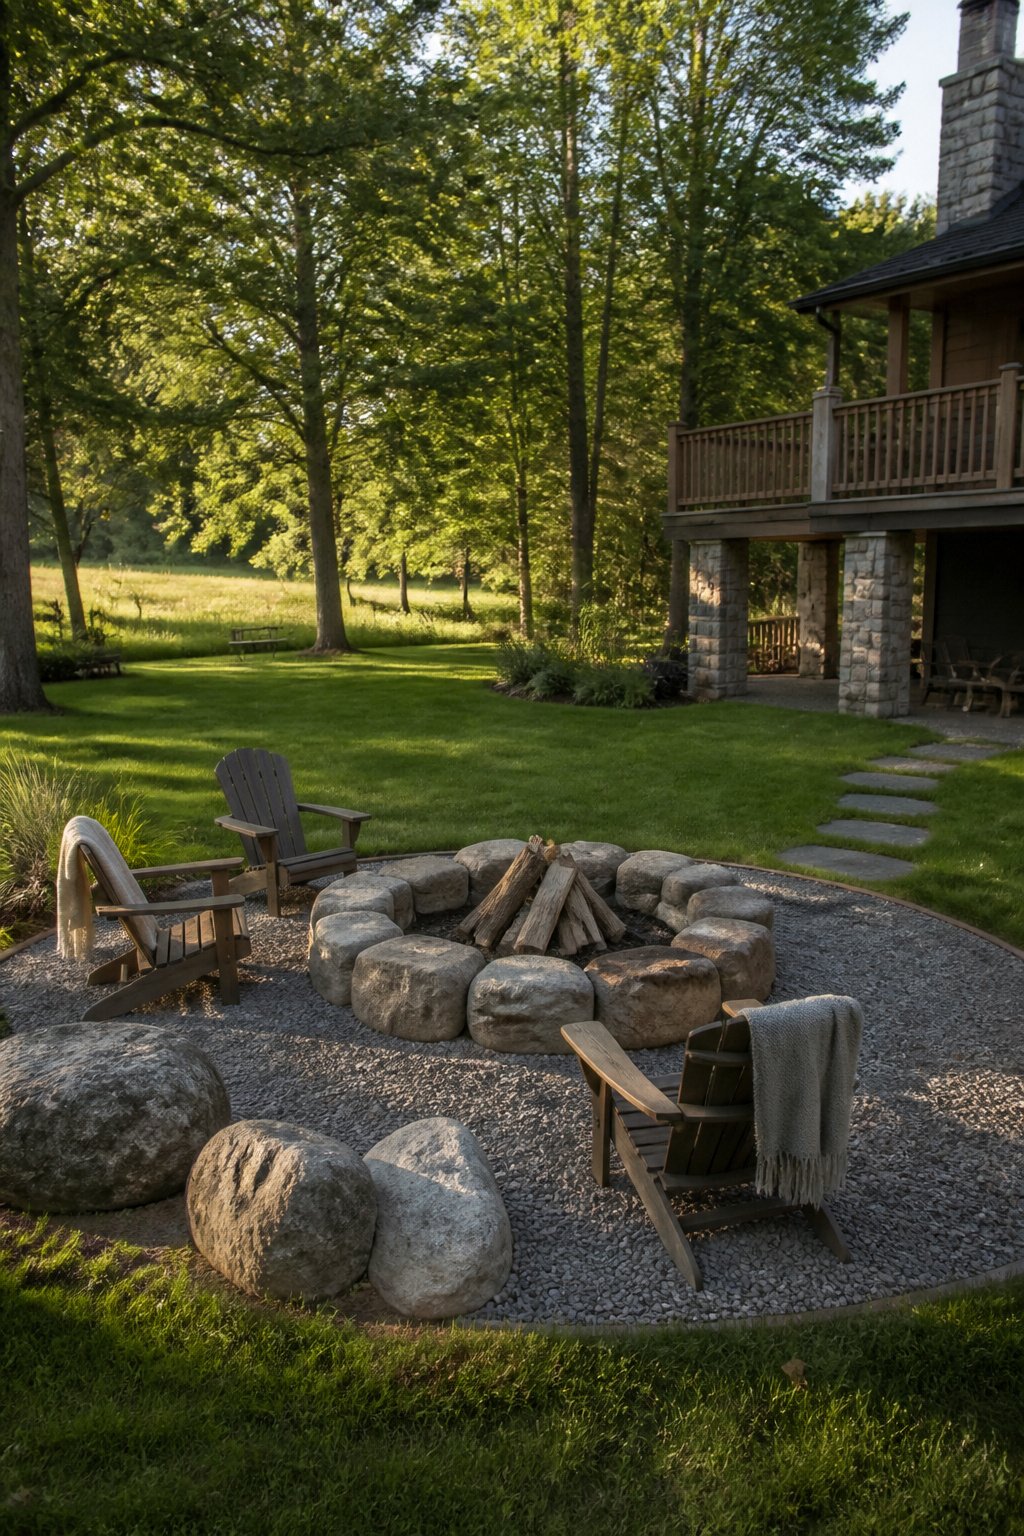
A circle of large stones has been gathering people around a fire for about as long as there have been people, and the design still works because the shape does the hosting. Chairs or blankets arrange themselves naturally; everyone faces the same point, and the conversation follows.
Salvaged stone keeps this under $200 if you have a source. A paver-based version with a metal ring insert takes a half-day to full-day build, and the ring is the part worth buying new. Landscape pavers are not automatically rated for direct flame, so confirm the masonry and insert are appropriate before you dry-fit anything. Stagger the joints and keep air openings unobstructed.
One quiet palette, one gravel tone, and a clean outer edge makes an easy build look deliberate. The gravel base sits on landscaping fabric to keep it clean long-term, and the whole thing reads as a room rather than a pile of materials.
2. Repurposed Brick Fire Pit
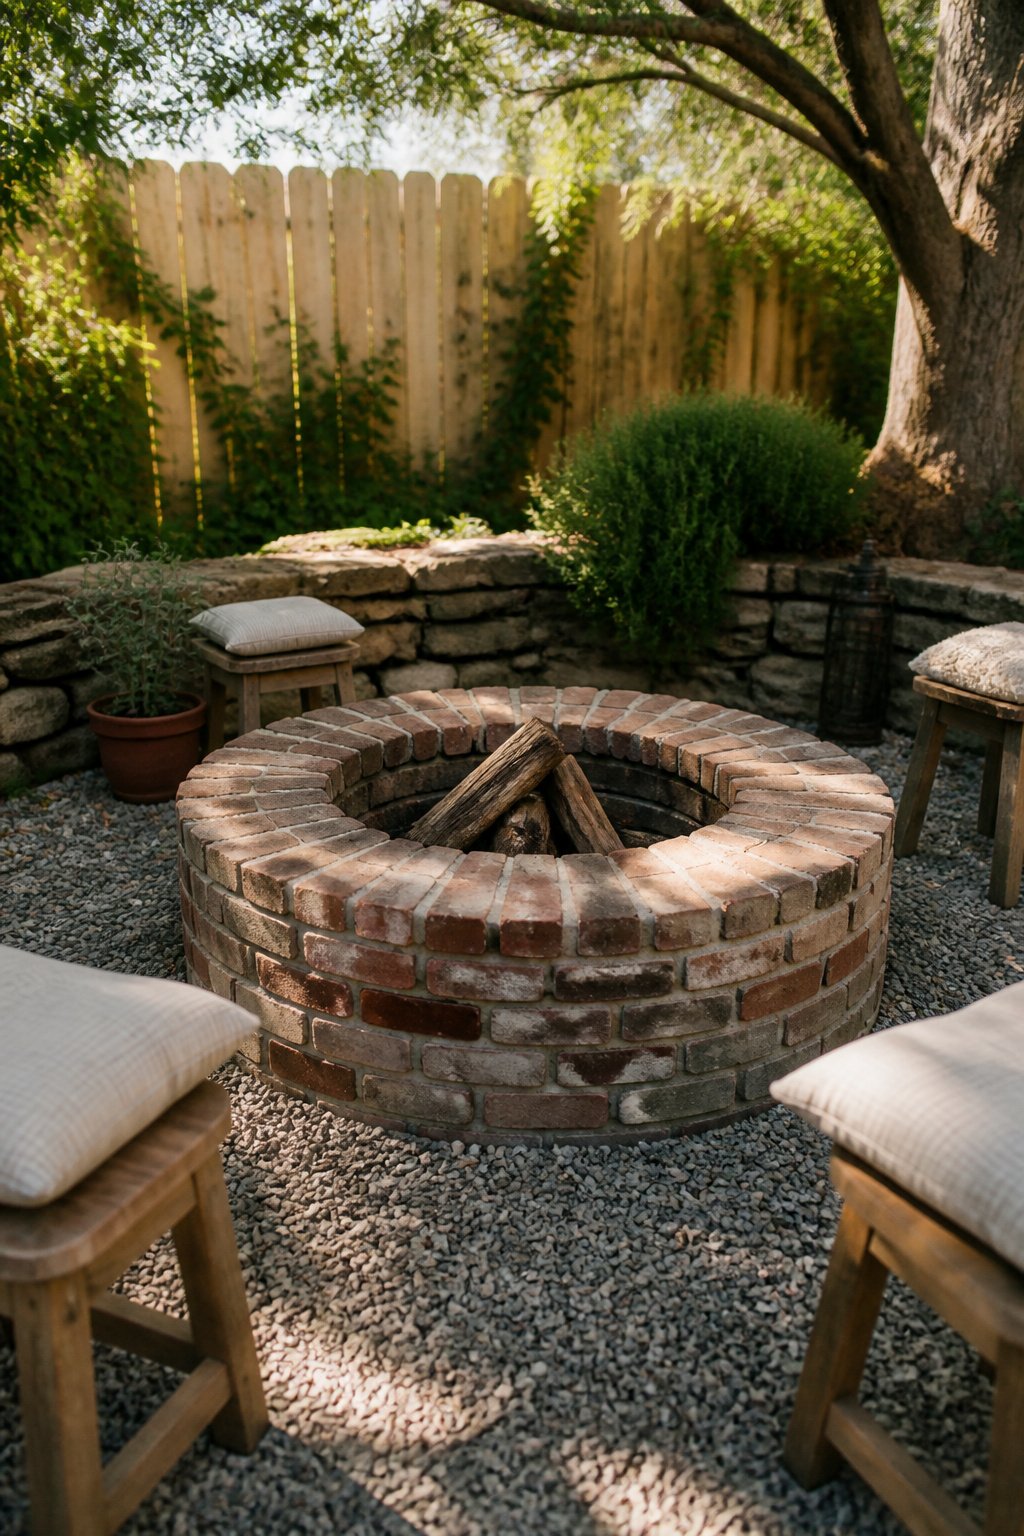
Reclaimed bricks carry the soft edges and color shifts of weather that no new paver mimics, but only firebricks belong in the inner ring. The clay in standard reclaimed brick holds too much moisture; cycle it through real heat and it spalls, crumbles, turns to grit. Around sixty firebricks for the pit face, per the build that held up, and the reclaimed ones can ring the outside where the temperature stays gentler.
Dry-stacking works if the base is dead level and the circle stays small enough that wall tension holds. For anything wider than three feet or taller than two courses, a lean mortar mix, roughly one part Portland to four parts sand, keeps the ring from walking apart through freeze cycles without locking it so tight that the uneven old bricks crack.
A gravel bed of #8 limestone or pea gravel, two tons for the full project, sits on landscaping fabric that lets water through. Plastic sheeting traps it; the pit becomes a pool after rain. The fabric stays put, the gravel drains, and the weathered brick above it looks like it was always there.
3. Built-In Fire Pit with Integrated Seating
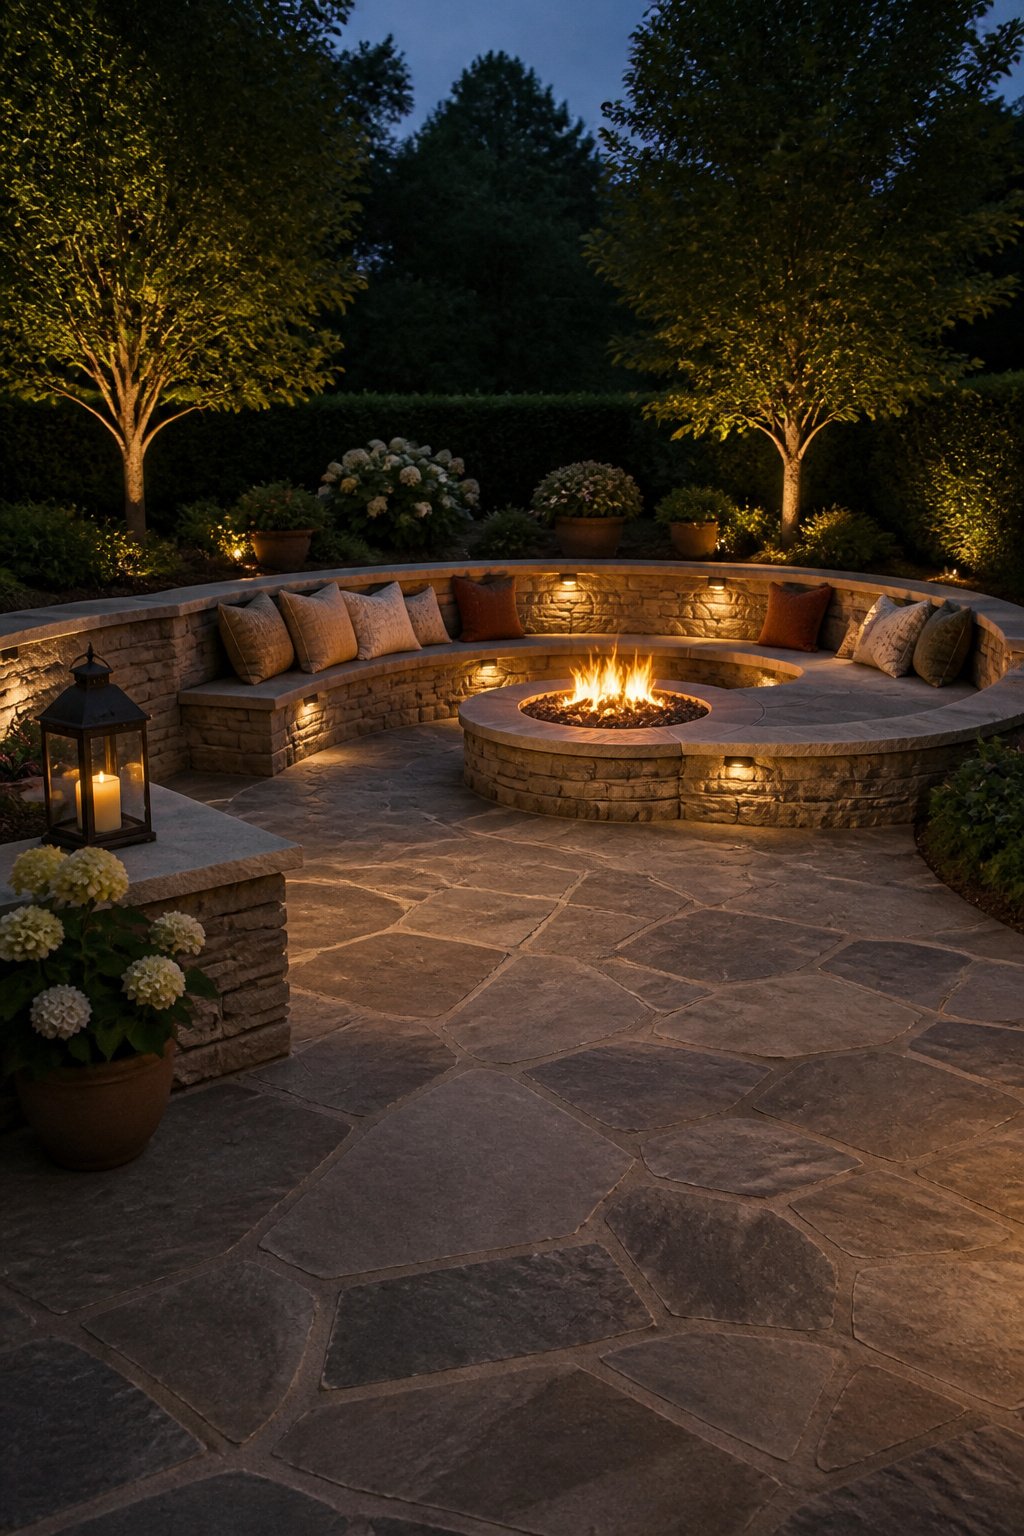
A built-in fire pit with integrated seating is the permanent, masonry version of the idea, and the difference from movable furniture is the first thing to get straight. Stone walls or bench caps form the same structure as the fire pit itself, so the seating does not shift, weather, or need winter storage. The tradeoff is exactly that: you are committing to one layout, one distance from the flame, and one angle of conversation.
Seating walls can define the space while they hold people, which matters on a patio that already mixes dining and lounging areas. The hardscape flows better when the bench is the wall is the pit, all one material. I like this for hosts who actually fill the seats, but for someone who rearranges furniture every other week, the fixed position wears thin fast.
Cost and construction sit outside what most first-year gardeners want to tackle. This is not a weekend project with bagged concrete. Masonry, proper footings, and safe clearance from combustible surfaces mean hiring out or devoting serious time. If your annual outdoor budget sits in that $500–$800 range, a built-in unit probably consumes several years of it at once.
The payoff, if you pay it, is a room that acts like part of the house. Cool evenings extend naturally when the fire and the seats are already waiting, no hauling chairs from the garage.
4. Modern Linear Fire Table
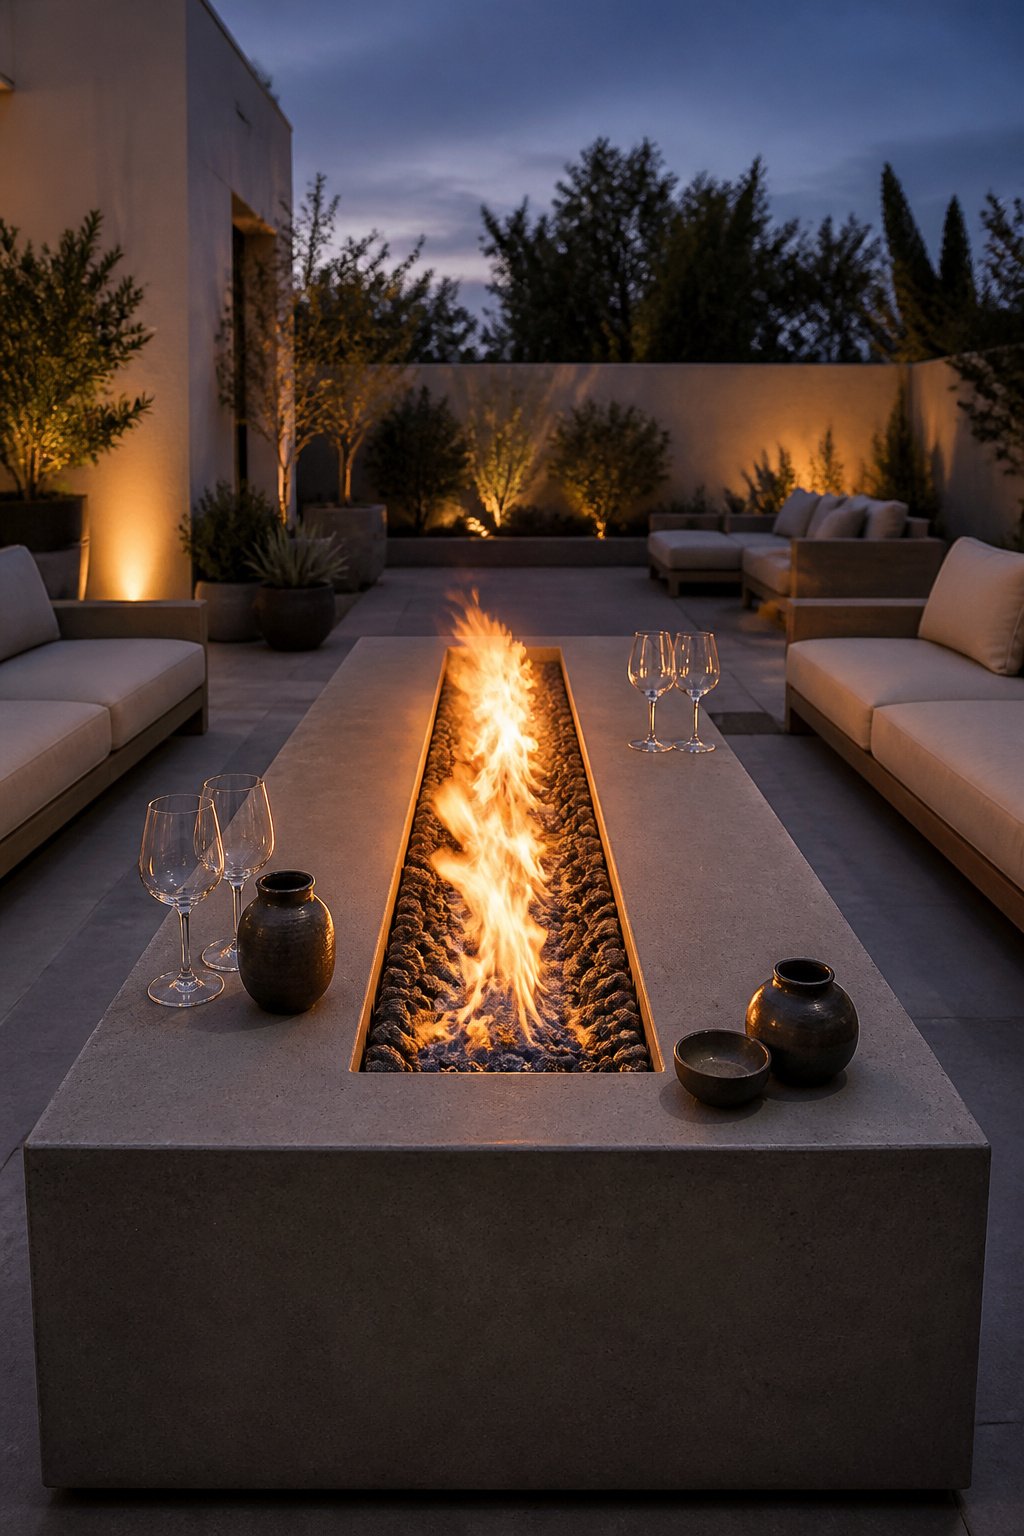
A linear fire table stretches the fire into a narrow channel, and that shape changes how people gather around it. I noticed this at a friend’s patio last summer: the flame ran the length of the seating wall, so four of us could face the heat directly without anyone stuck in the smoke drift. A round pit forces a circle and leaves someone downwind; the rectangle lets you line up along it like a bench at a campfire, which suits modern layouts where furniture already sits in straight runs.
Gas configurations dominate the linear style, and the fuel use tracks the geometry. A round pit burns in all directions, sending heat outward to empty space; a long burner concentrates the flame under the seats you actually placed. Wood-burning linear models exist, but the elongated pan is harder to stack and tends to ash unevenly. For a clean-lined hardscape, the rectangular form also doubles as a coffee table when the burner sits low; Boxhill Designs and similar makers build the surround wide enough for drinks and plates, so the feature earns its footprint even in daylight hours.
5. DIY Washer Drum Fire Pit
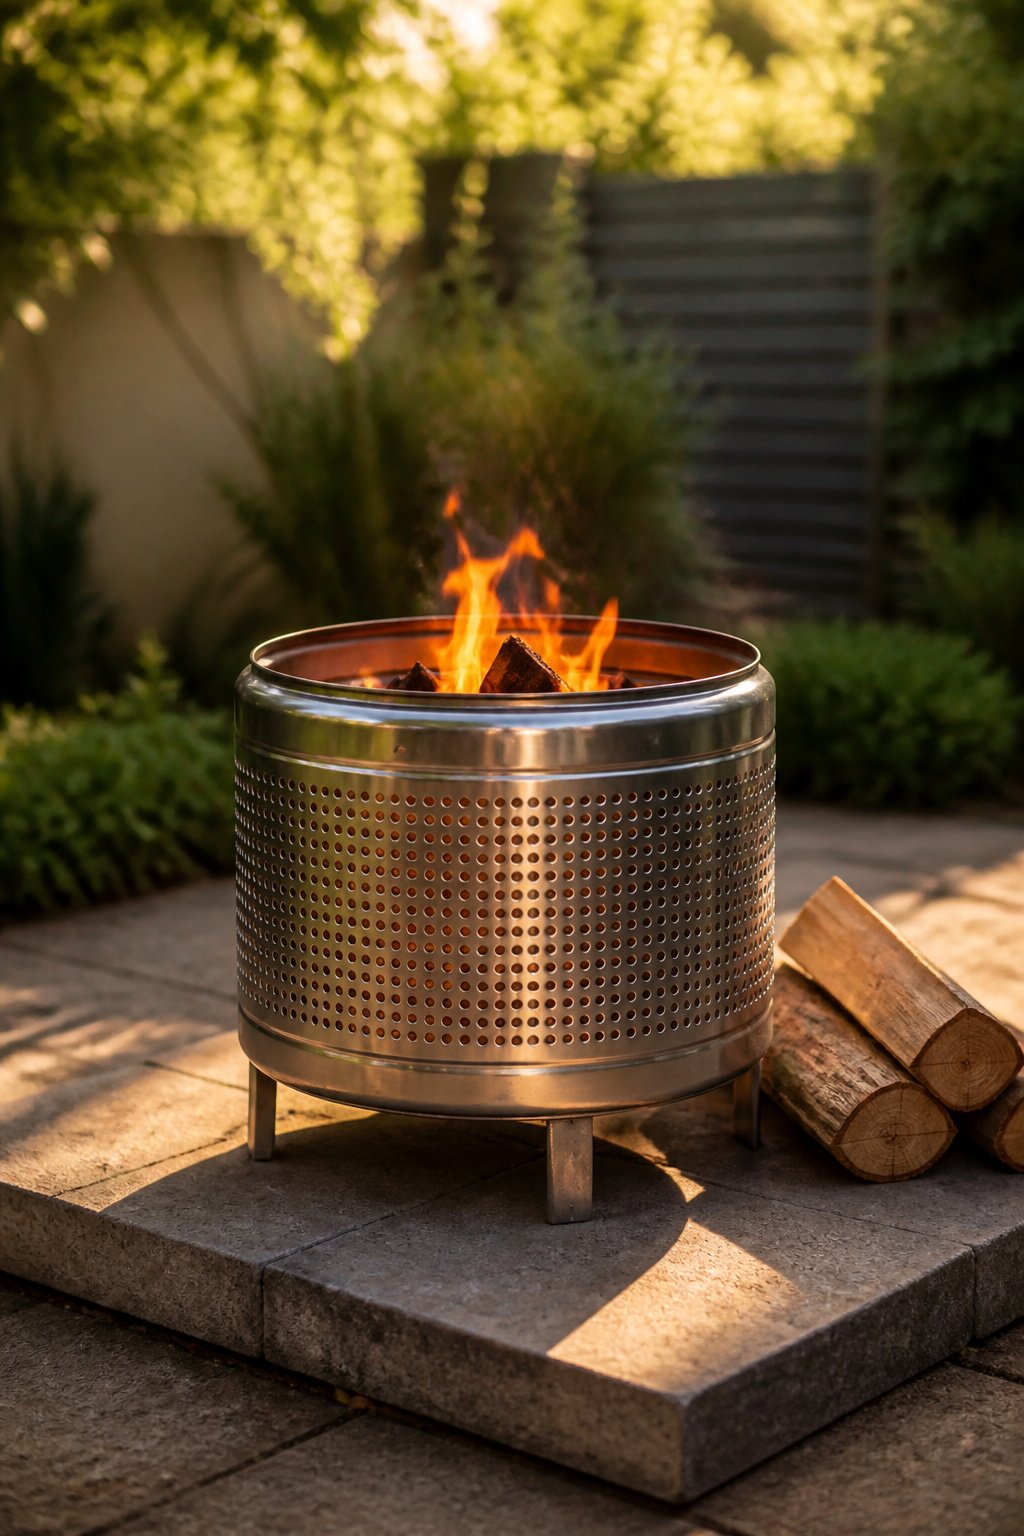
A washer drum fire pit runs about $50–$200 and takes an afternoon to put together, which makes it one of the cheaper ways to get a contained flame if your patio or small yard is tight on square footage. The drum itself is basically a steel basket, already perforated so air feeds the fire from the sides and the whole thing weighs less than hauling around a solid bowl.
You pick these up from appliance repair shops or scrap yards, not big-box stores. The drum has to be steel, never plastic, and it cannot have held anything hazardous. Coatings and residues are the real problem: unknown finishes can off-gas once they heat, so any history you do not trust means finding a different drum. Strip off plastic mounts, smooth the cut edge with a file or grinder, and set the whole thing on something stable and heat-safe. Concrete pavers work; grass or a wood deck does not. Give the sparks more open space than the small footprint suggests, because those ventilation holes throw embers farther than a solid wall would.
6. Sunken and In-Ground Fire Pits
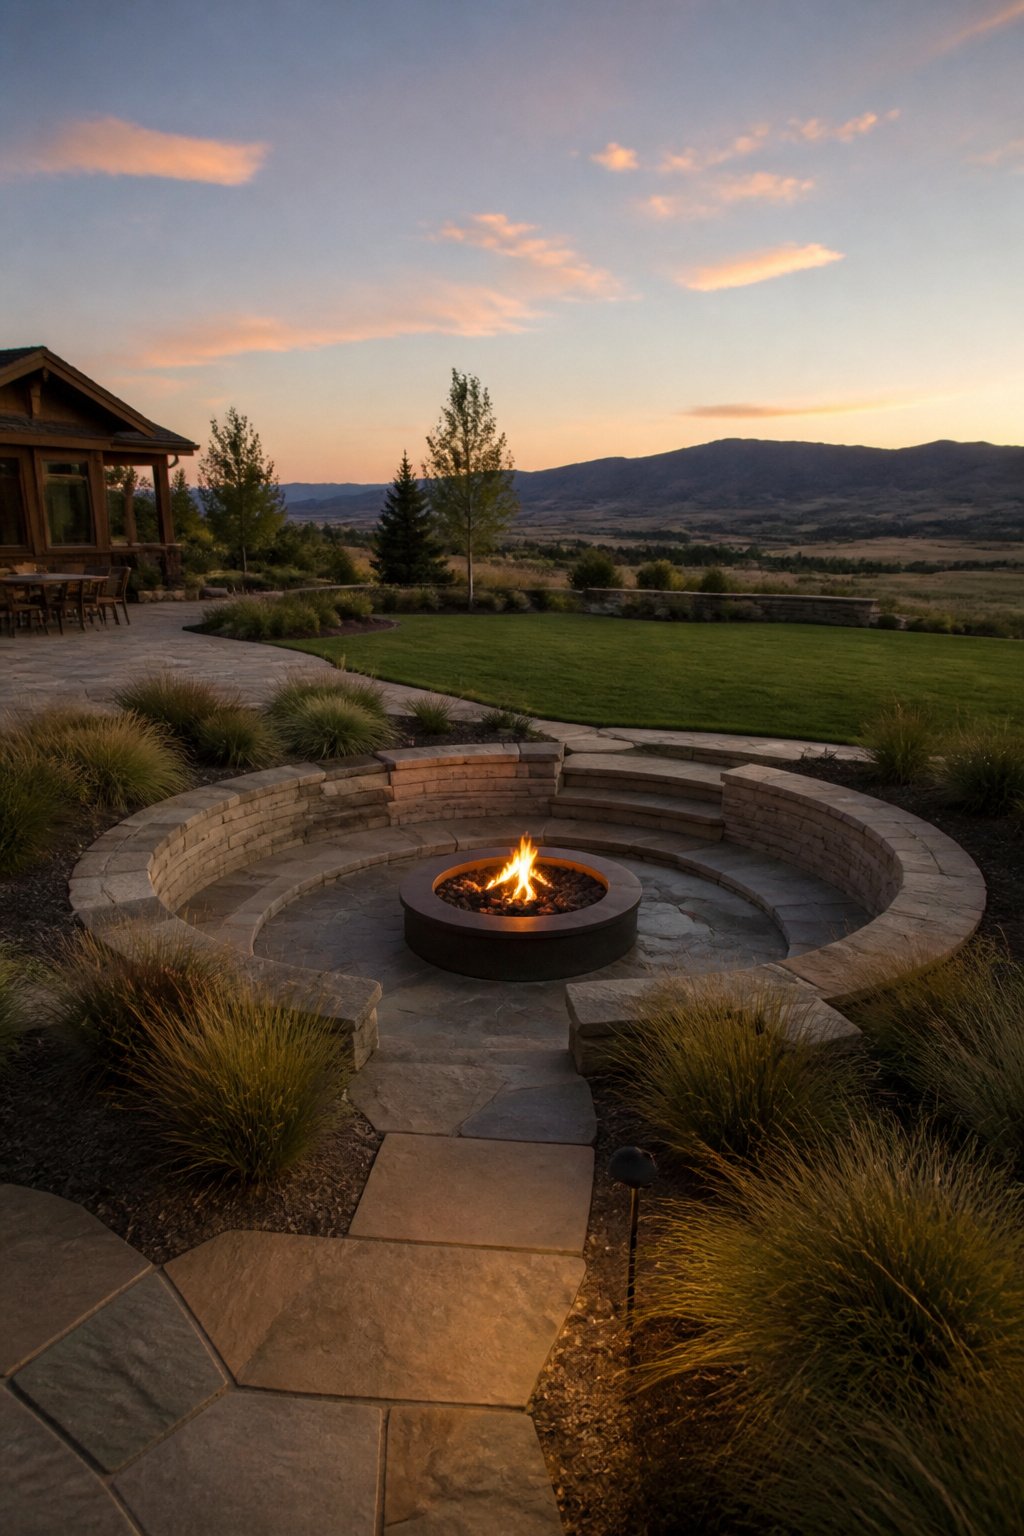
Sunken fire pits sit at two different depths, and the distinction matters for how you use the space. A flush-to-grade pit finishes level with the surrounding lawn or patio; you look down into the flames from standing height, and the rim disappears into the surrounding material. A recessed below-grade pit drops the fire zone and the seating together, so guests sit at ground level with the flames at eye level. That second version takes more excavation but creates the intimate, gathered feeling that makes in-ground designs worth the trouble either way.
The flush version suits open yards where you want the fire to read as a subtle destination rather than a focal object. The recessed version needs more planning because you are managing drainage below the finished floor, not just around a ring. Both require locating utilities before you dig and confirming what your municipality allows; some codes treat any below-grade combustion differently than a raised ring.
Cost runs roughly $100–$350 for a basic in-ground build if you handle the labor and line with standard fire-rated components. The trade-off against a raised pit is visibility and foot traffic. A low rim after dark reads as flat ground until someone stumbles. Light the perimeter or use contrasting stone, and keep either version away from paths people walk without thinking.
7. Tabletop Fire Bowl
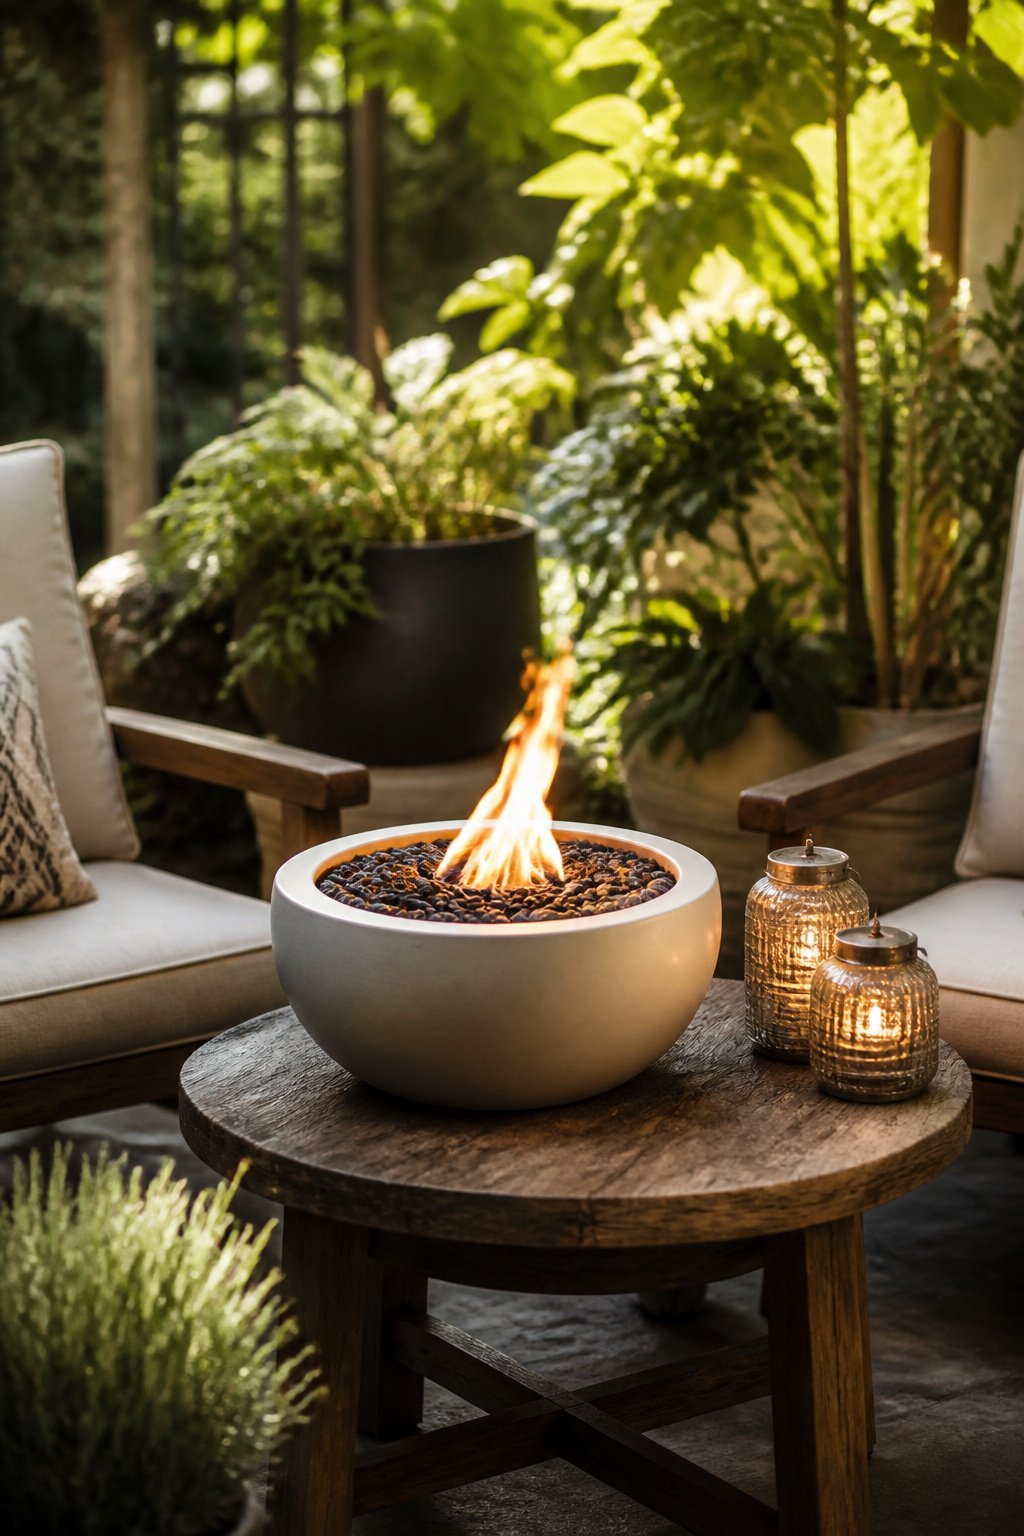
A tabletop fire bowl buys back the center of a small patio without eating the square footage a full pit demands. Mine sits on a cast concrete side table between two chairs, close enough to feel the heat, far enough that drinks stay outside the flame zone.
Listed tabletop burners run $50 to $225, and the build itself takes an afternoon at most. The vessel matters more than the styling. Stone, concrete, or fire-proof metal all work, but the surface beneath it has to be heat-compatible and stable. I skipped the wobbly bistro table after reading one too many accounts of tipping.
Fuel is where the real choice sits. Liquid fuel gives a real flame and some warmth, though never refill it while the unit is hot, and never swap in something the manufacturer did not approve. Small flame does not mean small risk. Propane burners with listed hardware cut that hazard down to turning a knob, which is why they dominate the ready-made market.
For two to four seats on a compact patio or balcony, this is the format that actually fits. Check local regulations first. Most setups demand open air and non-combustible surfaces, and overhead clearances are not negotiable.
8. Chiminea
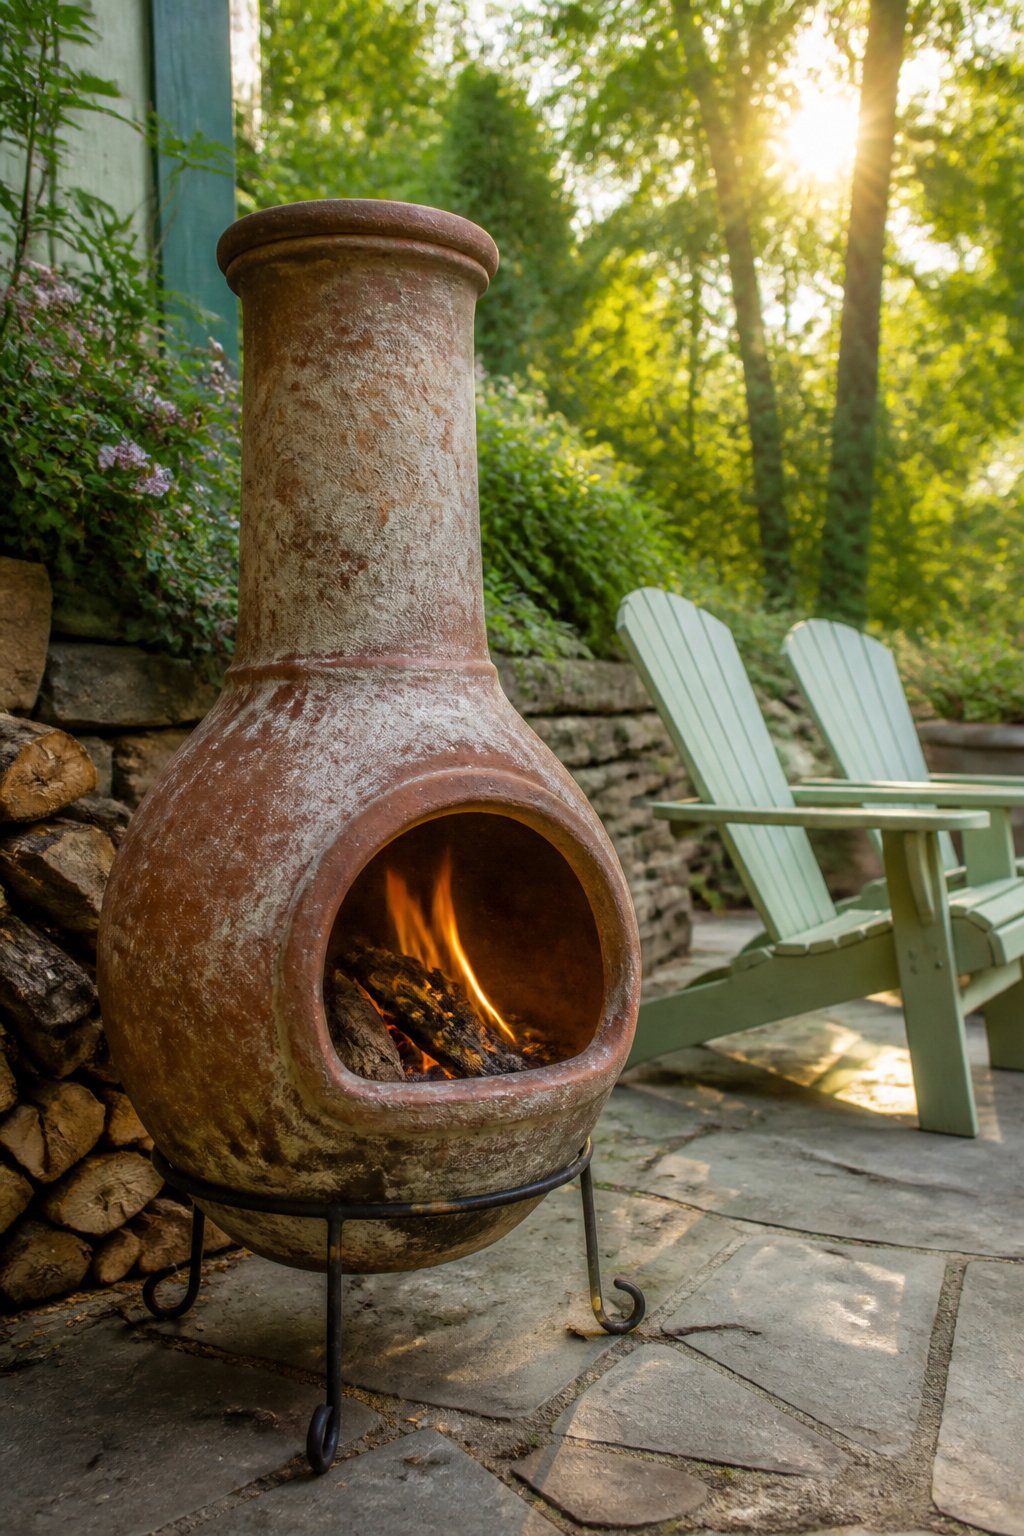
A chiminea is the first fire pit idea worth considering for anyone working with a small patio or balcony. Its chimney directs smoke upward instead of letting it drift across your seating area, which matters more than I expected before I understood how these things draft.
Clay and cast iron are the two materials you’ll actually find. Clay holds heat longer and costs less upfront, though it cracks if you build too hot a fire or leave it out in freeze-thaw cycles. Cast iron weighs more and radiates heat faster, so you feel warmth sooner on cool evenings, but it rusts without seasoning and the surface gets hot enough to mark decking.
The directed draft is what makes a chiminea practical where a wide bowl fire pit would fail. On a 10-by-10-foot patio, smoke that rises straight up disappears above head height instead of pooling at chair level. You lose the 360-degree seating of an open pit, but you gain a wall you can place against a railing or corner, reclaiming floor space you do not have. Installation runs lower than building a fixed fire pit, and most units ship as one piece you set in place.
9. Fire Pit Tables
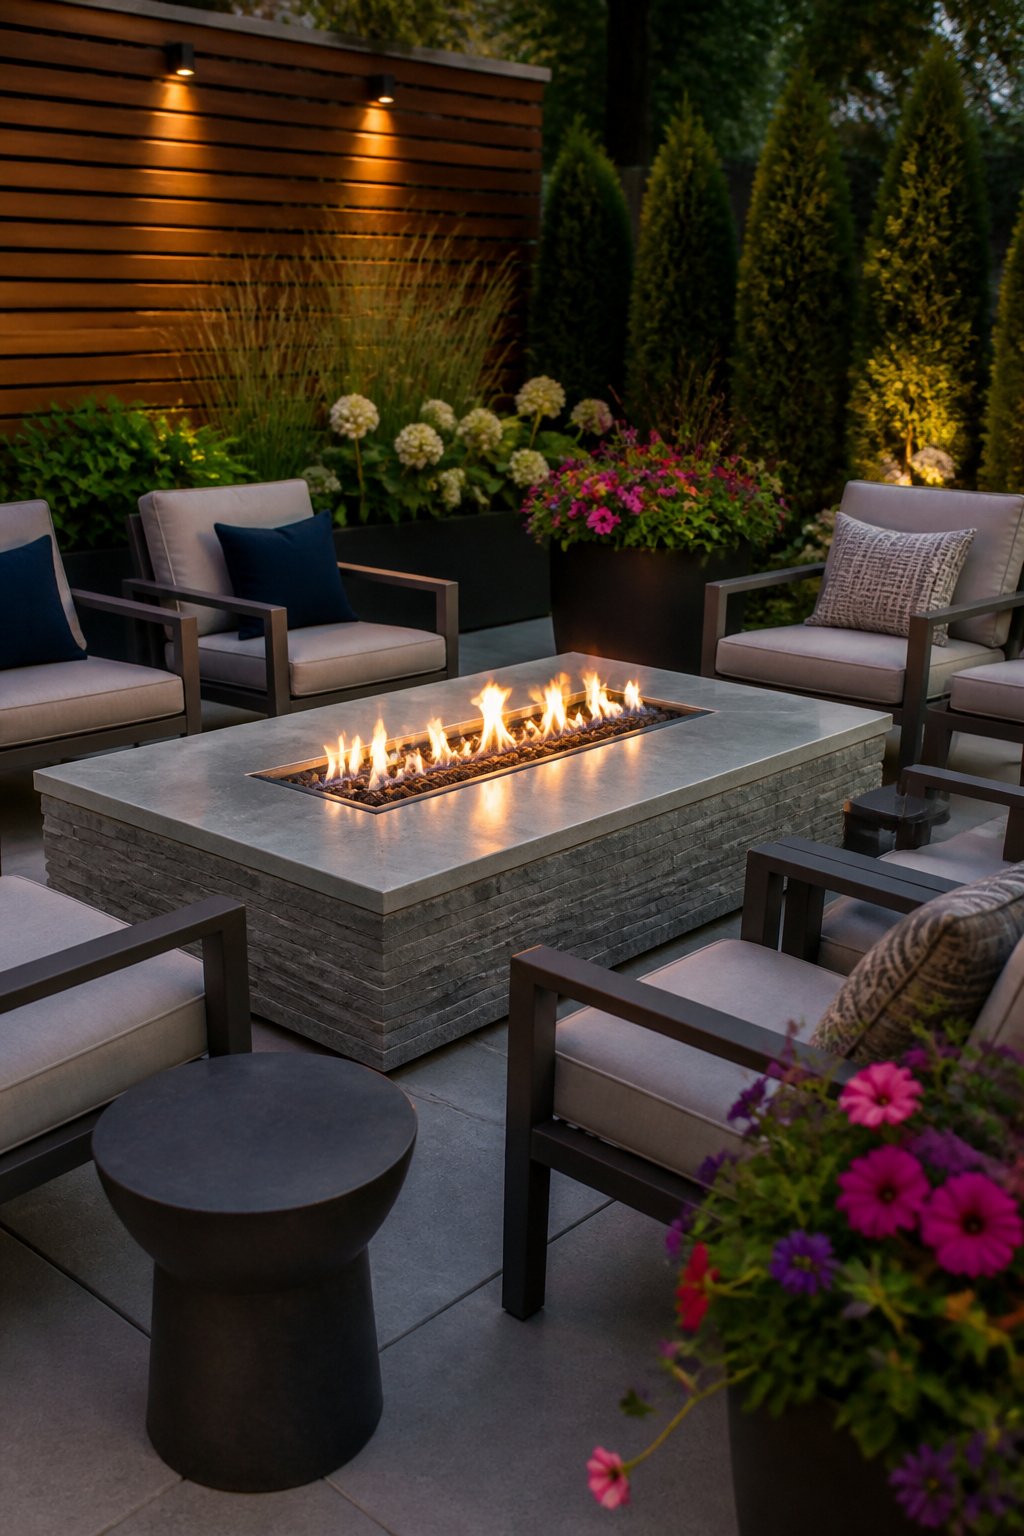
A fire pit table is not the same thing as the little tabletop bowl you move around. It is a full piece of outdoor furniture, usually waist-high, with a burner set into the center and a ledge of stone, tile, or metal running around it on all sides. That ledge is what makes it usable. You can set down a drink, a plate, a phone, whatever you are holding, without crouching toward the ground or balancing it on your knees.
The rectangular ones stretch the idea further. I have seen a design where the fire sits at one end and the rest of the surface functions as a true table, magazines and cocktails and all. Marble over paver tiles, sharp edges, very architectural. The fire is slightly away from where you sit, which matters. You are not roasting your face to warm your hands; the heat pools in the middle and the table still works as a table.
This is where I draw the line from the linear fire table. That style runs long and narrow, like a gas fireplace turned sideways, and the flame itself is the whole point. A fire pit table wants the flame to be one element among several. You eat here. You play cards here. The fire is warmth you happen to be sitting around, not the entire reason for the gathering.
10. Portable Fire Pits
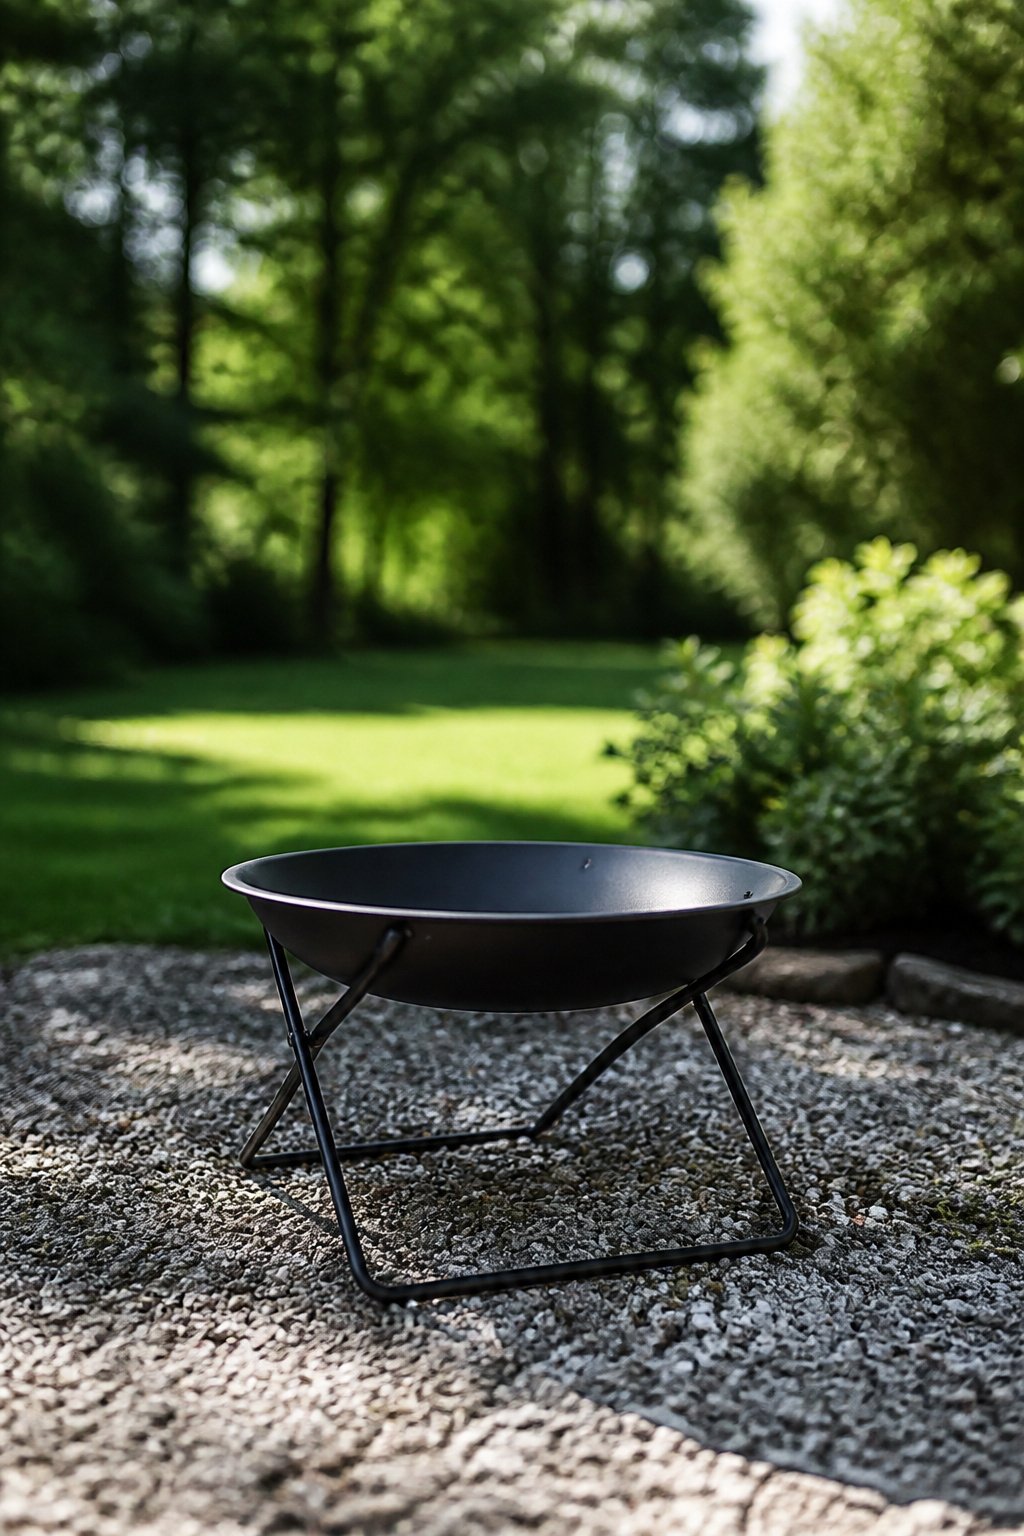
A portable fire pit turns any level spot into a gathering place, then disappears when you need the space back. For renters or anyone who rearranges the yard every season, that flexibility matters more than a permanent build.
The lightest options collapse flat or pop up from a carry case, ready for a camping trip or a balcony corner. A bowl-on-stand design sits heavier but still lifts in two pieces, and the stand folds to slide behind a shed. What convinced me, reading through a dozen setups, is that the landing zone matters more than the pit itself. A non-combustible base, sized for the unit plus its required separation from walls and seating, is the part you actually build. Gravel or concrete pavers work; grass does not, even with a "portable" label.
One Louisiana backyard I kept coming across wheels its pit out for impromptu parties, then rolls the chairs back the next morning. The whole fire area becomes lawn again by noon. Budget roughly $100–$450 plus the pit for a simple gravel pad and lightweight furniture that shifts with it. Store the cooled unit and fuel safely when the space returns to everyday use, and never move a warm one, overhang or not.
11. Natural Stone Fire Pit
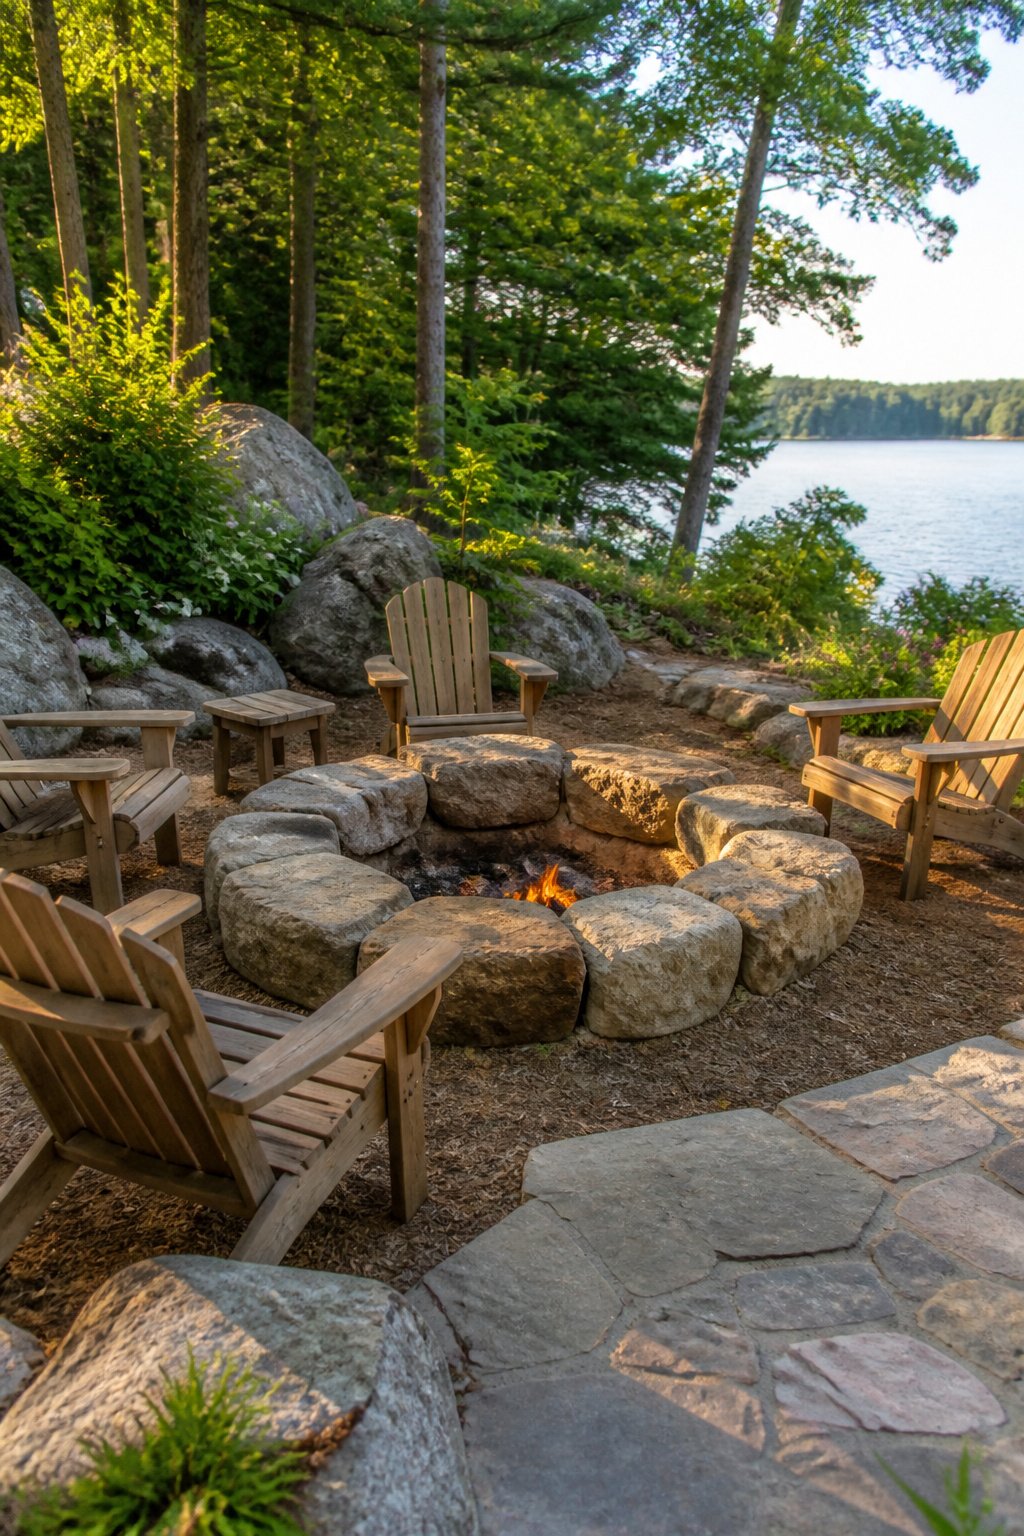
A natural stone fire pit trades the tidy ring of a classic build for something rougher, more particular. Small, irregular boulders half-sunk in gravel let the pit settle into the yard as if it had always been there, especially when the stone echoes a wall or a view just beyond the fence. Marie Flanagan used limestone this way, sizing the circle to pull seating close without crowding, and the result reads as landscape rather than installation.
Dry-stacking keeps the look loose and lets you shift stones as the ground settles, though mortar buys permanence if you are building on a slope or stacking higher than knee-height. Either way, gathered river stone works only if you are prepared for the hunt and for some of the pieces to be too round to seat well. Heat and time will wear down softer stone, so budget for replacing a few edges years out.
12. Smokeless Fire Pit
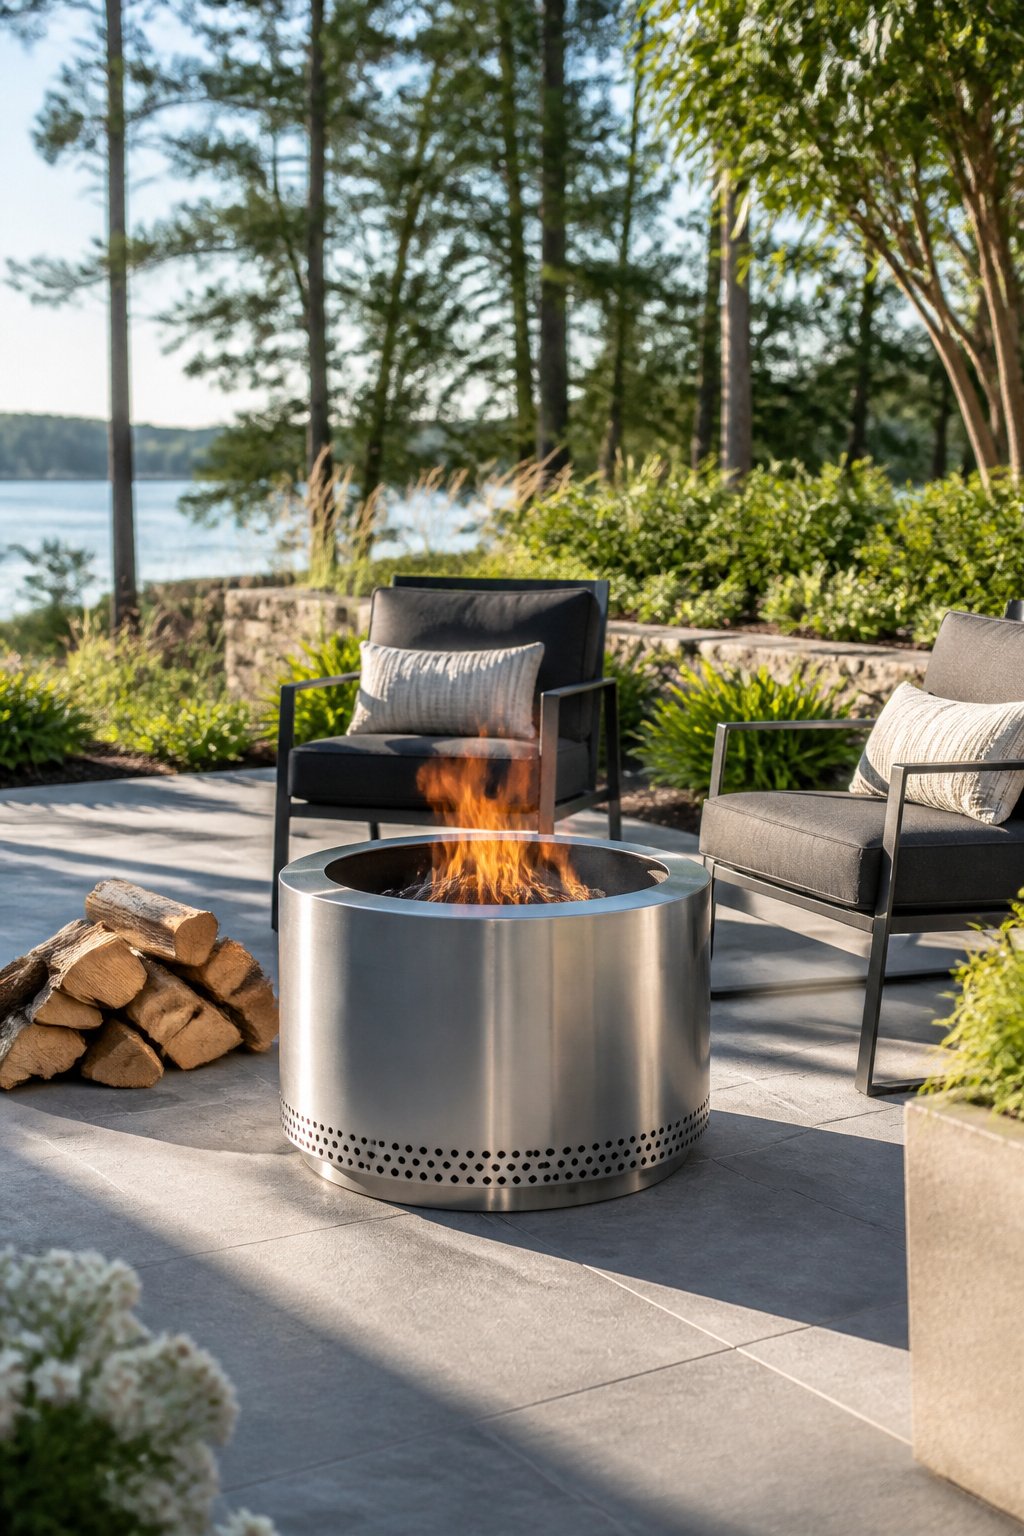
A double-wall design is what separates a smokeless fire pit from the ring of stones you grew up with. Air heats between the inner and outer walls, then exits through holes near the rim. That hot air feeds the flame from above, burning off smoke particles before they drift toward your sweater. No batteries, no fan, just physics.
The commercial versions run on ordinary logs and still give you the crackle and glow of wood. What you lose is the campfire smell that used to follow you indoors.
For a DIY approach, a round metal bowl raised slightly off the ground and ringed with stone can borrow the same idea if you build in an air gap and vent the top rim. A concrete form filled with gravel and a metal fire bowl inside gets partway there too, though the double wall is harder to replicate without fabrication tools. The store-bought route wins if you want the smokeless claim to actually hold up on a still evening.
13. Lakeside and View-Facing Fire Pits
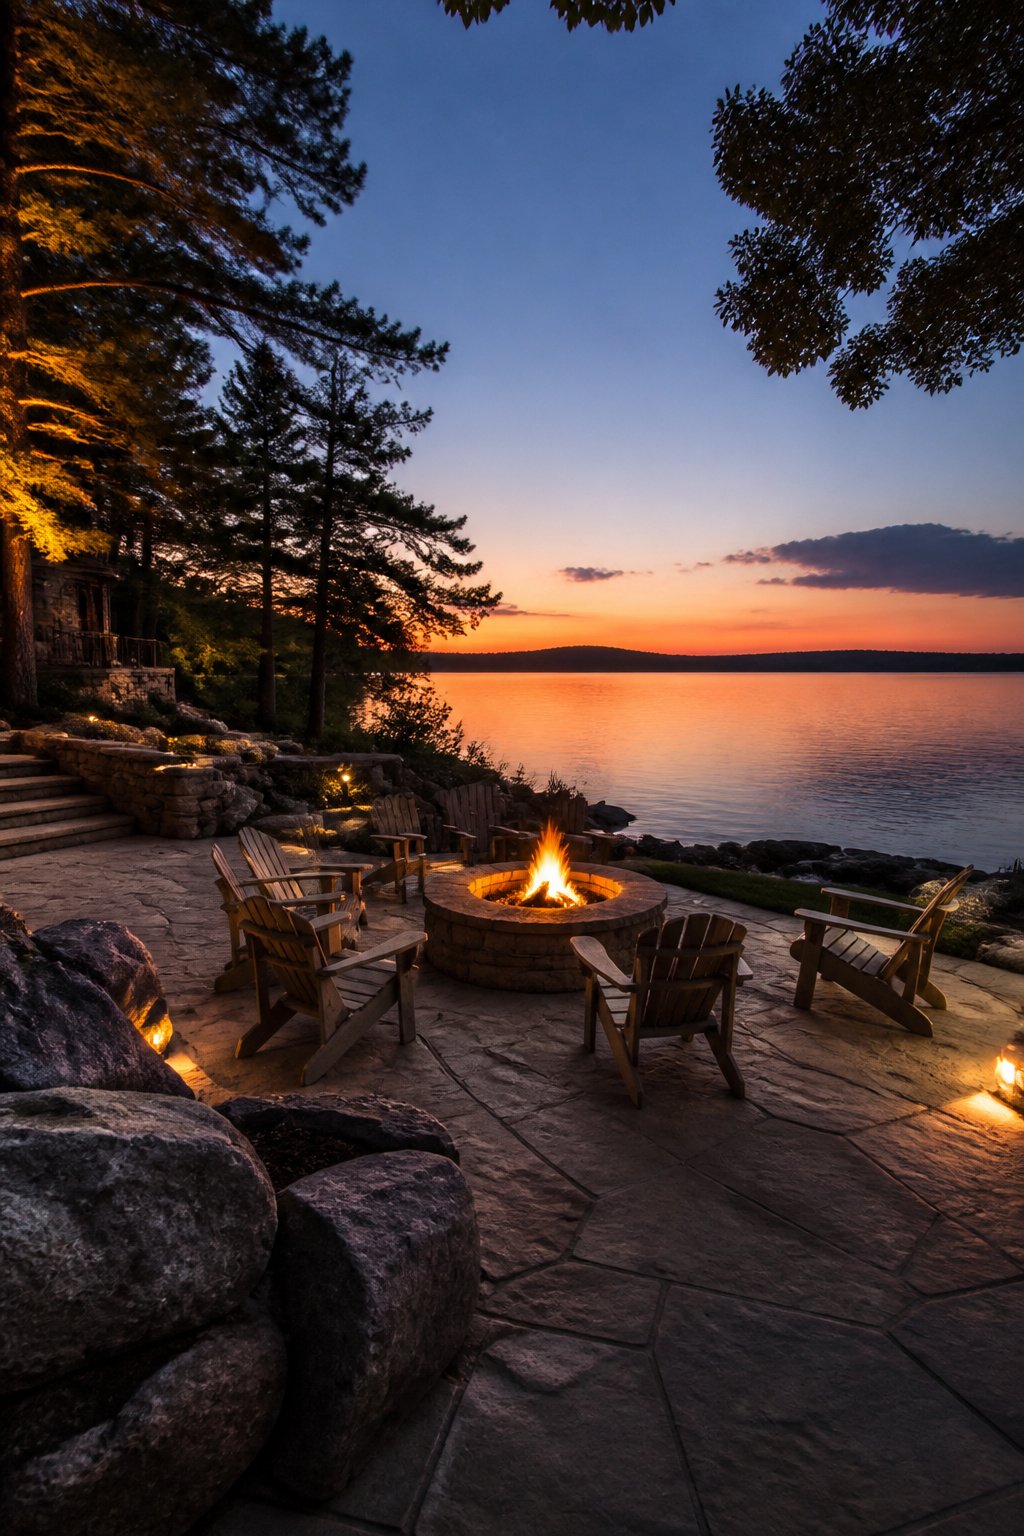
A fire pit aimed at a view asks more of the seating than the usual circle. Opening the arrangement toward the water or skyline, rather than wrapping chairs all the way around, keeps the sightline clear while the fire still anchors the gathering. I have seen this go wrong when the pit sits too close to the edge; the heat competes with the breeze off the lake, and guests end up scooting their chairs back anyway. Leave enough depth for people to settle between the flames and the drop-off, roughly the width of a paver patio’s seating zone, so the fire reads as warmth in the corner of your eye rather than the main event.
After dark, the balance shifts. A wood-burning pit throws enough light to wash out a dim shoreline, while gas or a low bed of coals lets the view stay legible. White seating, like classic Adirondack chairs or a light slipcovered couch, catches the firelight without turning the whole scene into a stage set. Stone slabs in a geometric pattern, outlined with grass, ground the area in daylight and keep the layout from feeling temporary. The season you actually use this setup is the one that matters: early autumn nights, when the chill arrives before the dark, and the fire earns its keep chasing the cold back while the last color hangs over the water.
14. Statement and Geometric Fire Pits
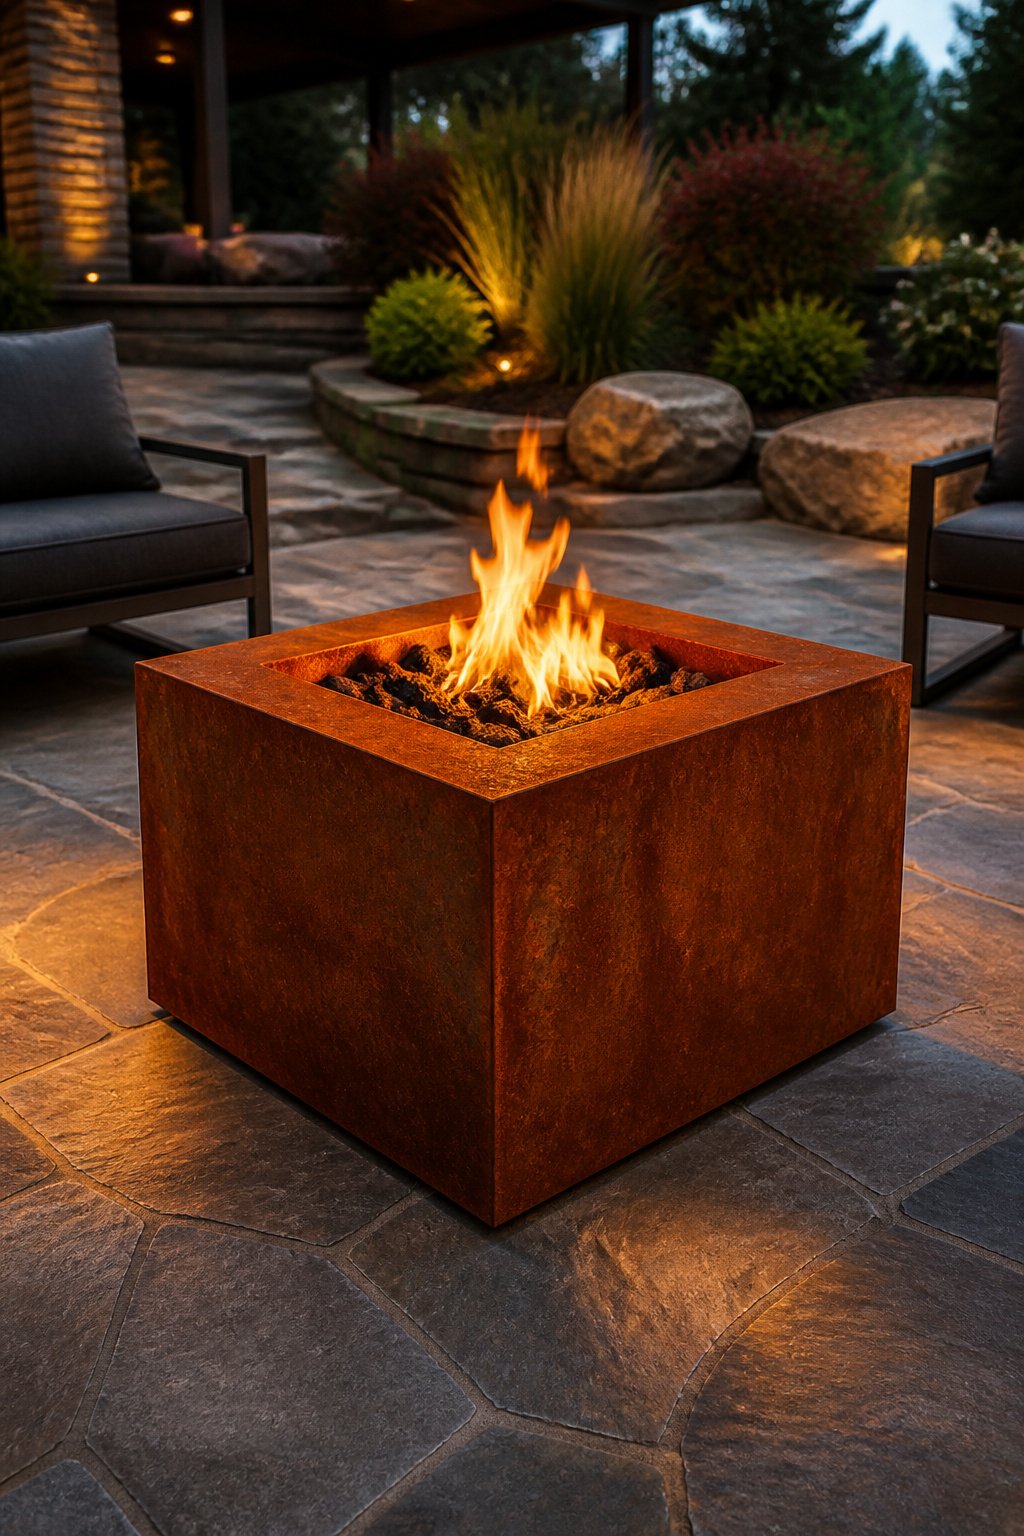
Corten steel cubes and hexagons do something round fire pits cannot: they hold a shape that reads as deliberate even when the fire is out. I noticed this first in photos of a raised Corten bowl set on flagstone, where the rust-red surface matched a distant water feature and the whole patio felt composed rather than assembled. The steel keeps that vivid color because it arrives pre-weathered; rain will not shift it toward dull brown the way it does with raw steel.
Geometric forms work especially well as sculptural anchors in small or awkward spaces. A notch cut into a tiered deck, barely wide enough for a hot tub and a fire nook, gained its only breathing room from the angular fire pit tucked beside it. The shape repeated the deck lines instead of fighting them.
Corten cubes and hexagons start around $800–$1,200 for quality welded stock, and the weight means you place them once. Bronze finishes and raw concrete bowls hit a similar sculptural note if the industrial rust tone clashes with your existing materials. The mistake I have made is assuming a statement piece needs a large footprint; a compact hexagon on a balcony reads as intentional where a small round bowl just reads as small.
15. DIY Concrete Fire Pit
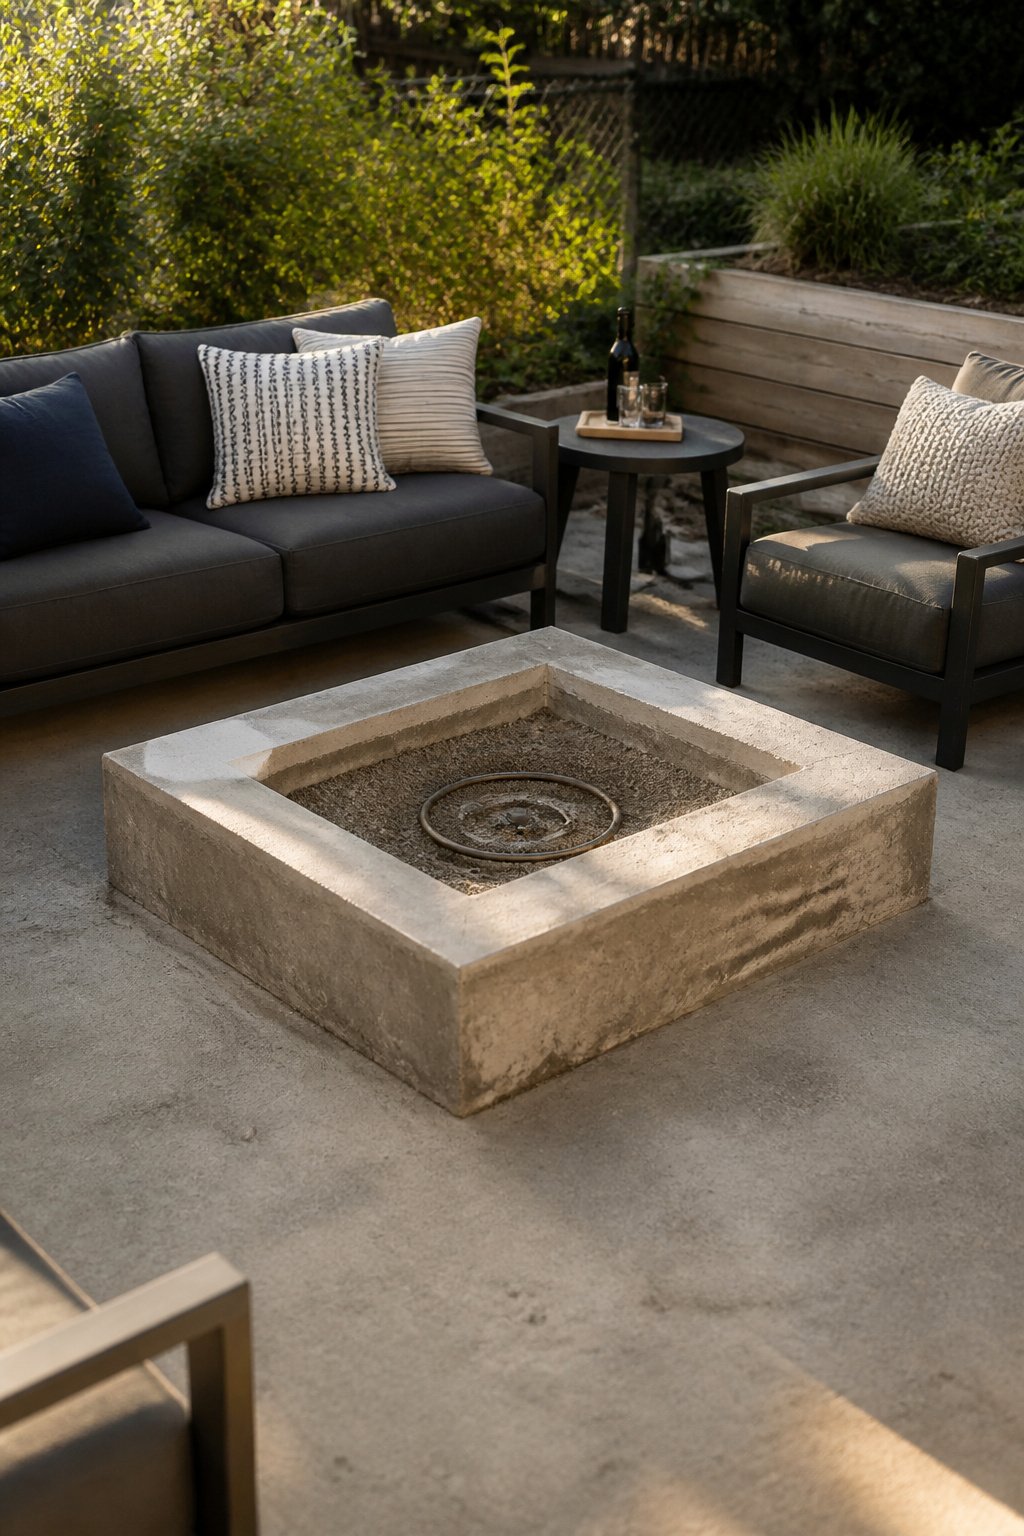
Concrete fire pits sit somewhere between weekend project and minor construction, and the difference usually comes down to patience with curing. I learned that the hard way when I rushed a pour in late September, figuring two days was plenty before the first fire. The surface spider-webbed within a week, and what I’d built for roughly $175 in materials became a very modern-looking planter instead.
Full curing means 28 days minimum, not the 48 to 72 hours the concrete feels hard. Heat exposure before then traps residual moisture, and that internal pressure is what spalls the surface or splits the wall. The sources I trust now put build time at 2 to 3 days including cure, but that assumes you’re only forming, pouring, and stripping the mold; the actual wait before burning is closer to a month.
Mold choice shapes the look more than most beginners expect. A round bowl form reads traditional; rectangular or cube molds read modern and stack neatly against patio edges. Reinforcement matters either way: steel mesh or rebar keeps thermal expansion from finding the weak point. Ventilation and drainage can’t be improvised, and the fire-rated bowl or burner needs to sit with proper separation from the concrete shell, not wedged in as an afterthought. Total cost runs $175 to $600 or more depending on size and whether you source a prefab burner or fabricate one. Skill level sits at intermediate to advanced, mostly because mistakes in form-building are expensive to undo.
16. Gravel-Base Fire Pit
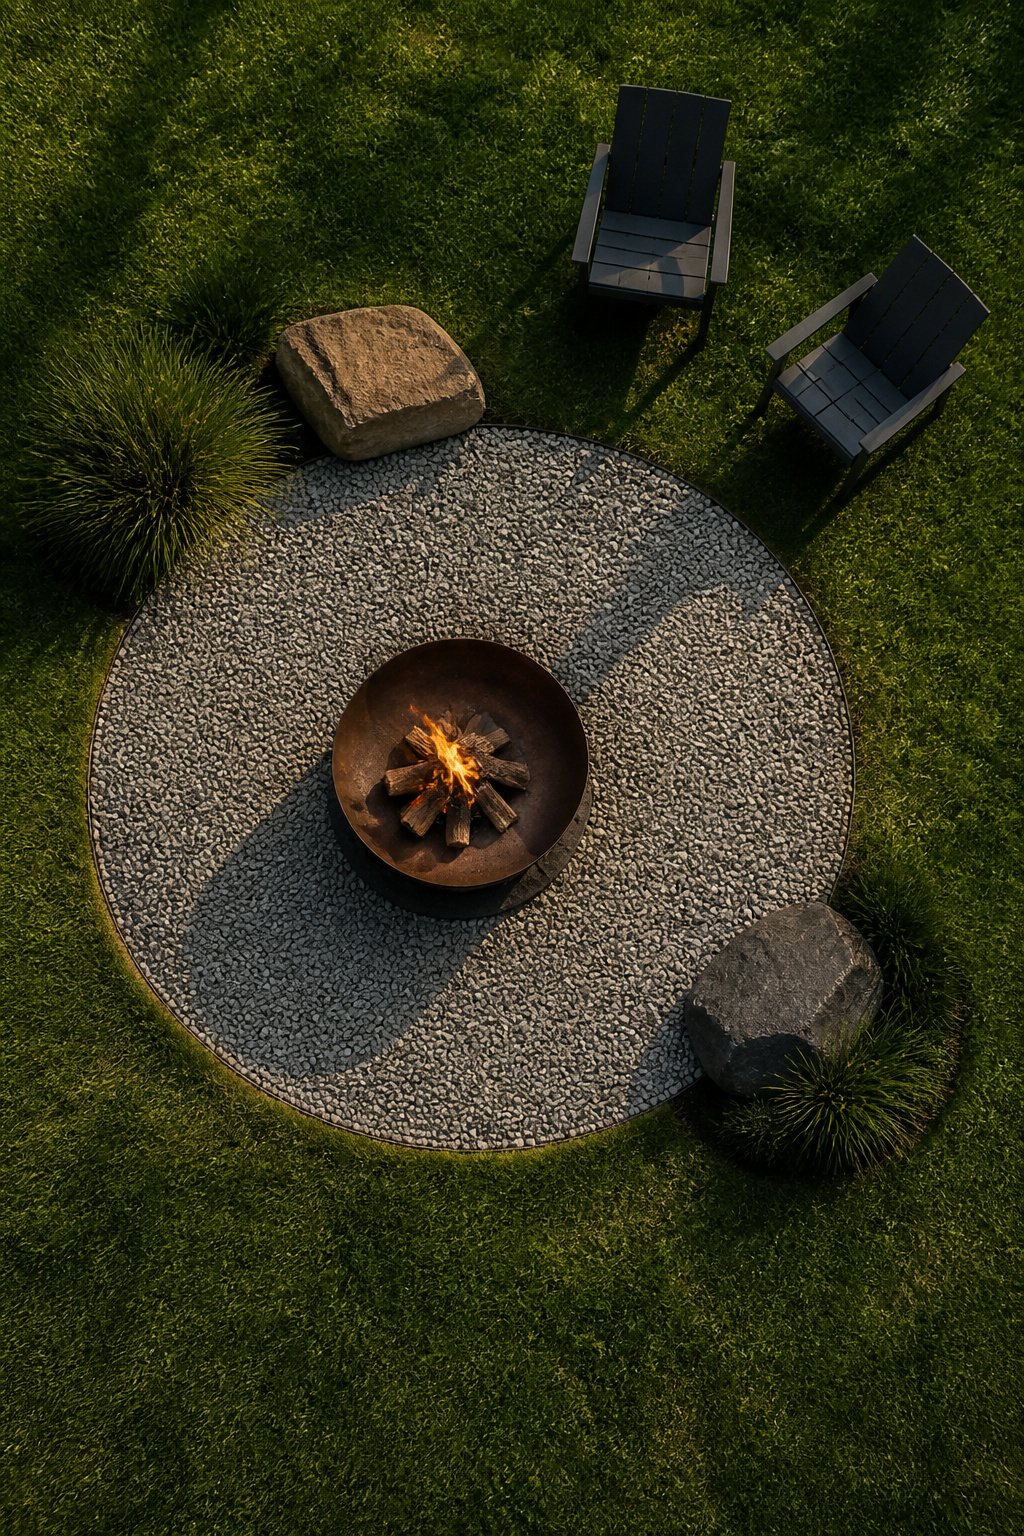
A gravel base is the simplest way to make a fire pit look finished without pouring concrete. Crushed stone or pea gravel gives you a non-combustible surface that also frames the pit so it reads as a deliberate part of the yard rather than something dropped on the grass.
Four to six inches of compacted gravel is the working depth for most setups. That gives you enough mass to absorb stray sparks and keep the surrounding ground from scorching, plus a stable plane for chairs. The type matters less than the size: anything with fines in it will lock together underfoot, while clean stone drains better but shifts around. I would use what matches the rest of the hardscape, since the whole point of this approach is visual quiet.
The edge is where gravel pits succeed or look sloppy. A steel strip, a row of pavers, or even a treated timber sunk flush with the lawn gives you a clean termination. Without that boundary, gravel migrates into the grass within a season and the whole thing looks like a construction site. The finished area wants to be large enough for the pit itself plus circulation; a round pit seating four to six needs roughly the diameter of the ring plus another six to eight feet overall to keep chairs on stone, not turf.
Cost stays low, usually $75–$250 depending on whether you are buying a metal ring insert and how much ground you are covering. The work is beginner-level and takes half to a full day, most of it digging and leveling rather than anything technical.
17. Fire Pit with Water Feature
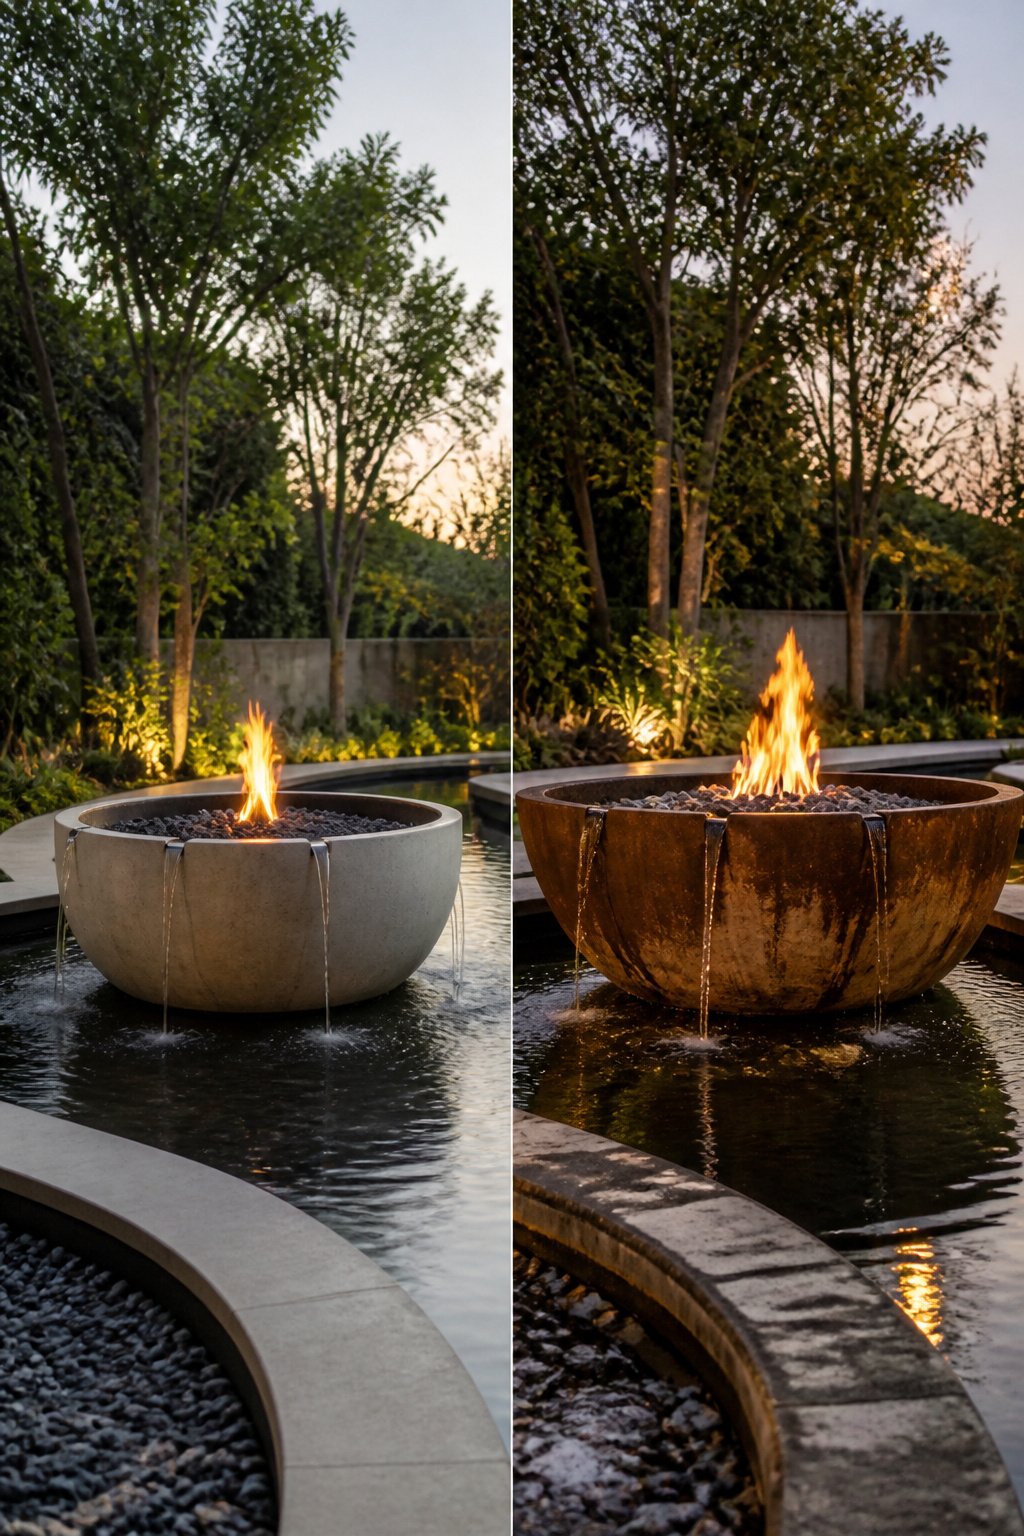
A fire bowl set into a reflecting pool gives you two things to watch after dark, but the engineering runs tighter than it looks. Water has to travel far enough to look dramatic without misting the flame or flooding the gas line, and that distance shrinks the moment wind picks up. On my first attempt I set the pump outlet eighteen inches from the burner and called it safe. Three evenings in, a gust angled the spray just enough that the flame sputtered and the pilot rusted inside a month. Pump placement needs a dry zone wider than looks right, and if you are using a submerged reservoir, the housing has to sit below frost depth or you are rebuilding seals every spring. Electric runs for both systems mean trenching, and most towns want that inspected before you backfill. The effect is worth the fuss, but only if you build the fuss in from the start rather than adjusting later, which is what I tried and what cost me the summer.
18. Log Benches and Swing Seats
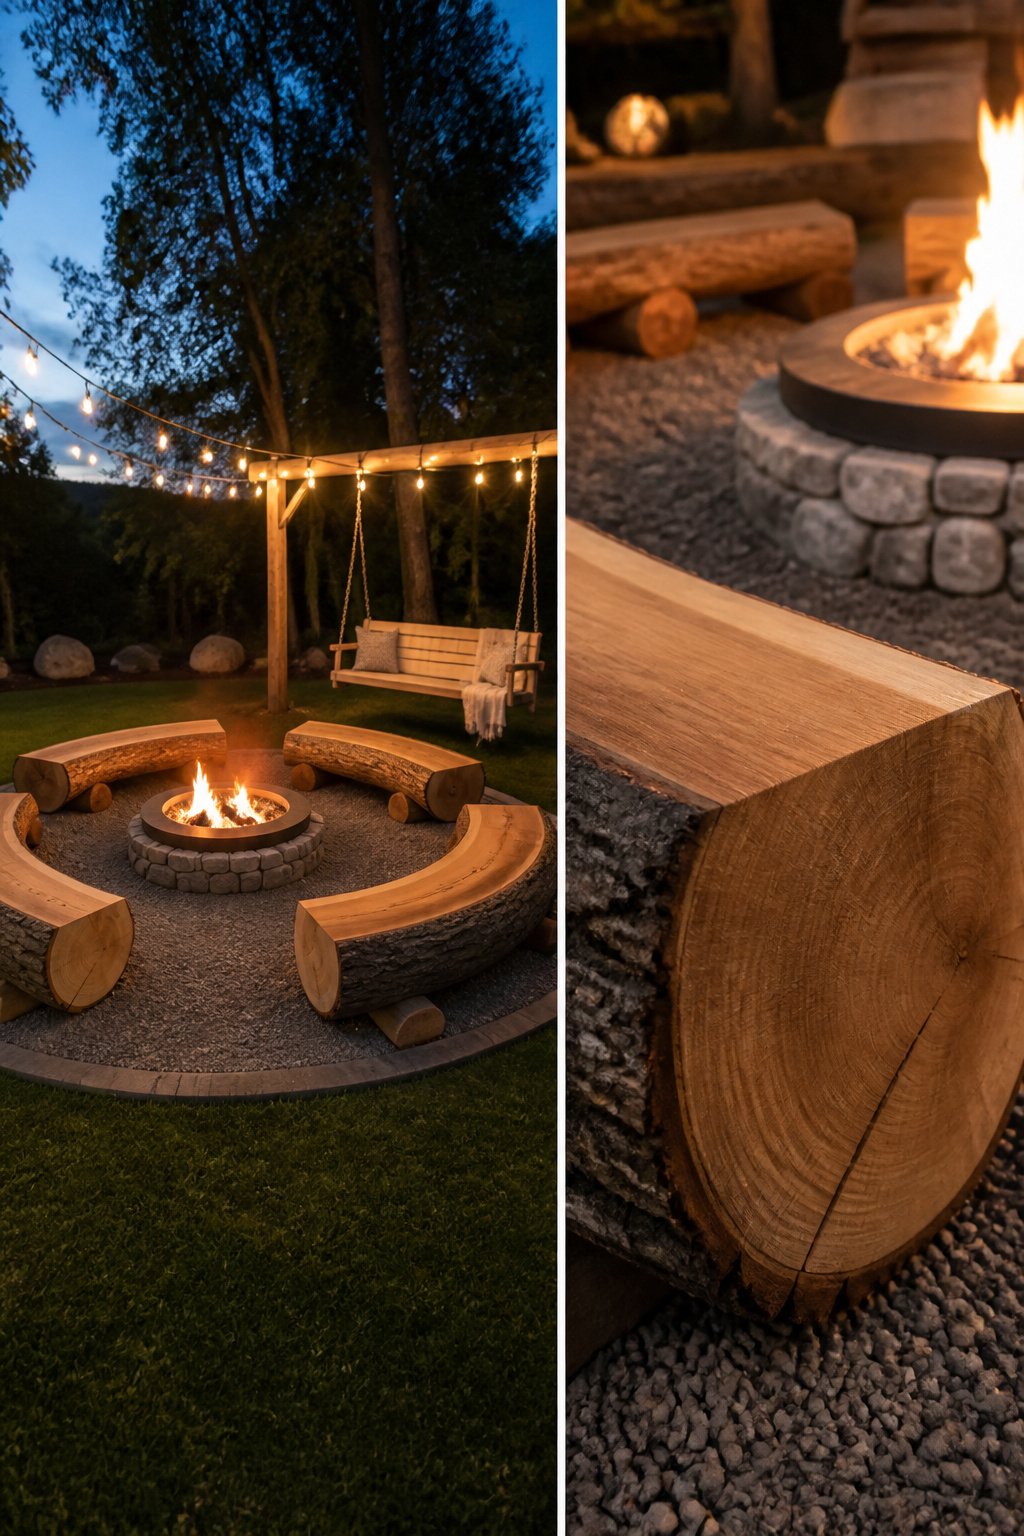
Log benches and swing seats both orbit the fire without looking like they came from a store, though they pull the space in opposite directions. Half-log benches cut from a single trunk and laid flat side up keep the circle low and grounded; the bark still on rounds the edges so no one gets a splinter on the way down. Three or four set in a ring close enough to share a blanket but far enough to let someone walk behind, and the whole thing starts to feel like a single piece of woodsmoke furniture.
Rope-hung swings trade that steadiness for motion. A plank seat, two lengths of sturdy rope, and a sturdy branch or beam overhead, and you have a perch that rocks gently while the fire pops. The clearance issue matters more than I expected: the arc of a swing carries a seated person forward and back, not just down, so the fire has to sit farther out than bench seating would require. The instructions for your fire pit, fuel source, and local code determine the actual safe distances, but as a planning pattern, swings need a wider radius than fixed seats to keep the rider from drifting into heat or smoke. Measure the full swing path before you sink the posts, or you will be digging them up the first time someone kicks forward into the embers.
19. Destination Fire Pits
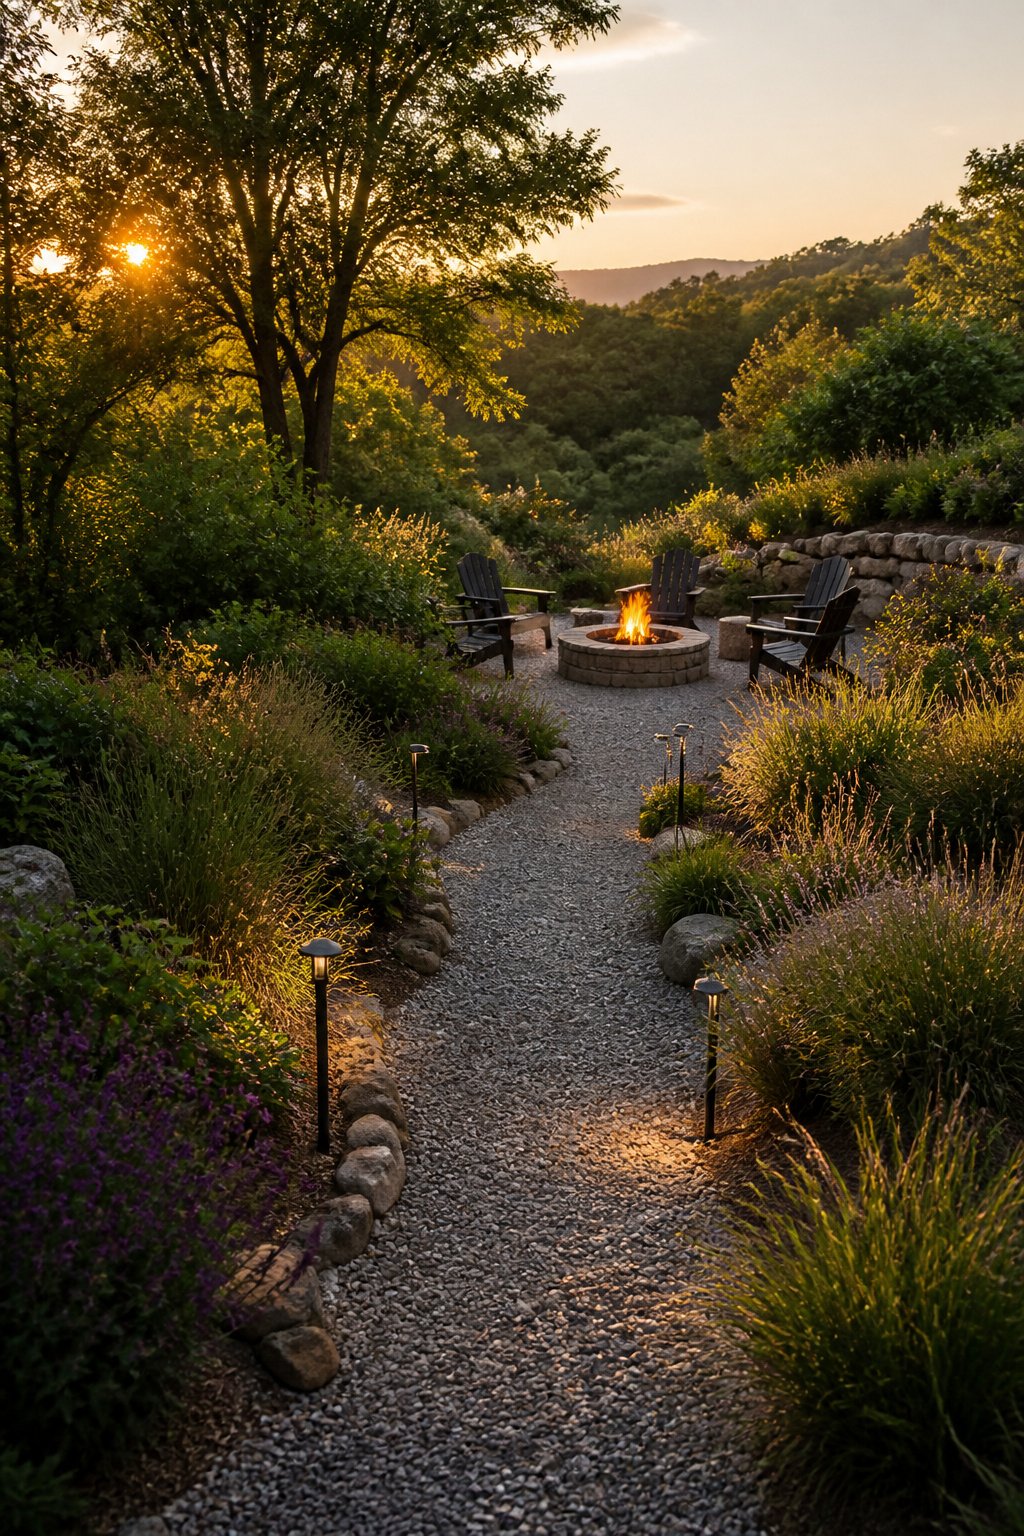
A fire pit set back from the house turns the walk there into part of the evening. Last summer I helped a friend lay a simple gravel path through her side yard to a pit she’d tucked behind a perennial bed, and the twenty paces of solar path lights did more for the mood than anything around the flame itself. Budget $100–$500 for the approach, not the fire feature. The sources split on where to spend it: one favors crisp edging and repeated chair styles at the destination, while a designer I read about placed a secondary terrace entirely away from pool noise and foot traffic, surrounded by ornamental grasses for quiet. Both agree the journey matters more than decoration at the pit. A single clear path beats multiple small borders every time. Measure what you have honestly; a destination setup needs enough distance to feel separate, but the pit still has to meet standard clearances for fuel type and overhead branches. Check that first. A cosmetic upgrade cannot fix an unsafe fire feature.
20. Covered Fire Pit
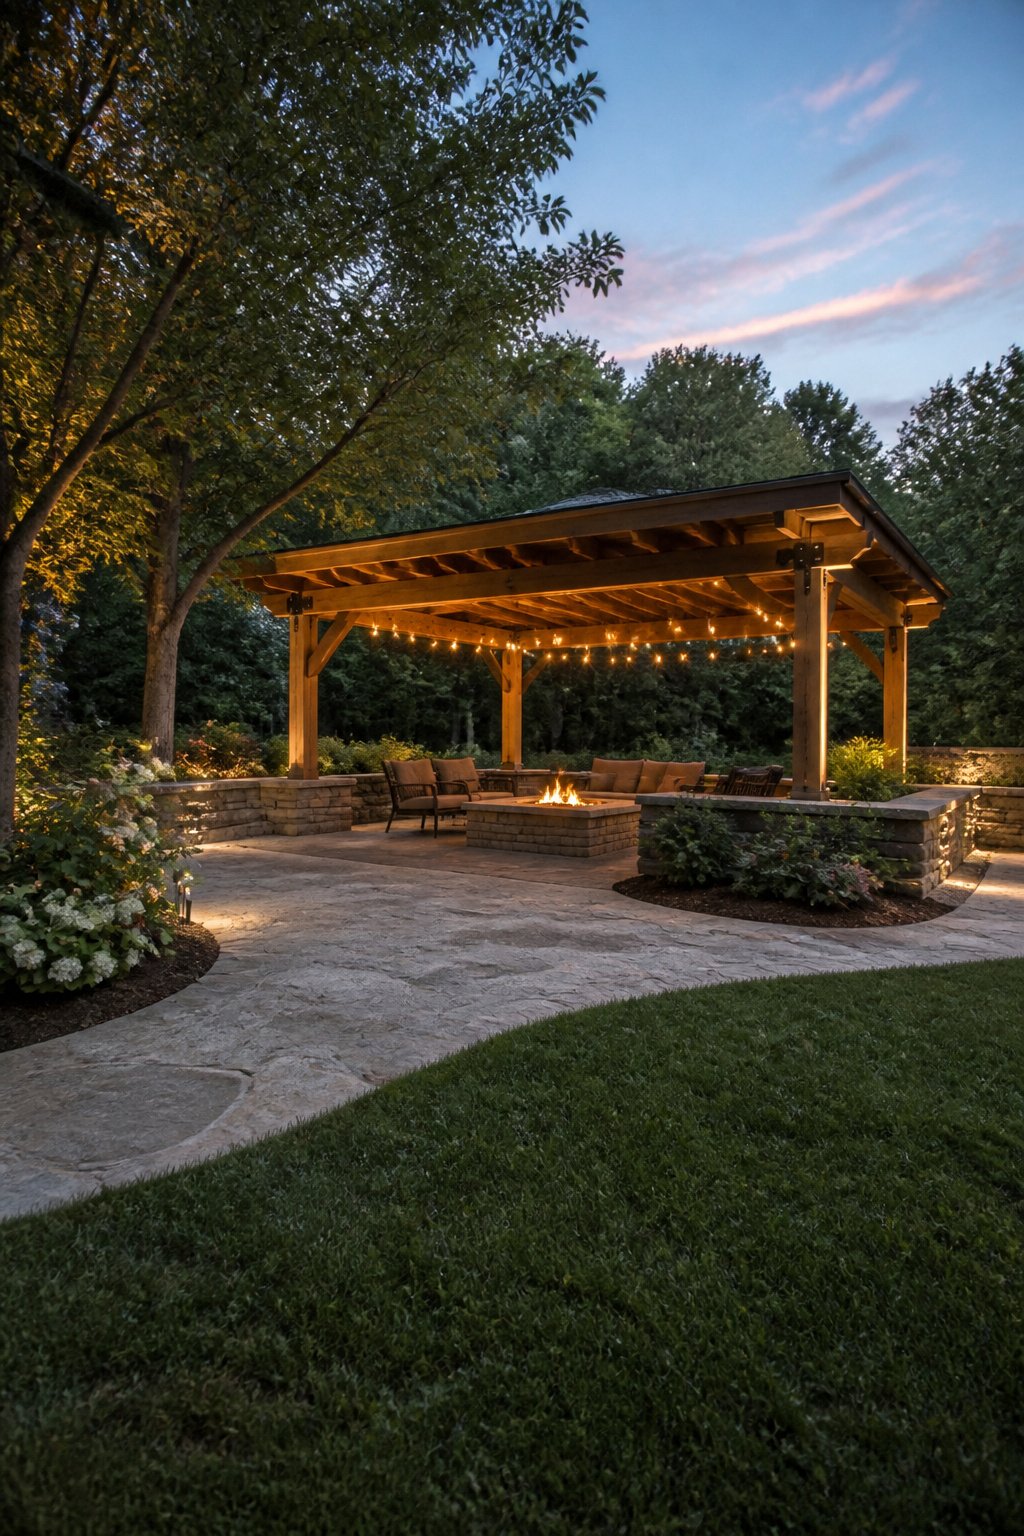
A covered fire pit under a gazebo or pergola stretches the season into rainy evenings and crisp fall nights, but the structure overhead changes every safety calculation. Combustible materials like wood beams or fabric curtains need serious clearance from the flame, and most manufacturers spell out exact distances in their instructions. What convinced me, reading through a dozen of these setups, is that the written clearance is only the starting point; local code often demands more, and some jurisdictions ban any wood-burning fire pit under a roof outright.
Ventilation is the detail that gets skipped in the pretty photos. Heat and combustion gases collect fast in an enclosed overhead, so open sides or a high ceiling are not design flourishes; they are functional requirements. A gas fire pit table can make the math easier, with controlled ignition and no flying embers to track, though it still needs the same non-combustible surface underneath and the same check against what your city actually allows. The usable tabletop is a genuine bonus on a small patio, giving you a place to set a drink when the fire is off.
Most setups demand open air, non-combustible surfaces, and adequate clearance that your local regulations may define differently than the manufacturer does. If your yard cannot meet those clearances, a compact round conversation plan with a portable pit in the open air wins over forcing a permanent installation into a space that cannot safely hold it.
21. Outdoor Fireplace
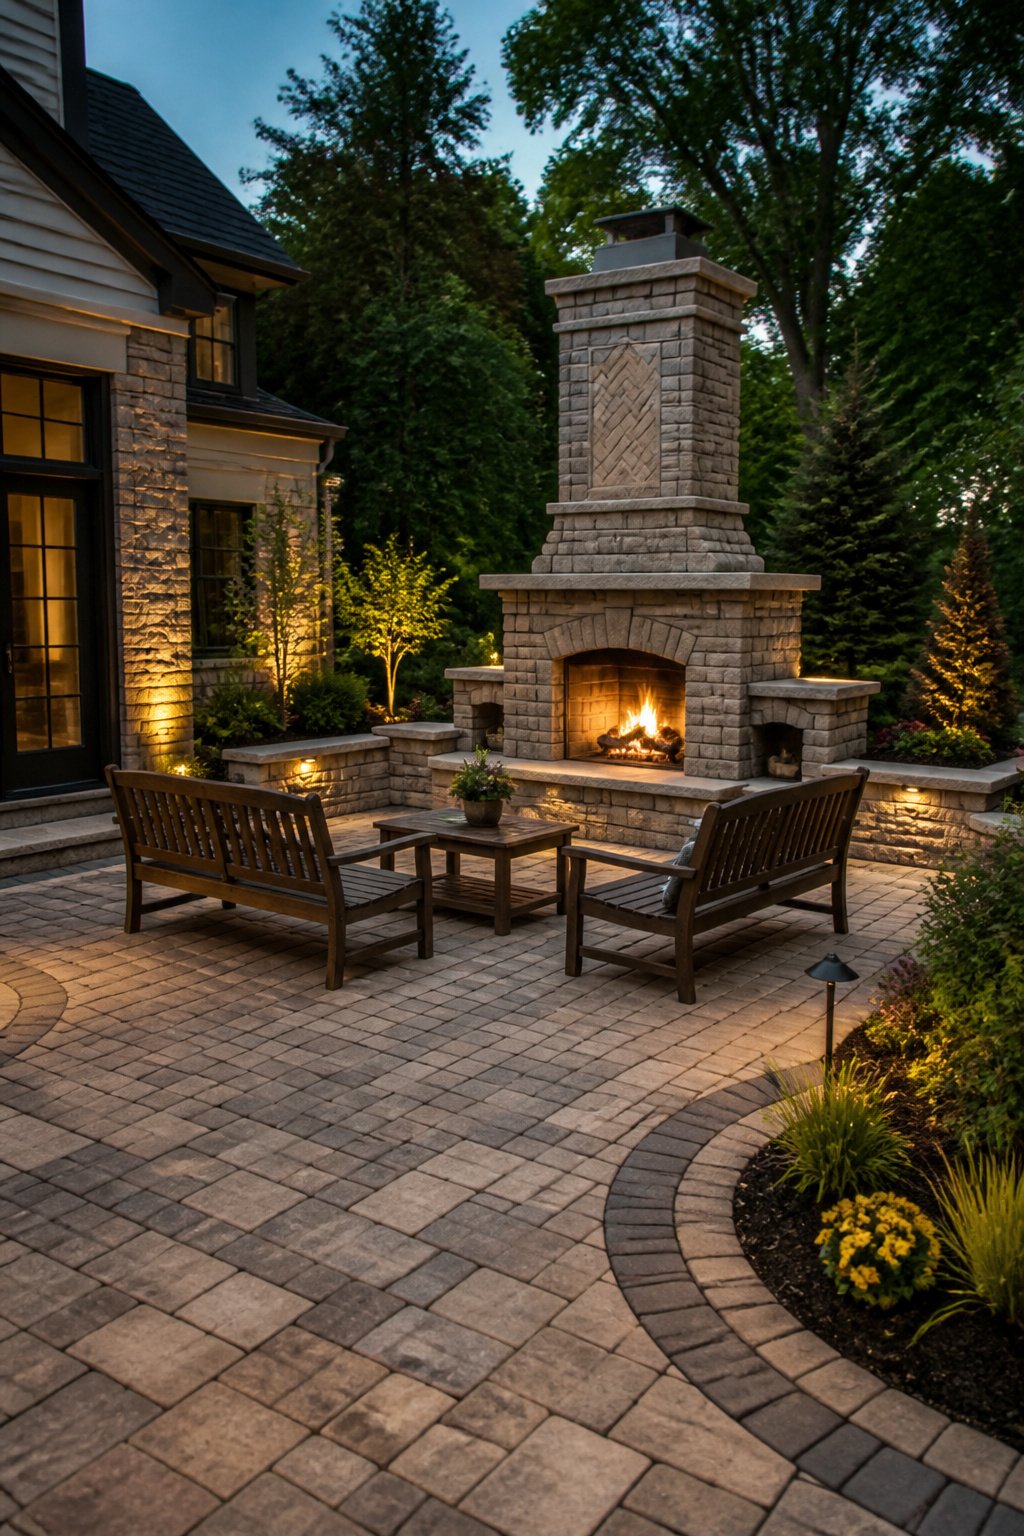
An outdoor fireplace is the move when a fire pit starts to feel like a toy in the space you have. The scale changes everything: instead of a bowl you pull out, you’re building a structure that anchors the patio and gives guests somewhere to face. Masonry builds in stone or stucco run rustic; smooth concrete or steel reads modern. Either way, the smoke routes up and away through a chimney, so the seating area stays clear.
The cost jumps hard here. Between materials, a proper footing, and likely a permit, you’re past the $500–800 annual garden budget fast. The footing is non-negotiable if you’re laying brick or block; frost heave will crack anything rigid that sits on grade. Budget for a concrete foundation before you pick a finish.
A chiminea covers some of the same ground, directing smoke upward in a smaller footprint. The difference is permanence and presence. A chiminea you can relocate when the layout changes. An outdoor fireplace commits the wall, the patio flow, and a chunk of cash to one spot. For a renter or anyone who might rework the yard next season, that commitment is the deciding factor.
22. Minimalist and Rustic Metal Fire Pits
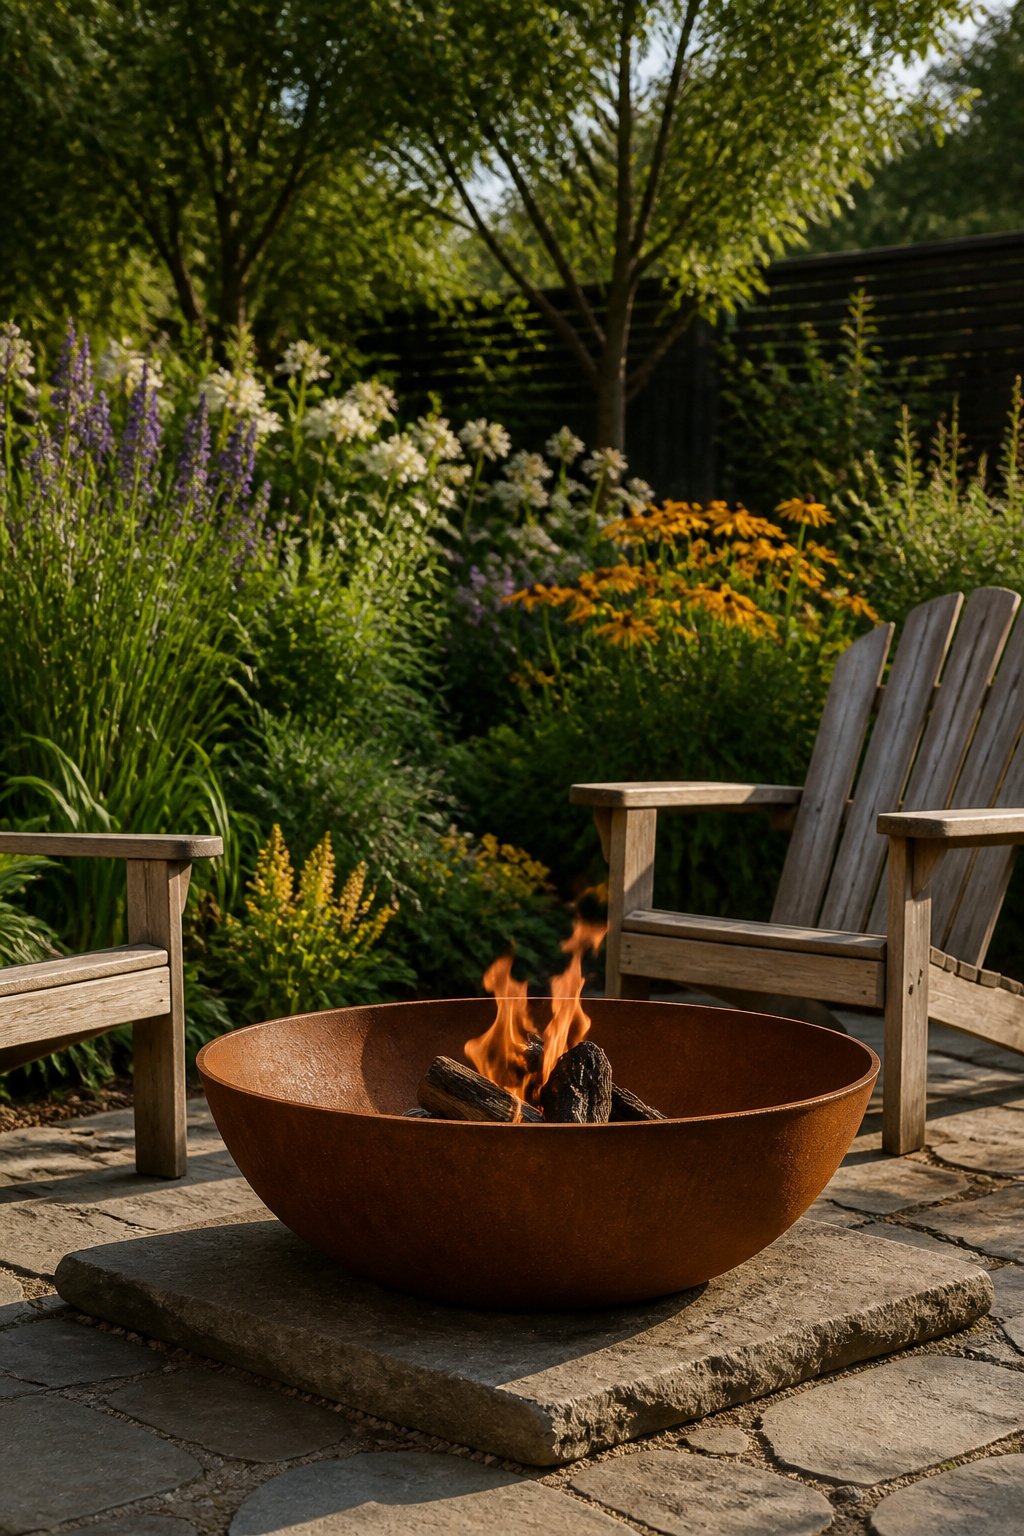
Corten steel starts out looking like any other raw metal, then settles into a vivid red surface that does not chip or flake because the rust is the finish. I like it against planting because the color reads as earth, not object; the bowl sits among ferns and greenery without shouting over them. A raised bowl on flagstone, matched to a water feature in the same material, keeps the sight lines clean across the yard.
Raw steel bowls go the other way. The patinated surface suits flush ferns and simple Adirondack chairs, and the whole setup stays inside a natural color scheme so the pit does not disrupt the space. The metal darkens and mottles with use, which is the point; you are buying the weathering, not fighting it.
The two styles read differently against modern hardscape. Oversized pavers and crunchy gravel around a square gas fire pit create something informal but styled, the clean metal lines pulling the planting together rather than softening into it. Corten wins if you want the pit to dissolve into the garden over time; raw steel works when you want the fire itself to stay the focal point.
23. Cinder Block Fire Pit
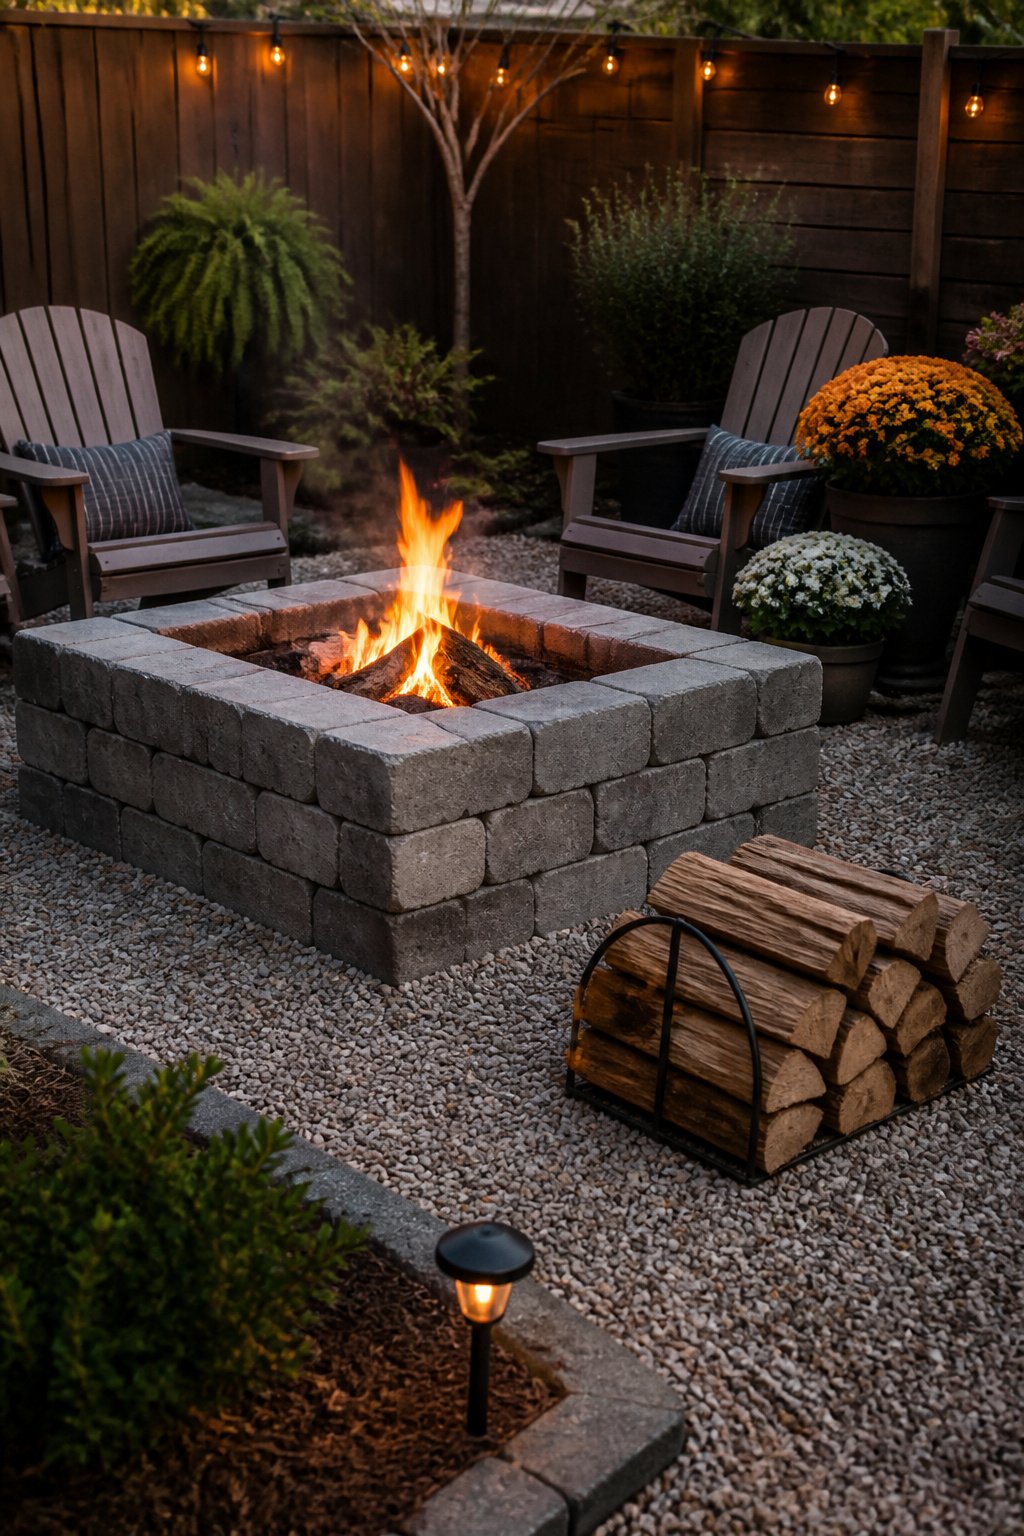
Cinder blocks look like the cheapest path into a fire pit, and they are, but the gap between "looks fine" and "survives the heat" is where most first builds fail. Standard concrete block is not rated for fire; the aggregate inside can hold moisture, and under direct flame that water turns to steam, cracking the face or spalling chunks off entirely. After two seasons of weekend fires, my first ring had three blocks with hairline fractures running corner to corner and one that had shed a palm-sized flake. It still stood, but it looked like something you hid from guests.
The safer play treats the blocks as an exterior shell and drops in a fire-rated insert or heat barrier sized to the opening. You dry-stack the surround, level a non-combustible base, and let the metal or firebrick take the direct flame while the block handles only radiant heat. Build cost runs $80–$275 depending on insert choice, and the half-day timeline still holds for beginners because you are not mortaring anything. Finish the surrounding ground in one consistent material, gravel or pavers, so the whole setup reads as a single outdoor room rather than a pile of leftovers.
24. Seating Walls and Multi-Level Seating
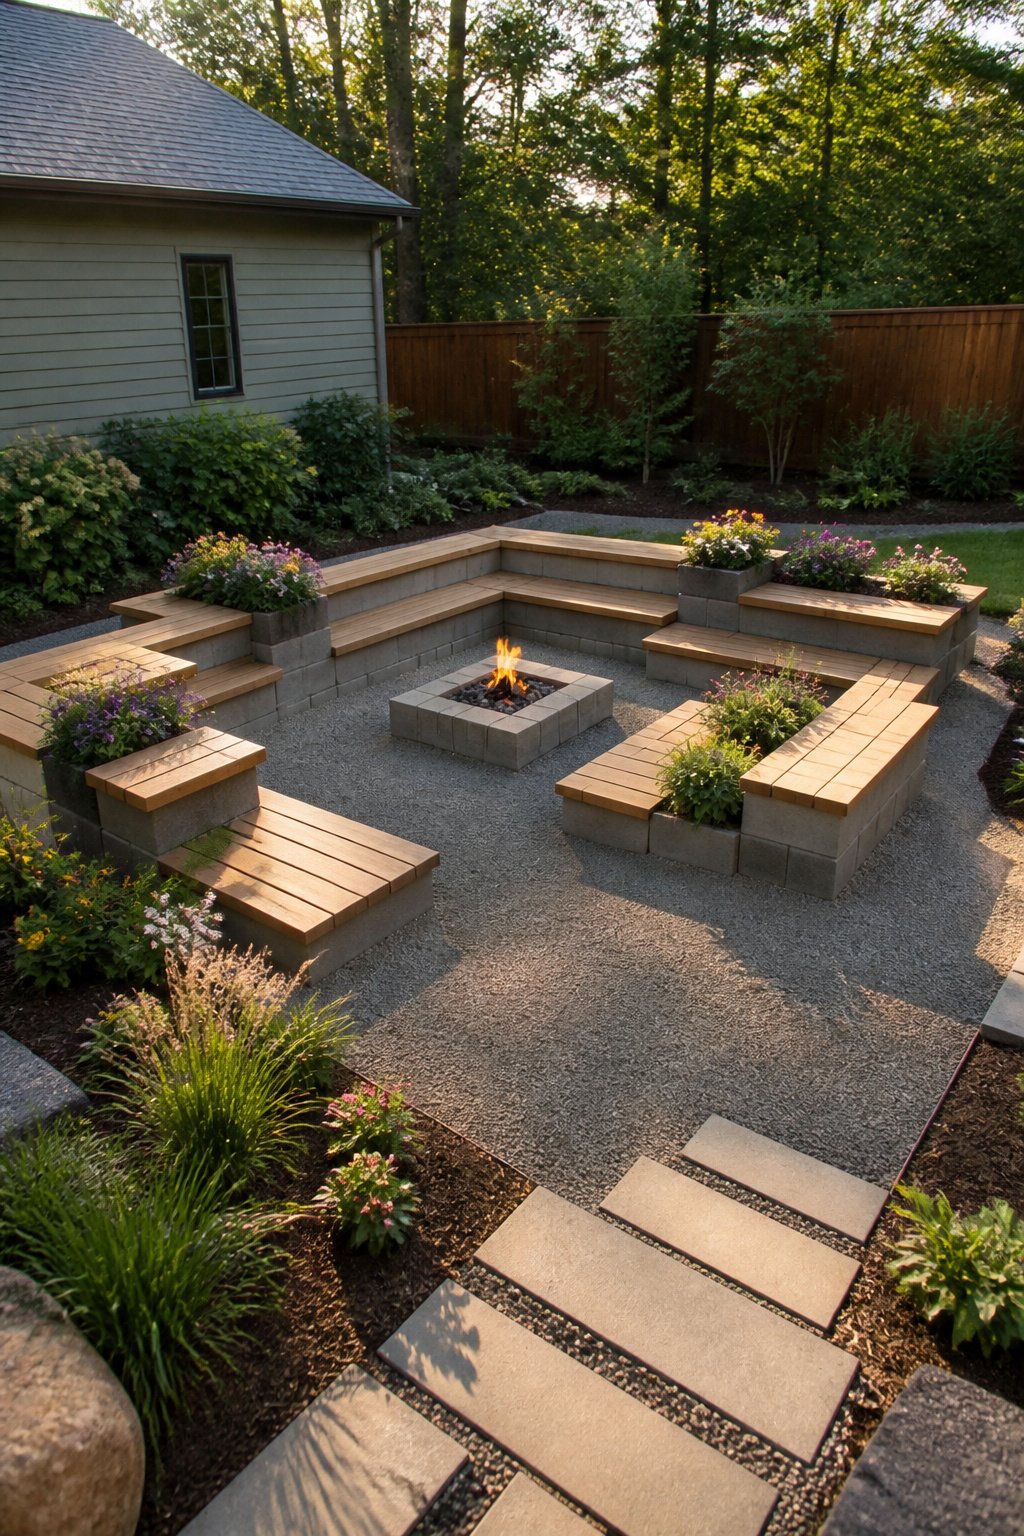
Cinder block-and-wood tiered builds sit at the opposite end of the permanence spectrum from poured or masonry seat walls, and the choice between them comes down to how long you plan to stay put. The cinder block route stacks blocks in graduated rows and caps them with wood planks, creating a retro, 1970s-influenced look that one Texas designer likened to breeze block walls of that era. It is fast, cheap, and you can dismantle it when the lease ends or your tastes shift. What convinced me, reading through the options, is that this method genuinely maximizes seating capacity in a small footprint; the tiered levels let people sit at different heights without crowding the fire ring itself.
Poured or masonry seat walls, by contrast, integrate into a paver patio as permanent hardscape. They define the space, improve flow, and remove the need for separate patio furniture. A masonry wall only makes sense if you own the place and can commit to a single layout, because once that concrete sets, your gathering space is fixed. For a renter or anyone still figuring out how they actually use their yard, the cinder block-and-wood build wins. It gives you the same multi-level seating effect with a fraction of the commitment, and if you stain the planks to match your patio, the rustic look reads intentional rather than improvised.
25. Decorative Stone and Built-In Storage
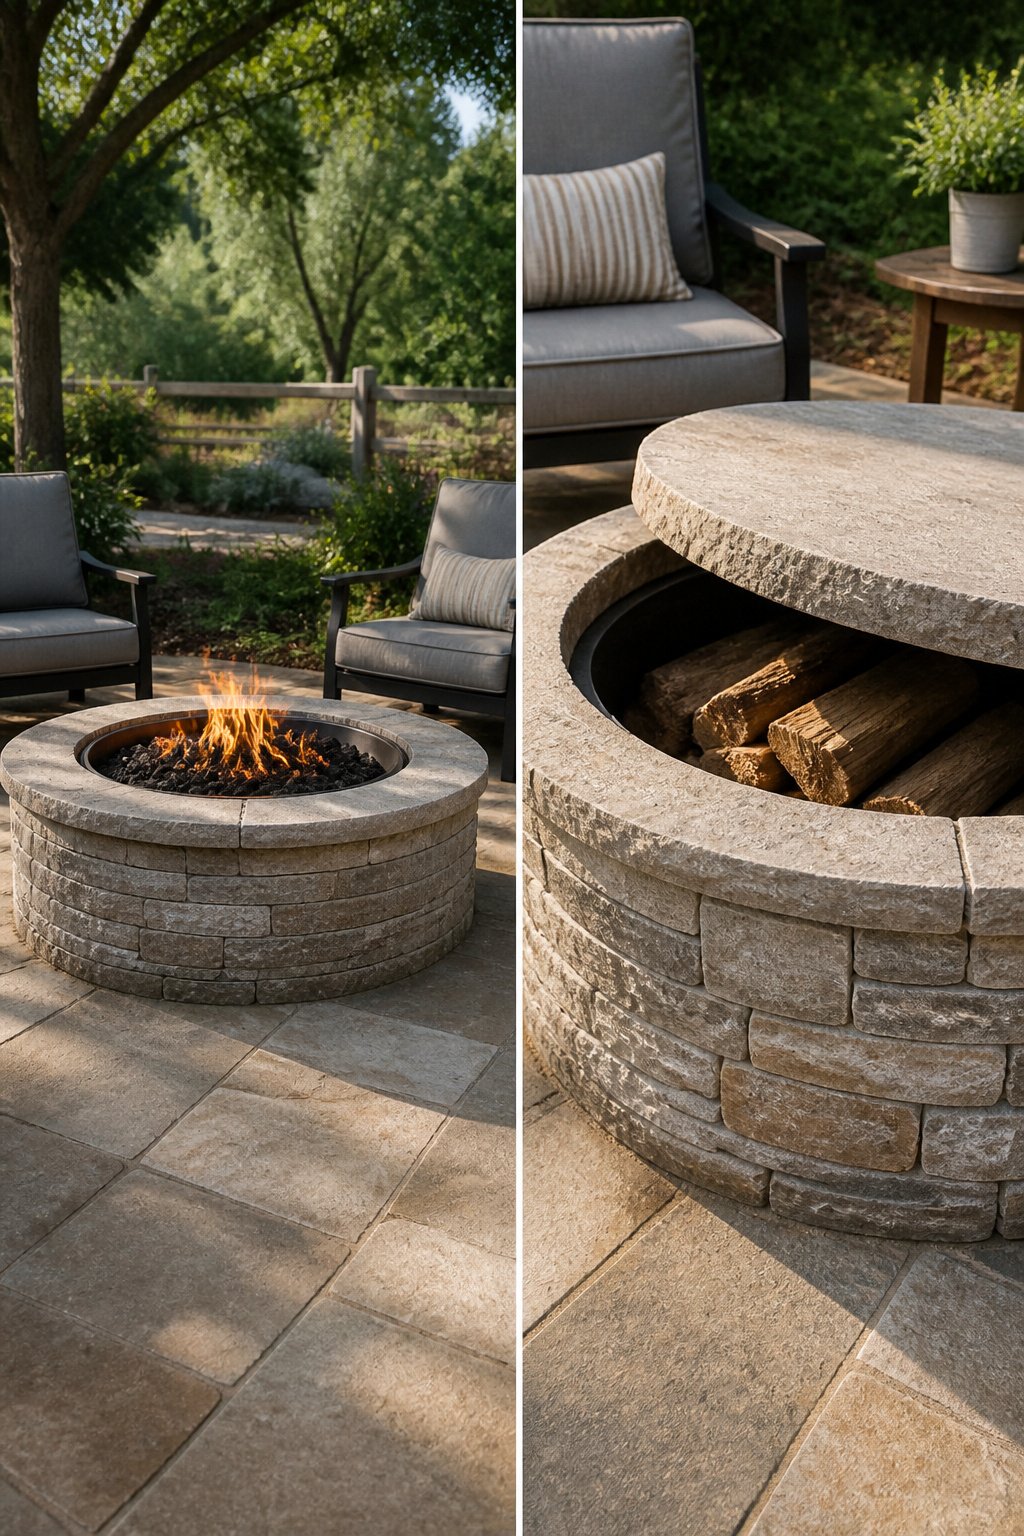
Stone veneer over cinder block gives a fire pit the weight and texture of solid masonry without the cost or the backache of hauling full stones. A friend built hers this way last spring: she stacked standard blocks in a circle, buttered the exterior with mortar, and pressed on thin-cut limestone veneer left over from a neighbor’s patio project. The face looks twenty years old already, and the hollow cores of the block became her hidden storage compartment for a half-cord of split oak. She capped the top with a single row of solid capstone, leaving one section loose so she can lift it and reach down inside.
Open wood niches work better if you want the firewood visible and within arm’s reach. A low wall of the same veneer wraps three sides of the pit, and the fourth side steps back to create a shallow alcove stacked with logs. This is the design I would choose for a small patio where every trip to the garage for more wood feels like an interruption. The veneer matches across both structures, so the niche reads as part of the architecture rather than a storage bin tacked on. Either approach needs a sloped roof or a metal lip above the opening to keep rain from pooling on your fuel.
Materials That Survive the Heat
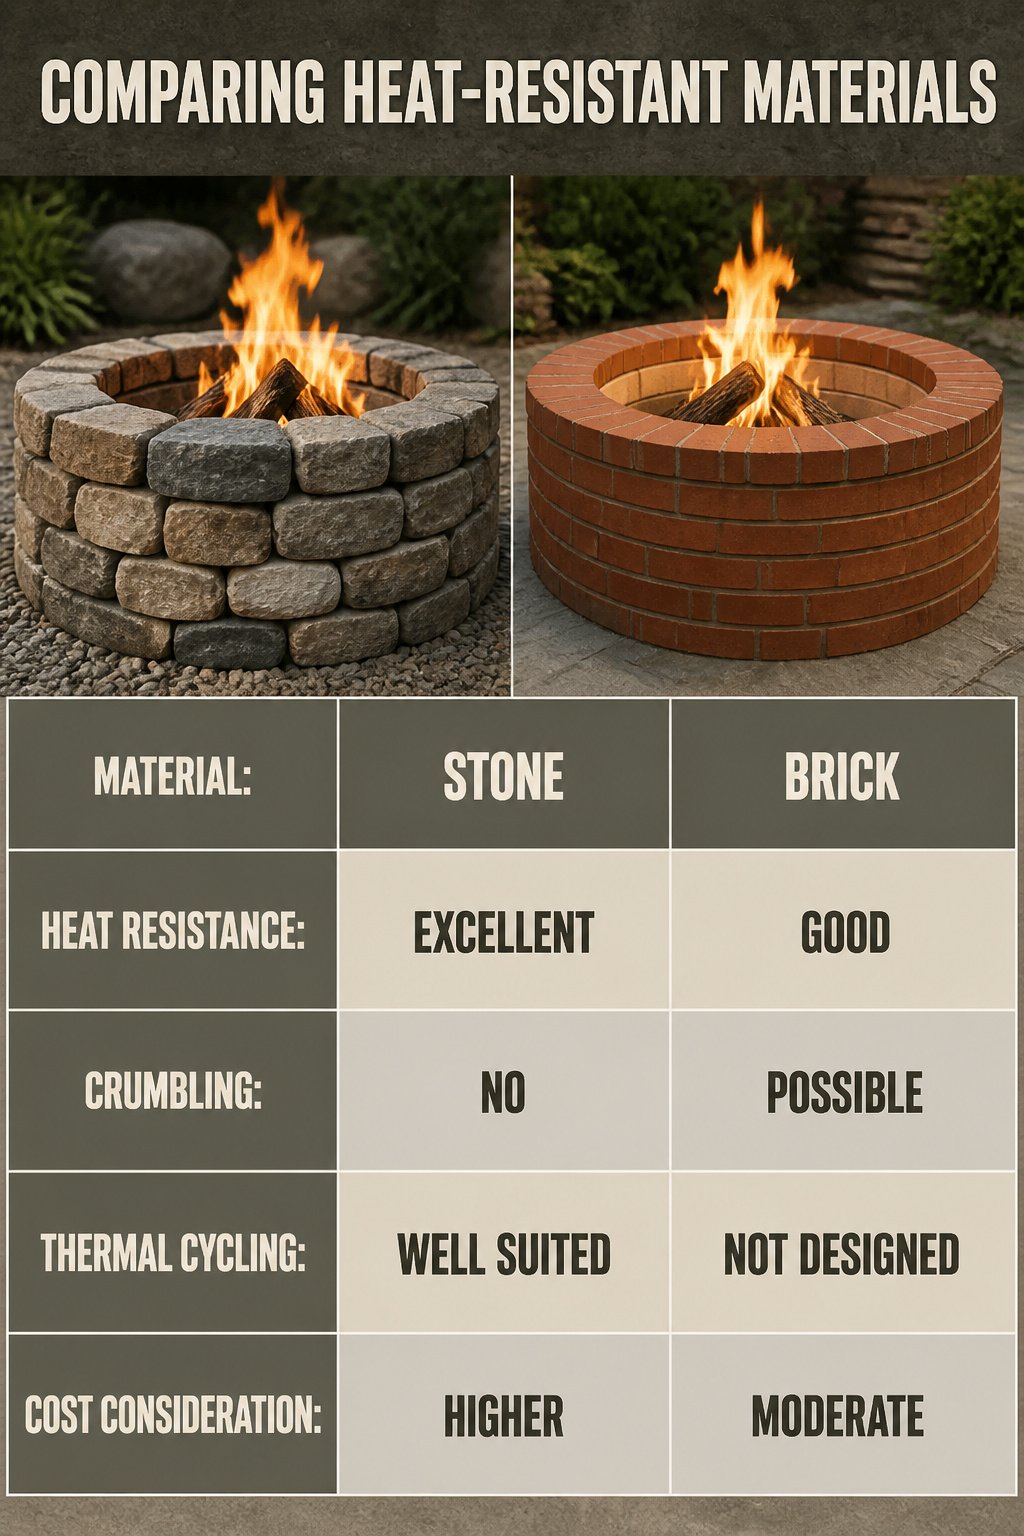
Stone handles heat better than almost anything else you can stack in a yard, which is why it keeps showing up in fire pit builds that are meant to last. Brick runs a close second, though the split between firebrick and regular face brick matters more than I expected when I first started reading plans. Firebricks are built for the thermal cycling; face bricks are not. One source puts a brick pit at 25 firebricks and 100 to 160 face bricks, with the firebricks forming the inner wall that actually sees the flame.
Concrete pavers and standard blocks are where I drew a hard line for myself. The same pages that list pavers as cheap and easy also warn that they crumble over time with heavy use, and that ordinary concrete block can crack or spall from direct flame. I had salvaged a stack of old cinder blocks for a project that never happened, and they are still sitting behind my shed for exactly this reason. The heat rating matters more than the price tag.
Metal rings solve part of the problem by taking the flame contact away from the masonry entirely. A purpose-built steel insert lets you use simpler materials for the surround while the liner does the thermal work. That combination, gravel base plus metal ring plus a fire-rated masonry wall, is what several guides point to as the safest beginner build. It skips poured concrete, skips the guesswork about whether your particular pavers can take it, and still leaves you with something that looks intentional in the yard.
Clearance and Safety Setup
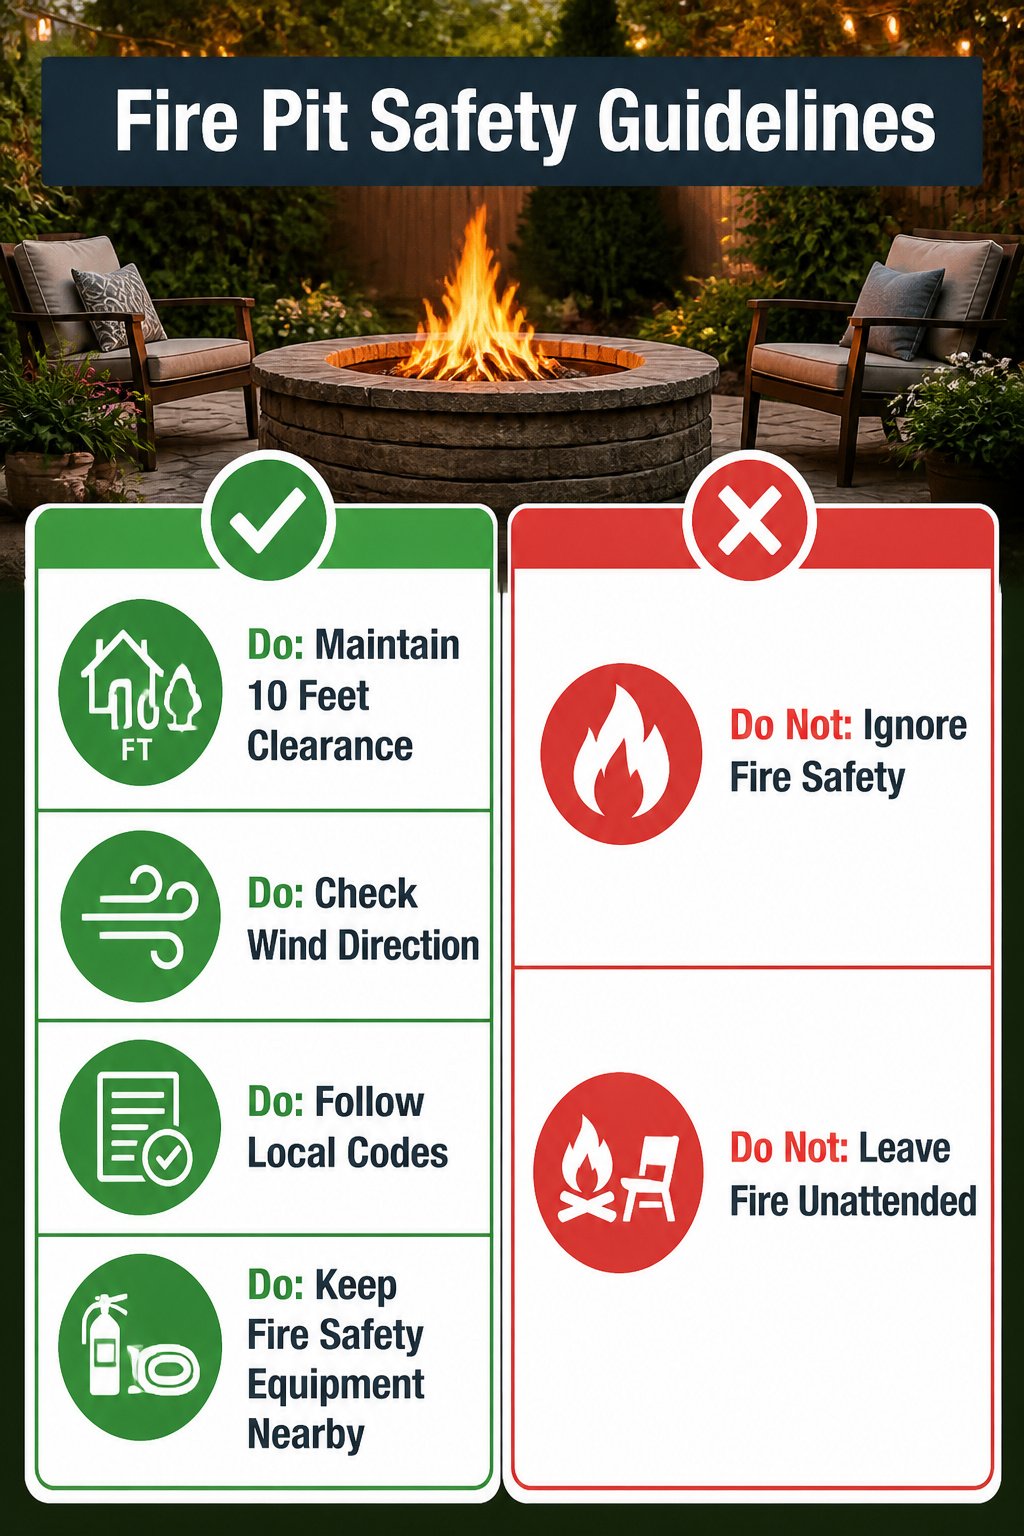
A fire pit belongs at least 10 feet from any structure, tree, or bush before you strike the first match. I learned to pace this out the hard way after watching embers climb toward a low oak branch one evening, and now I step off the distance every time I move a portable unit.
Wind direction matters as much as distance. I stand where the pit will sit and feel the breeze on my face; if it blows toward the house, the fence, or anything that can smolder, I wait or relocate. Most evenings this takes thirty seconds and saves the night.
Your local code may demand more than the 10-foot minimum, or it may restrict fuel type, operating hours, or require a permit. I call the county fire authority before any new install, because the rules in one town do not transfer to the next county over.
Every setup needs a working fire extinguisher, a bucket of sand, or a charged hose within reach. I keep a metal bucket of sand beside my gas pit too; it handles stray embers without the steam explosion water can give you. And I never leave a fire cooling down unwatched, even when the flames look gone. Ash holds heat longer than intuition suggests, and the neighbor’s cat does not read your intentions.
Seating Layouts That Actually Work
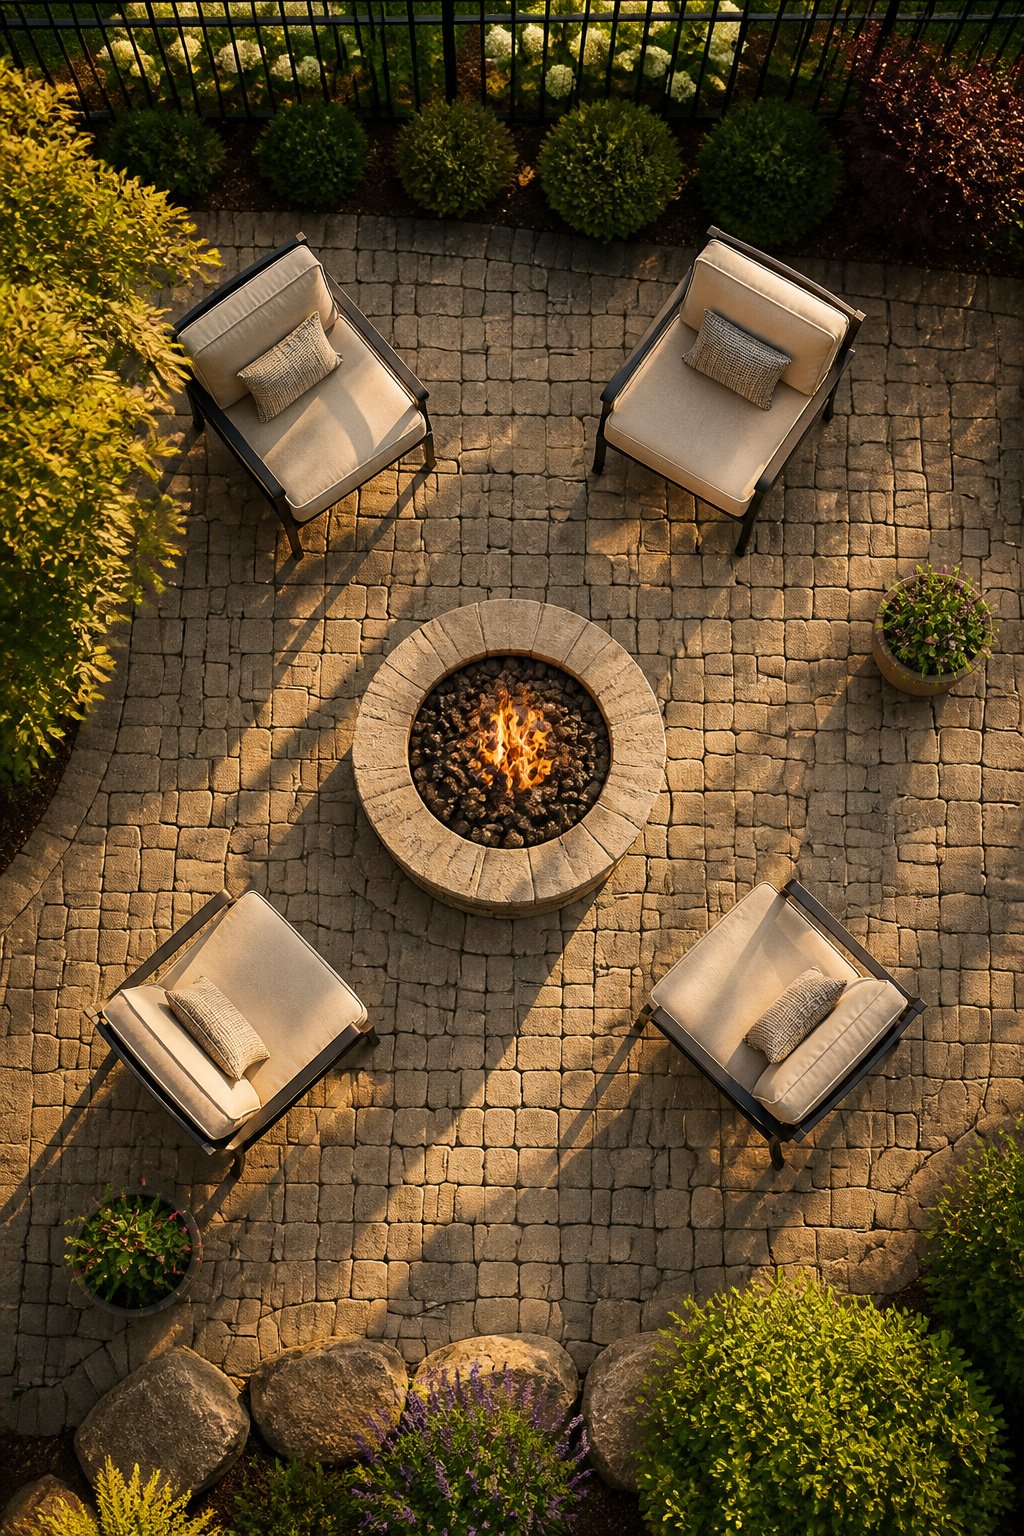
Round fire pits pull people in naturally. The curve lets four to six chairs sit shoulder-to-shoulder without anyone stuck at a corner, and the conversation flows easier because everyone faces the center at a slight angle. I measured knee clearance for a few layouts last season, and 24 inches from pit edge to chair front keeps most adults comfortable without stretching.
Square pits suit smaller patios where space runs tight. Four chairs line up clean against the four sides, and tucking small tables into two outside corners keeps drinks within reach without crowding the center. The geometry feels more structured, more modern, and it anchors a rectangular patio better than a circle ever could.
For larger gatherings, scale matters more than shape. A 15-person ring sounds generous on paper, but that many bodies need serious diameter or you are stacking legs and tripping over feet. Most backyards this size do better hosting two separate conversation clusters than one oversized pit trying to do it all.
DIY Skill Levels and Time
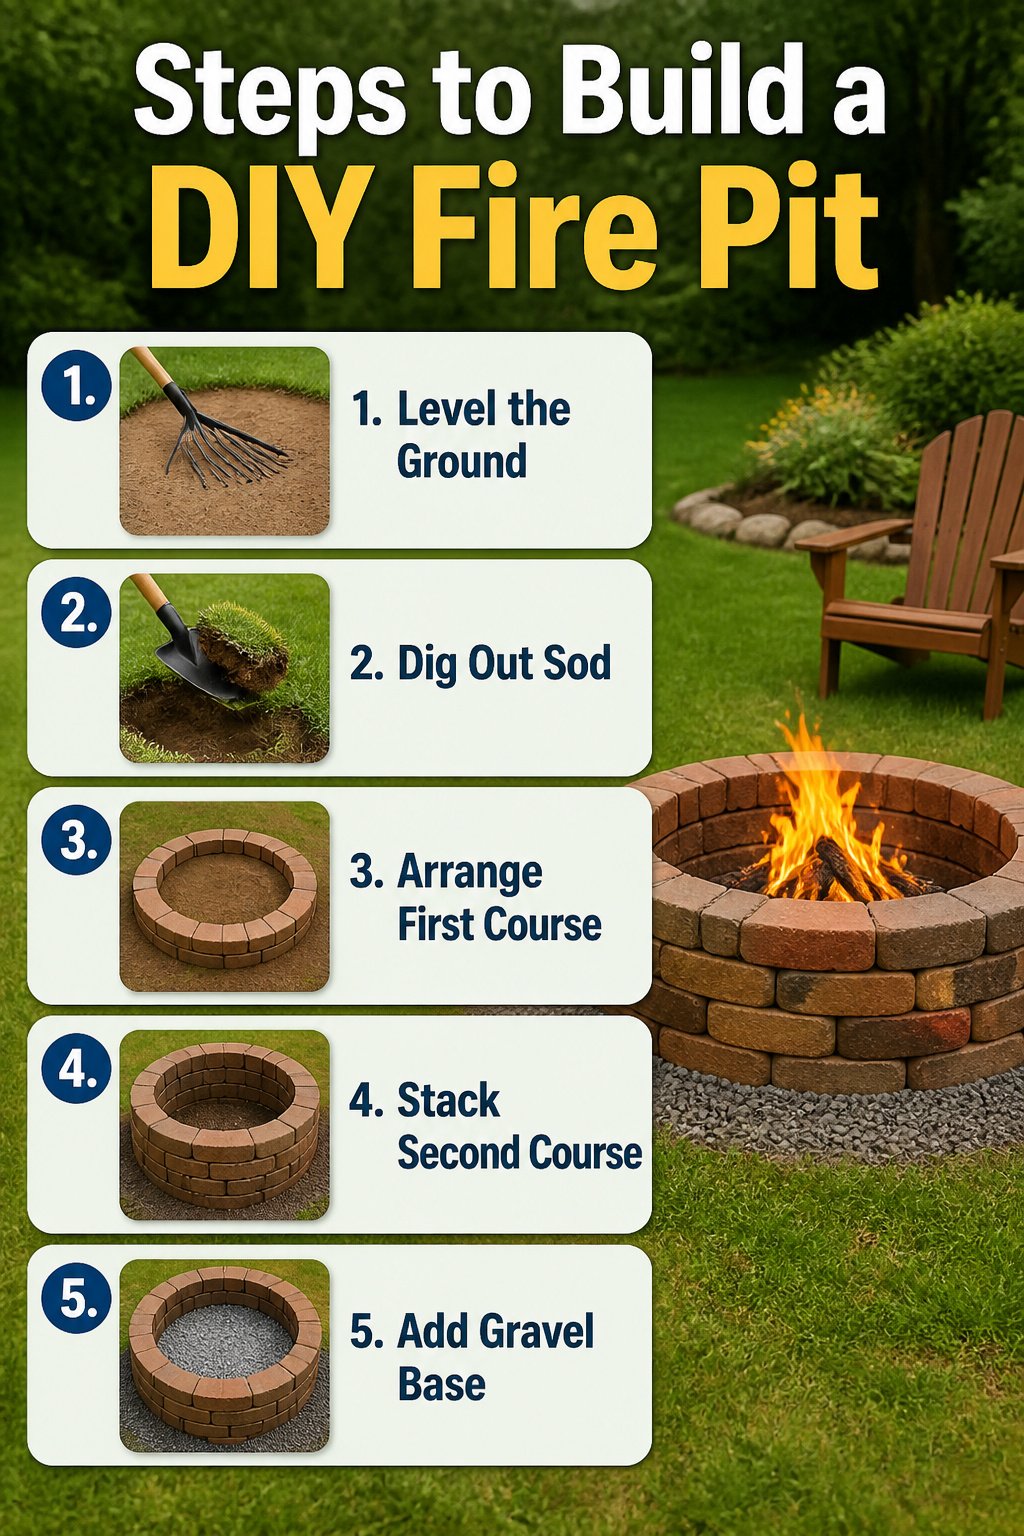
A simple ring of salvaged bricks on bare dirt takes about four hours if the ground is already level. Digging out sod, hauling in gravel, and stacking a second course pushes the same project to a full Saturday, and that is where a second pair of hands saves your back on the wheelbarrow runs.
The brick fire pit I have in mind uses 25 firebricks and somewhere between 100 and 160 face bricks, plus concrete to lock the courses together. At $100 to $500 in materials, it sits in the middle of the range, but the weight is the real issue. Firebricks run about eight pounds each, and face bricks are not much lighter. By the time you are setting the last course, you will want someone passing bricks while you work the trowel.
Gas fire pit tables flip the timeline. The site work and fuel planning happen up front, then you wait on delivery and a qualified setup. I have never run gas lines myself, and that is the line where I called a mason. The finished unit costs more at the start, but the hours you spend on it are front-loaded into planning rather than digging.
Wood-burning builds that stop at a dirt bowl and a rock ring can finish in an afternoon. Anything with mortar, a steel insert, or a connected fuel source drifts toward several weekends. Knowing which side of that line your project falls on before you break ground keeps you from staring at half a circle of bricks at dusk, wondering where Sunday went.
Designing Fire Into the Garden
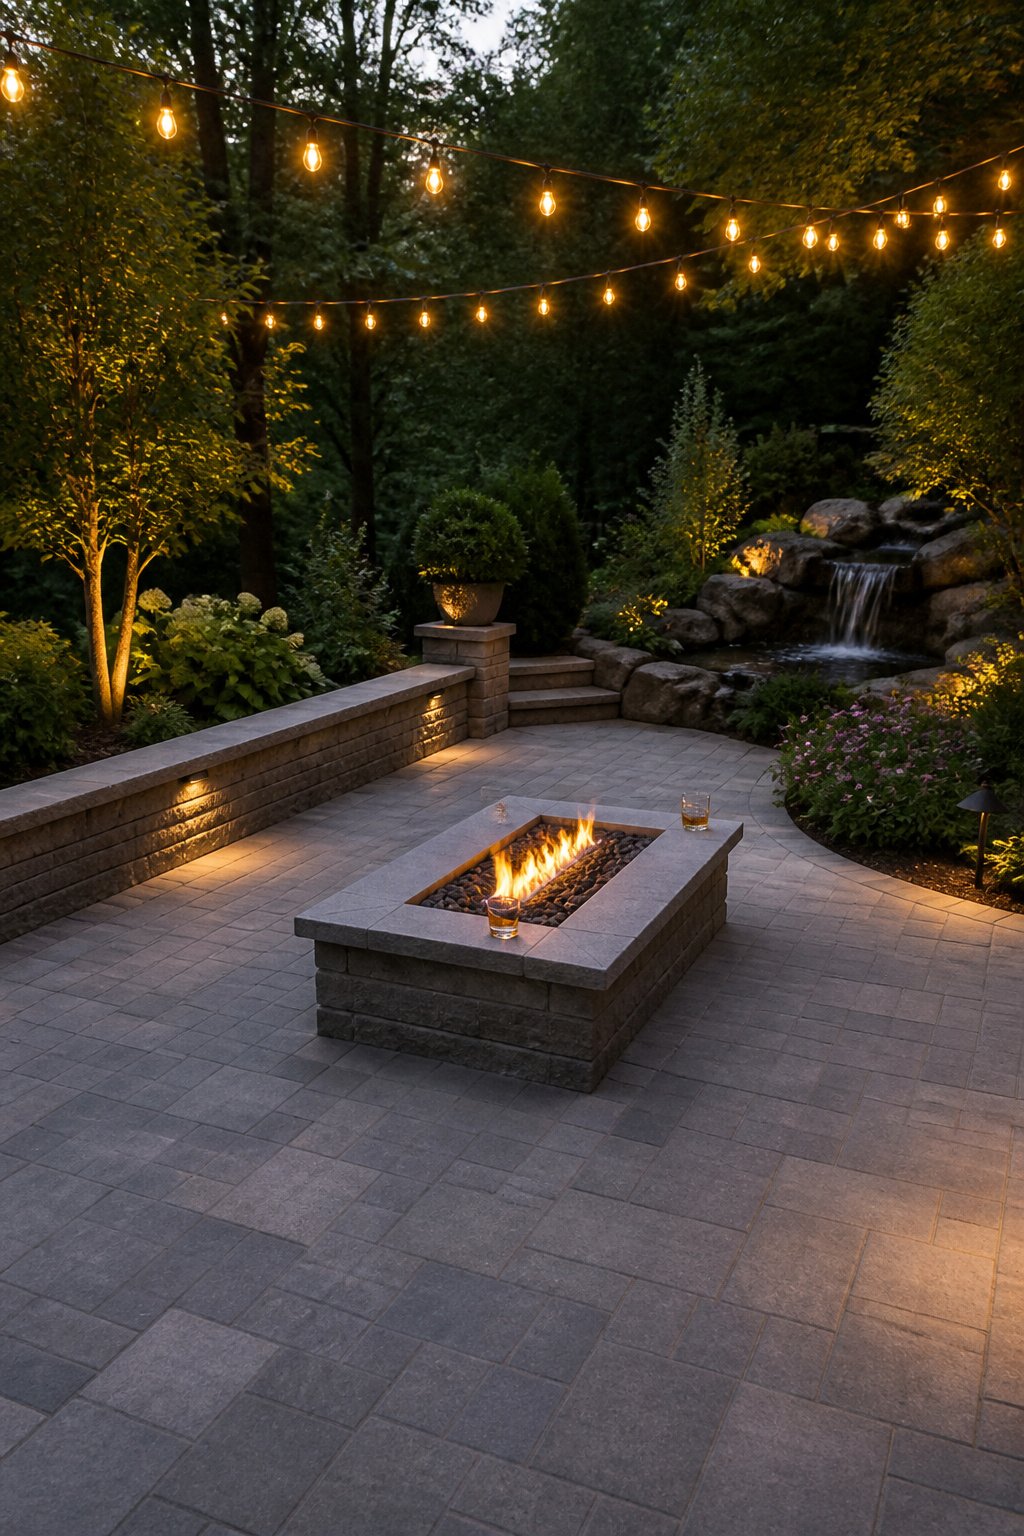
A fire pit built into a paver patio creates a natural focal point that extends outdoor living into cooler evenings. The placement matters more than the pit itself: position it where the house’s sightlines draw the eye, but far enough from doors that smoke doesn’t chase guests back inside. I learned this the hard way with my first setup, which sat pretty but sent every breeze straight through the kitchen window.
Circle fire pits soften hardscape edges and let seating flow around the flame without a host chair or a bad angle. Rectangular ones, like the sleek stone design with a broader lip, work better as the clear centerpiece of a modern space. That wider edge matters; people relax when they don’t feel perched at the lip of the heat.
For evening use, string lights hung 8–10 feet overhead, not directly above the flame, give you layers you can dim as the fire builds. Start with the overhead glow, let the pit take over as the center, and the space stays usable past midnight instead of flipping from bright to black. The fountain trick I borrowed from a courtyard setup, low and trickling, covers the highway hum two blocks over.
Frequently Asked Questions
What is the easiest DIY fire pit to build?
A level gravel or paver base with a purpose-built metal ring or insert is the simplest project for most beginners. It skips poured concrete and complicated forms, though you still need to check local rules, confirm materials are rated for direct flame, and keep clearances correct. The gravel base sits on landscaping fabric so it stays clean long-term, and the whole build usually takes half a day to a full day.
How much room do I need around a fire pit?
The minimum distance depends on your specific fire pit, fuel type, heat output, surface, nearby structures, vegetation, overhead conditions, and local requirements. Start with the manufacturer instructions and your local code, then add extra space so chairs can shift and guests can move without walking through the heat zone. A round pit seating four to six needs roughly the ring diameter plus another six to eight feet overall to keep chairs on stone rather than turf.
Can I use regular pavers or cinder blocks for a fire pit?
Ordinary landscaping pavers or concrete blocks may crack or spall under direct flame or repeated high heat. Confirm the masonry is rated for the intended use, and always build around a compatible fire ring, firebox, liner, or heat barrier as required. For the inner ring itself, only firebricks belong against the flame; standard reclaimed brick holds too much moisture and will crumble through heat cycles.
What seating layout works best around a fire pit?
A round pit works naturally with four to six individual chairs arranged in a circle. A square pit suits four-sided or modular arrangements, while a rectangular pit aligns best with a sofa, opposing sofas, or one sofa plus two lounge chairs. In every layout, keep one obvious opening for entry so the flow feels intentional rather than cramped.
Is a DIY fire pit or a gas fire pit table better?
Choose a DIY build if you want a hands-on project with real wood flame and lower upfront cost. Consider a gas fire pit table for push-button ignition, a usable tabletop ledge for drinks and plates, controlled fuel, and less ash cleanup. A fire pit table earns its footprint during daylight hours too, while a DIY stone or paver pit asks more effort but costs less and burns wood.