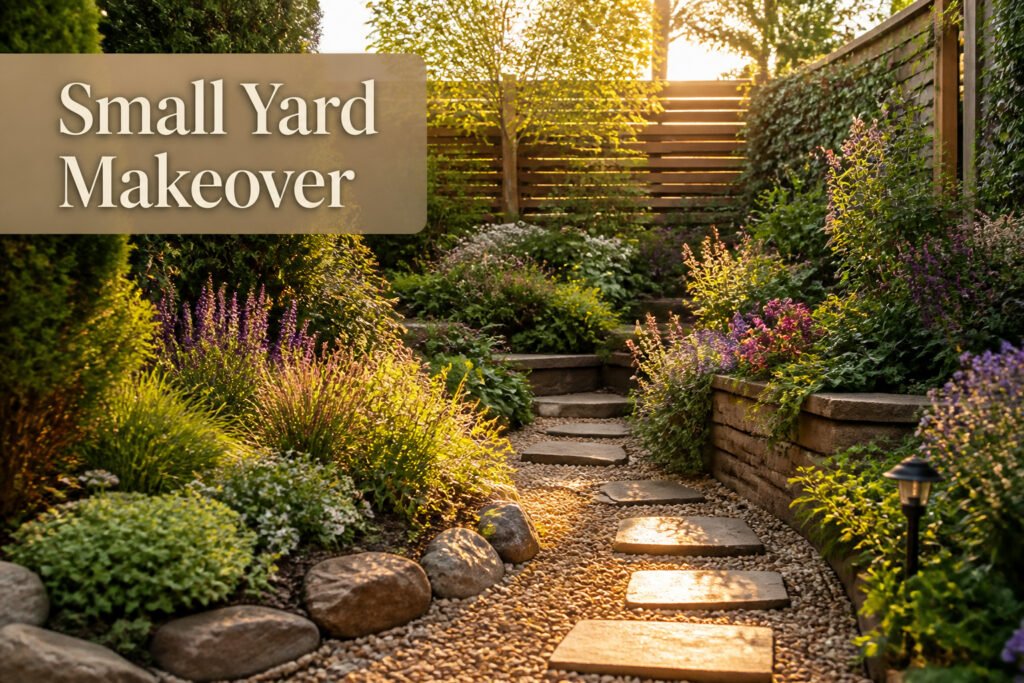
Most landscaping ideas for small yards fall on a line between what you can build in a weekend and what you will still be paying off next spring. The deciding factor is not budget alone but whether you are willing to prep the ground before the visible part goes in. Skip the gravel base under a paver patio or the drainage behind a retaining wall, and the project leans, cracks, or heaves inside two winters. A six-foot-deep patio bed can read as spacious if you stagger heights so the eye travels upward instead of hitting a flat wall of green, but that same bed collapses into clutter if every layer peaks at once.
1. Layered Planting for Depth
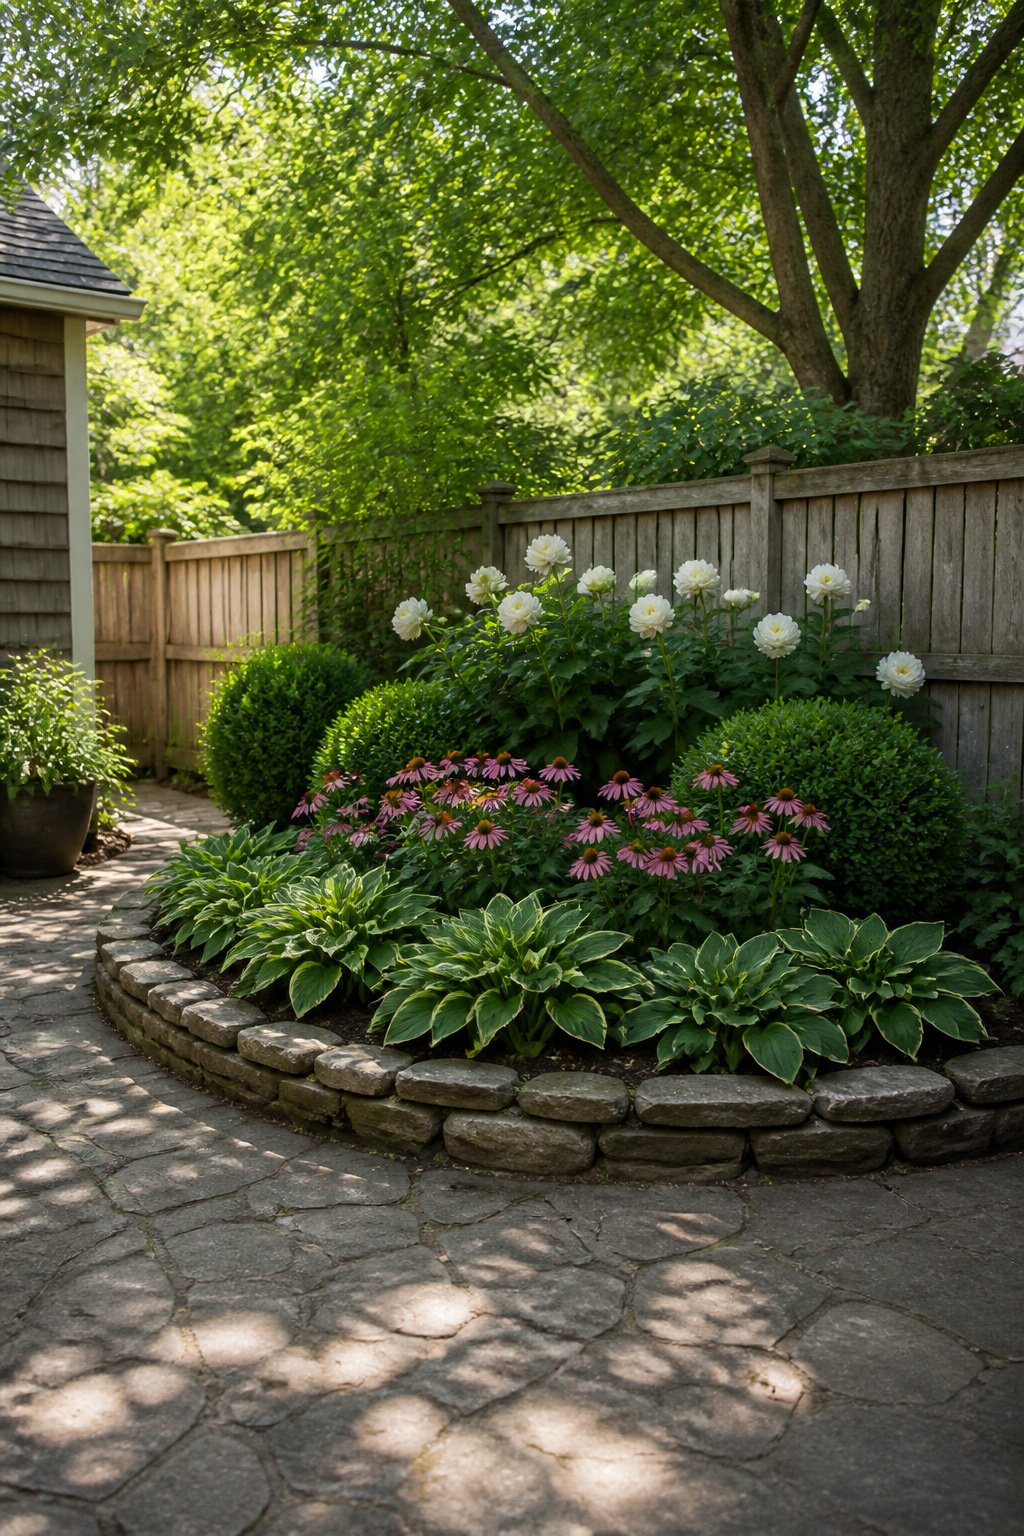
Layered planting is the single most reliable way to make a small yard feel larger than its footprint. Placing taller plants toward the back and smaller ones in the front staggers sight lines so the eye travels upward and inward instead of hitting a flat wall of green. In my own patio bed, which is only about six feet deep, this trick turned a cramped rectangle into something my neighbor actually asked about.
The technique works because it borrows stage design: the back row hides fences or house walls, the middle layer carries the visual weight, and the front edge stays low enough that you still see sky. For that middle band, peonies or boxwood shrubs bulk out the view without demanding more square footage. Hostas fill lower shade spots. Mix in something airier, like coneflowers or Russian sage, and the contrast keeps the layers from reading as three solid blocks.
Texture variation matters as much as height. Sparser plants let light through and create pockets where the eye rests, which reads as depth in a space that has none. In a yard measured in hundreds of square feet rather than thousands, that illusion is the closest thing to extra ground you will get.
2. DIY Composting Bins
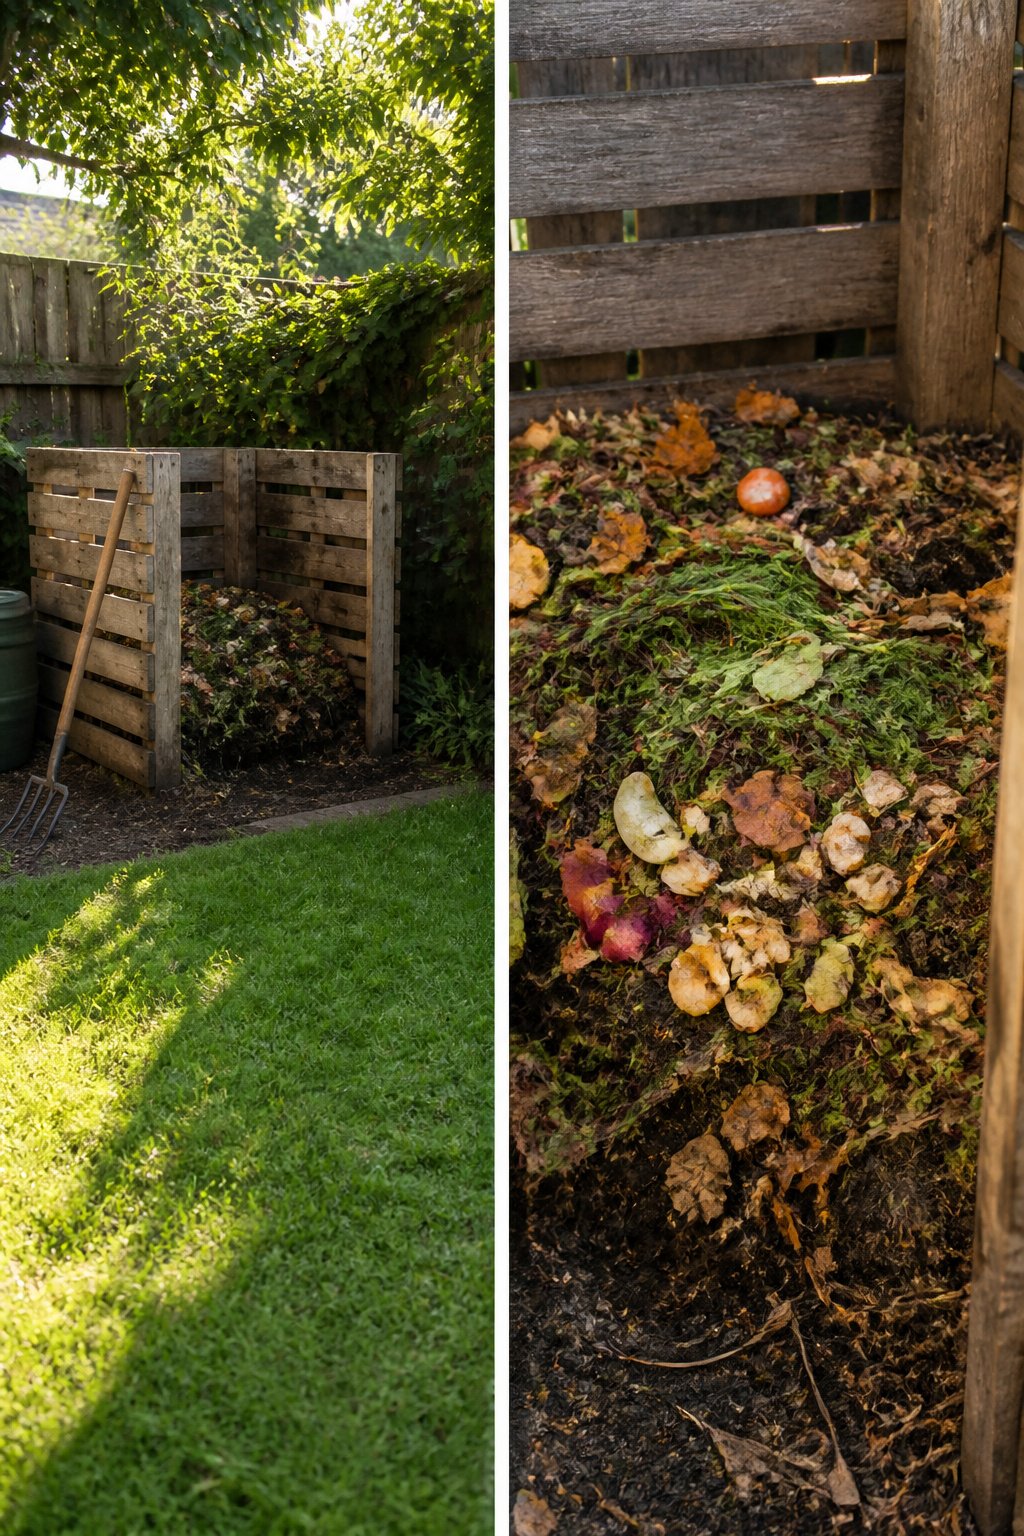
A homemade composting bin turns the scraps you already have into the thing your soil needs most. Kitchen peels, grass clippings, and the leaves you raked last fall break down inside a simple box or tumbler you can build from pallets, wire mesh, or a plastic drum. The finished compost goes back into beds and borders as a slow-release fertilizer that also loosens heavy soil and helps sandy soil hold water.
Construction does not have to be elaborate. Three sides of old shipping pallets wired together, with a fourth left loose for access, will hold a pile and let air reach the center. A bin three feet on each side is large enough to heat up but small enough to turn with a garden fork. The key is balancing greens like vegetable scraps with browns like dry leaves; too much of either and the pile either rots anaerobically or sits cold for months.
Last season I watched a neighbor’s tomato plants outpace mine by mid-July. Same variety, same light. The difference was a shovel of finished compost worked into her raised bed in early spring. Her soil held moisture through a dry stretch that left my plants wilted by afternoon. That is what the bin gives you: not just nutrients, but soil that behaves better.
3. Retaining Walls
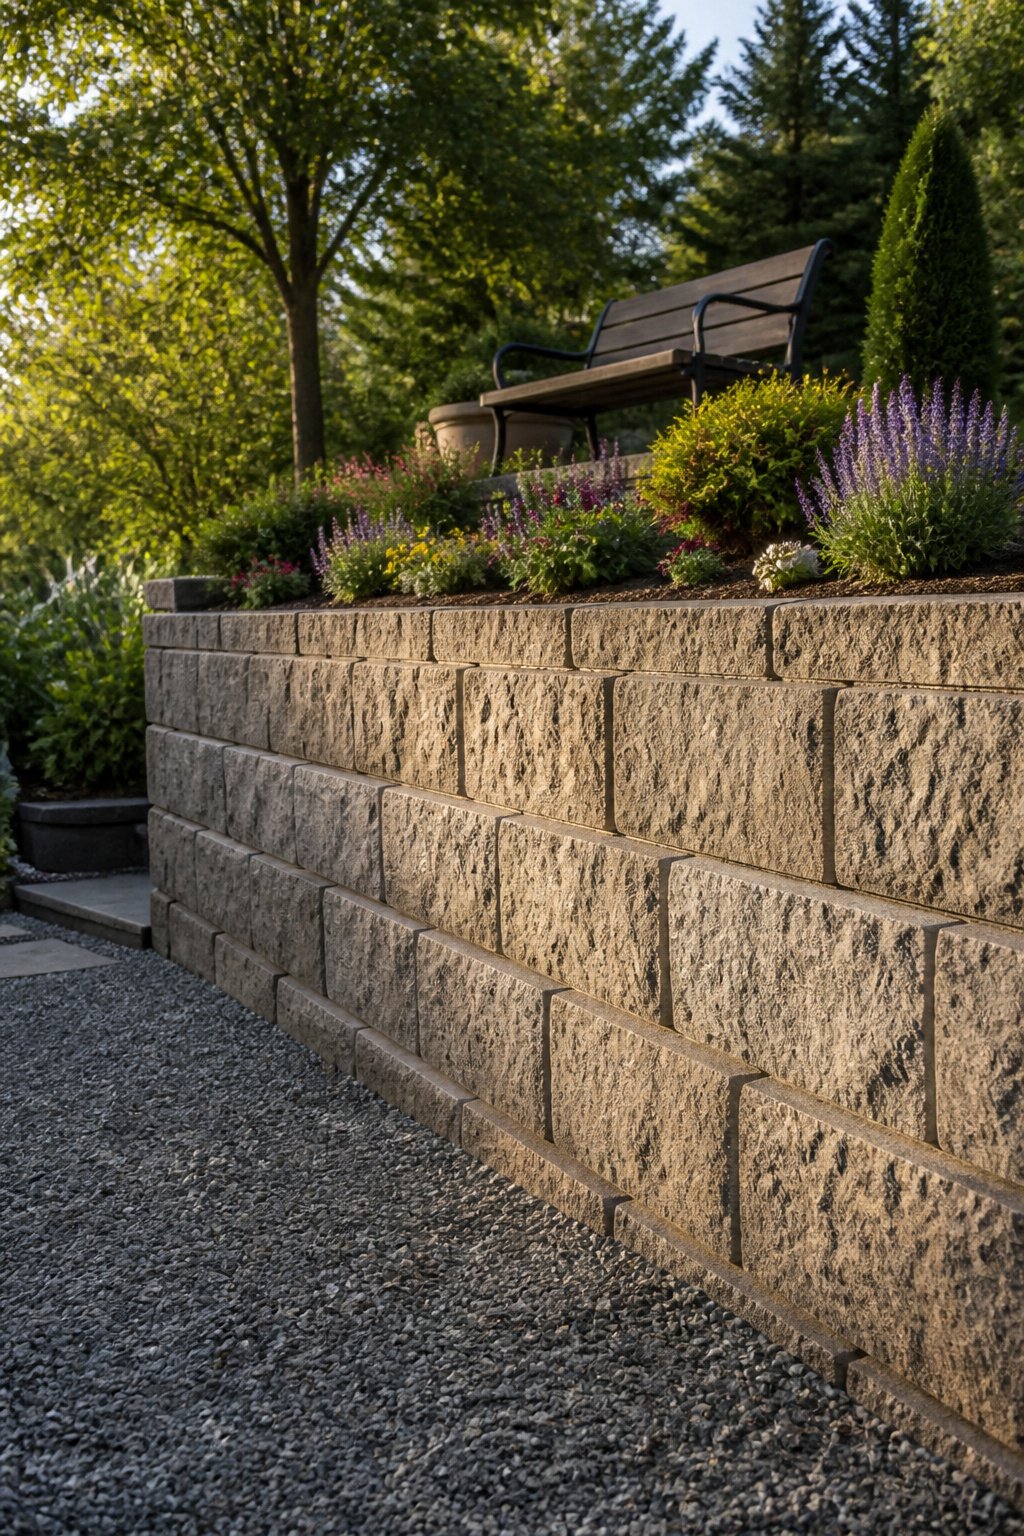
A sloped yard eats usable square footage the way a steep driveway eats a car’s gas mileage. Retaining walls fix that by turning grade change into level ground you can actually stand on, set a chair on, or plant in.
The materials matter more than the face of the wall lets on. Interlocking blocks are what I’d reach for first on a small residential job, because the lip-and-groove system does the structural work without mortar. What the wall sits on matters too: compacted gravel base, drainage behind the wall, and backfill with drain piping or filter fabric to keep water pressure from pushing the face outward come spring thaw. Skip that step and the wall leans, cracks, or both within a couple seasons.
For a yard under a thousand square feet, one terraced wall two to three feet high often gives you more usable flat space than two shorter walls, since each level needs its own setback. The tradeoff is the single wall handles more load and needs better drainage. Either way, the flat ground you gain is what you’re paying for, not the wall itself.
4. Walkways
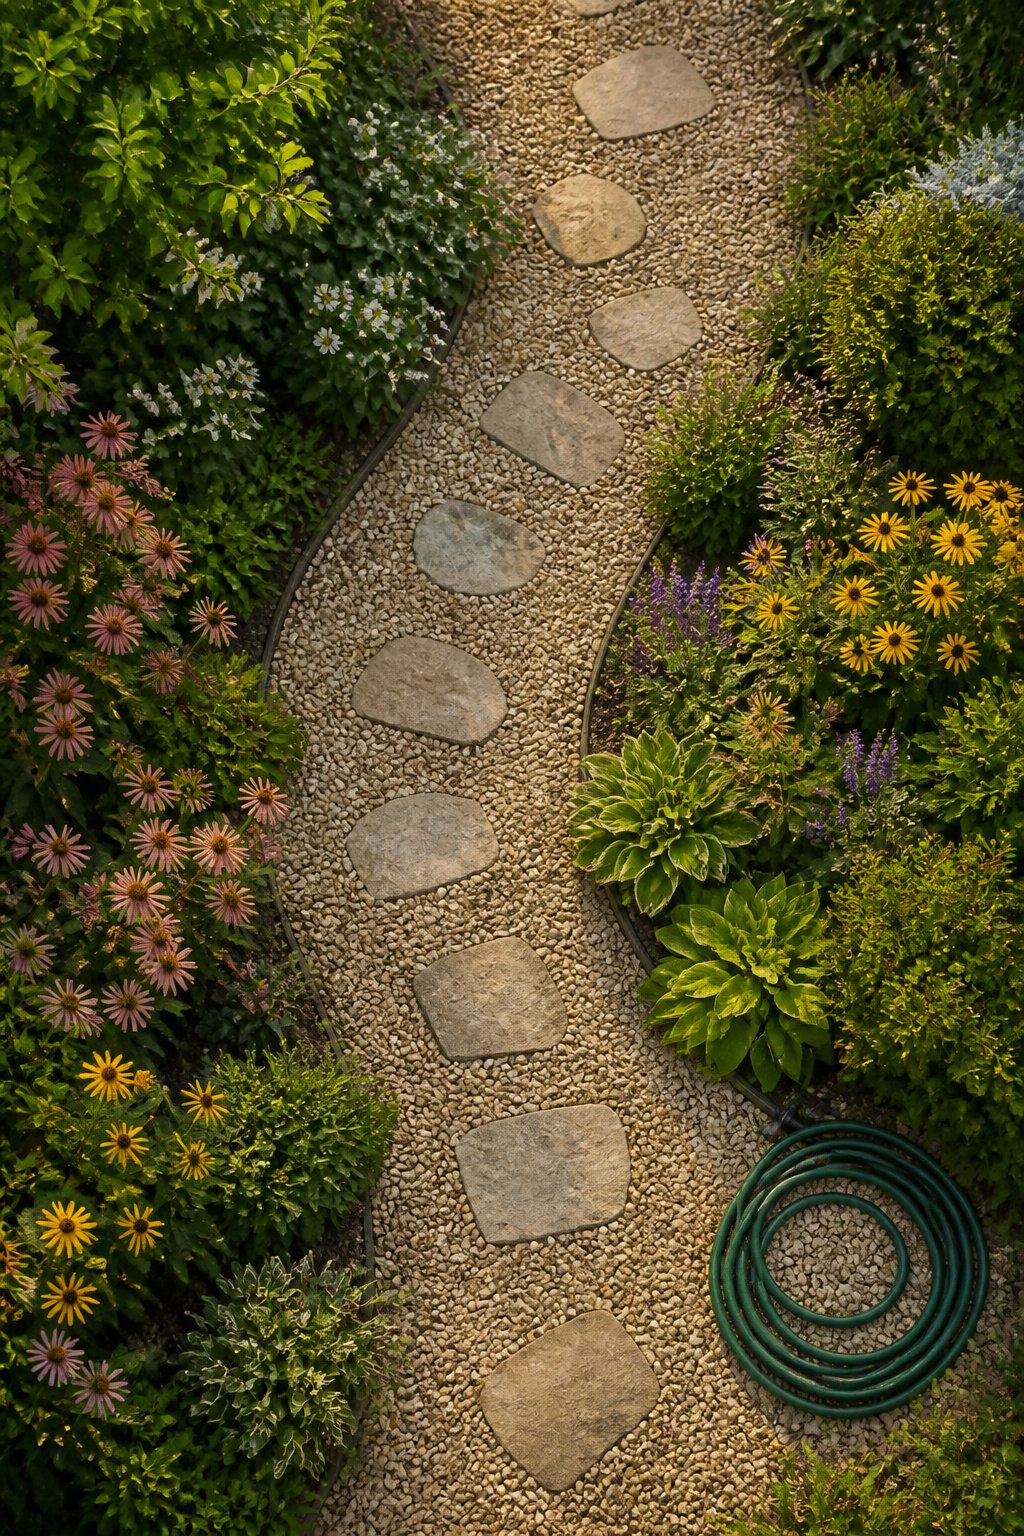
A walkway does more than keep your shoes dry. It tells people where to walk, which means it also tells them where not to, and that division is half of what makes a small garden feel intentional. Gravel runs about as cheap as hardscaping gets, and for a balcony or side-yard path you can lay it yourself in an afternoon. Mulch paths with wood chips or cypress bark cost even less, though they soften and need refreshing every season or two. Stepping stones through either one keep the surface stable underfoot and add a rhythm that plain gravel lacks.
Repurposed brick or stone works the same way if you can source it, and the irregularity reads as character rather than mistake in an informal garden. What matters most is placement: a path that cuts straight from the door to the shed will get used like a highway, while one that curves slightly past a planted bed slows the eye down and makes the space feel larger. I have learned to lay out a proposed path with garden hose first and walk it daily for a week before committing. Traffic patterns you think you know and the ones your feet actually follow are rarely the same thing.
5. Window Boxes
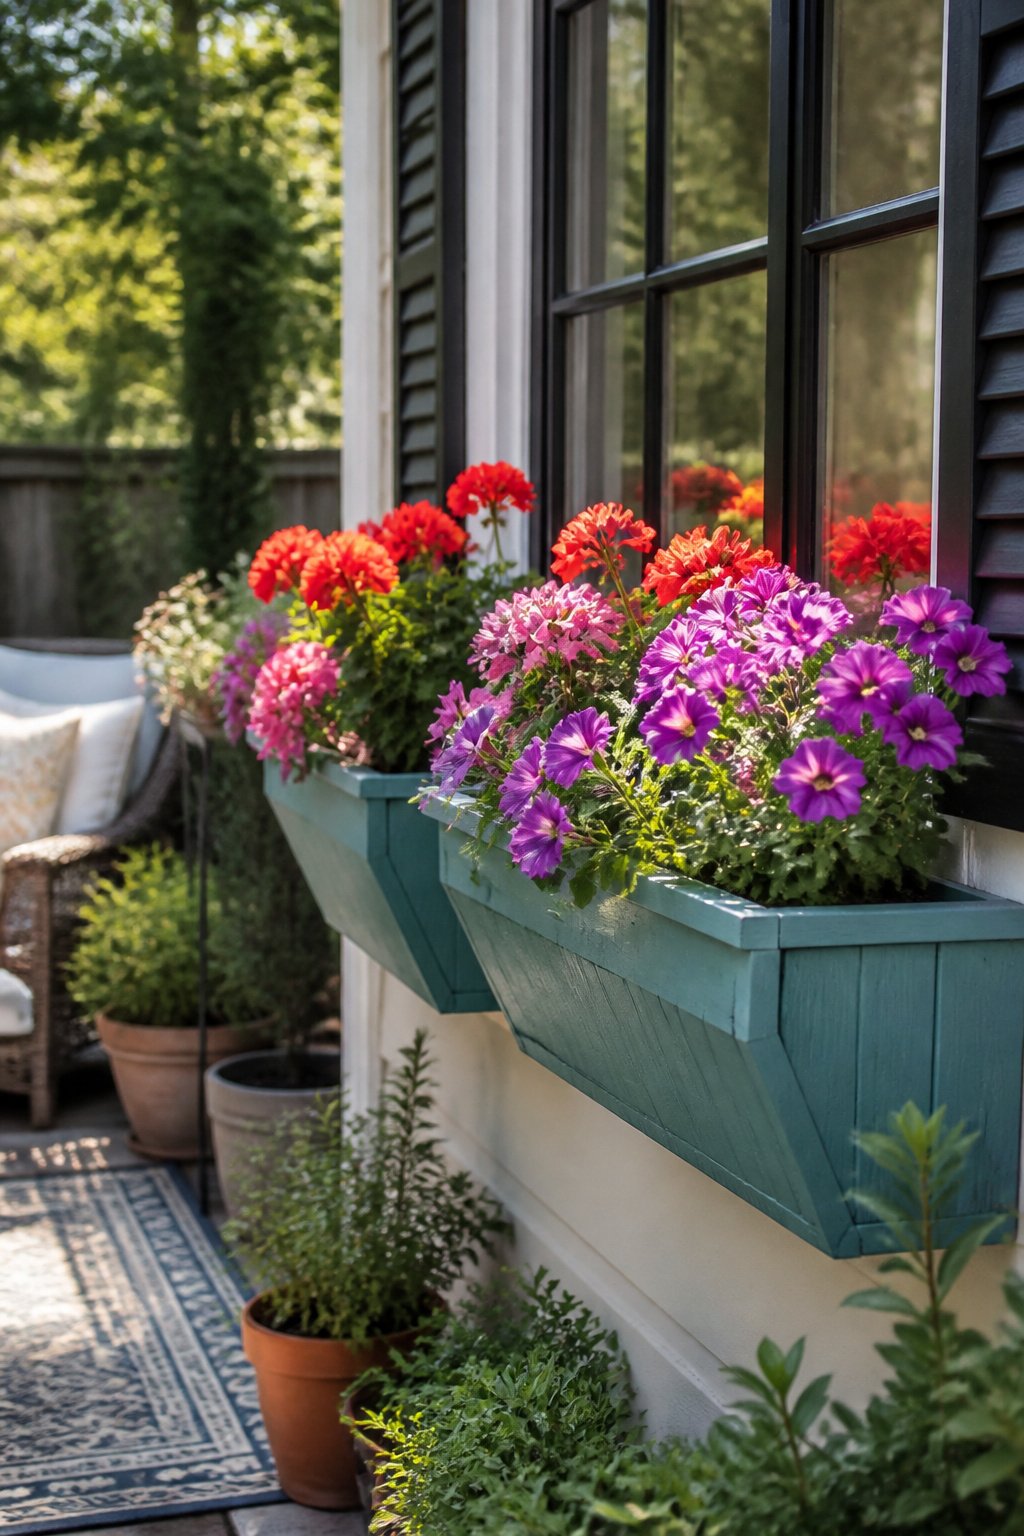
Window boxes add color without eating any ground, which matters when the whole yard is a patio or a narrow strip of foundation. Plants in them are natural air purifiers, and a box placed beneath a window gives the eye depth and scale from the curb. Coordinating flower colors with the house paint pulls the look together, though artificial flowers work for a display that lasts year-round.
Building one yourself starts with a simple rectangle of cedar or pine, sloped slightly so water runs out rather than pooling against the siding. A frame two feet to four feet wide fits most standard windows without looking undersized or crowding the trim. Line the inside with plastic sheeting, punch a few drainage holes, and mount it with sturdy brackets rated for the filled weight.
Before buying plants, watch the light on that wall for a full day. South-facing boxes bake in summer heat and need full-sun survivors like Russian sage; north-facing ones stay shaded and call for plants happy in lower light, similar to what works along a north-side foundation bed. Matching the plant to the actual hours of sun matters more than matching it to the color scheme.
6. Backyard Privacy with Greenery
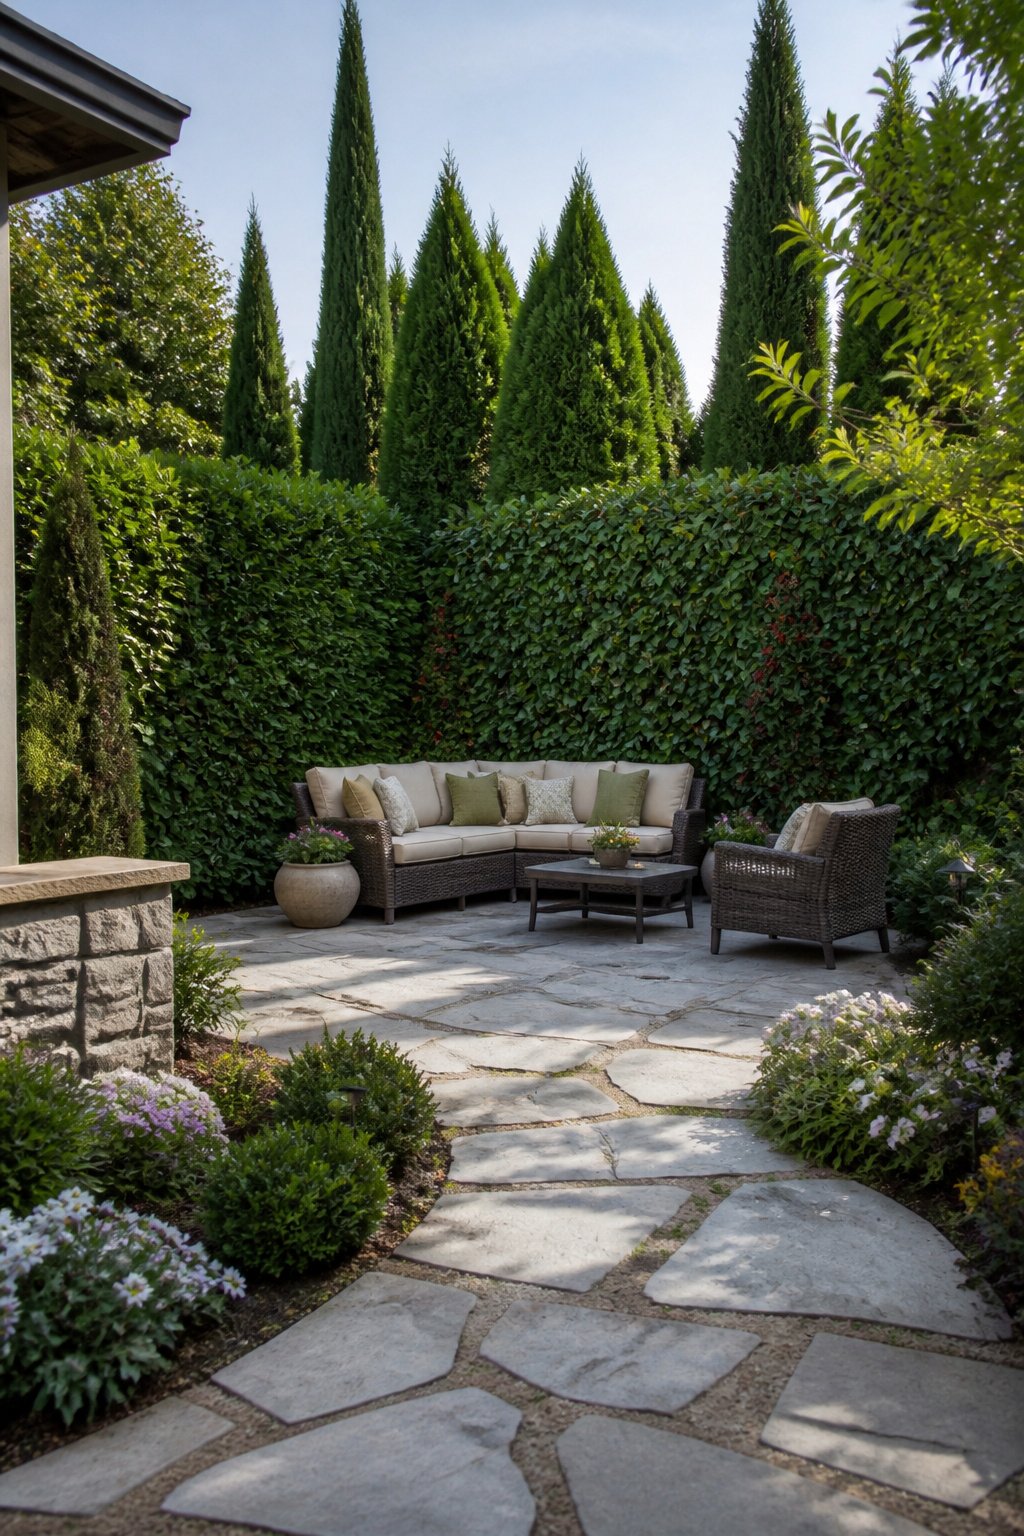
A solid privacy hedge starts with the backbone plants and fills in around them. Italian cypress and Japanese yew both grow tall enough to block second-story sightlines, while arborvitae stays dense from ground to tip without shearing. Holly adds glossy foliage and red berries through winter if you want something that reads as garden, not just barrier.
Space them at mature width, not nursery size. Arborvitae tops out around 3–4 feet across, so planting at 2-foot intervals means years of thinning and eventually pulling every other plant. Start wider and let them close the gap; the wait is shorter than the regret.
Trees and major shrubs should go in first, even when the budget only stretches to a partial planting. They need the time more than the perennials do, and deciduous trees still give winter structure once the leaves drop. Bamboo grows fast enough to feel tropical in season two, though you will want to check whether your variety runs or clumps before you commit to digging.
A fence blocks the view and ends the conversation. Layered plantings, tall to short, give the eye somewhere to travel and the yard a sense of depth that lumber never manages.
7. Water Features
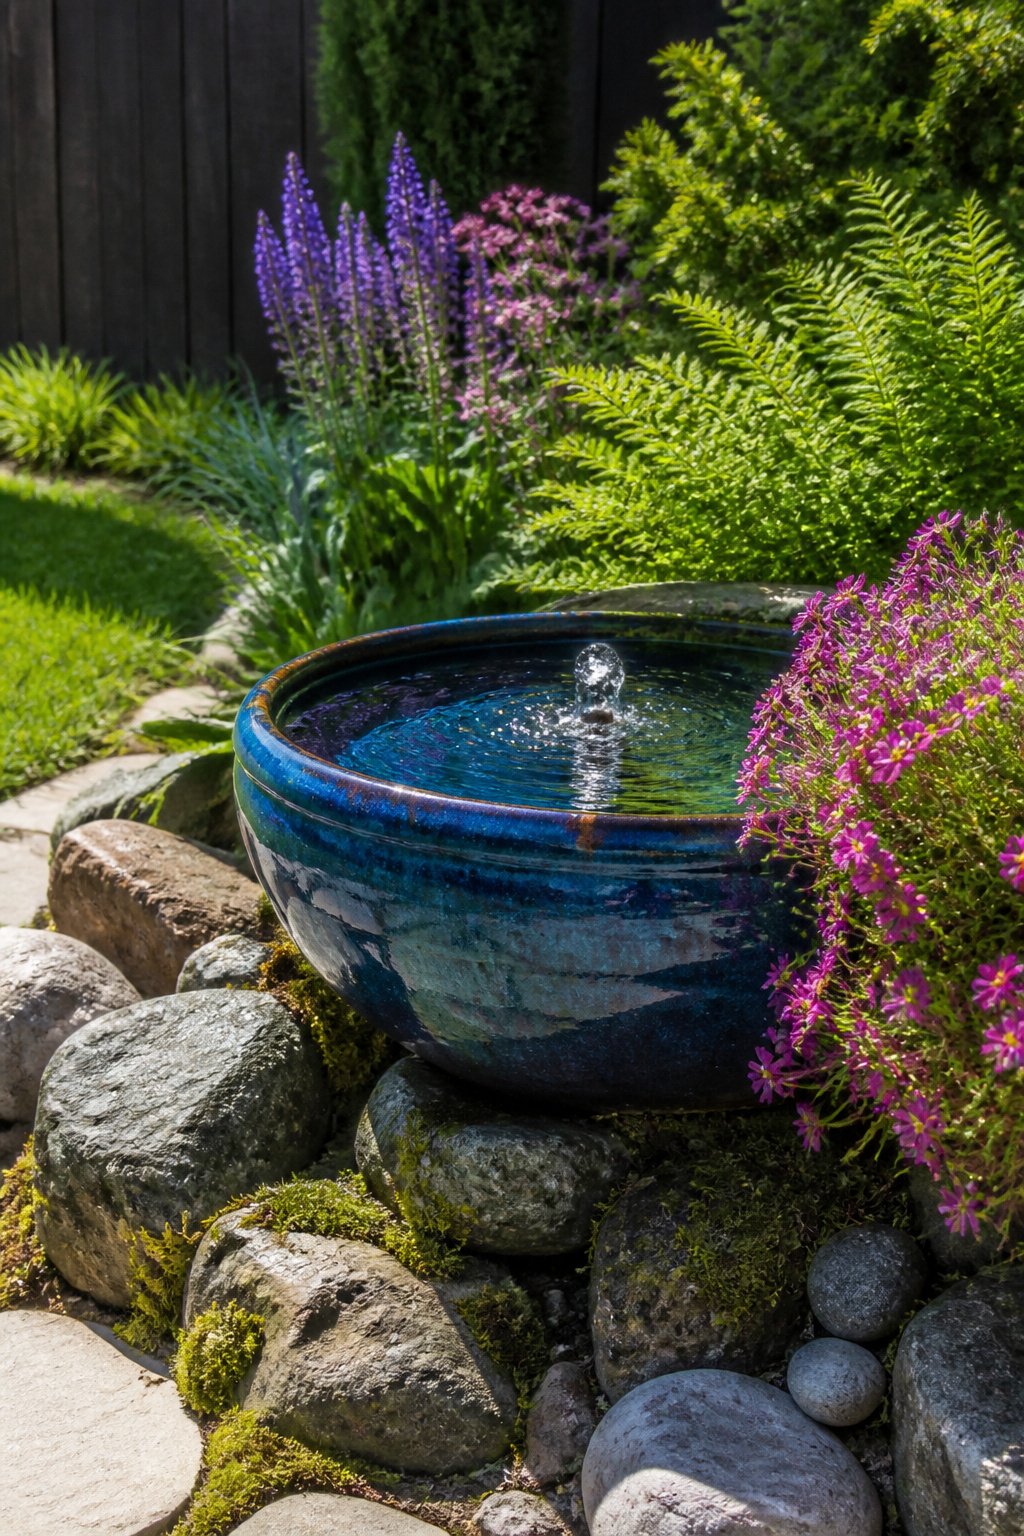
Self-contained, disappearing, and spouting fountains each suit a different corner of a small yard, and the distinction matters before you buy. A self-contained unit plugs in and loops its own water; a disappearing style buries the basin so only rock and water show, which reads as more ground than machine. I have watched friends lose a Saturday trying to level a disappearing fountain on sloped concrete that would have held a simple pot fountain without complaint.
A heavy-duty pump is the non-negotiable piece whether you run a fountain or scale up to a waterfall with a stream. Gravel, stones, and that pump are the whole material list for a backyard waterfall, and the project can stay modest or grow elaborate from the same starting point. Waterfalls improve air quality as they run, and the sound covers traffic noise in a way wind chimes only compete with.
Ponds demand more honesty about maintenance than most displays give them. Leaves drop, algae blooms, and the pump needs clearing before it burns out. Fountains and birdbaths pull in birds without the commitment of a full pond; a ceramic bowl repurposed with a small pump becomes a birdbath that moves. The choice is between the living sound of water and the living work of keeping it clear.
8. Landscape Lighting
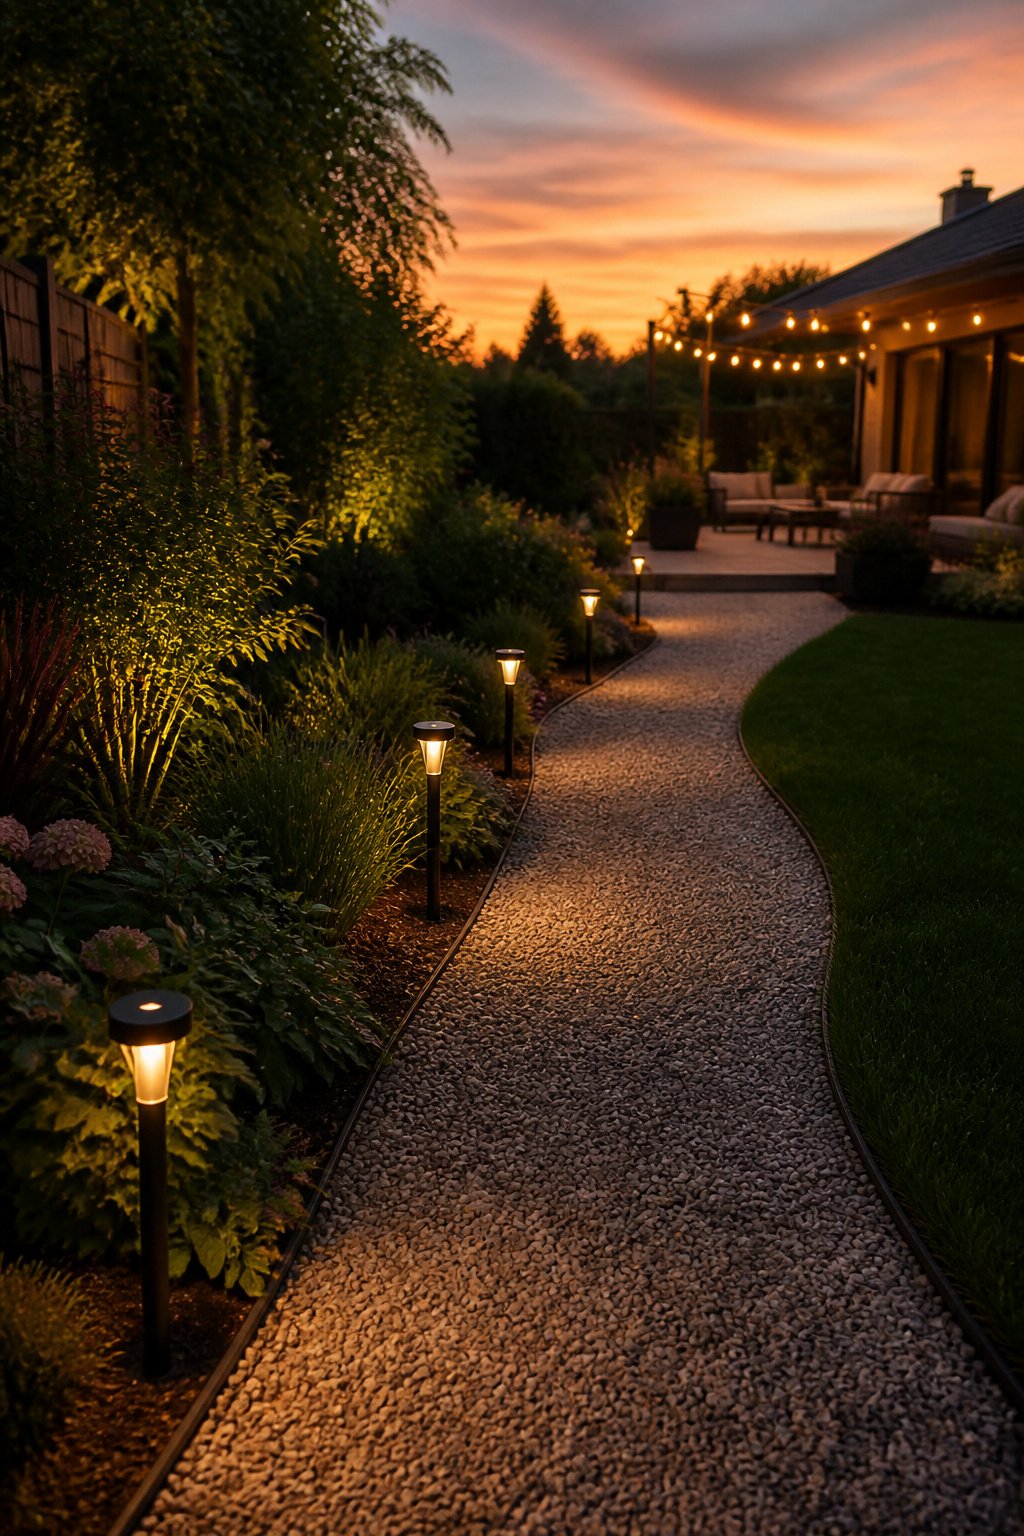
Solar-powered path lights clip together in roughly the time it takes to walk the route you are lighting. No trenching, no transformer, no outlet math. The tradeoff shows up around year two or three, when batteries weaken and the glow turns faint. Wired low-voltage kits cost more upfront and need a Saturday of digging, but the fixtures stay bright for years and you can add a timer or dimmer later.
String lights over a patio or along a fence rail cost almost nothing compared to either system, and they shift the usable hours of a small yard from sunset to midnight. Motion-sensor stair riser lights on front steps matter more than they look like they should; a guest who trips in the dark remembers the hazard, not the hydrangea. Solar spotlights aimed up into a tree or shrub from the front face do the same highlighting work as wired equivalents, though they dim faster on short winter days.
For renters or anyone who moves their layout each season, solar stakes and lantern strings pack back into a box. Wired fixtures reward a plan you intend to keep. Either way, the goal is the same: enough light to move safely, not so much that you have lit your yard like a parking lot.
9. Rock Gardens
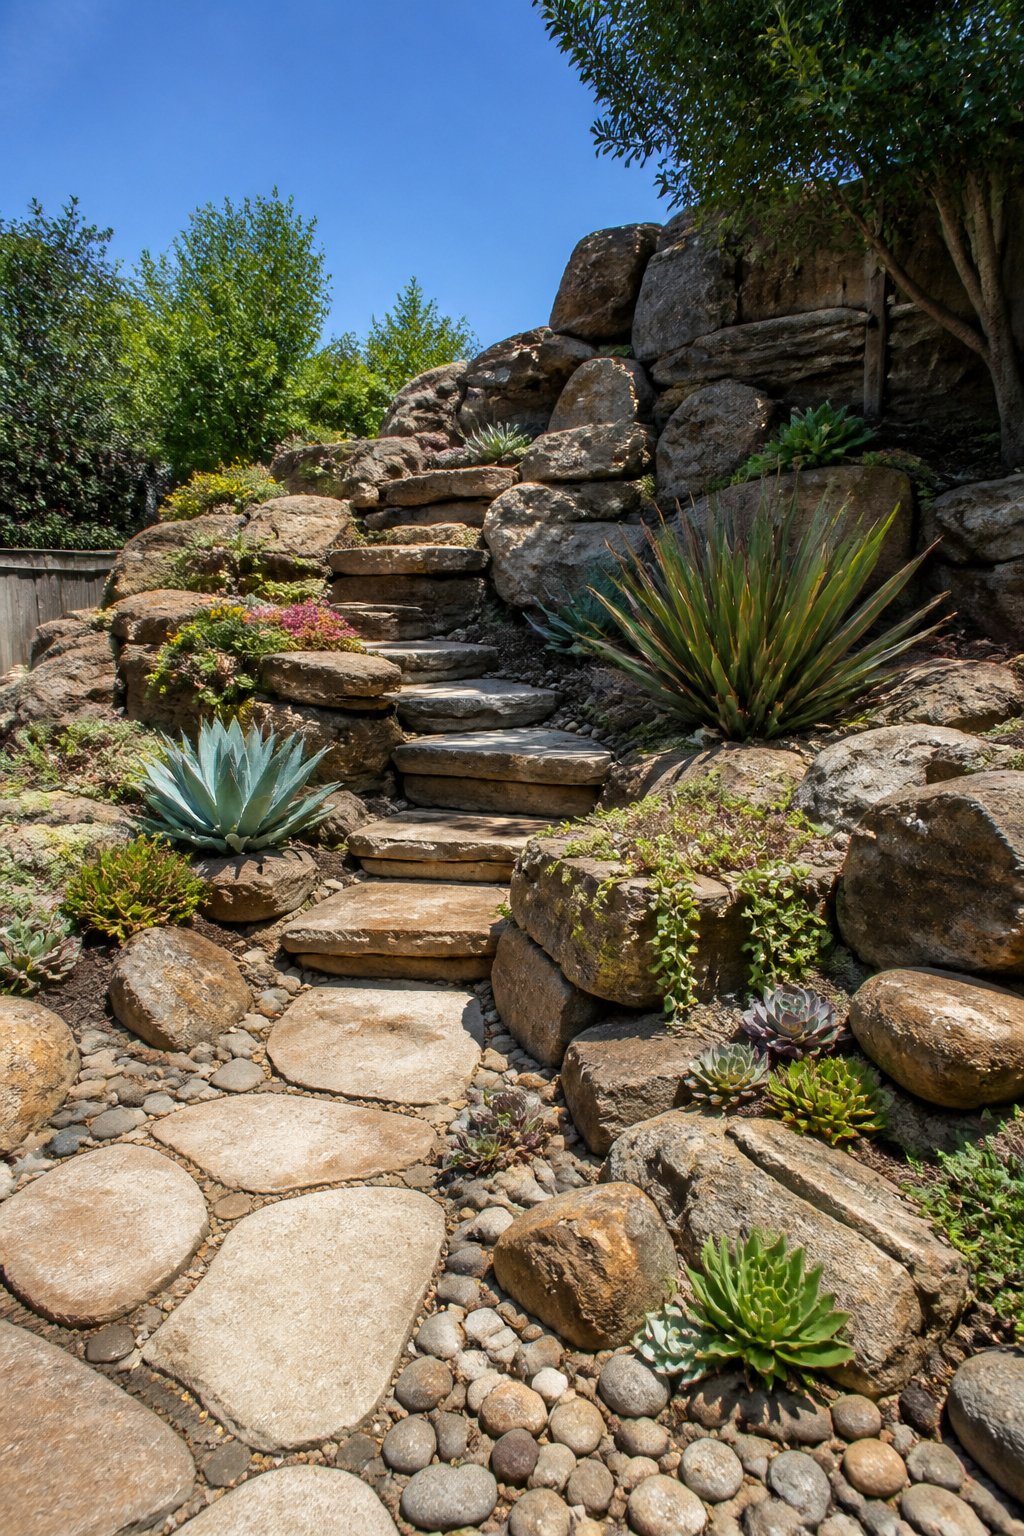
Rock gardens earn their keep in the spots where other plantings give up. Dry soil against a foundation, that narrow strip the hose never reaches, the corner where lawn thins to dust every August; these are the places where stacking stone and tucking in crevice-loving plants turns failure into the most interesting feature in the yard.
Construction starts with drainage, not decoration. A shallow scrape six to ten inches deep, filled with gritty mix rather than topsoil, keeps roots from rotting in winter. I set the largest stones first, half-buried so they look settled rather than dropped, then work smaller ones into the gaps at angles that channel rainfall toward any grass that still needs it. Riverbed rock, flat ledge stone, and the occasional boulder give enough variety that the eye keeps moving.
Plant selection is where patience pays. Alpines and sedums that would sulk in rich garden soil thrive here: mat-forming thyme for the cracks, low campanulas for spring color, small succulents where the angle bakes. Dry or neglected corners become the driest, sunniest microclimates in the yard, exactly what these plants evolved for.
The budget stays low if local stone is available. Free blast rock from construction pits costs only the labor of collection, and the sweat equity turns into something that looks deliberate rather than desperate.
10. Paver Patios
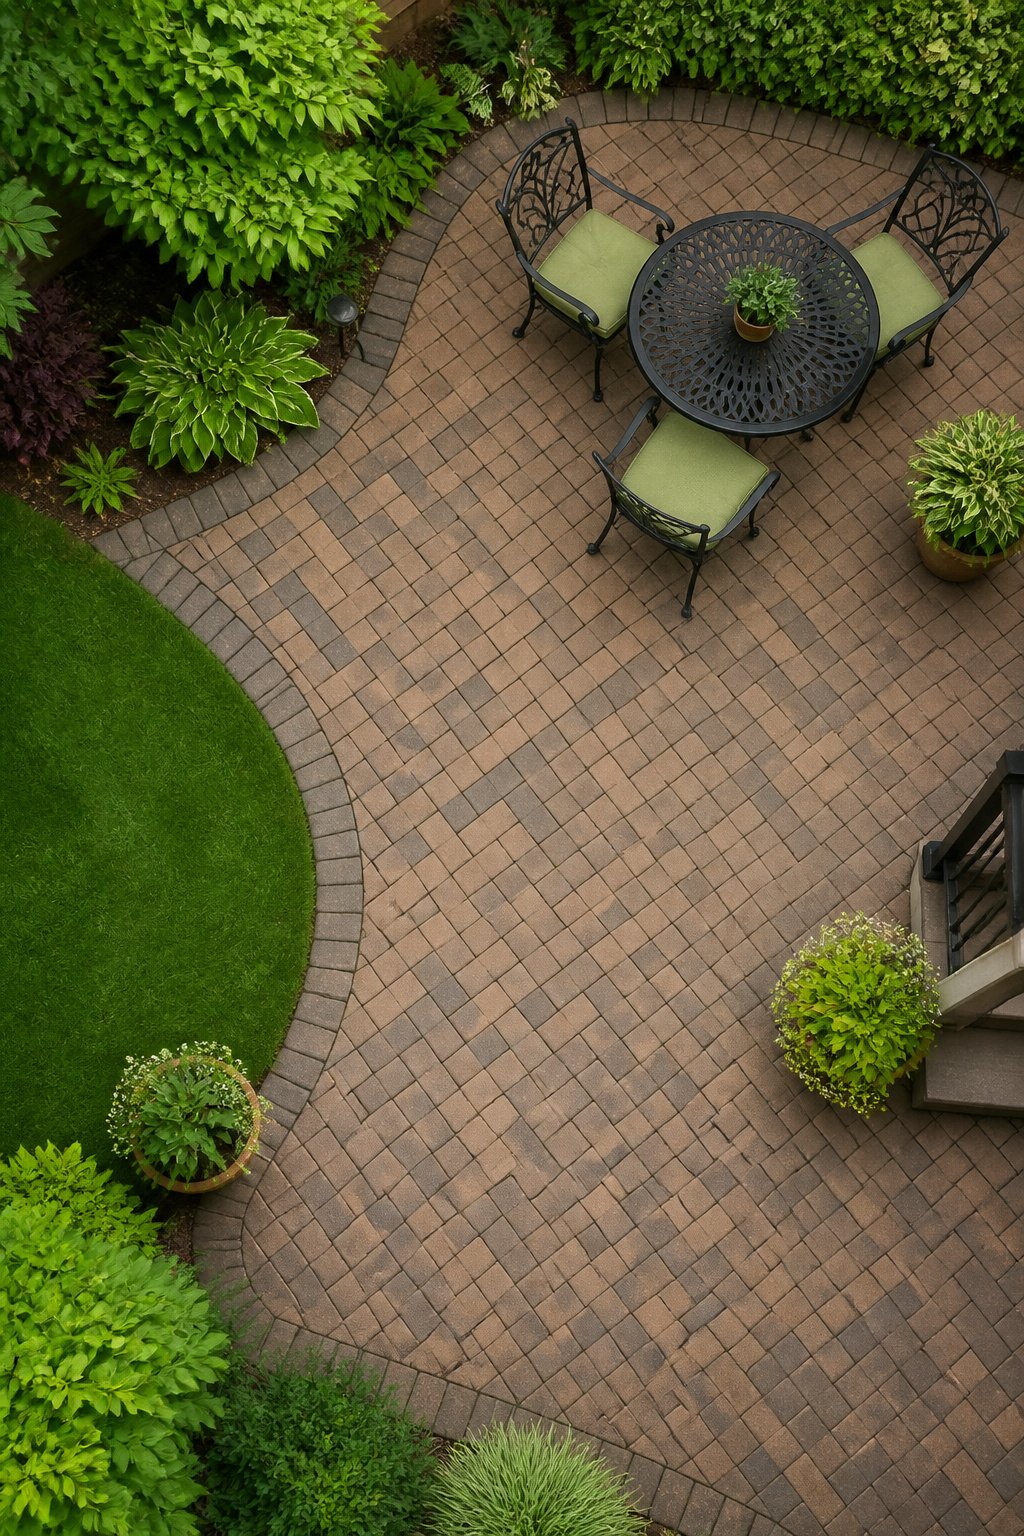
A paver patio starts with base preparation, which matters more than the stones on top. Dig out organic soil until you hit firm mineral earth, then compact a layer of crushed stone in lifts. Without this, freeze-thaw cycles heave the surface out of level inside two winters. The material costs run lower than poured concrete, and the labor is something two people can manage over a weekend.
Pattern choices change both the look and the installation speed. Running bond with rectangular pavers goes fastest; herringbone takes longer but locks together under pressure from a parked wheel or heavy table. Budget for a half-inch of joint sand and edge restraints, or the perimeter creeps outward by spring.
What convinced me, reading through a dozen how-tos, is that pavers let you fix mistakes. Lift a settled stone, add base, tamp, and reset. Concrete cracks demand a full replacement or an obvious patch. For a seating area off a back door, that repairability matters more than the seamless look.
11. Pergolas
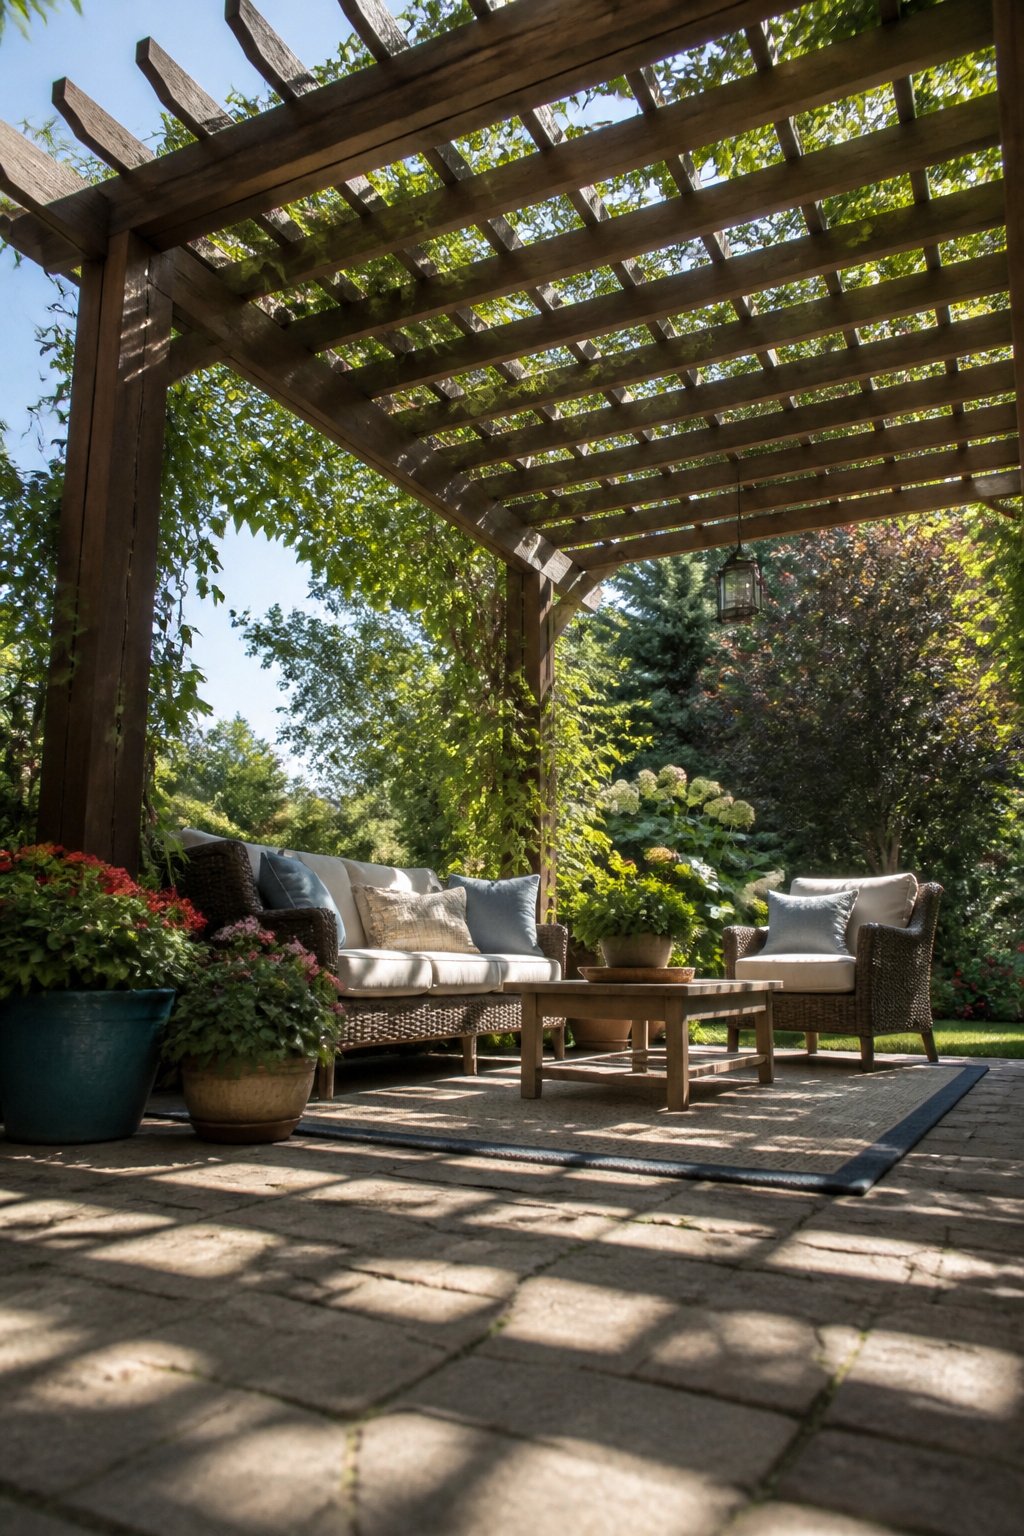
Pergolas work best when they solve a problem you already have, not when they create a new one. In my first yard, I put one where it looked nice from the kitchen window and then spent three summers puzzling over why nobody sat there. The sun had moved by afternoon, and the thing baked. Place it where you actually want shade during the hours you use it, which usually means tracking sun on your patio for one day before you commit.
The shade itself is partial by design. That lattice of beams cuts direct sun but lets air move through, so you get the cooling without a cave effect. For more coverage, a fabric shade cover or vines eventually fill the gaps. Sources note clematis, climbing roses, and wisteria as the classics for this, and in my reading the order matters: clematis gives fast color, wisteria takes years but delivers drama, and roses need more tending than a busy gardener usually budgets.
Build or buy is where the budget bites. A DIY kit runs cheaper and goes up in a weekend, which matters when your whole outdoor spend is that $500–800 window. Custom builds from a landscaper eat half that or more in labor alone. The kit looks plainer, but string lights and a few seasons of vine growth fix that faster than you’d expect.
12. Outdoor Furniture
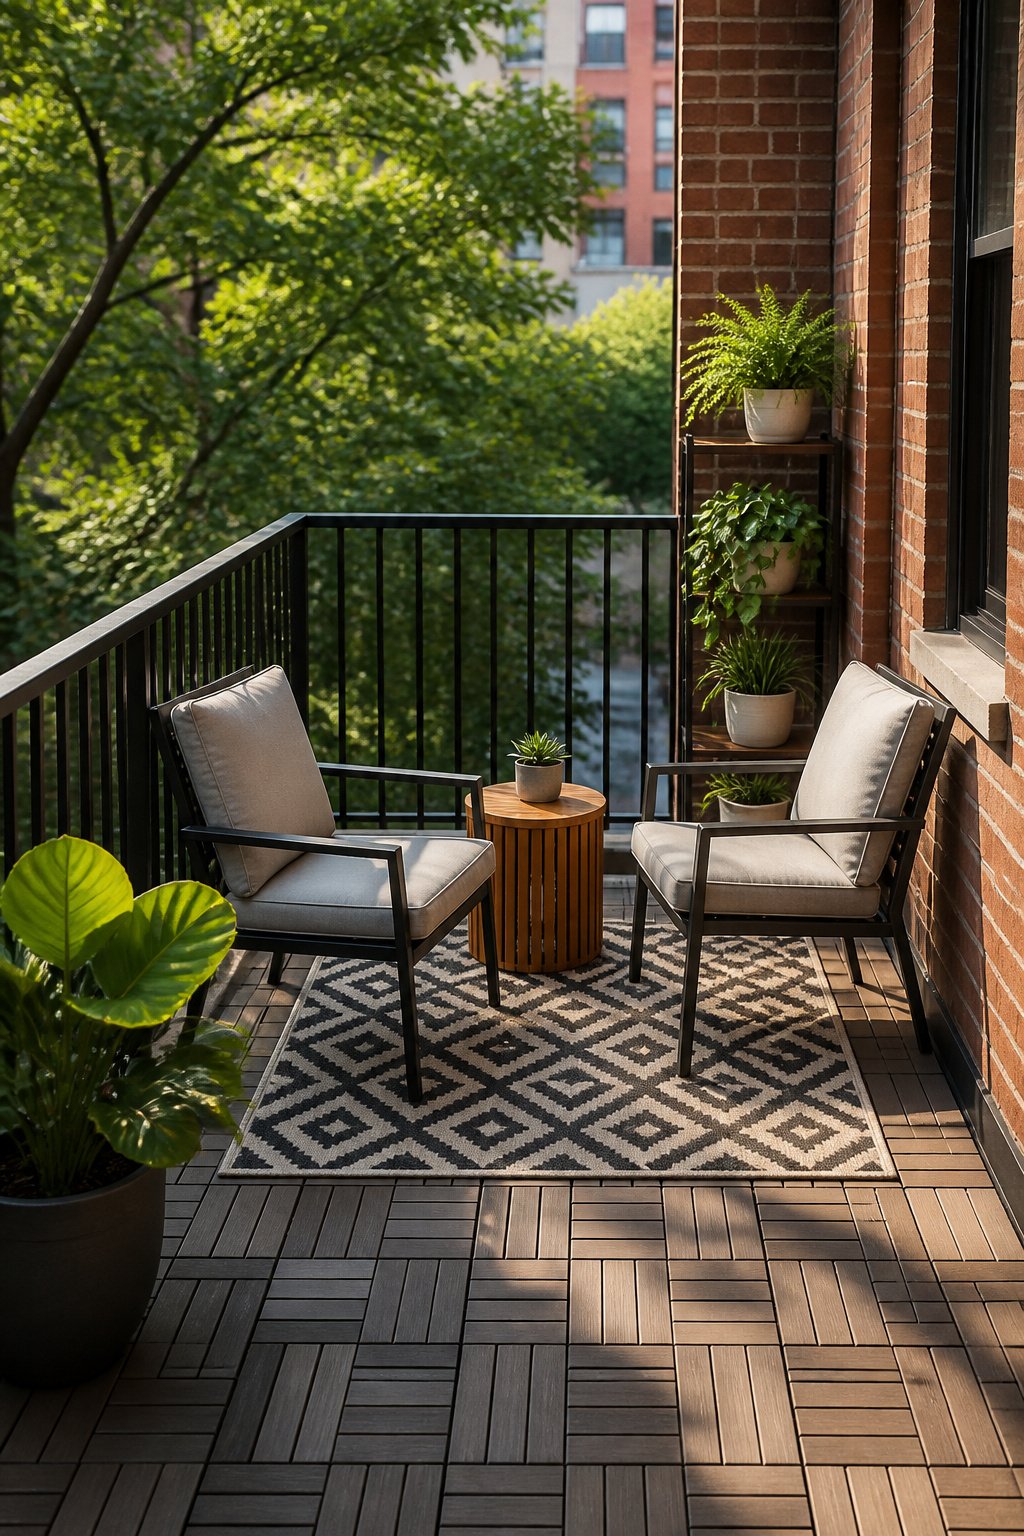
A rug and a sofa turn concrete into a living room. On my balcony, a 5 × 7 foot outdoor rug under two folding chairs did more to define the space than any plant arrangement. The rug established the "room," and the chairs faced each other rather than the railing, which made conversation feel natural instead of perched.
Material choice matters more than style when you are storing pieces in a corner or hauling them inside before a storm. Teak and eucalyptus last, but they need oiling; powder-coated aluminum and resin wicker do not. For the $500–800 annual garden budget, a single quality chair in aluminum beats a set of painted steel that flakes in year two. I learned that after a bistro set rusted through at the joints.
Small spaces reward pieces that earn their footprint. A storage bench seats two and hides cushions. A wall-mounted drop-leaf table leaves floor space for morning yoga or evening drinks. My balcony never fit both a dining set and a lounger, so I chose the lounger and ate at the railing with a lap tray. The concession felt like a loss for two weeks, then I stopped noticing.
13. Trellis Panels for Vertical Gardens
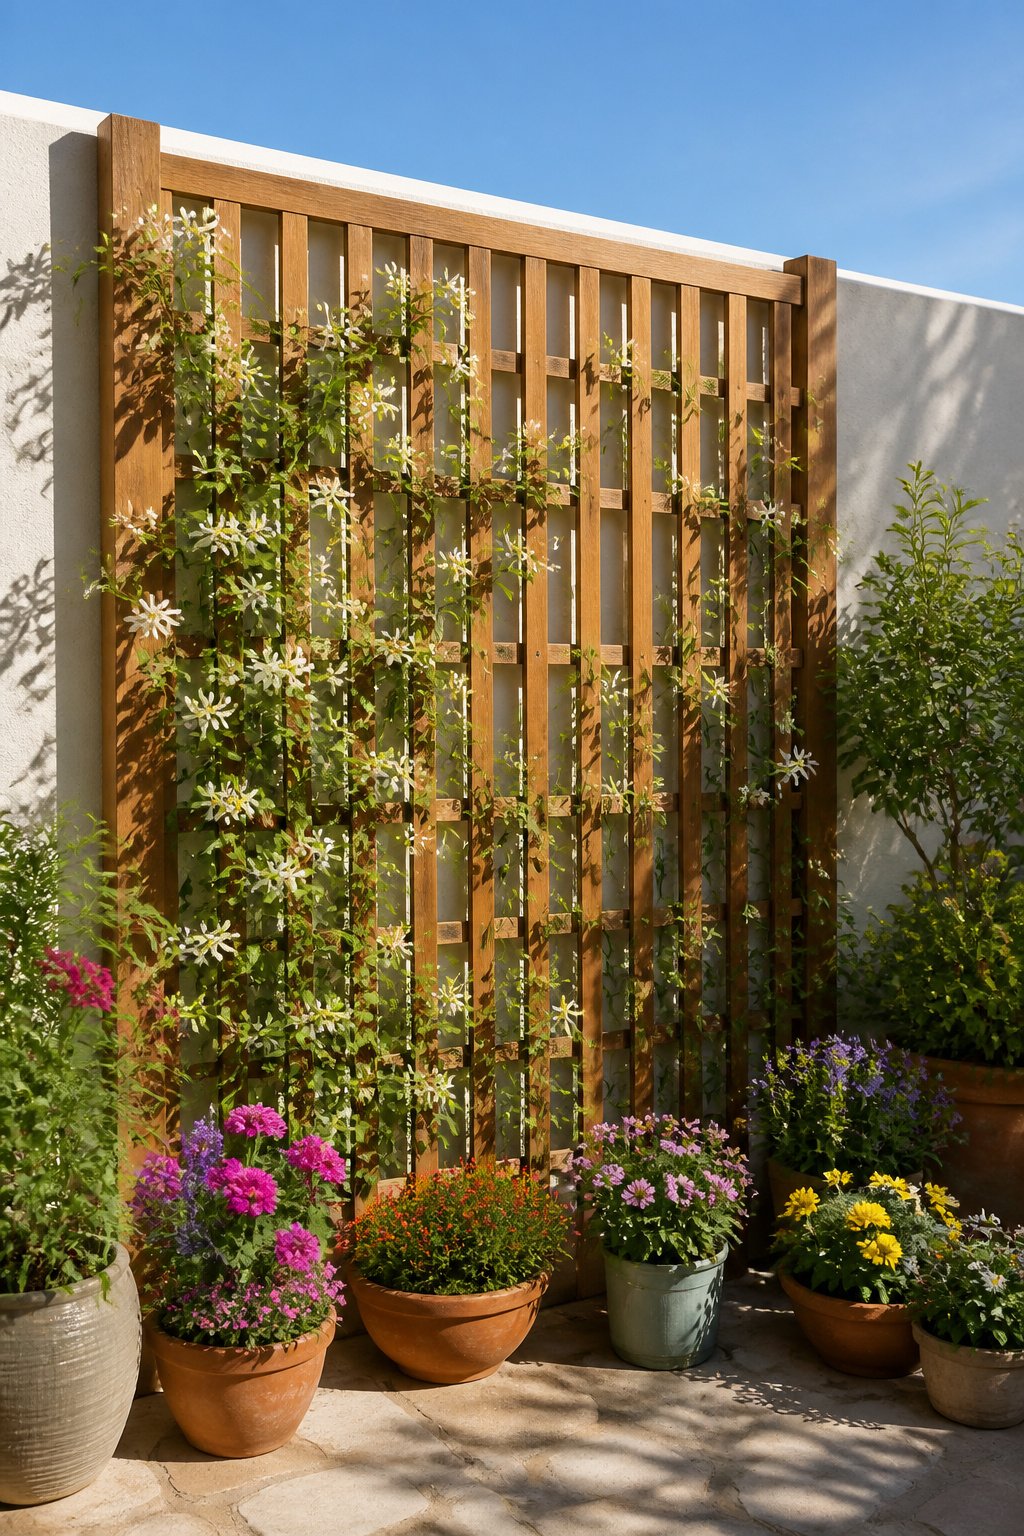
A balcony with six square feet of dirt taught me that vertical space is the only space that scales. Trellis panels let a wall carry the garden instead of the ground, and the material choice shapes how long that wall lasts. Cedar holds up well in wet seasons, bamboo keeps the whole setup light enough for a railing mount, and copper pipe weathers to that soft green patina some gardeners chase deliberately.
Mounting is where most first attempts wobble. A panel needs solid backing, a fence post or wall stud, not just siding. The gap behind the panel matters too: an inch of breathing room keeps air moving so stems do not mold where they touch.
The plants make or break the look. Jasmine stays green through winter in the warmer zones and smells like summer evenings. Honeysuckle pulls hummingbirds in reliably. Passion flower reads as exotic but grows like a weed once it finds its grip. Any of these will cover a panel in two seasons if the roots have enough soil depth, roughly eighteen inches minimum for perennial climbers.
The real limit is weight at maturity. A panel heavy with wet leaves and late-season growth can pull a weak mount right out of the wall. Build for August, not for May.
14. Planting Perennials
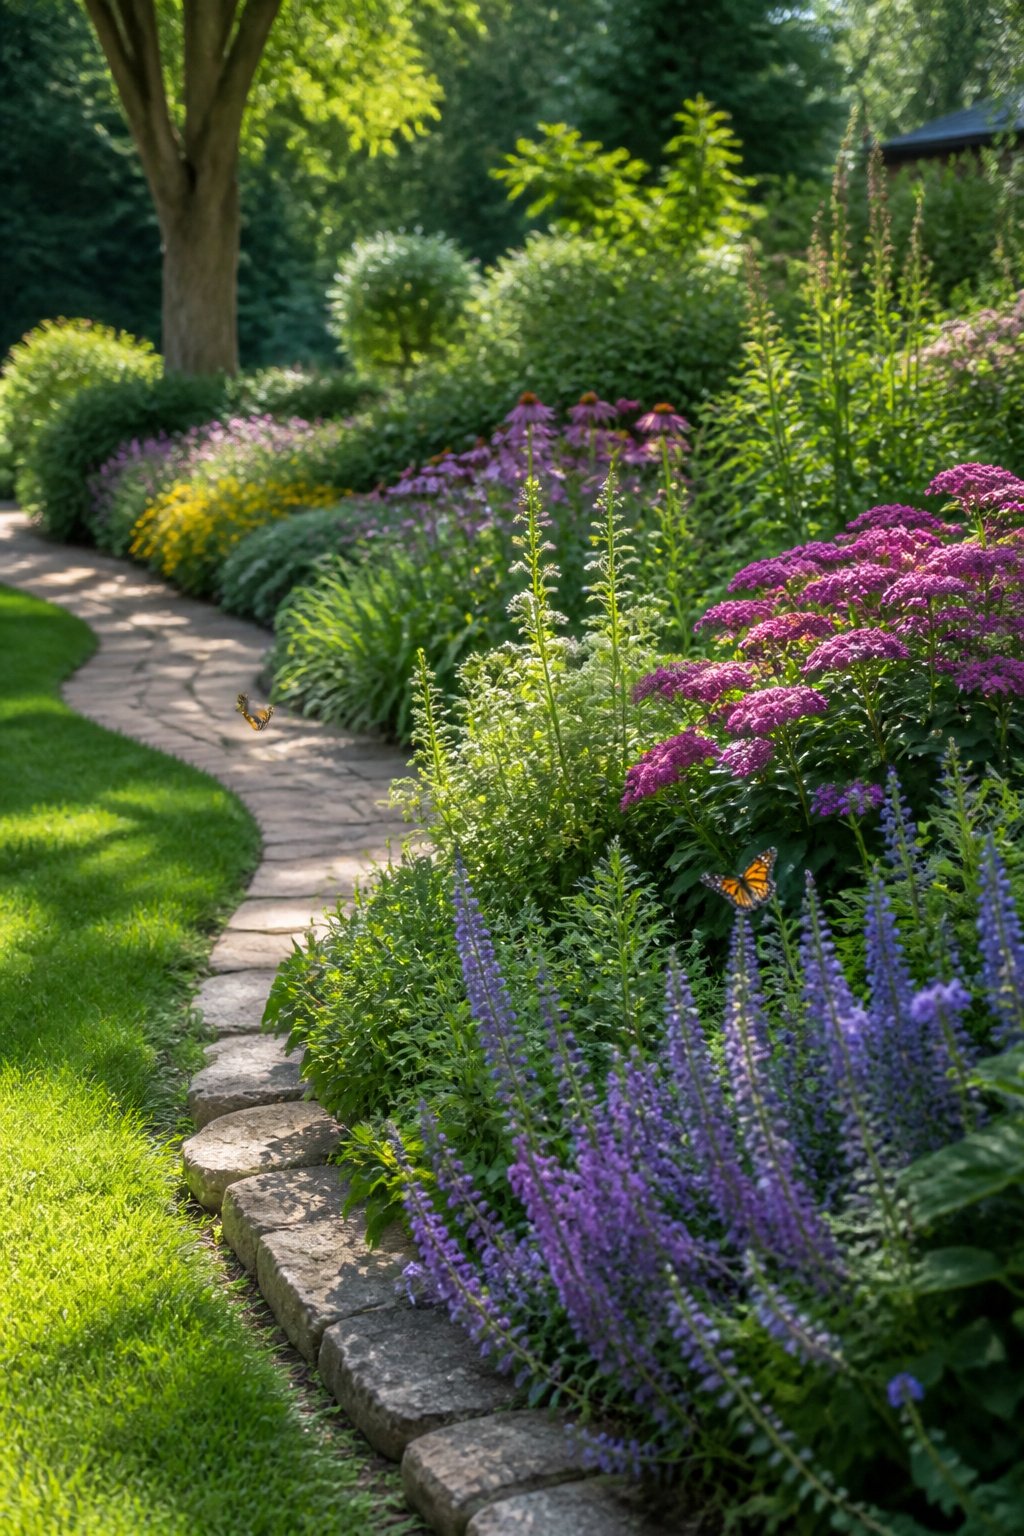
Perennials earn back their purchase price by the third summer, after which they return free of charge. That math matters when the annual plant budget sits around $500–800 and every spring replanting session erases last year’s spending.
Bloom timing is what separates a perennial border from a few weeks of color followed by months of green mush. Salvia pumps out waves of bloom across a single summer, while spirea shoulders the early season and clematis climbs through late spring into early summer. English lavender and balloon flower fill the mid-summer gap, and hosta carries texture where flowers have finished. The trick is planting varieties whose peak weeks barely overlap, so one fades as the next wakes up.
Shade complicates this calendar. Hydrangea and fern understories need the same staggered thinking, but with fewer loud colors to work with. My own mistake was clustering three varieties that all peaked in June; July and August looked abandoned. Now I map bloom windows before I dig, treating foliage as the backup plan, not the main event.
15. Xeriscaping
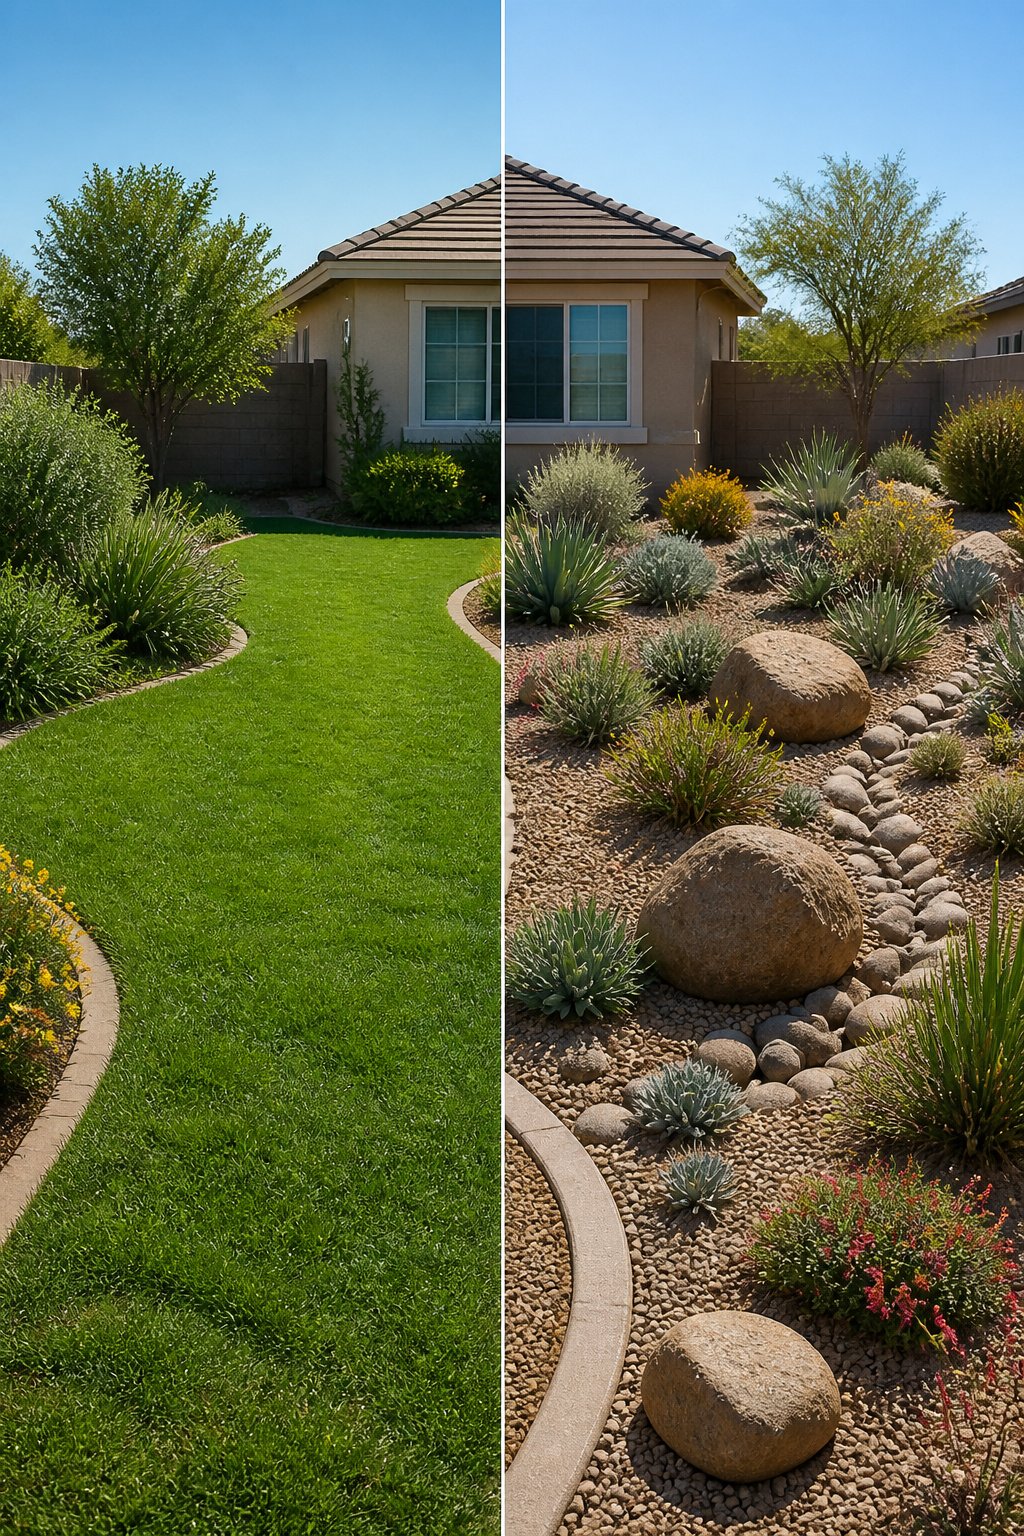
Xeriscaping can cut outdoor water use by up to 80%, which matters more than I expected before I started comparing bills with neighbors running traditional lawns through July. The approach pairs drought-resistant plants with permeable gravel groundcovers like pea gravel and decomposed granite, letting rainfall sink in rather than run off.
I used to assume this style only worked in the Southwest, but sources from across the country keep proving me wrong. Cacti, agave, and succulents now show up in Pacific Northwest designs, and desert favorites like Red Yucca or Desert Museum Palo Verde handle accent roles well outside arid zones. The key is spacing: give each bold plant its own stage with two-foot boulders or Sedum mats between them, rather than clustering aggressive shapes into visual noise.
Tan gravel as mulch ties the whole look together, matching the decomposed granite base that desert-style designs rely on. Whether your yard is structured or loose, the rhythm stays the same: planting, open space, planting. Better too open than too stuffed, and the water savings follow automatically.
16. Fire Pits
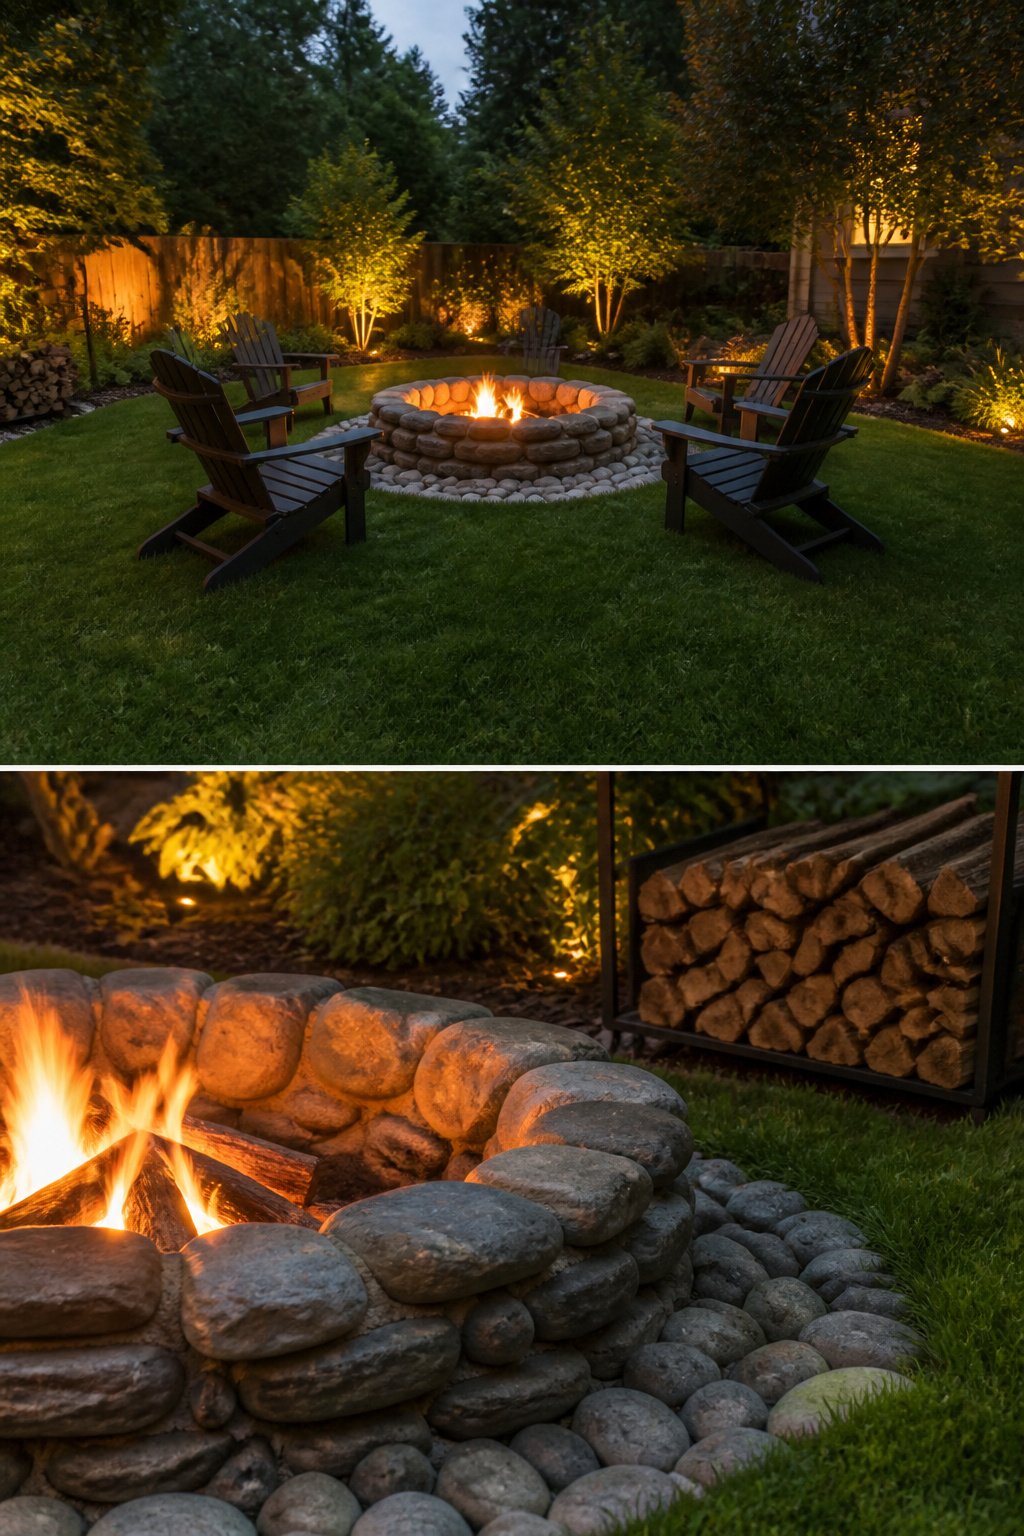
A fire pit can anchor a small yard without eating the whole budget. Dig a shallow pit, line the bottom with gravel for drainage, then stack stone, brick, or pavers around the rim. Flagstone and gravel keep the look softer than poured concrete, and low Adirondack chairs let the fire stay the focus without blocking sightlines.
Check local fire codes before you dig. Most municipalities require a set distance from structures and overhanging branches, and some ban open burns entirely during dry months. Seating should sit far enough back that sparks do not reach fabric, but close enough that the heat matters on cool nights. A dug-out circle with lawn chairs arranged around it handles three or four people comfortably; more than that, and someone is always smoke-blind.
17. Yard Art
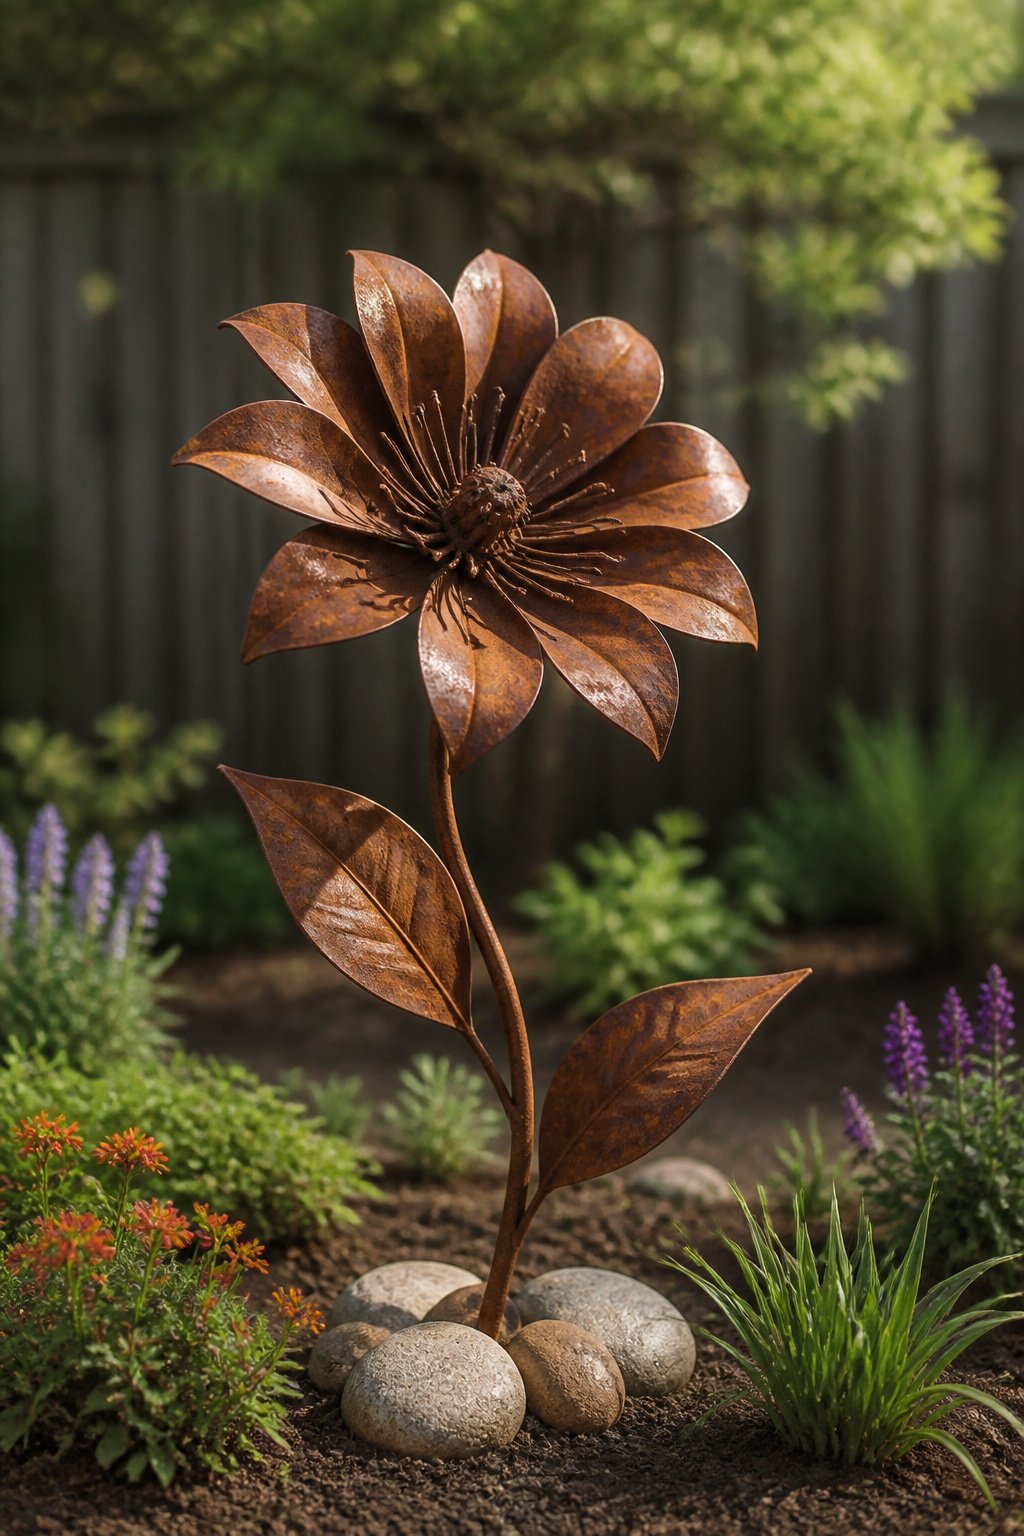
A single piece of yard art changes the whole feel of a space without adding a single plant. Last season I watched a neighbor’s tiny patio transform when she leaned a corrugated metal flower against her fence. The piece was maybe two feet across, nothing large, but it gave the eye somewhere to land.
Scale matters more than price in small yards. A sculpture that looks modest at the garden center can dominate a balcony once you get it home. Found objects work the same way: a painted rock cluster or a few mosaic stepping stones read as intentional in a 6-by-8-foot corner, but a mass of competing pieces turns cluttered fast.
Weather resistance is the detail that separates the projects that last from the ones that sag by August. Wooden crates and reimagined utensils need sealing, and wind chimes left unanchored walk themselves off ledges in the first storm. The metal flower my neighbor used already carried a rust patina, so rain only added character. Homemade garden art like painted rocks or upcycled sculptures holds up fine if you choose materials that age in a direction you like.
18. Edging
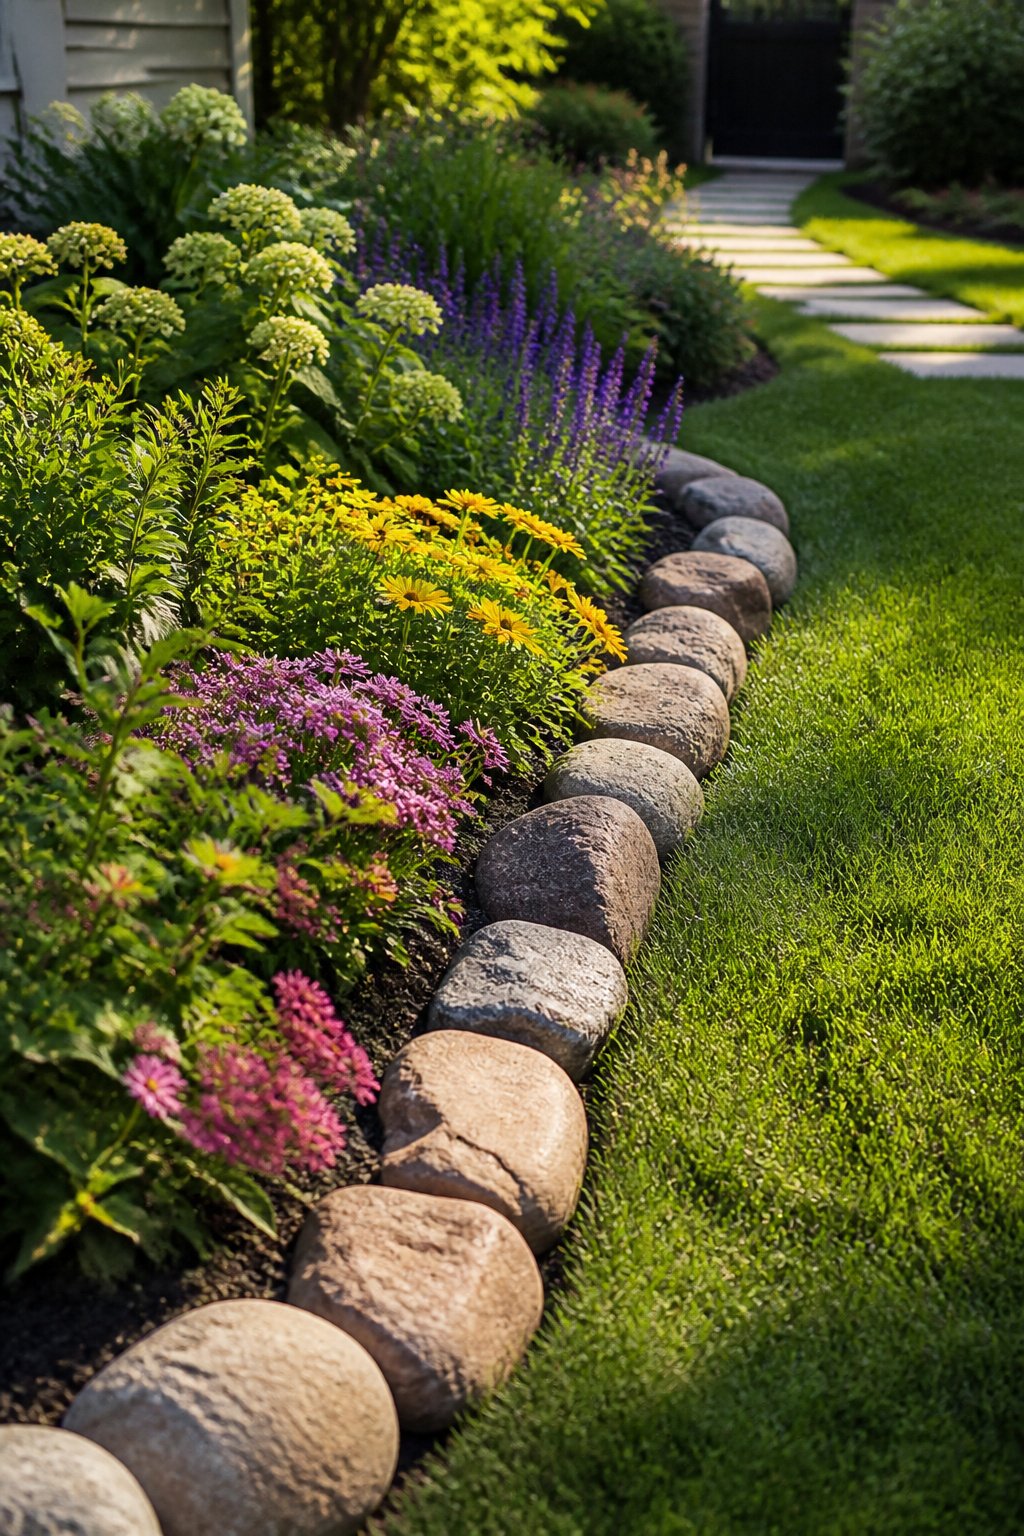
Stone, brick, or natural edging gives a bed or path its finished shape. The material sits at the border, and that border trains the eye where to look. A crisp edge between lawn and flower bed keeps things looking neat, while a row of stones or bricks helps define borders against grass or a front driveway.
Affordable materials like bricks, rocks, stones, or pebbles work for garden beds, pathways, and lawn edges. It is a small detail that makes a significant impact on the overall look of the landscape, and some edging can even be done with materials you may already have. Placing a bordered edge around plants and trees also creates a natural container for landscaping mulch, which keeps the mulch where it belongs and off the lawn.
Clean edges make a yard look maintained because they give a clear place to stop when you mow or run a string trimmer. That clear divider between lawn and garden keeps unwanted grass out of the landscape design and saves the work of cutting back stray blades by hand later.
19. Ground Covers
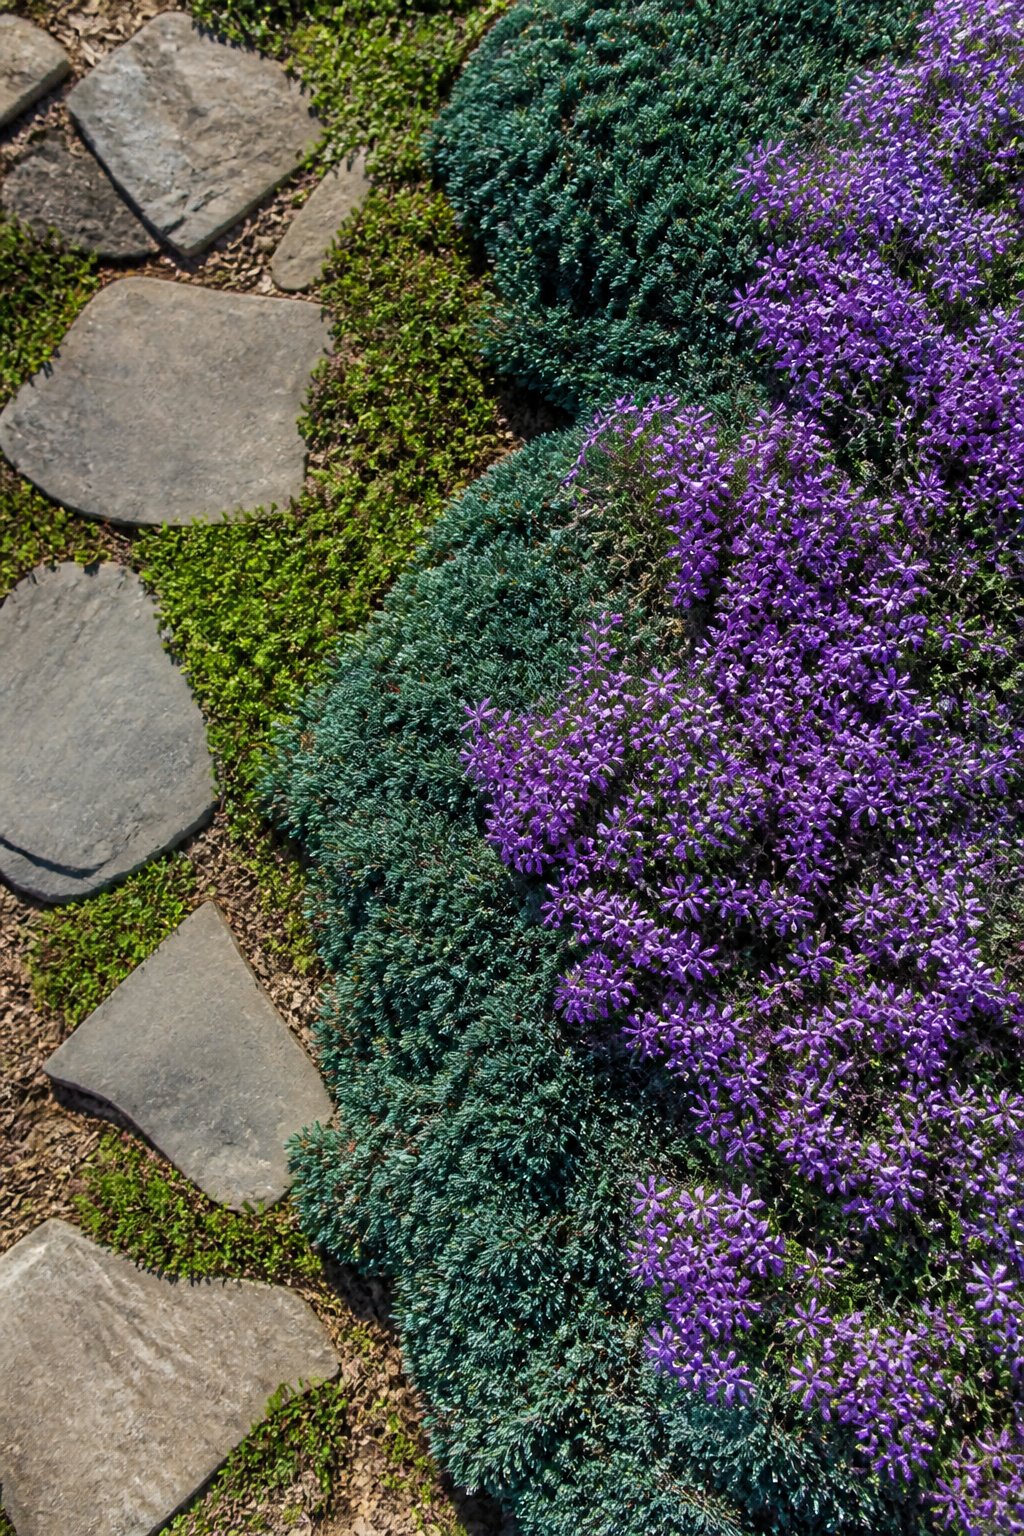
A patch of bare soil between stones or a slope too steep to mow is where ground covers earn their keep. Creeping phlox spreads into a low carpet of color, and on a tricky hill it does double duty holding soil in place. Juniper handles the same job with a tougher constitution, staying evergreen through winter and shrugging off sun and poor drainage. For something you can actually walk on, creeping thyme takes light foot traffic once established and prefers the same dry, well-drained spots that make lawn struggle.
The first season is mostly watching and waiting while roots anchor. After that, the maintenance drops to almost nothing, which is the real appeal over turf grass. Blue Rug Juniper stays flat enough to edge a path without engulfing it, a detail that matters when you are fitting plants into tight front-yard corners. I have learned to check the mature spread before planting, because a ground cover that creeps two feet wider than expected becomes a weeding problem instead of a solution. Green Mound Juniper behaves similarly, and both work well tucked under the dappled shade of a small tree where grass thins out anyway.
20. Drought-Tolerant Plants
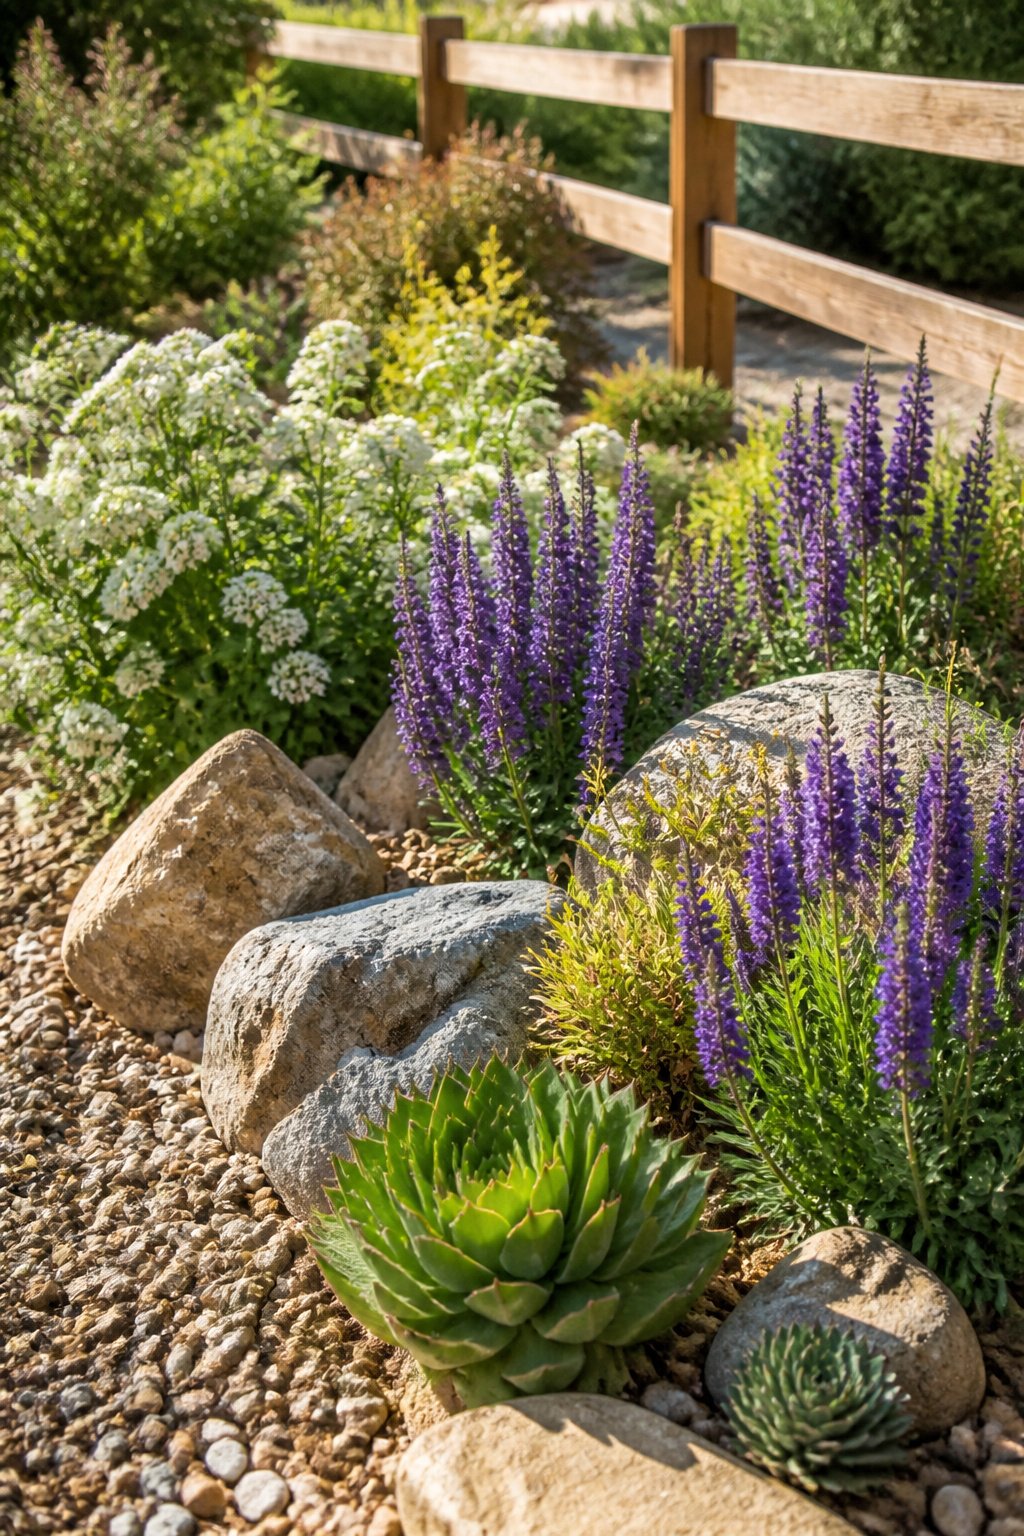
Three summers back, my neighbor replaced her entire front border with succulents and native wildflowers after the city restricted watering to twice a week. The bed looked sparse that first June. By August, it was the only plot on our street that hadn’t browned out.
She told me later she spent maybe $120 on plugs of purple salvia, white spirea, and a few potted succulents. Watering dropped by about two-thirds, and the plants filled in thicker the following spring because perennials establish where annuals just exhaust themselves.
Dry-condition plantings work best when you match the plant to the spot and leave it alone. Native wildflowers already know your soil and your rainfall patterns. Succulents store what they get. Pampas grass, if your zone allows it, handles neglect like a shrub. The mistake is treating them like thirsty border plants and overwatering out of habit; the roots rot before the garden ever shows stress.
Rock gardens help here, not for looks alone but because stone holds heat that keeps soil drier and drains fast after rain. My neighbor tucked a few large boulders between her plantings. The effect reads as intentional landscaping rather than a resignation to drought.
For a small yard or balcony budget under $800 annually, this approach frees money you’d otherwise spend on replacement annuals and higher water bills. The upfront cost of perennials pays back by year two.
DIY Projects That Actually Save Money
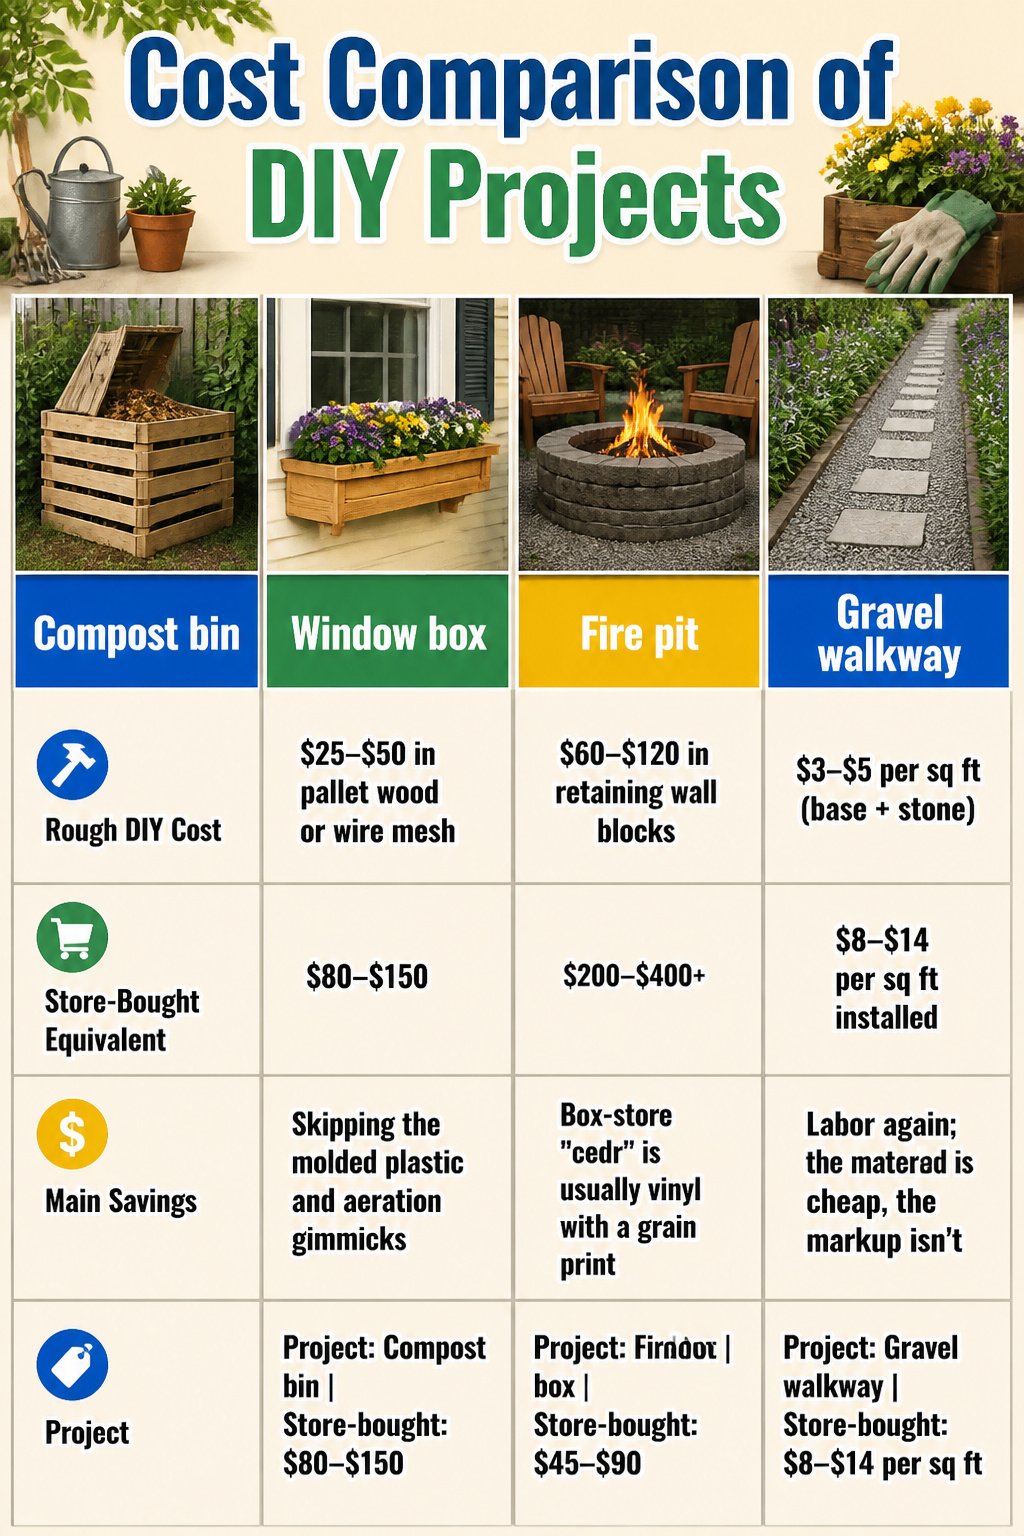
Some projects cost more in materials than the finished thing at a big box store, so it pays to know which ones actually keep money in your pocket. A compost bin, window box, fire pit, and gravel walkway are the four where building beats buying by the widest margin, mostly because labor is where stores mark them up hardest.
| Project | Rough DIY Cost | Store-Bought Equivalent | Main Savings |
|---|---|---|---|
| Compost bin | $25–$50 in pallet wood or wire mesh | $80–$150 | Skipping the molded plastic and aeration gimmicks |
| Window box | $15–$30 in cedar boards | $45–$90 | Box-store "cedr" is usually vinyl with a grain print |
| Fire pit | $60–$120 in retaining wall blocks | $200–$400+ | The kit is just blocks arranged in a circle |
| Gravel walkway | $3–$5 per sq ft (base + stone) | $8–$14 per sq ft installed | Labor again; the material is cheap, the markup isn’t |
The fire pit surprised me most. A ring of basic blocks on level ground works the same as the $350 "outdoor fireplace" kit my neighbor bought. The only tool you need is a level and patience for one Saturday. Window boxes fail fastest when people use pine instead of cedar or redwood, so spend the extra $8 on real rot-resistant stock.
Choosing Plants for Your Light and Zone
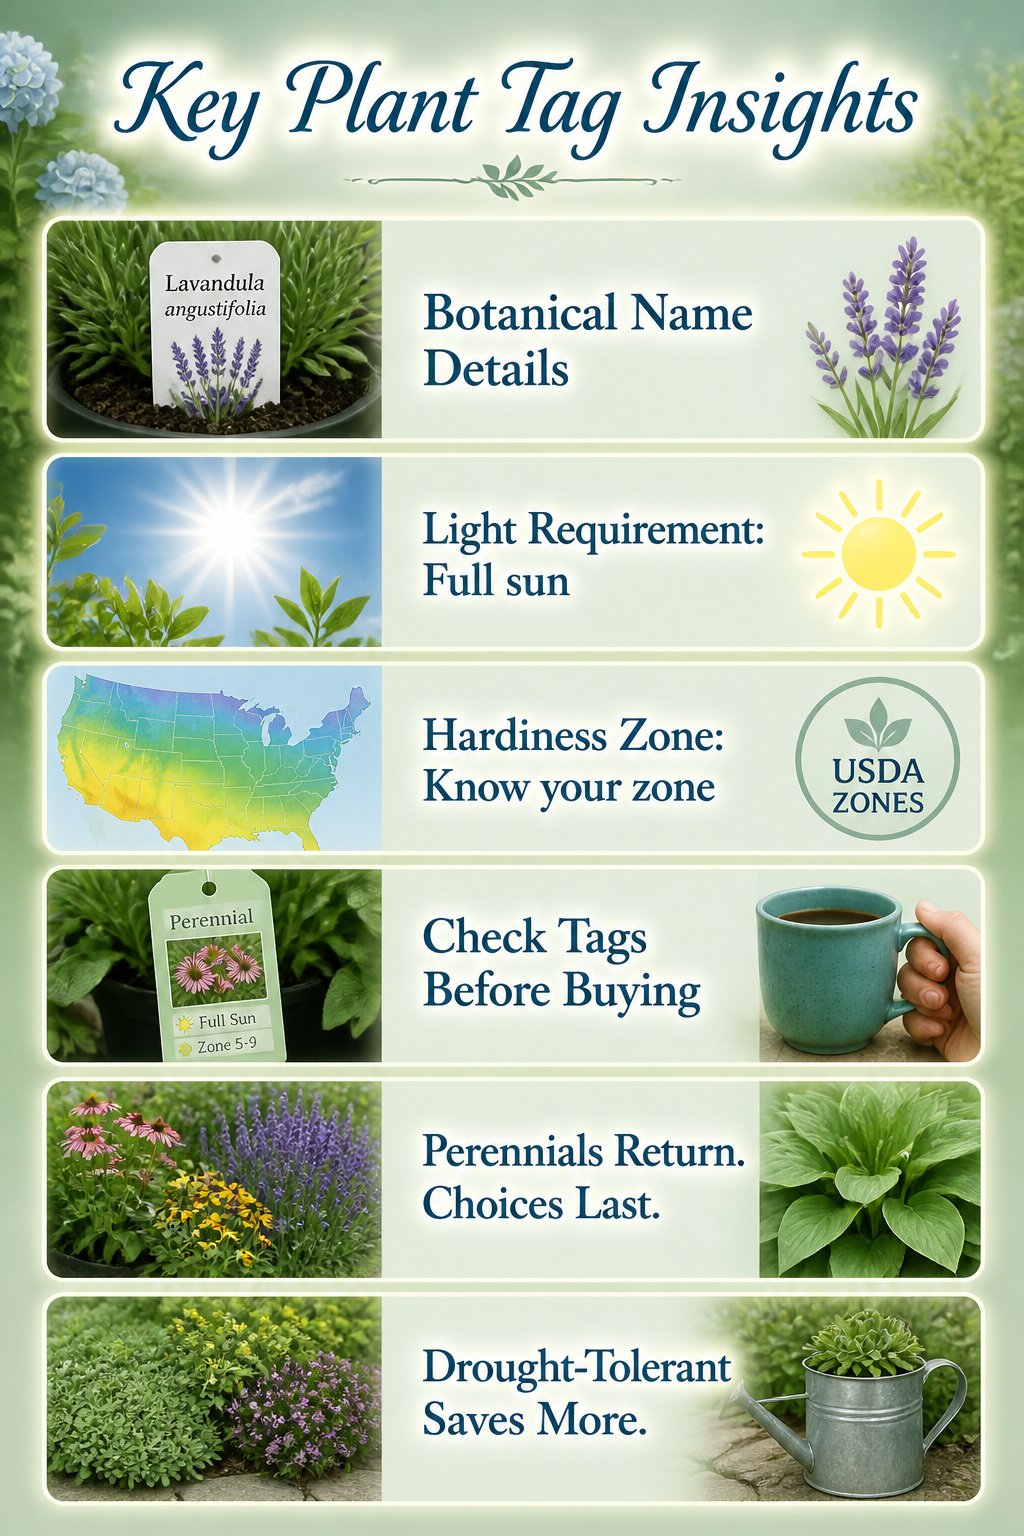
Walking the nursery lot with a coffee in one hand and a plant tag in the other is where most landscaping mistakes start. The tag tells you three things that matter: the botanical name, the light requirement, and the hardiness zone. That zone number is not a suggestion. A plant rated for Zone 8 will sulk through a Zone 7 winter and probably die in a hard freeze, even if the nursery stocked it locally. I check the tag against the USDA map before I buy, because returning a dead shrub in spring is not how I want to spend my Saturday.
Light readings are just as easy to get wrong. "Full sun" means six or more hours of direct light, but morning sun is gentler than afternoon blast, and a tag will not tell you which your bed gets. Spend one day timing the shadows. Perennials suited to your actual hours of light will return for years; ones forced into the wrong spot get leggy, then gone. For dry corners, drought-tolerant ground covers like sedum or creeping thyme fill space without the water bill, and native perennials need less intervention once they settle in. The upfront cost of a perennial is higher than an annual, but the math shifts by year two or three when you are not rebuying.
Mulch and Edging Together
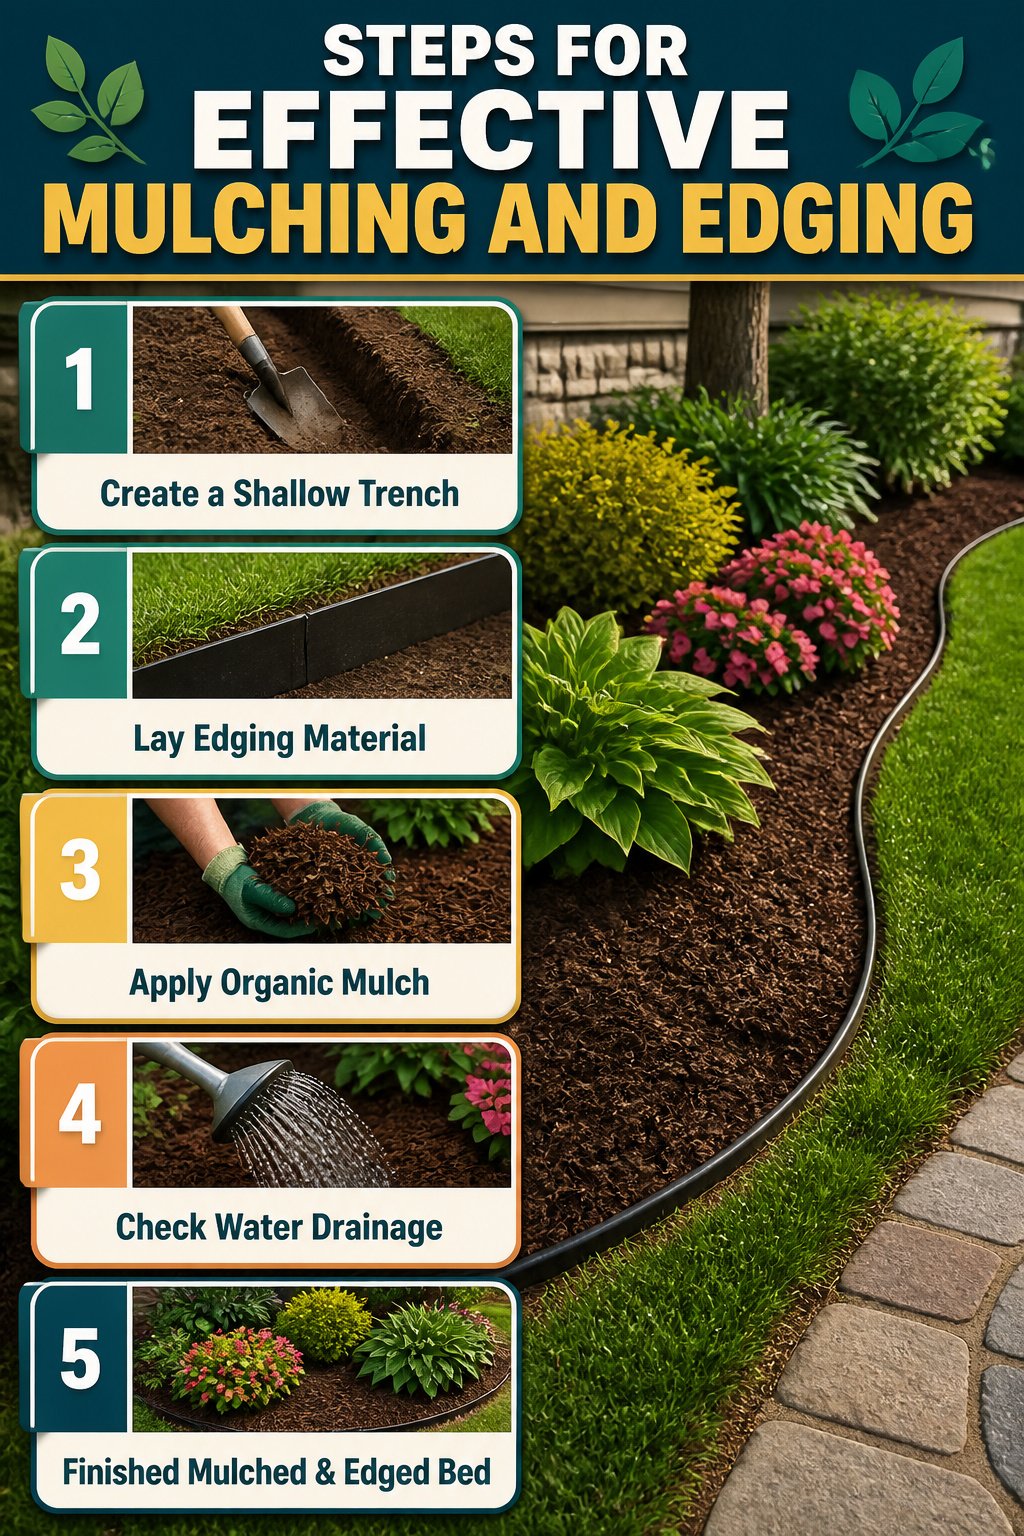
Mulch works harder when it stays put, and that is where edging earns its keep. Two inches of shredded bark or compost laid over bare soil will lock in moisture and choke out weeds before they seed, but only if it does not wash onto the path every time it rains. A shallow trench or a strip of metal or stone set flush with the soil line creates that boundary without looking like a fence.
Organic mulch breaks down, which is the point. It feeds the soil, but it also means the bed sinks a little each year. A top dressing of one to two inches every second or third season brings it back to depth without burying stems or smothering shallow roots. Trying to stretch that interval with landscape fabric underneath does more harm than good; water and roots tangle in the mesh, and weeds colonize the surface anyway. Spot-spray or pull what comes through, and let the mulch do the rest.
Color matters more than most people expect. Dark bark against pale siding or warm compost against cool stone creates contrast that reads as intention, not accident. Match the tone to the house or the hardscape, not both, or the bed disappears into the background it was meant to set off.
Raised Beds That Fit Small Spaces
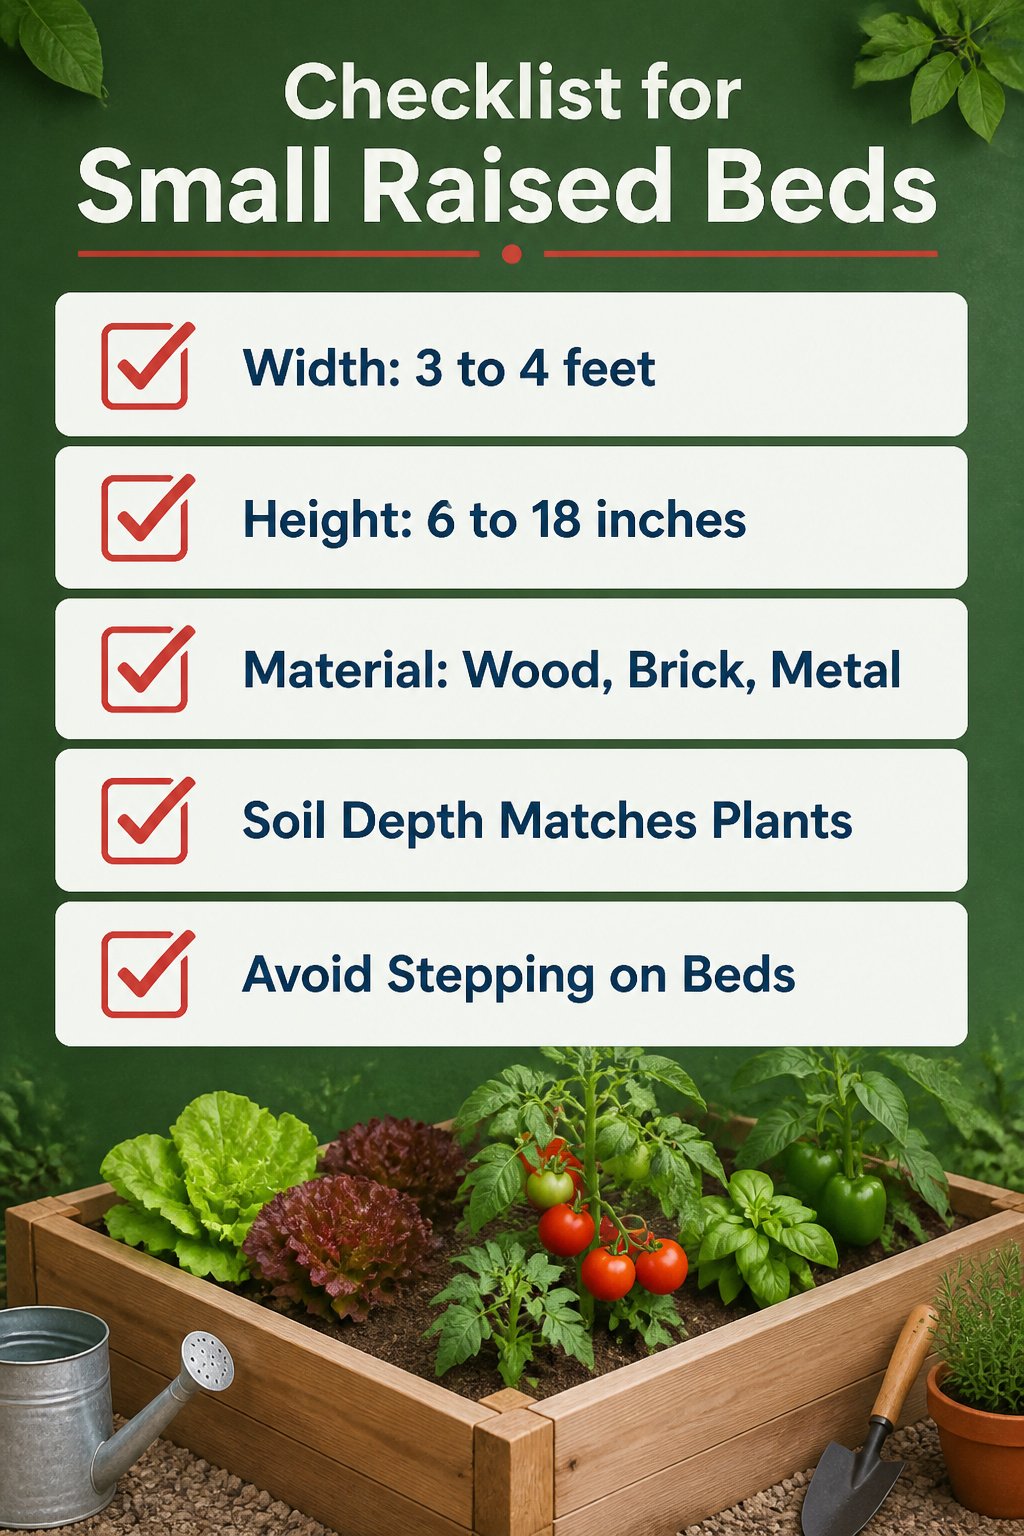
Most raised beds I have seen in small yards fail on one of two counts: too wide to reach the middle without stepping in, or too low for roots to drain. 3 to 4 feet across fixes the first problem. At that width, arms reach the center from either side, so the soil stays loose and you are not compacting it with your boots.
Height matters just as much. Leafy greens get by at 6 inches, but tomatoes and peppers want more root room and better drainage. The 6- to 18-inch range covers both. Wood, brick, metal, or concrete all work for the box itself; what counts is that the soil depth matches what you are planting. I have watched people build gorgeous 6-inch beds and wonder why their peppers sulked all season. The answer was sitting right there in the dimensions.
Lighting Without Wiring
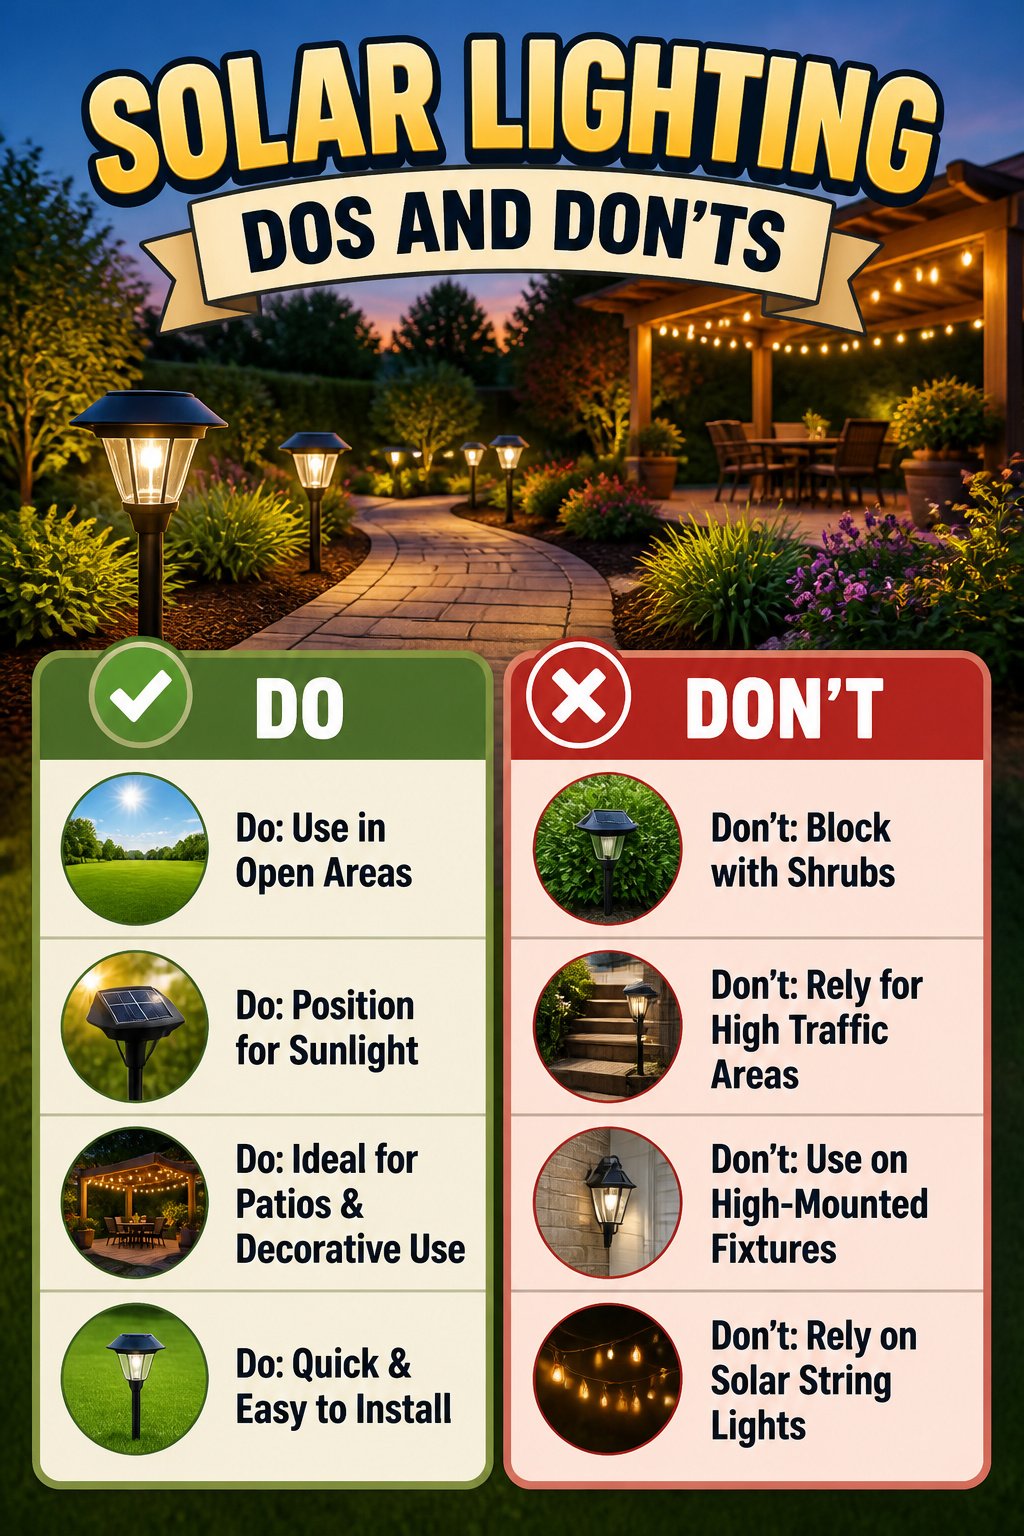
Solar-powered landscape lights have come far enough that they are worth considering for most yards, though they still carry limits a buyer should know before opening the package. The small panel on each stake or fixture needs roughly six hours of direct sun to reach a full charge, which means placement beside a dense shrub or under a porch overhang will leave you with dim light by nine in the evening. Brightness tops out lower than wired LED systems, so solar works best for marking a path or adding atmosphere rather than lighting steps where someone might trip.
Wired options still win for three spots: anywhere you need consistent brightness regardless of weather, any path shadowed by trees or architecture, and any fixture mounted high where a panel cannot catch sun. String lights hung over a patio or pergola count as wired in practice, since the solar versions rarely hold enough charge to last through a dinner party. For a small yard or balcony with open sky, solar stakes install in minutes with no trenching, and the variety of styles now available means you are not stuck with the cheap plastic look that dominated the market five years back.
Frequently Asked Questions
How do I create a layered garden?
Place taller plants toward the back and smaller ones in the front to stagger sight lines and add visual depth. The back row hides fences or walls, the middle layer carries the visual weight with plants like peonies or boxwood, and the front stays low with hostas or coneflowers. Mixing textures, like airy Russian sage against denser shrubs, keeps the layers from looking like solid blocks.
What are the best plants for xeriscaping?
Drought-resistant plants like succulents, cacti, agave, and wildflowers work best, along with grasses such as pampas grass. Red Yucca and Desert Museum Palo Verde also handle accent roles well outside arid zones. The key is spacing them with gravel or boulders between so each plant has its own visual stage.
How can I make my yard more private?
Plant tall, dense greenery like Italian cypress, Japanese yew, or arborvitae at their mature width rather than nursery spacing. Arborvitae reaches 3–4 feet across, so starting wider avoids years of thinning. Trees and major shrubs should go in first even if the budget only covers a partial planting, since they need the time most.
What are some low-maintenance landscaping ideas?
Use native perennials that return yearly, mulch paths instead of hardscaping, and let composted kitchen scraps and yard waste feed your beds. Solar path lights install in minutes with no wiring. Rock gardens with sedums and thyme thrive in dry corners where other plantings fail, and xeriscaping with gravel groundcovers can cut water use by up to 80%.
How do I install landscape lighting?
Solar-powered path lights clip together as you walk the route, with no trenching or transformer needed. For brighter, longer-lasting results, wired low-voltage kits need a day of digging but take timers and dimmers later. String lights over a patio or fence rail cost little and extend usable hours past sunset.