
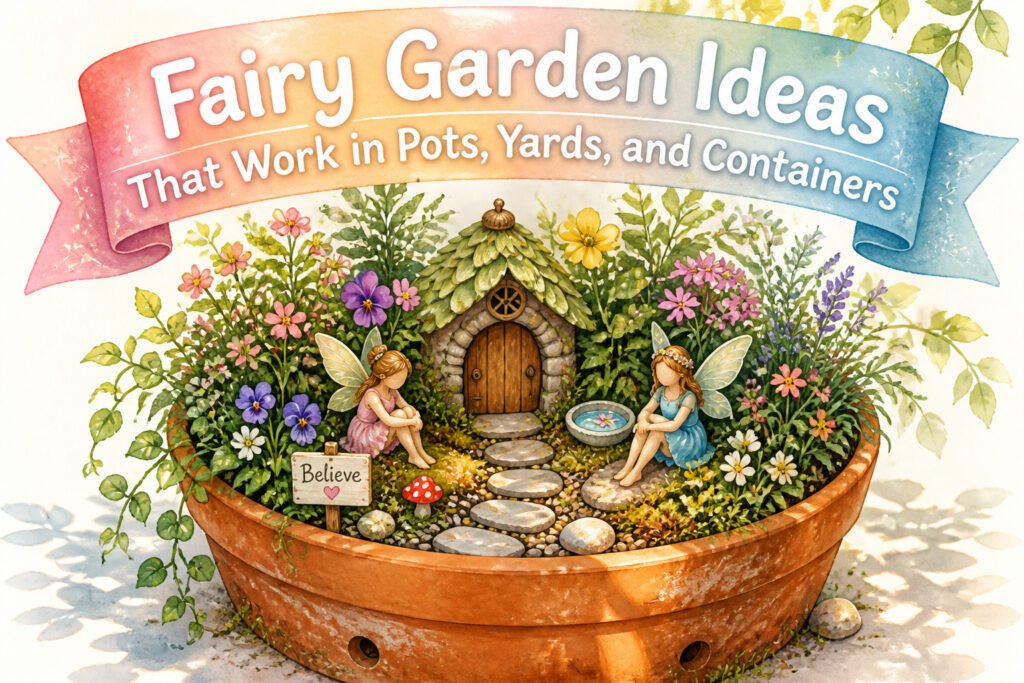
A fairy garden can cost nothing but broken pots and backyard sticks or run to collector figurines and recirculating fountains; the deciding factor is whether you need the thing to survive a season of real weather or a weekend of curious kids. The trick most sources skip is starting with the container already sitting in its final light, because a pot that dries in an afternoon kills faster than any wrong accessory. A 6-inch terra cotta pot with drainage holes drilled through will carry a first attempt through August; without those holes, the same soil becomes a swamp by July.
1. Mini Fairy Garden in a Pot
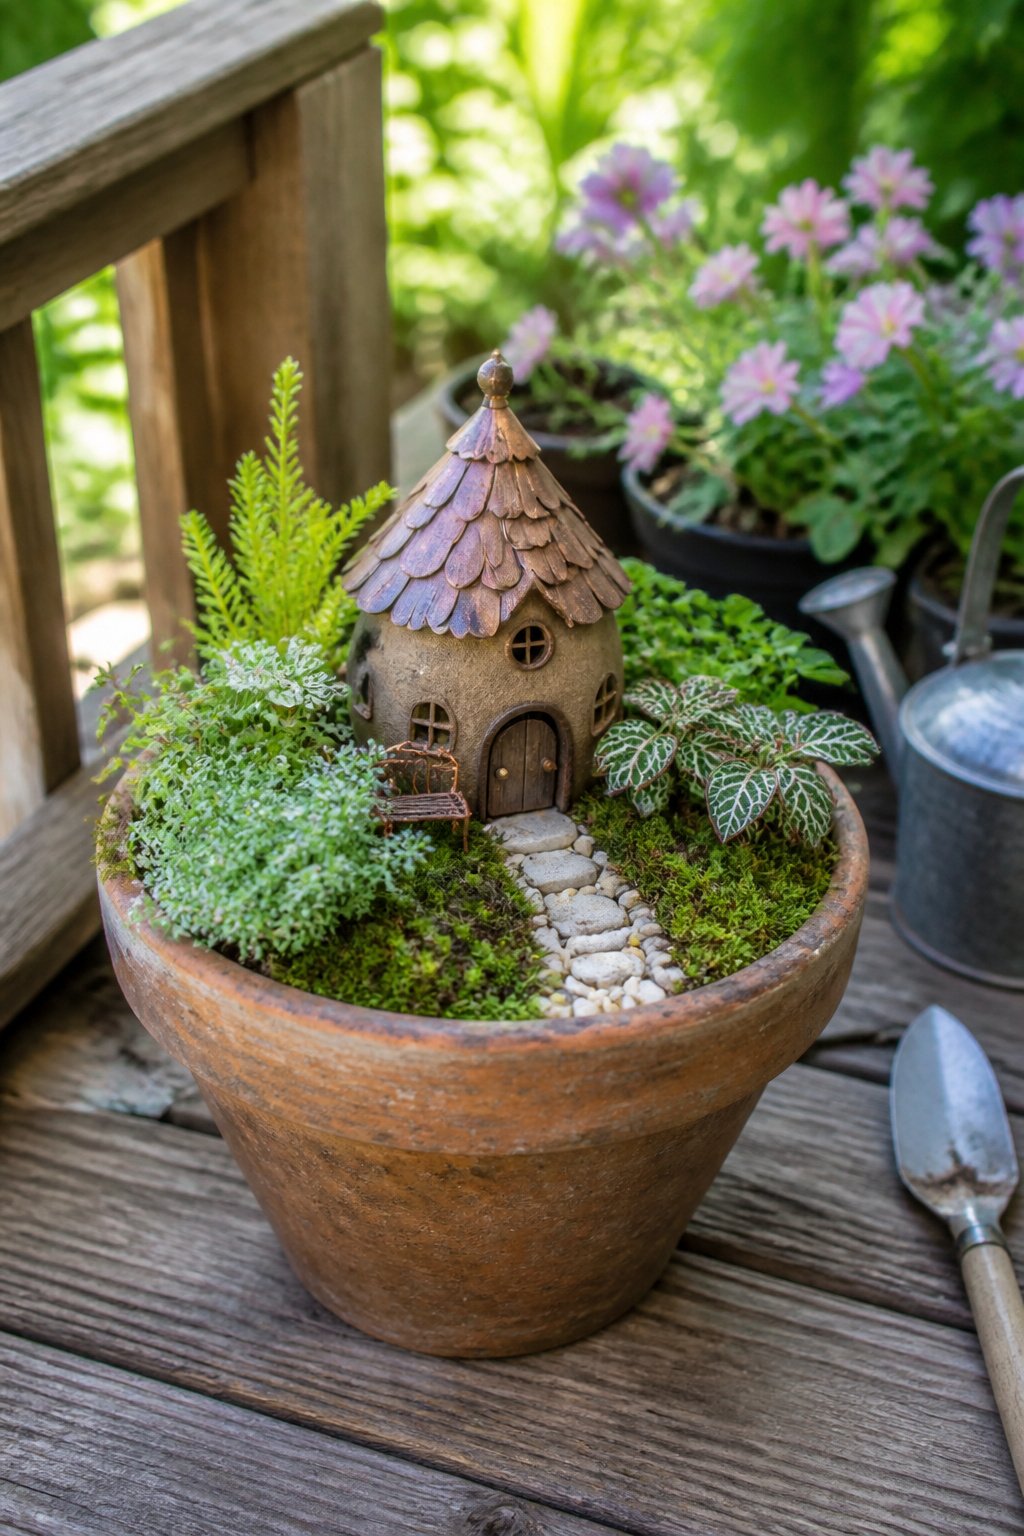
A 6- to 10-inch pot is the right starting point for a first fairy garden. That size holds enough soil for a small house, one or two plants, and a path without the whole thing tipping over or drying out in an afternoon.
Drainage matters more in a pot than anywhere else. Sources keep coming back to this: drill holes if the container does not have them, because fairy gardens are built to last a season or two and rotted roots end the project early. Terra cotta, galvanized tubs, even nested bowls work, but only if water escapes.
The difference from a yard installation is control and consequence. In the ground, a plant that hates its spot can be moved or will likely survive anyway. In a pot, the wrong plant in the wrong light just dies, and the whole scene looks like a graveyard by July. I start with the container in the spot where it will live, then match plants to that light, not the other way around.
Soil choice depends on what you plant. Regular potting mix for most small plants, sandy cactus mix for succulents. A few tablespoons of worm castings mixed in gives young plants a head start without the risk of burning roots that full-strength fertilizer brings.
Accessories go in last, after the plants are settled and watered. Houses, pebbles, tiny stairs, a pinch of sand for a path. The temptation is to pack it full, but air around the objects is what makes them read as a landscape rather than a clutter drawer.
2. Broken Pot Fairy Garden
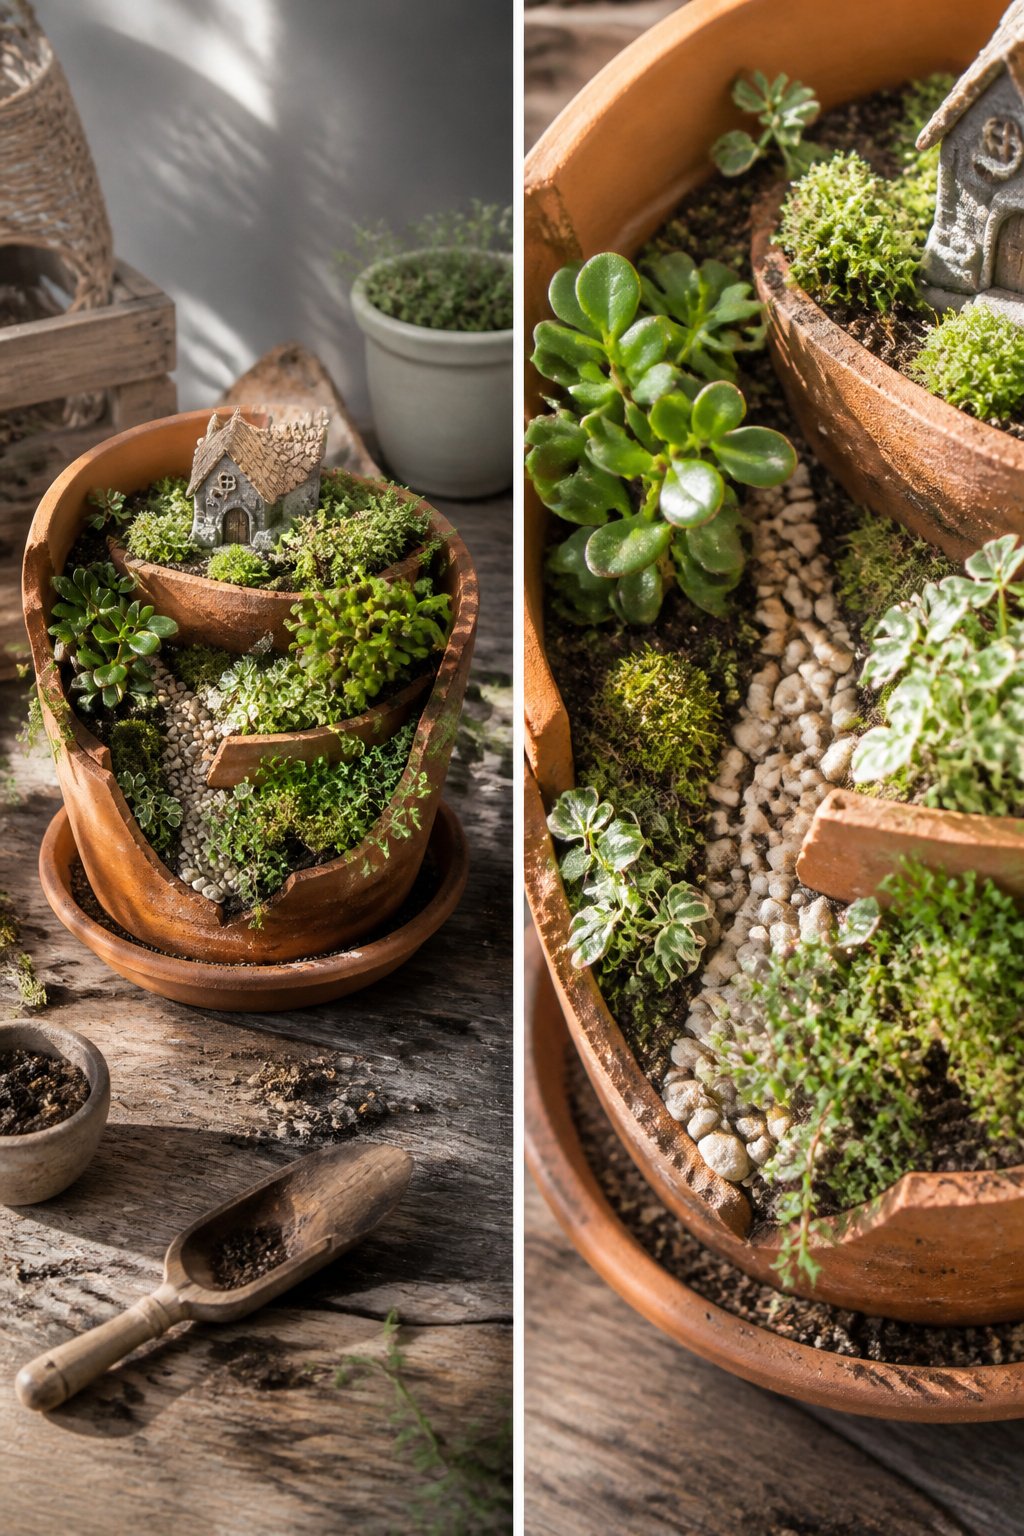
A cracked terracotta pot that would otherwise go in the trash becomes the bones of a tiered fairy garden with real depth. The curved shards work as retaining walls that hold soil in stacked levels, each one a separate scene. I wedge the largest broken piece upright for the middle wall, then fit smaller shards into the gaps like puzzle pieces to keep dirt from washing out with every watering.
Between those tiers, small plants and moss tuck into the pockets the breaks create. Over time, as soil slowly seeps with waterings, the whole thing shifts; a jade plant I once set on an upper level sank six inches in two seasons until I rebuilt the wall with flat river rocks and wet clay-heavy dirt as a kind of glue. The clay dried hard, and that rock wall has held since.
Flat stones laid between tiers make stairs that look like they were always meant to be there. A little sand or gravel raked smooth becomes the path.
For pots, ask at any nursery with outdoor displays. Staff usually have a pile of cracked stock they will sell cheap or give away, especially after spring rush when handling breaks pots by the dozen.
3. Beach Fairy Garden
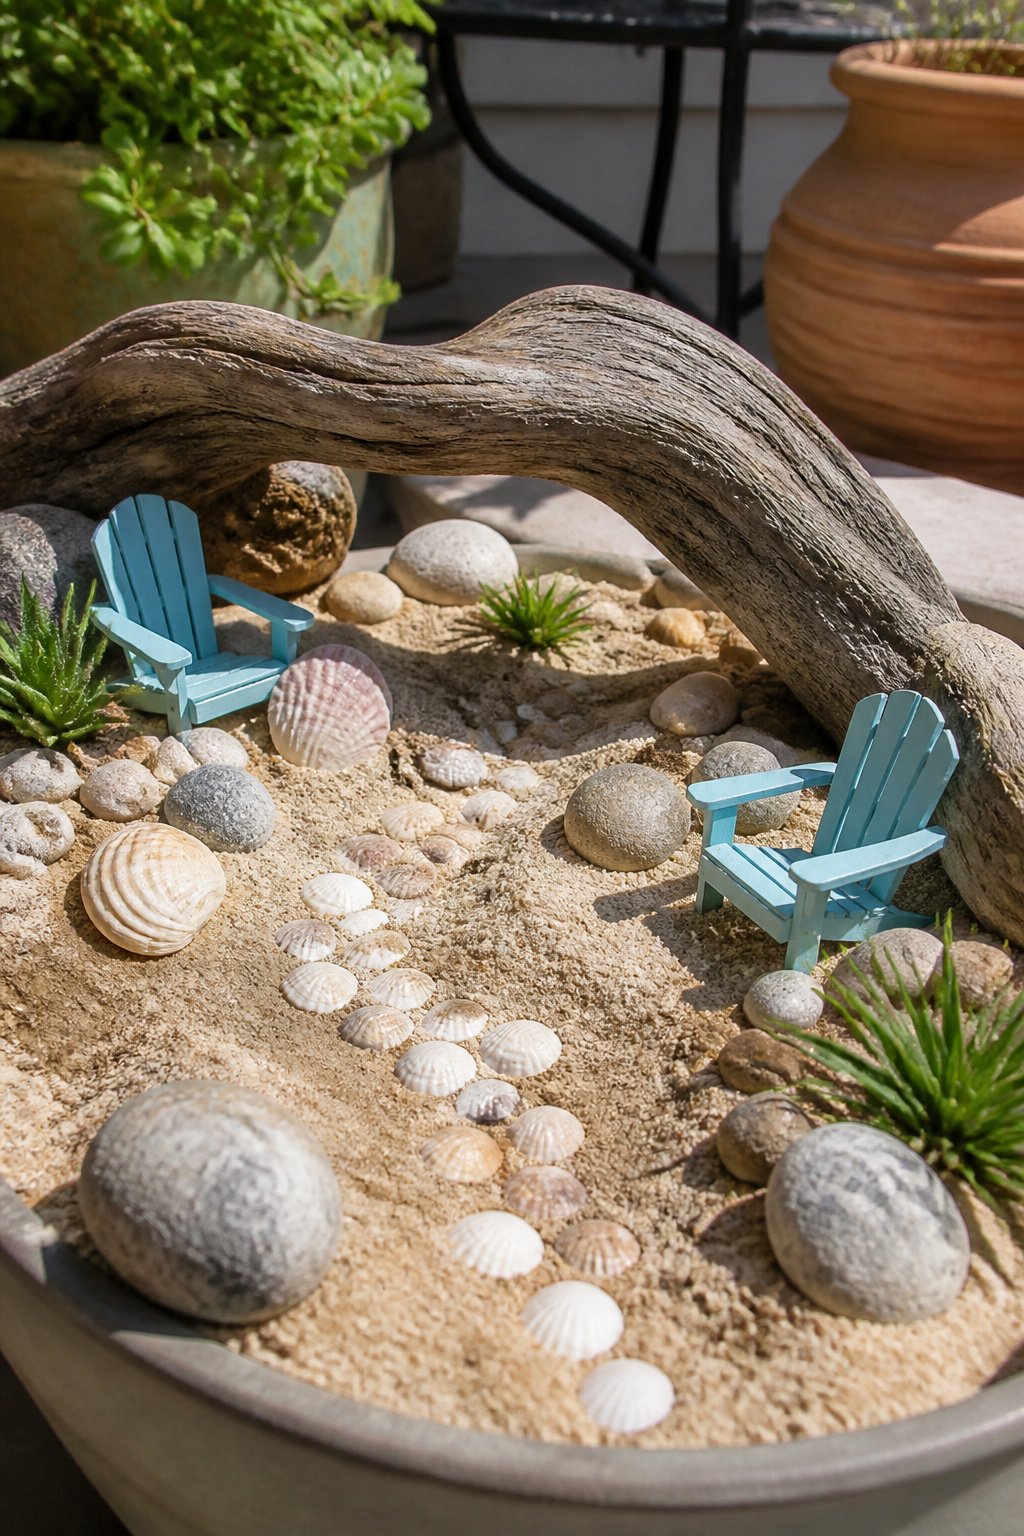
Sand reads as a beach faster than any other single choice, so a beach fairy garden starts there. I tried ordinary play sand once and it compacted into concrete after two rains; builder’s sand or paver base with a little grit mixed in drains better and still looks the part. A driftwood piece, even a forked stick washed white, gives the scene its scale and something for a miniature chair to lean against. I paint those chairs aqua now after seeing how a white one disappeared against pale sand, and the color holds up fine if you use exterior acrylic.
Seashells work as path material if you press them flat-side-down so they do not roll under a watering can. The real limit is plant choice. True beach plants want salt spray and deep sand; most will sulk in a container and rot by August. Sedum and moss rose are the replacements that survive the same full-sun beating and still look coastal. Sedum spreads low enough to read as dune ground cover, and moss rose flowers in that washed coral that fits the theme without trying too hard. Salt-tolerant look-alikes beat actual beach plants in a pot every time; the succulents forgive a missed watering and the moss rose self-seeds if you let it.
4. Dinosaur Theme Garden
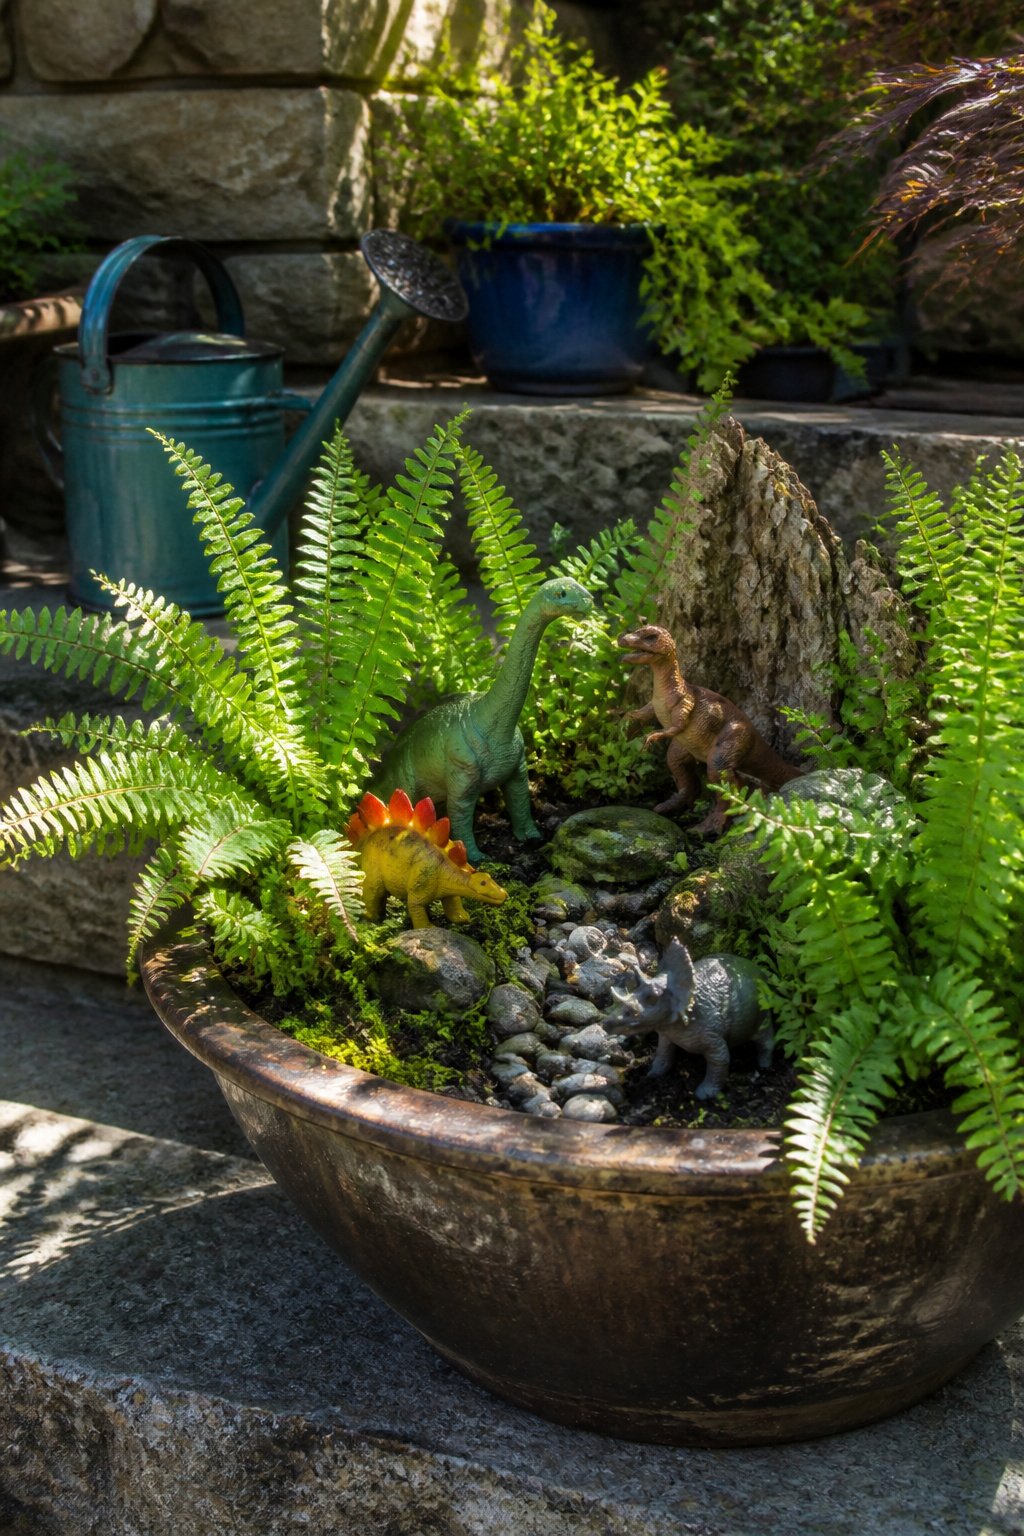
A dinosaur theme garden bends the fairy garden scale in a direction kids actually want to play with. The tiny plastic dinosaurs you find in craft store bins or dig out of old toy boxes become the inhabitants, stomping through moss carpets and around pebble outcrops that read as prehistoric terrain. Ferns do the heavy lifting here: a single Boston fern or a cluster of small maidenhairs fills the pot with the dense, Jurassic-looking undergrowth that makes the whole scene feel older than it is. Keep the dinosaurs to an inch or two tall, or the scale collapses and your ferns start looking like houseplants with toys dropped in them.
The real payoff is the shared space. Kids who would ignore a delicate fairy setup will rearrange dinosaurs daily, tell stories, flood the terrain with a watering can. That interaction keeps the garden alive in a way static decor never does. Ferns tolerate the extra moisture and handling better than flowering annuals would. After a summer of my nephew relocating a triceratops family through the same patch of selaginella, the plants looked rough but grew back; a fairy figurine would have snapped in week one.
5. Farm Theme Fairy Garden
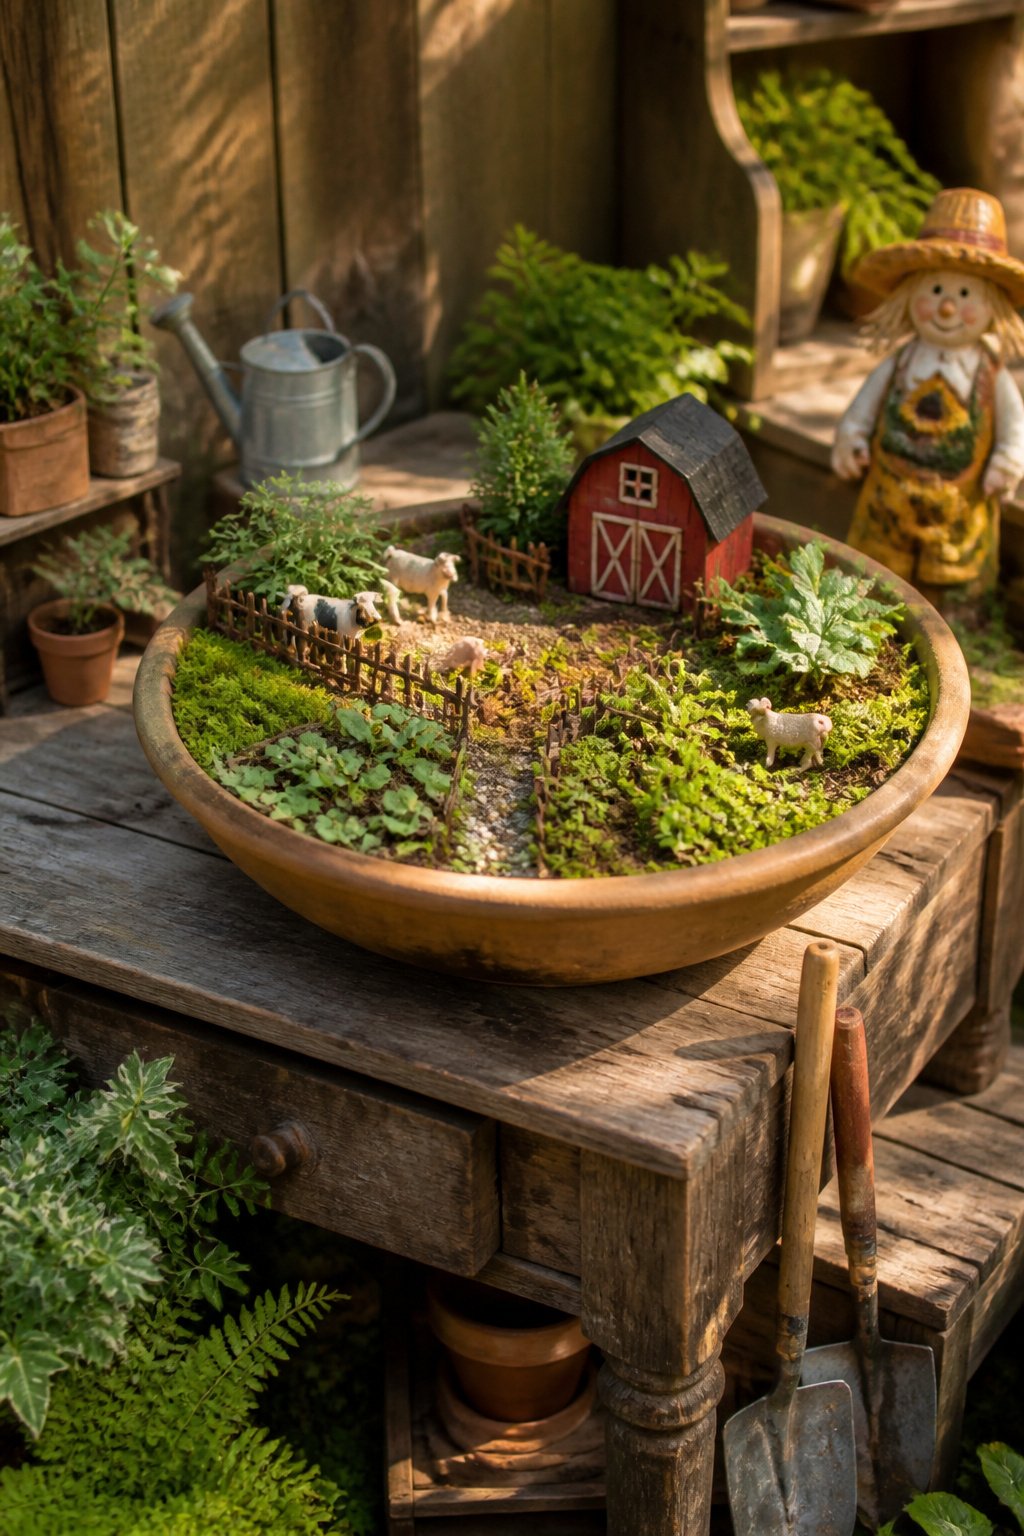
A farm theme fairy garden reads differently from the cottage or woodland versions, even when the plants underneath stay the same. Moss, creeping thyme, and low ferns still form the ground layer, but arranged in tidy rows they read as miniature vegetable plots rather than wild meadow. The change is in the accessories.
A miniature red barn, no bigger than a coffee mug, shifts the whole story. Twig fences pushed an inch into the soil mark off tiny fields, and a few plastic farm animals from the toy bin turn the same sedum into pasture. One blogger’s version used a painted barn her kids had made and hay bales cut from twine, which kept the whole setup under the cost of a single ceramic fairy door.
The plants do not need to change; the framing does. Ground cover that looks like fairy moss in one container becomes crop rows when edged with pea gravel paths and a wheelbarrow no one plays with anymore. An old wagon works especially well here, its rusted bed holding the soil and its shape already suggesting farm equipment rather than flower cart.
The charm is in the mismatch between scale and intent. A two-inch plastic horse does not look magical in the same way a glitter-winged figurine does, but placed beside a barn painted barn-red with acrylics from the craft drawer, it reads as deliberate story rather than leftover toy. That is the trick with theme gardens: commit to the accessories fully enough that the plants support the scene instead of carrying it.
6. Fairy Tea Party
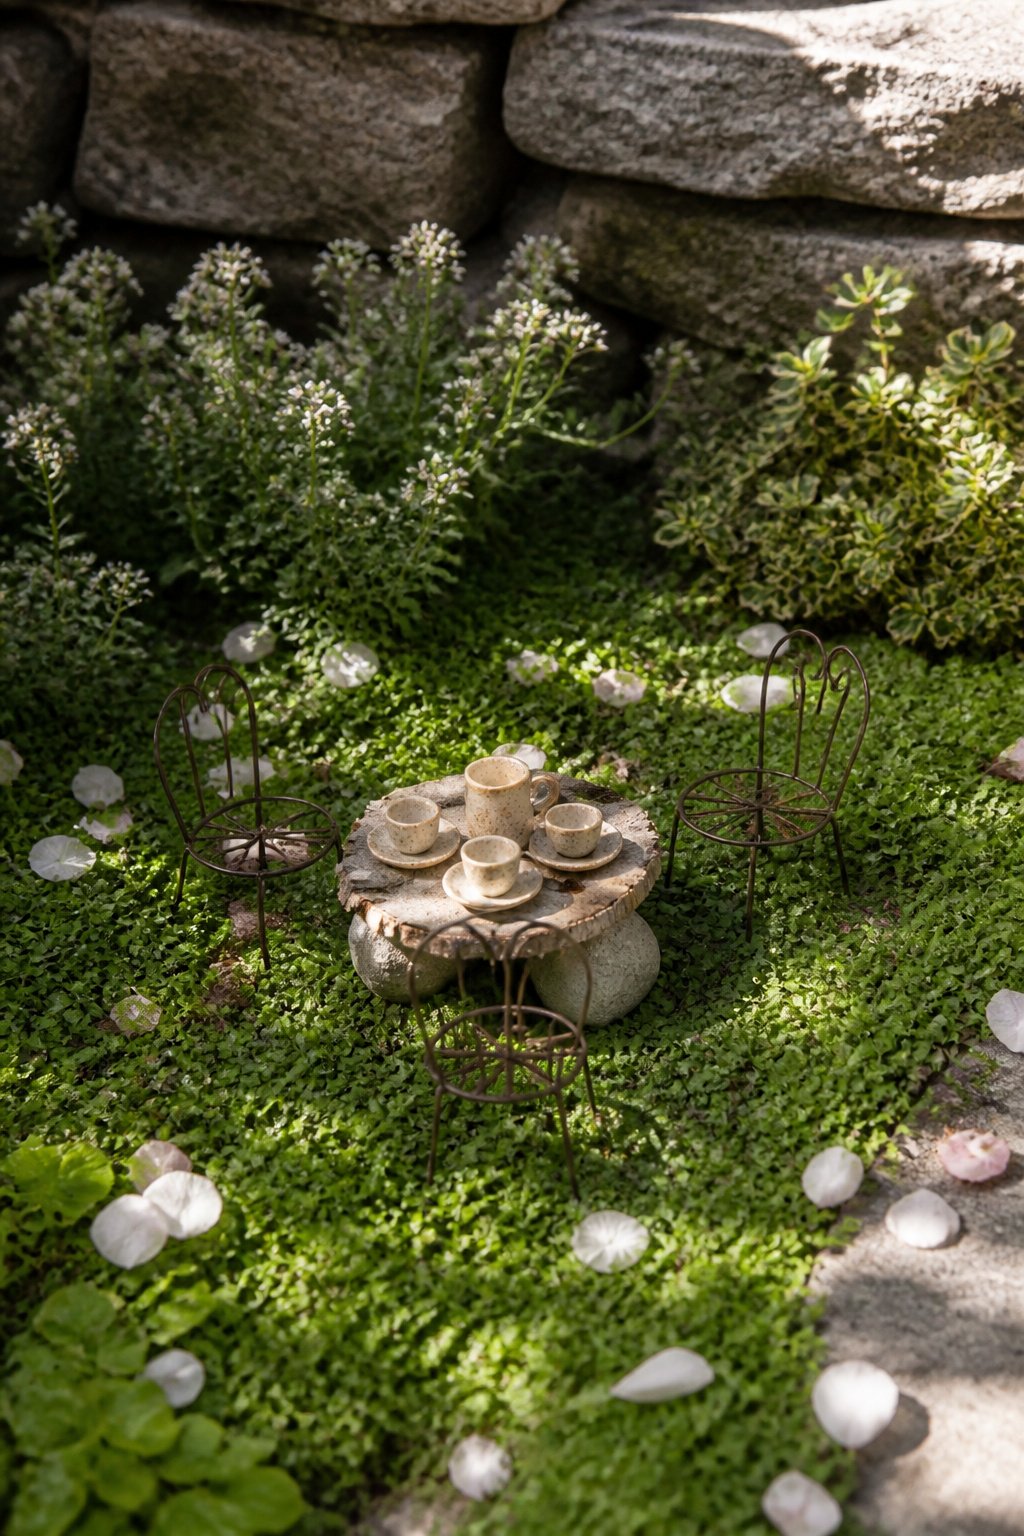
A tiny tea party needs ground cover that reads as lawn from two feet away. I like woolly thyme or baby tears for that clipped-grass look, and a single miniature rose or lavender stem poked in back suggests a garden hedge without overwhelming the scale. The props themselves, those inch-high cups and bent-wire chairs, weigh almost nothing. A gust off a balcony will scatter them into the neighbor’s boxwoods. Glue a penny to the underside of each piece before you set it out; the weight sits low and invisible, and the copper ages to a dull green that blends with moss. For the table, a slice of birch bark on three pebbles works better than the ceramic versions sold online. It weathers, it drains rain without pooling, and if a squirrel lands on it the thing just tips and rights itself rather than shattering. Set the chairs facing slightly inward, not straight at the table. Straight lines read as staged; a three-degree angle each way looks like conversation happened and stopped.
7. Hanging Fairy Garden
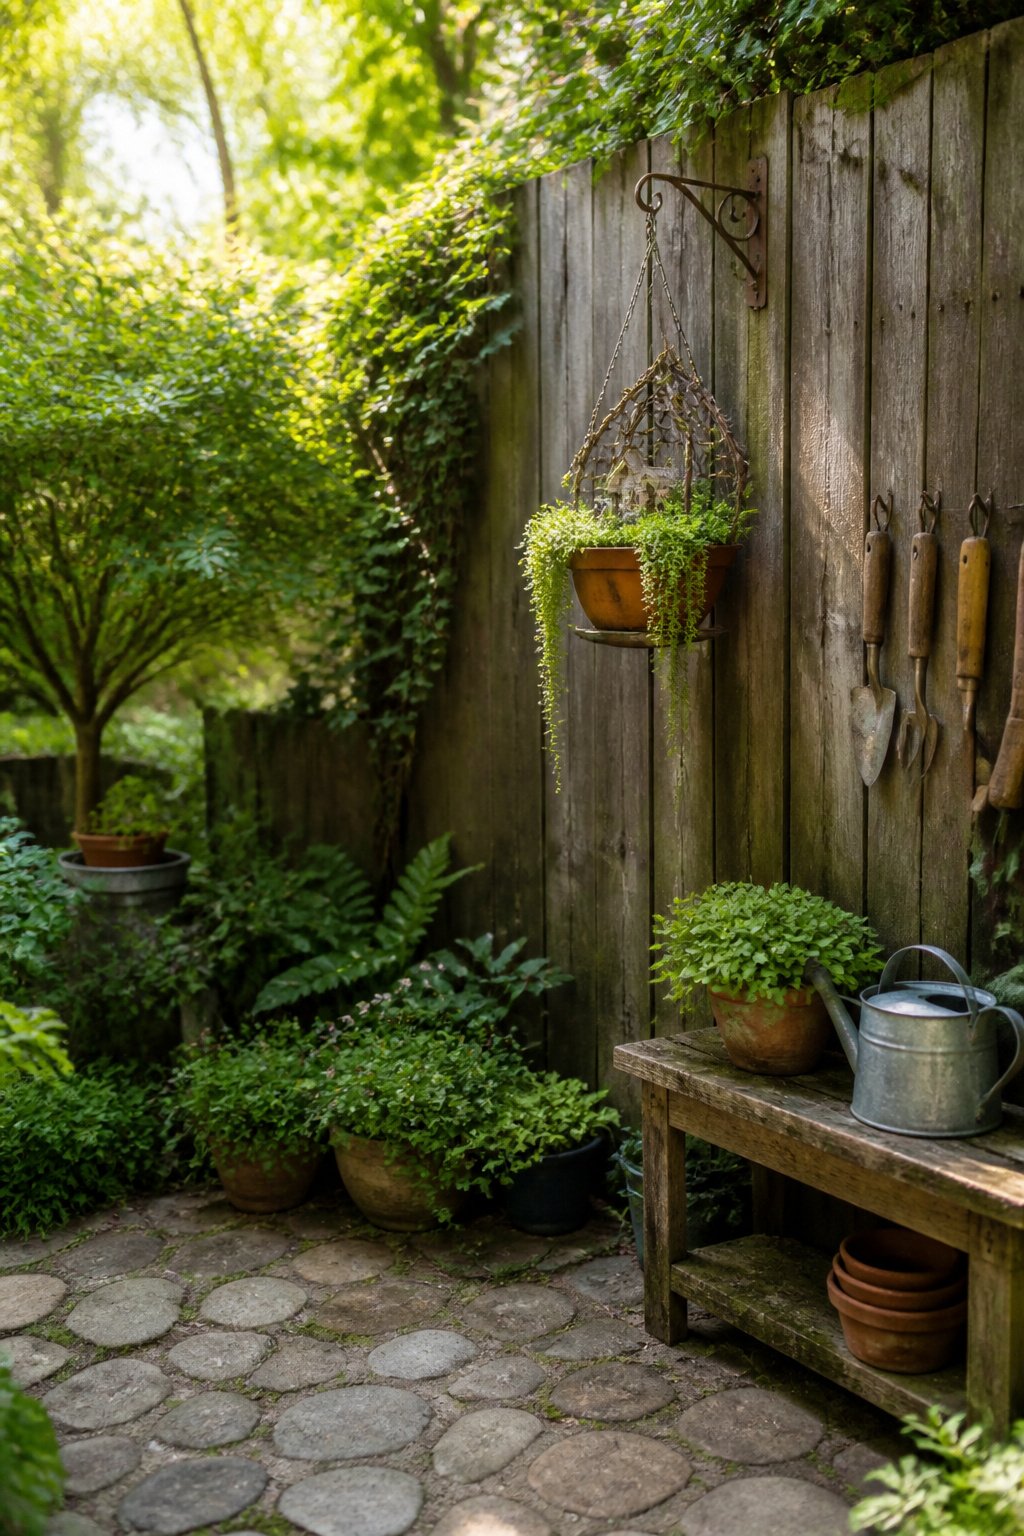
A hanging fairy garden puts the whole scene right at eye level, where the details actually get noticed. The weight sneaks up fast, though. A clay pot full of damp soil and a soaked-through liner can pull a cheap bracket straight out of siding. I check the hardware rating against the total wet weight before I commit, and I still lose sleep over the one I mounted under an eave that turned out to be hollow-core trim.
Drainage without the drip matters more here than anywhere else. Sources suggest drilling holes, which is standard, but a saucer or an inner reservoir catches what runs through so it does not land on whoever walks below. I have seen coir liners suggested for that effortless look; they dry fast, which helps, but they also shed water the moment they get saturated. A shallow plastic tray slipped inside, with the holes routed to it, solves the problem without showing.
The plants that survive up there are the ones that forgive a dry spell. Low-growing choices from the usual lists, sedums and small-leafed thyme, handle the exposure and the intermittent water that comes with a basket you need a step stool to reach. Moss dries to straw in two afternoons of sun; I skip it for hanging work and let the soil surface read as earth instead.
8. Enchanted Cottage
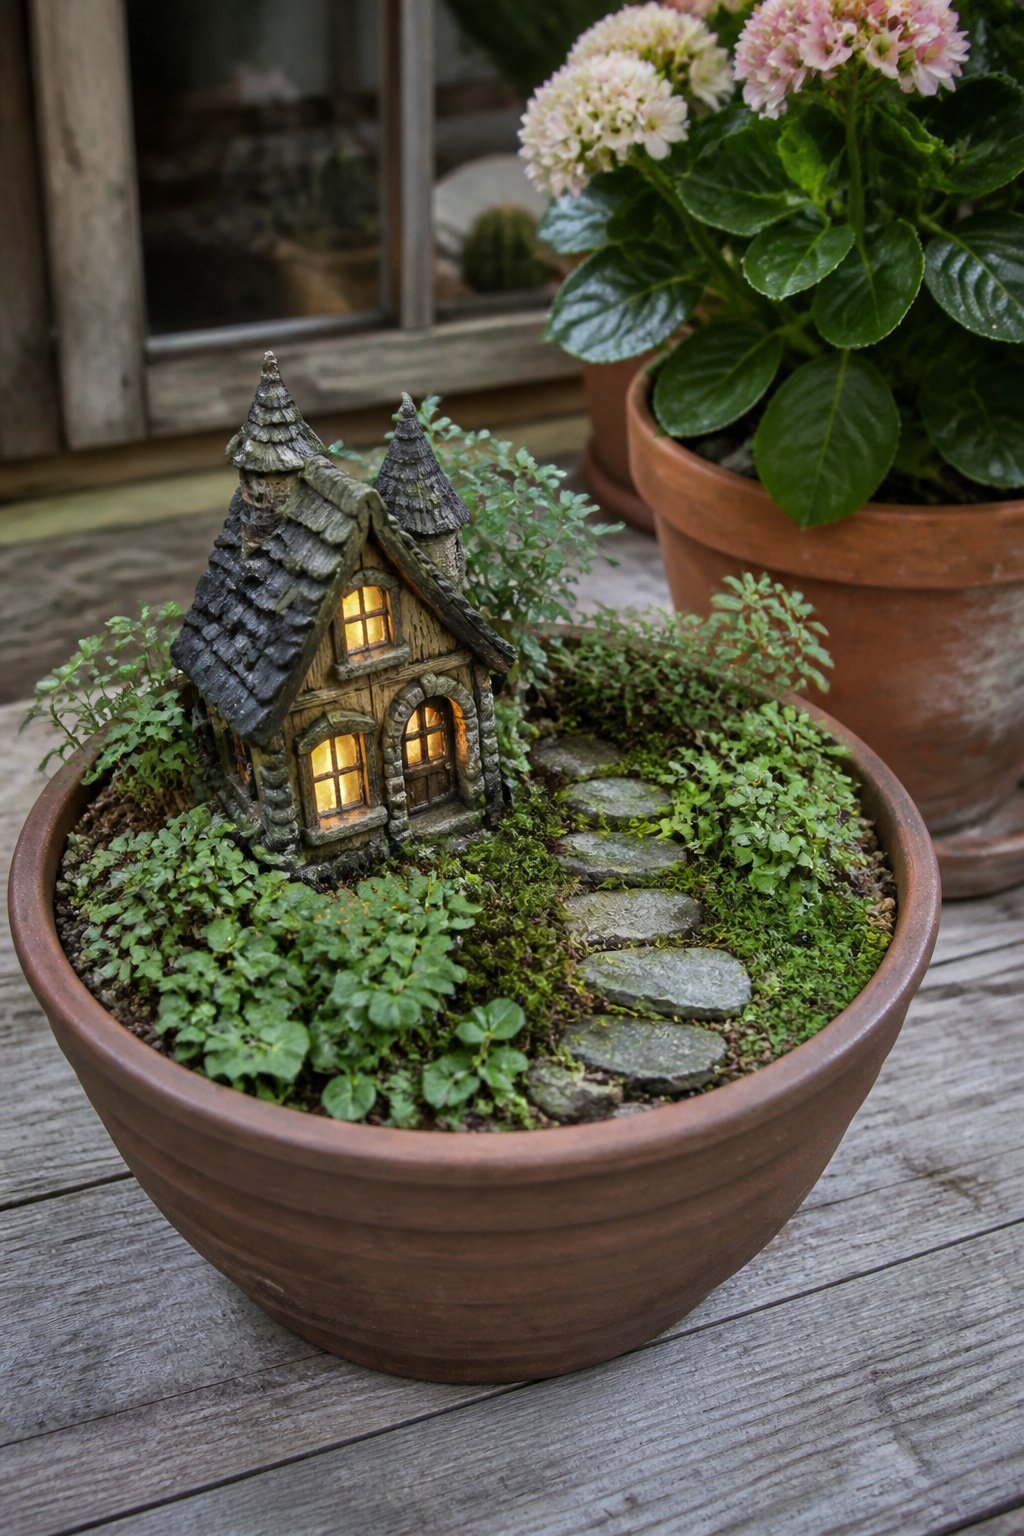
A miniature cottage gives a fairy garden its reason for being. Wood or resin houses are the most common starting points, and both work fine tucked against the edge of a pot or set slightly off-center in a raised bed so the planting can wrap around it. The sources that rank for this idea keep coming back to the same detail: an electronic flickering candle inside the windows reads as faint movement from within, and that half-seen glow is what makes a passerby slow down and look twice.
Building the cottage yourself changes the texture completely. Sticks, stones, and moss layered over a cardboard or small wooden box frame will read as something that grew in place rather than something that got placed there. The trick is keeping the scale consistent. A house built from twigs and bark should sit low, almost burrowed into the soil, with the roofline just clearing the surrounding plants.
Planting around it wants to look accidental. Small-leafed ground covers that spill over the foundation line, a slightly taller clump to one side as if it seeded there, maybe a flat stone path that stops short rather than leading anywhere formal. The cottage should look like the garden formed around it, not like it was dropped in after. Battery LEDs warm the interior after dusk without any wiring, and the ones with a soft amber flicker do more than steady white ones for the sense that something might be home.
9. Fairy Bird Houses
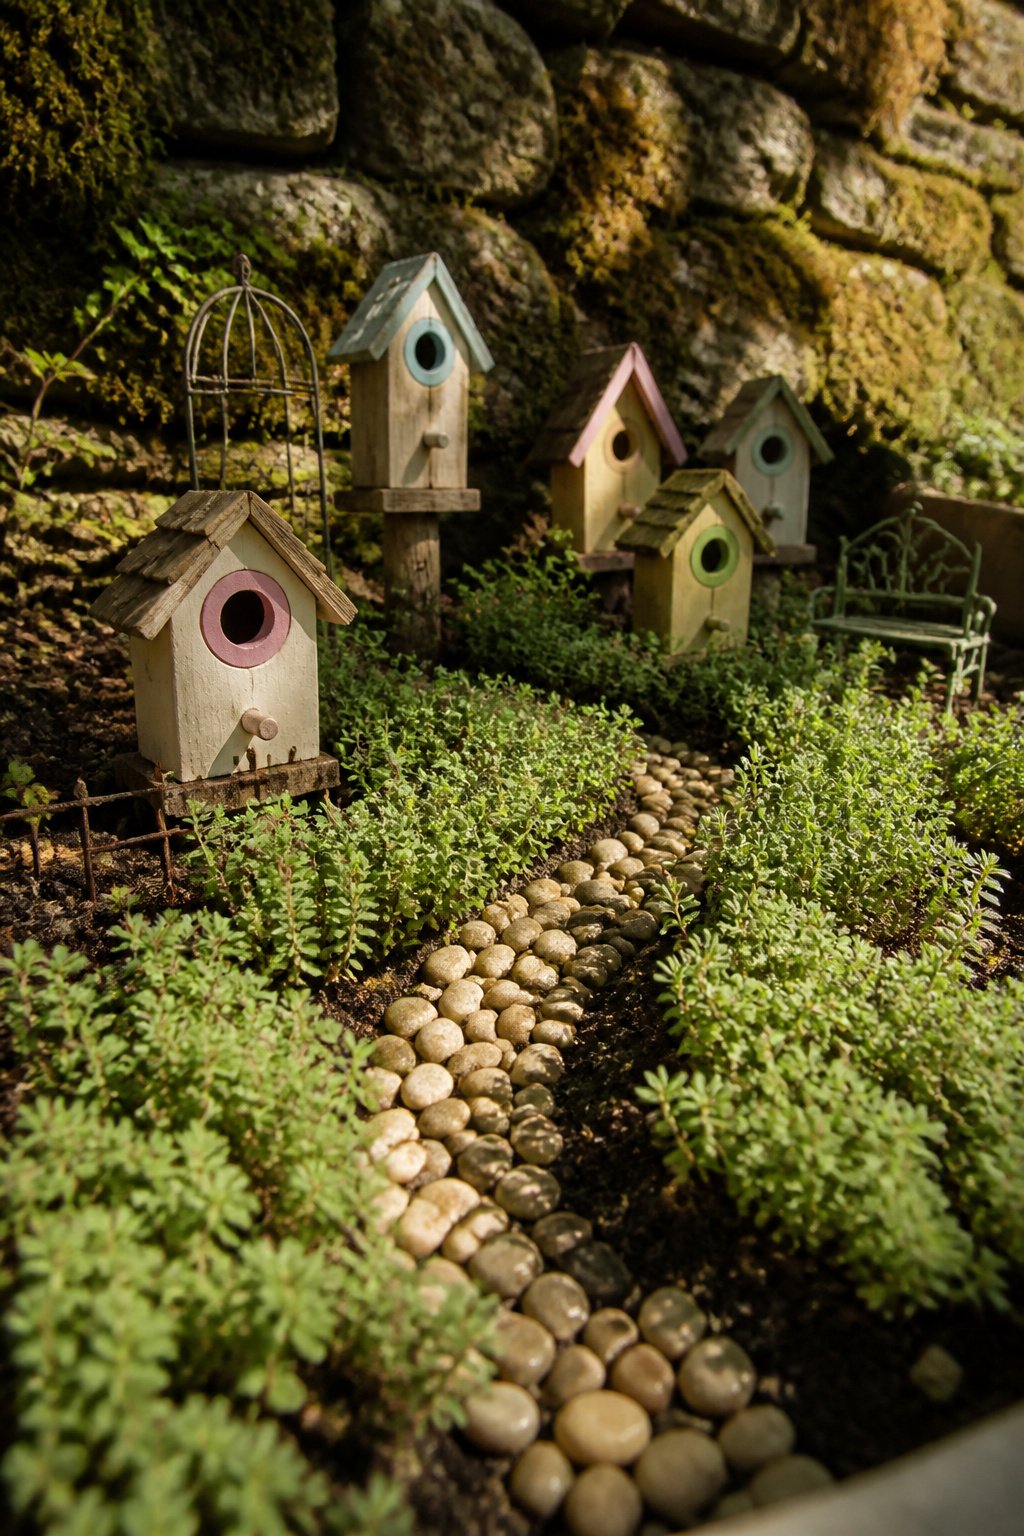
A small wooden birdhouse from the dollar store lands at exactly the right scale for a fairy dwelling, and the round entrance hole becomes a doorway once you stop thinking like a human. Paint it with acrylics, add a scrap of moss or a painted shutter, and the illusion holds. I have seen these mounted two ways: on a short stake pushed into potting mix so the house rises above the thyme like a real cottage on a hill, or freestanding on a flat surface where a pebble path can lead straight to that repurposed opening.
The stake method keeps the house stable in wind and lets you move the whole scene when the light changes. Freestanding works better under a porch roof or inside a terrarium where nothing jostles it. Either way, the entrance hole is already the correct fairy proportion, so resist the urge to enlarge it. A gourd-shaped house hung from a real branch, or a miniature Victorian birdhouse tucked among potted flowers, reads as a village the fairies built rather than a craft project you finished. Scale is the whole trick here. Match the birdhouse size to your other accessories, or the scene collapses into toy clutter. One well-scaled house beats three competing sizes every time.
10. Fairy Garden Gnomes

Gnomes shift the mood of a miniature garden from floral sweetness to something rougher and older. I learned this the hard way after placing a ceramic gnome I’d found at a thrift shop next to a delicate winged fairy in a window-box setup. The gnome dwarfed her; he looked like a woodland intruder rather than a neighbor. Match the scale of your figures to a single reference piece, then build outward, or the scene collapses into toy clutter.
The sources disagree on whether gnomes belong in fairy gardens at all. One camp treats them as guardians for hidden corners behind garages or under stairs, protectors of buried treasure with a ghoulish, old-world weight. Another prefers the garden to look as if fairies built it themselves, which makes any manufactured figure, gnome or otherwise, a compromise. Two ways to play this: commit fully to the fairy theme and keep the creatures tiny and winged, or let the gnomes stand guard and push the whole scene toward woodland tones, moss, and shadow. The woodland route wins if you already lean toward thrifted statuary and don’t mind a slightly ghoulish edge. The fairy-only route wins on a small balcony where every inch needs to read as deliberate and delicate.
I keep my gnomes separate now, in a corner pot under the stairs where scale doesn’t fight and the mood stays consistent.
11. Fairy Garden in a Teacup
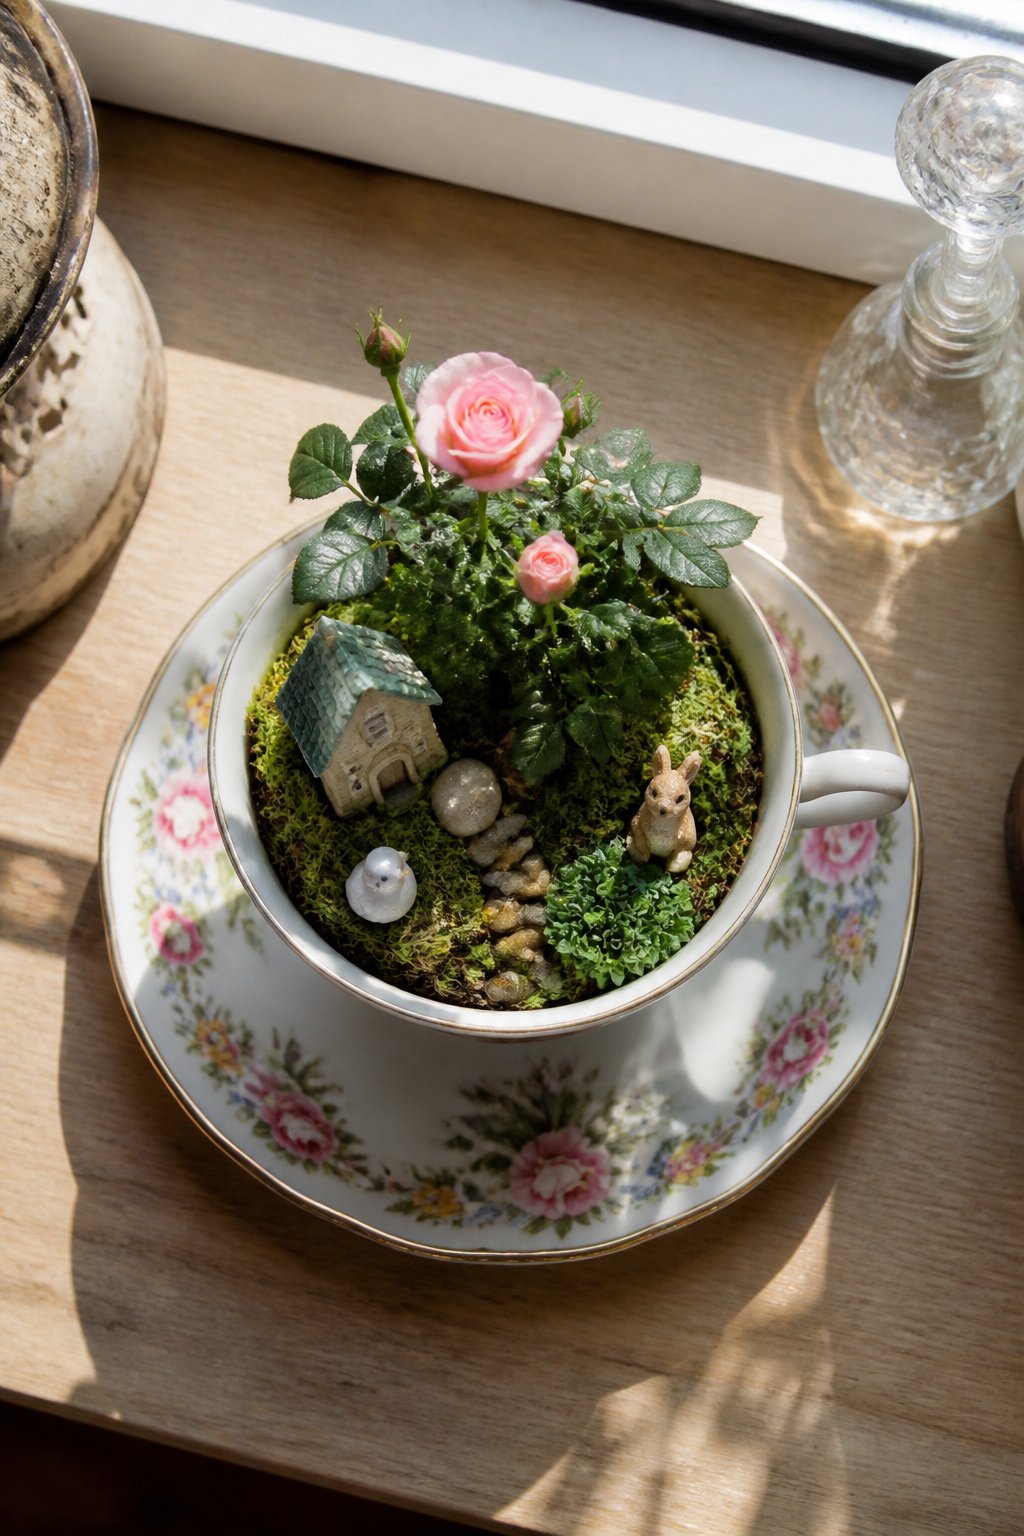
A teacup on the windowsill is the smallest space that still earns the name fairy garden. The ceramic needs a drainage hole drilled through the bottom or the roots will rot in days; a diamond bit and a slow hand keep the cup from cracking. Hens and chicks work here because one rosette reads as a full shrub in that scale, and they tolerate the shallow soil. Watering becomes the whole job. A teacup holds so little mix that it dries fast in sun and stays soggy in shade, so I check mine with a finger before adding anything. The saucer underneath catches drips and finishes the scene better than any purchased base.
12. Succulent Fairy Garden

Sedum and sempervivum, the hens and chicks varieties, give a fairy garden the structure of miniature shrubs without the watering schedule. Their leaves hold their own moisture, so a container built around them runs on a different rhythm than moss-and-fern setups. I learned that the hard way after drowning my first attempt with the same daily misting I’d given a shade-loving arrangement. Succulents want grit-heavy soil, roughly half perlite or coarse sand, and water only when the pot feels light and the soil is dry to the knuckle.
The forgiving part is real. A stretched-out echeveria or a sedum that dropped a leaf to rough handling just reroots and fills back in. Baby plants from fallen leaves tuck into gaps between pebbles or pinecones, so the garden thickens on its own. For sun-baked balconies or that one strip of yard where hose access is awkward, this is the fairy garden that keeps its shape through a three-day July weekend away.
13. Magical Mirrors
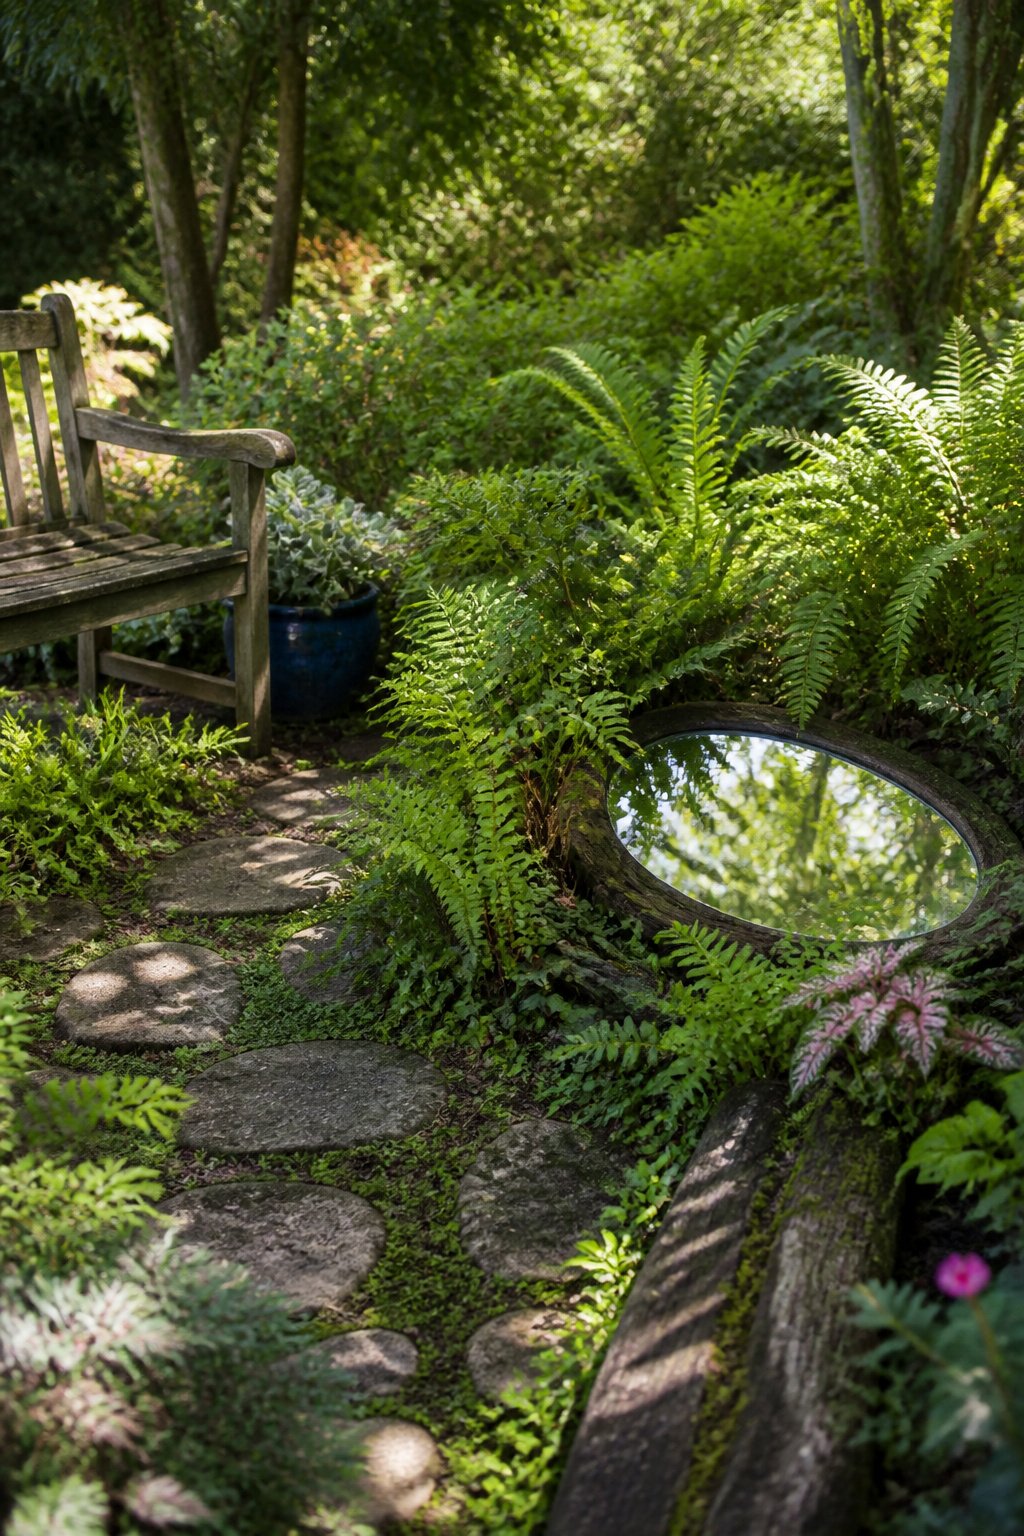
A small mirror tucked between ferns can read as a hidden pond or a portal you were not meant to find. I like the trick best in shade, where a glint of sky catches the glass and the eye fills in the water. The sources I trust on this split on material: one writer uses real glass, framed and weathered, while another points out that acrylic mirror sheet survives a dropped watering can and a hard frost without shattering. Real glass carries a sharper reflection, but a crack turns it into a hazard you will not notice until you are kneeling to deadhead. If you do use glass, seal the frame edge with exterior caulk and lean it against a wall rather than setting it flat, where a foot or a knee can land wrong. Flat placement has a second risk: a mirror angled toward sun can focus light hot enough to brown a leaf or worse. Keep the face tilted down, catching only diffuse sky, and never leave a concave surface where afternoon sun lines up. The acrylic route costs more upfront but forgives the bumps of a garden that sees actual use.
14. Fairy Garden with LED Lights
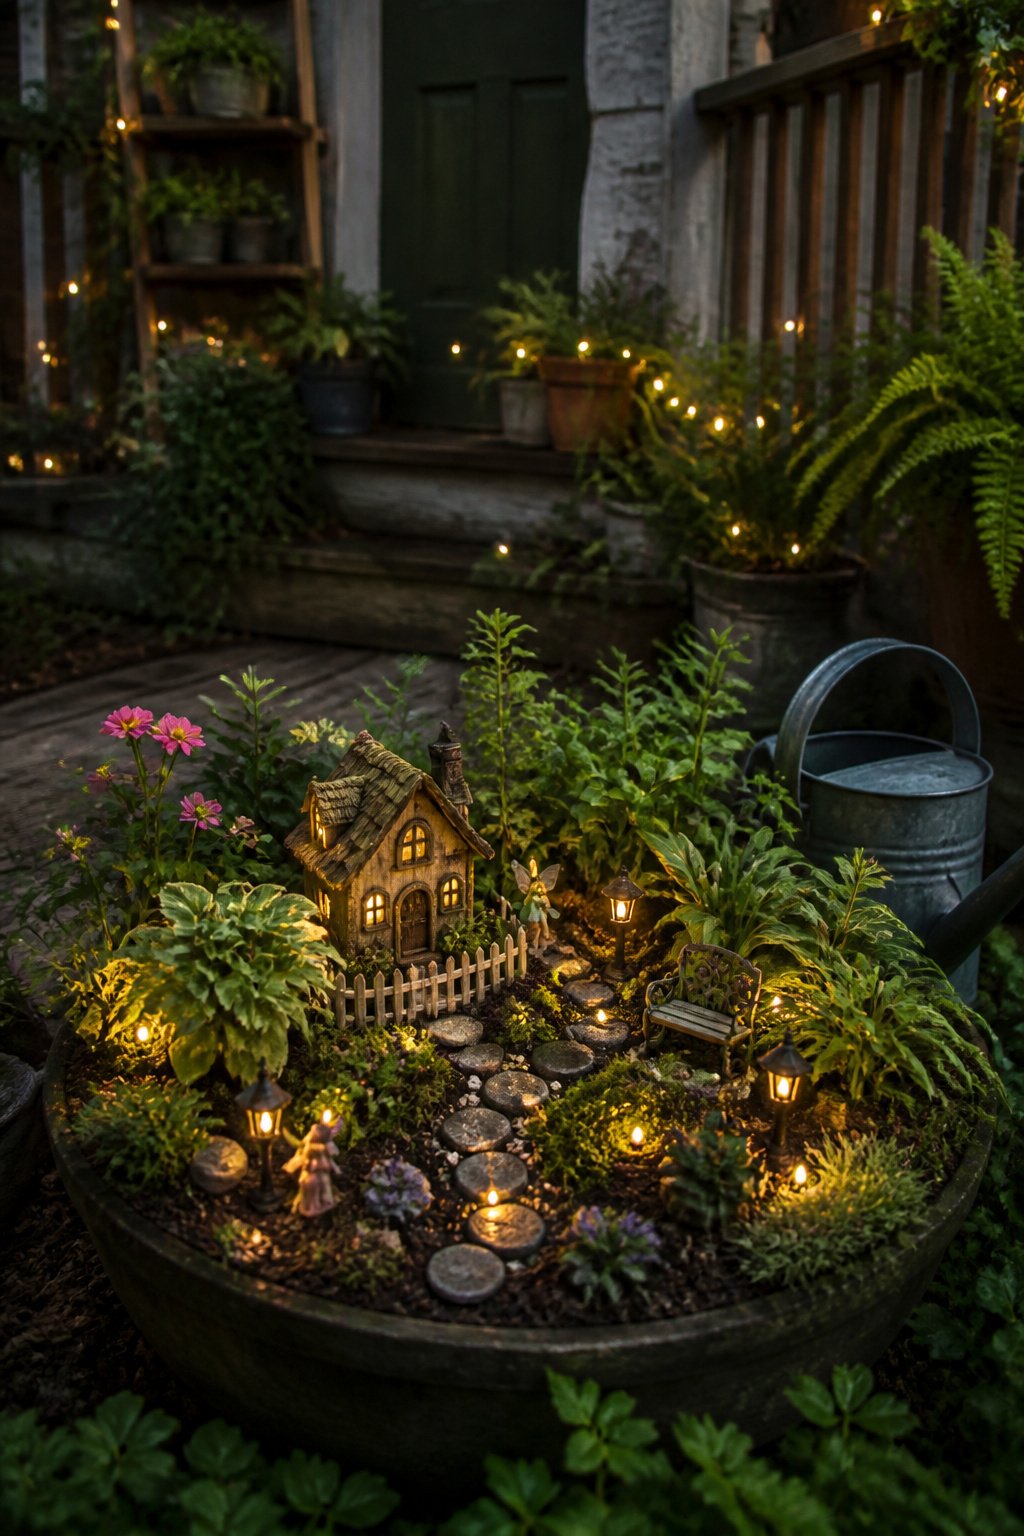
Evening is when a fairy garden actually earns its name, and battery-operated or solar LED strings are the simplest way to get there without an outdoor outlet. Solar strands charge through the day and switch on automatically; battery sets give you control over placement where shade blocks a panel. The trick is burying the wire under soil or tucking it beneath bark mulch so nothing shows but the glow. Timer settings on battery boxes run about six hours, which saves you from nightly switch-flipping and stretches the cell life. Weatherproofing matters more than the fairy houses themselves: some light sets read "indoor use only," so check the tag before you buy, and seal battery compartments with a wrap of electrical tape if the lid gap looks questionable.
Incorporating fairy lights is one of the primary ways to evoke a magical ambiance in your backyard.
That ambient glow works best when it catches something reflective, so position a few miniature white flowers or glass pebbles near the bulbs to bounce the light around the pot.
15. Water Features
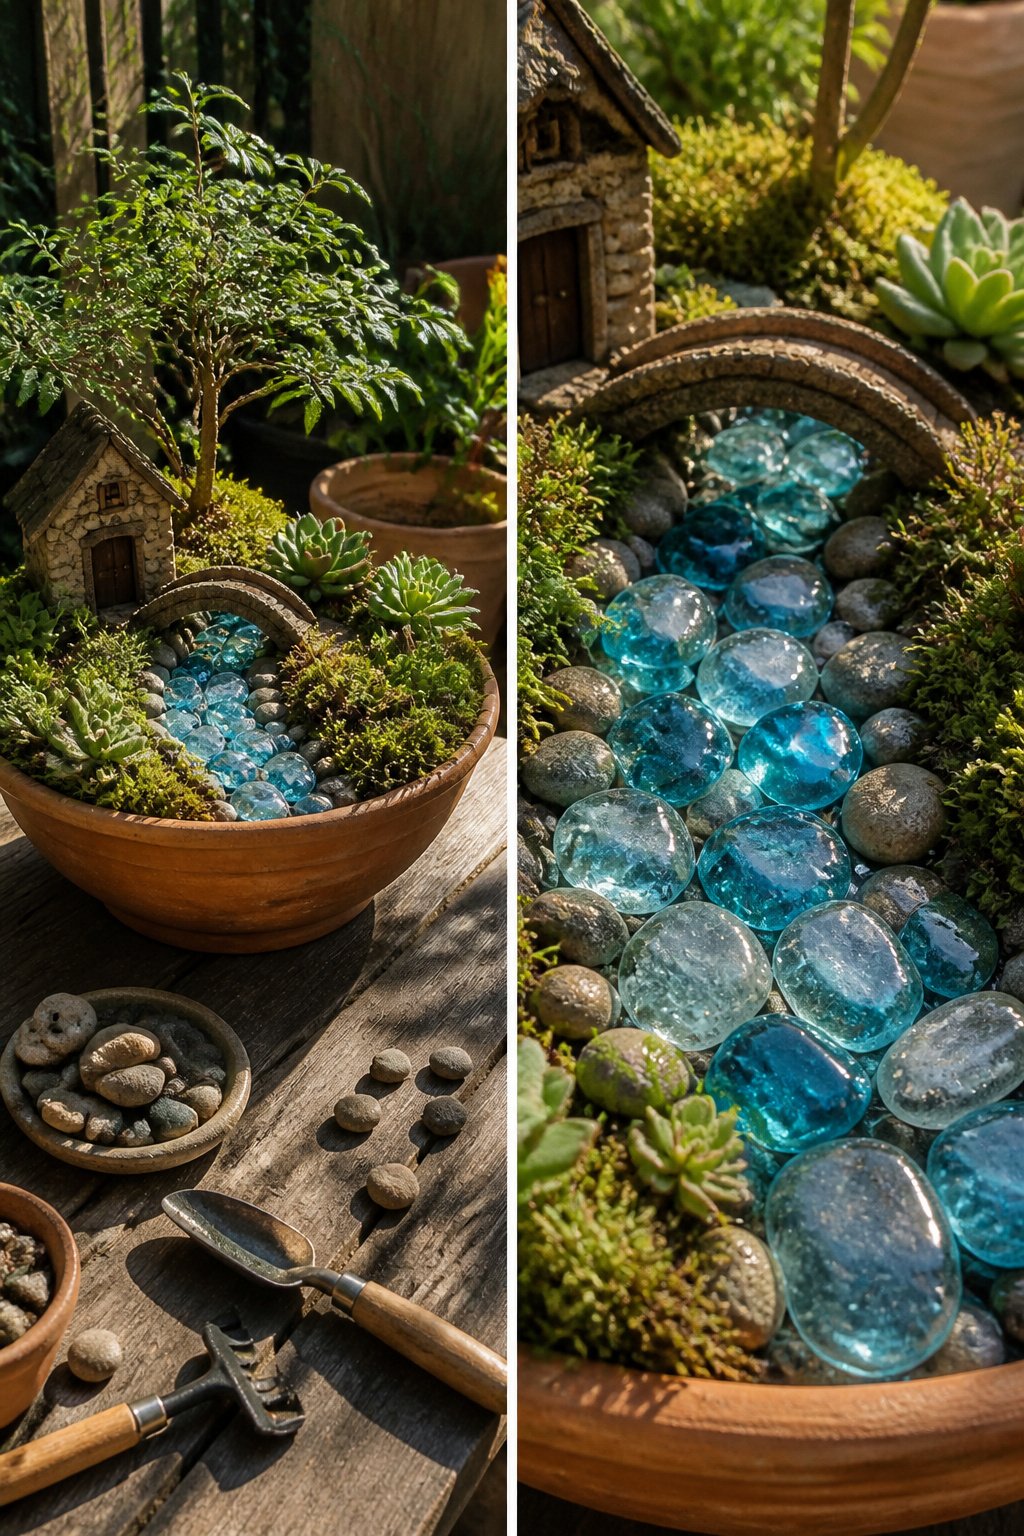
Still water reads as magical in a miniature setting, but actual ponds in pots turn sour fast. A small recirculating fountain solves this cleanly: the moving water stays clearer and the sound does half the work of making the space feel enchanted. Blue and clear sea glass or marbles layered over river rocks give the same illusion without the standing-water headache of mosquitoes or algae, which is what I settled on after watching a bowl of intended "serene" water go green in four days. If you do run a real fountain, keep it small enough that evaporation does not leave the pump grinding dry by afternoon. Bridges arching over either kind of feature, real or implied, give the eye a path to follow and the scene its sense of scale.
16. Vertical Garden
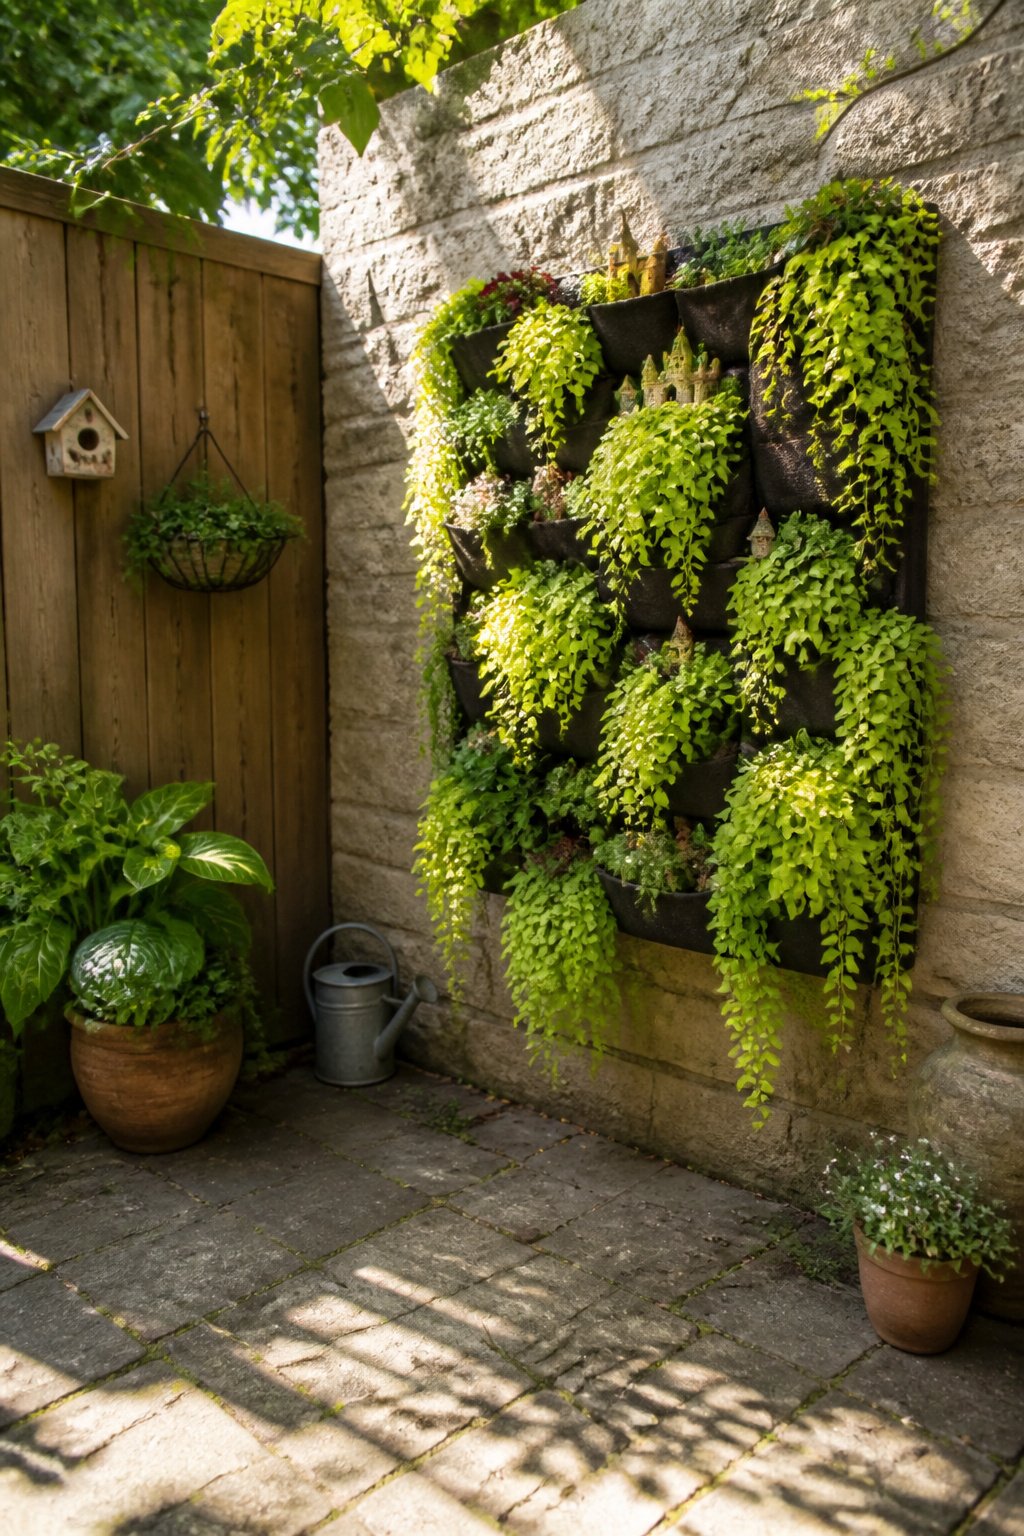
A vertical fairy garden saves the only real estate that matters when you’re working a balcony or a narrow patio: floor space. Wall-mounted pocket planters or a standing frame let you build upward instead of outward, and the orientation changes everything about which plants hold up over a season.
Trailing varieties become the stars. Creeping Jenny spills over the edges in soft chartreuse, and miniature ivy clings to the wire without the staking or fuss that upright plants demand. In a wall-mounted arrangement, those two do the work of filling gaps between pockets so the structure reads as one living piece rather than a row of separate pots.
I learned the hard way that full-sun perennials like sedum or hen and chicks cook in the top pockets of a south-facing frame; the soil dries faster up there, and the reflected heat multiplies. Better to save the top tier for something that can handle a little neglect, or shift the whole frame to a spot that catches morning light and afternoon shade. Ferns and moss, which the shade guides always recommend for ground-level fairy gardens, will struggle in a vertical pocket unless you are committed to watering twice a day. For a low-maintenance wall piece, calibrachoa or alyssum bridge the look with less fuss.
Standing frames have one advantage wall mounts do not: you can turn them. Rotate the frame every week or two and the creeping thyme fills evenly instead of leaning hard toward the light and leaving the back half bare.
17. Fairy Garden with Twinkling Lights
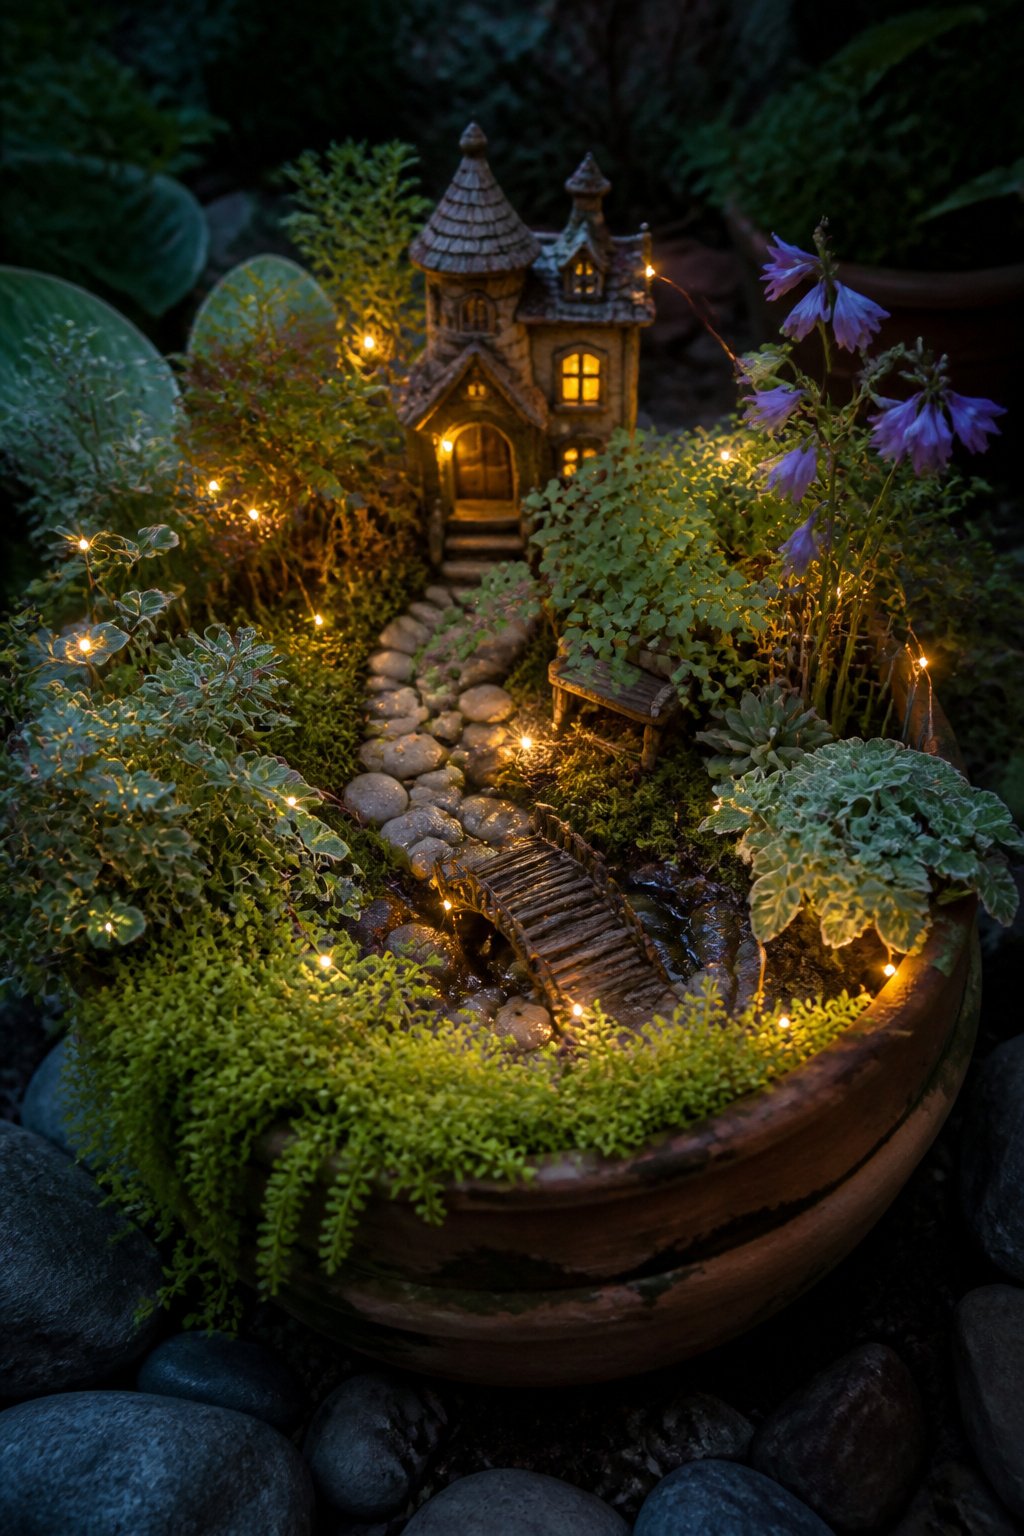
Copper wire lights changed how I wrap fairy garden structures because the wire itself disappears against bark and stone. String lights with stiff cord always fought back; copper lets you coil a single LED around a twig arch or thread five through a birdhouse window without the bulk showing. Battery-operated strands suit spots far from outlets, but solar-powered ones save the hassle of swapping AAs every three weeks through summer. The twinkle setting, which drops a random bulb to dim every few seconds, reads as firefly logic to the eye. Steady glow works better for lighting a path or steps where someone actually walks. Indoor-only labels on some fairy light boxes matter more than the resin furniture: moisture shorts cheap battery compartments fast, so the outdoor rating is the detail worth checking in reviews before buying.
18. Fairy Garden with a Swing
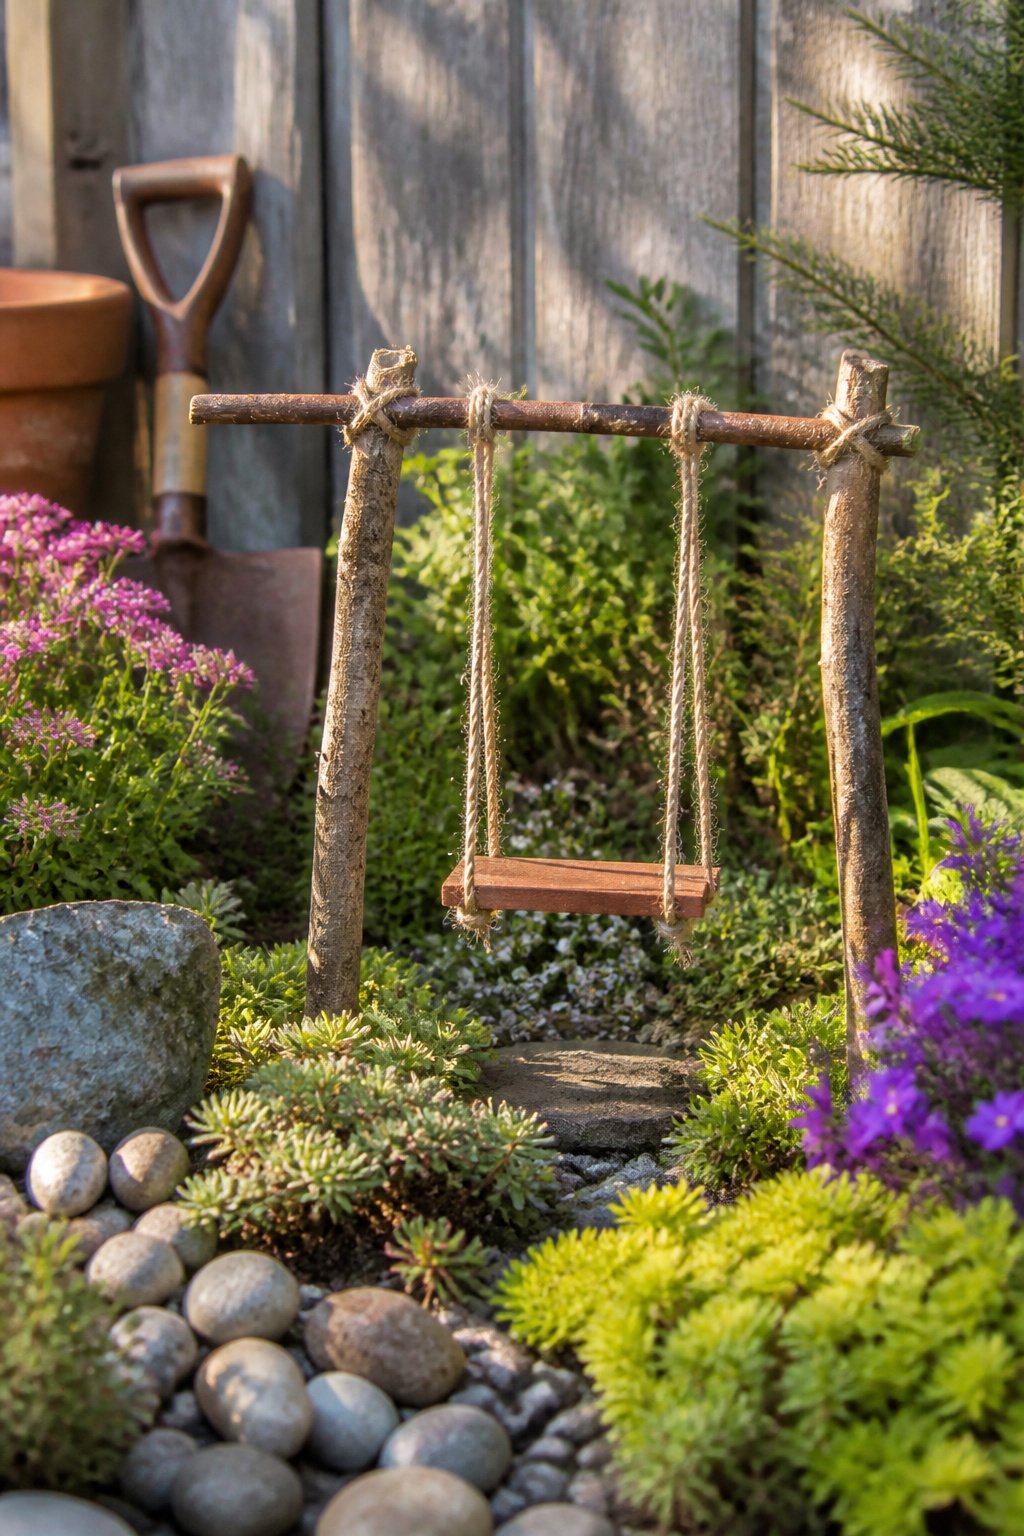
A swing turns a fairy garden from something you look at into something you watch. Last spring I tried suspending one from a bent-twig frame and learned the hard way that the base has to outweigh the seat by a lot or the whole thing tips in the first breeze.
Twig arches work if you bury the legs six inches deep and set them in E6000, not hot glue. The glue softens in summer heat and your fairy ends up on the moss. For a house-mounted swing, screw a tiny eye hook into the eaves and use fishing line; it disappears and holds up longer than thread.
Popsicle sticks will not last outdoors, so the seat itself needs to be scrap cedar or a weatherproof resin piece. Paint with acrylics made for exterior use, then seal with an acrylic sealer or the color flakes inside a month. Ribbon looks pretty but rots; thin wire wrapped in floral tape moves almost as well and survives rain.
The motion is what sells the illusion. A swing that actually sways makes the garden feel occupied, which is the whole point of building one in the first place.
19. Rustic Wheel Fairy Garden
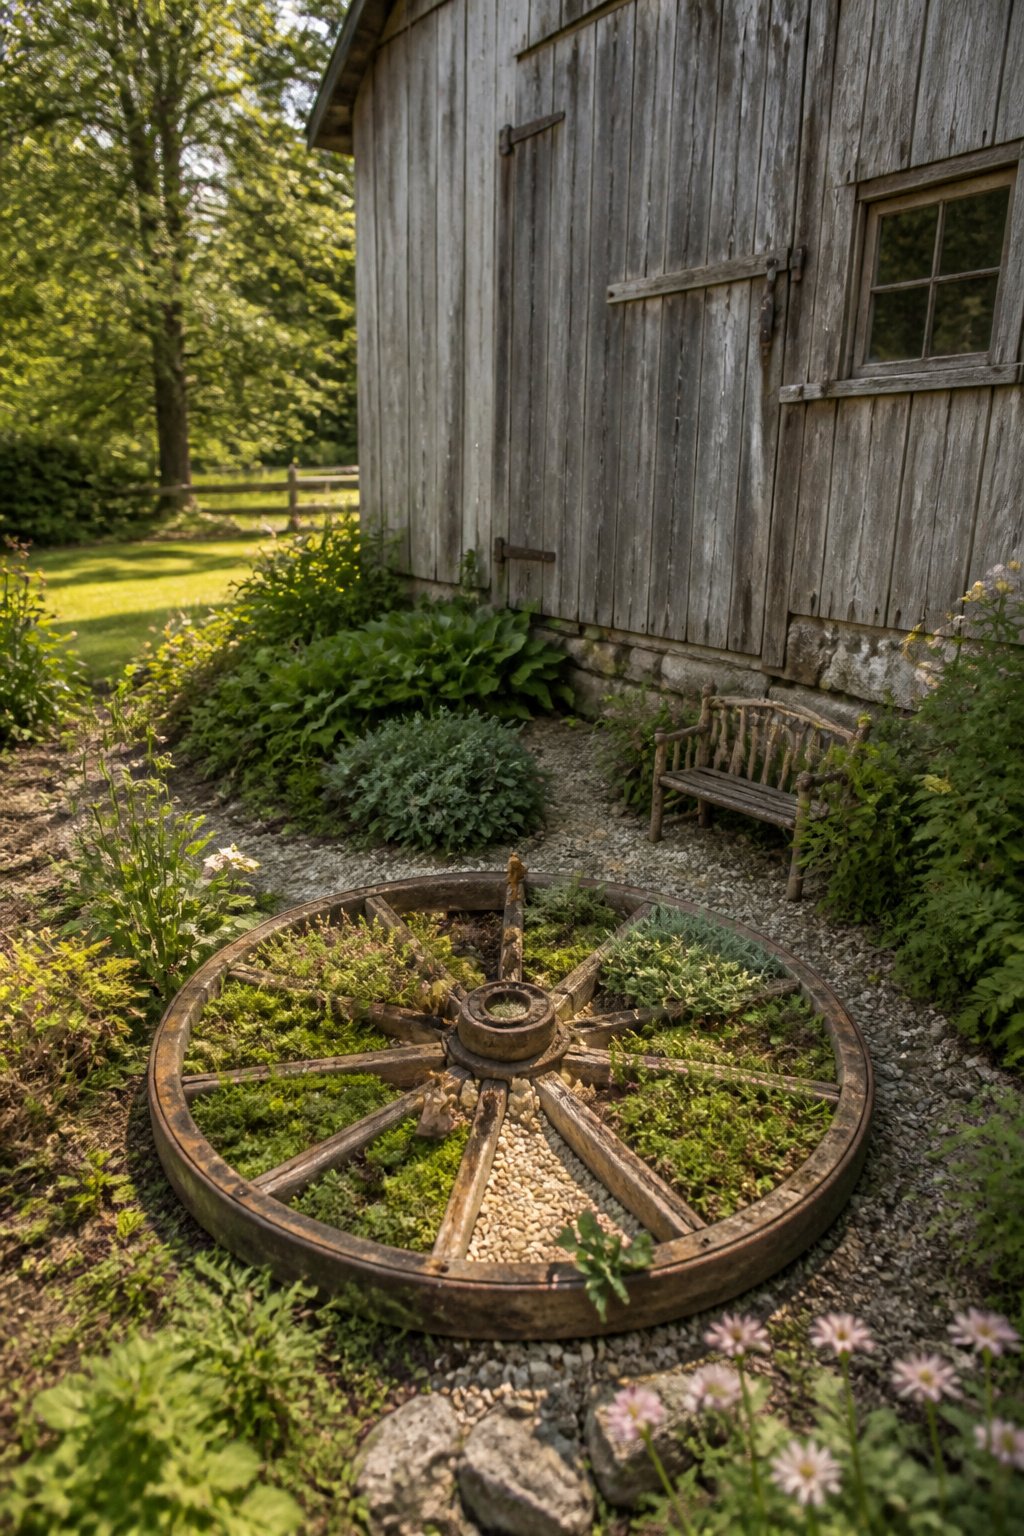
An old wagon wheel buried halfway in soil becomes a natural stage with built-in planting pockets. The spokes divide the ring into wedges, each one a separate zone for thyme, moss, or a single dwarf succulent. The hub cavity itself holds the most soil, so that is where a miniature birch or a clump of Irish moss gets the root room it needs.
Partial burial keeps the wheel from tipping in wind or after rain. Two to three inches below grade is usually enough to lock the rim in place without burying the detail you want seen.
Farm salvage yards and estate sales are where the real iron turns up, pitted and lichen-stained. Reproduction wheels from garden centers work if the casting is heavy enough to read as old from three feet back. The new ones tend to have cleaner lines, so rough them up with a wire brush before planting if the shine bothers you.
20. Wine Cellar Fairy Garden
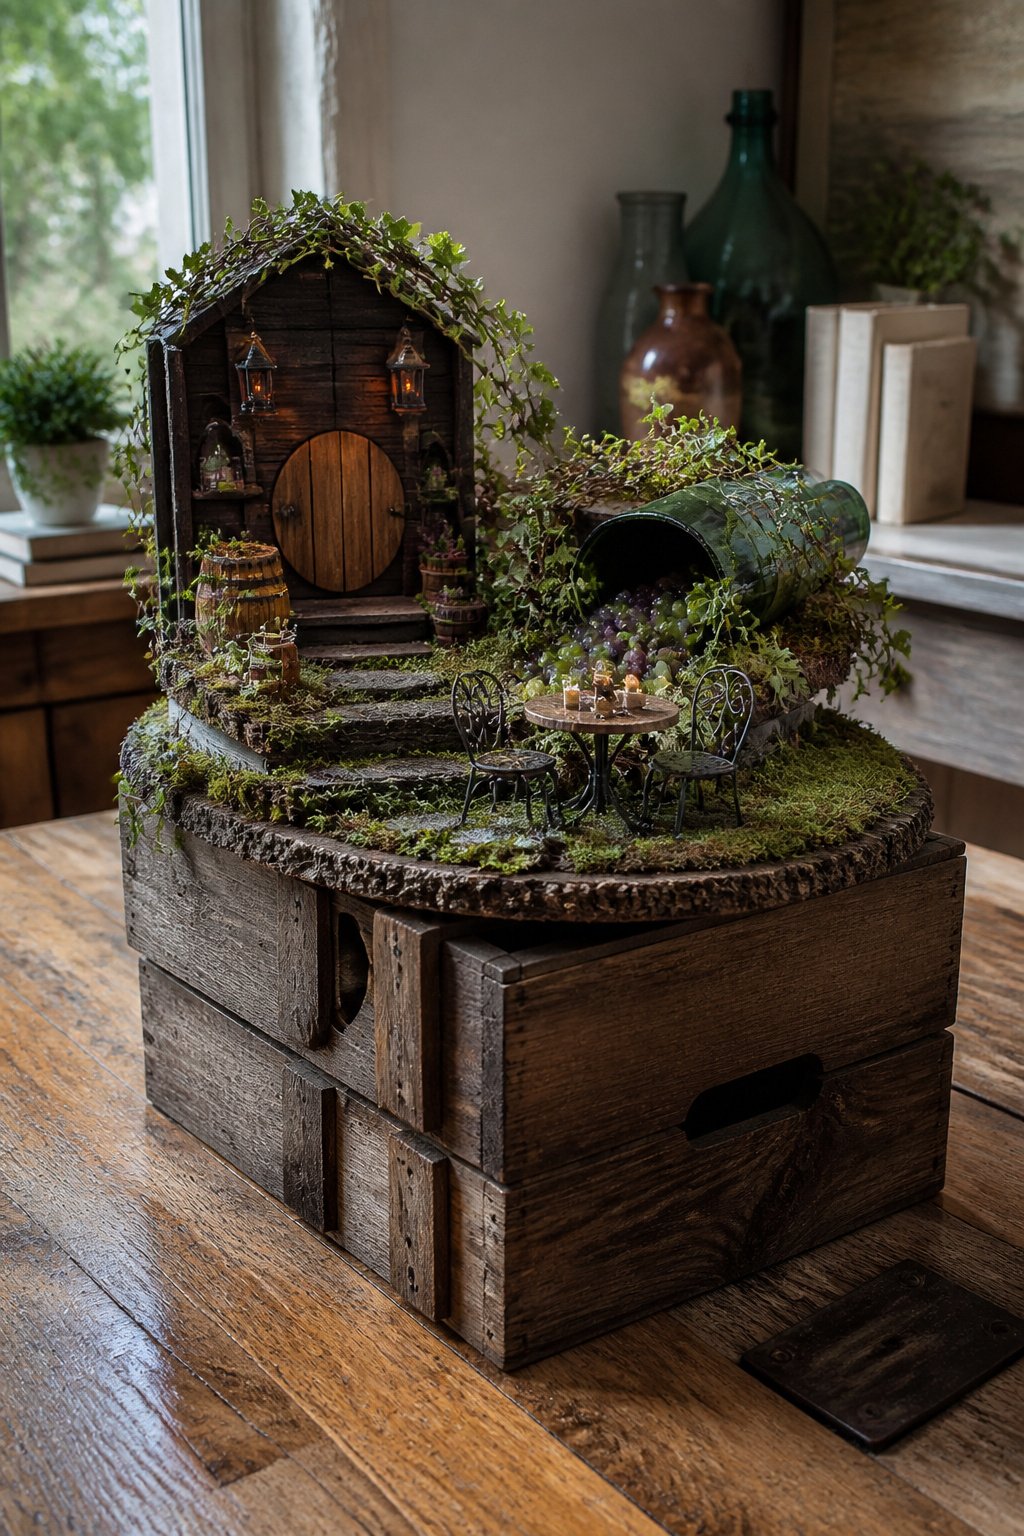
Dark-stained wood changes everything about how a fairy garden reads. I learned this after seeing a wine cellar setup built from a flea-market crate and a few miniature barrels: the deep color instantly drops the scene into something adults want near the drinks table, not something left over from a child’s birthday.
The trick is committing to the cellar atmosphere all the way through. Grape ivy, or even miniature plastic grapes, carries the production theme without needing real fruit to maintain. A tiny bistro table and chairs tucked beside a wine-bottle planter gives the fairies somewhere to taste what they’ve made, which is the detail that makes guests lean in at a dinner party instead of walking past.
Scale matters more here than in playful outdoor setups. The source pieces that worked, the crate and barrels, were just the right size relative to each other; one oversized accessory throws the whole cellar into looking like a toy collection. Less is more when the goal is a scene that invites curiosity rather than clutter that reads child-like.
This is the fairy garden idea that lives on a patio where you actually entertain, not tucked into a corner you forget.
21. Mushroom Decor
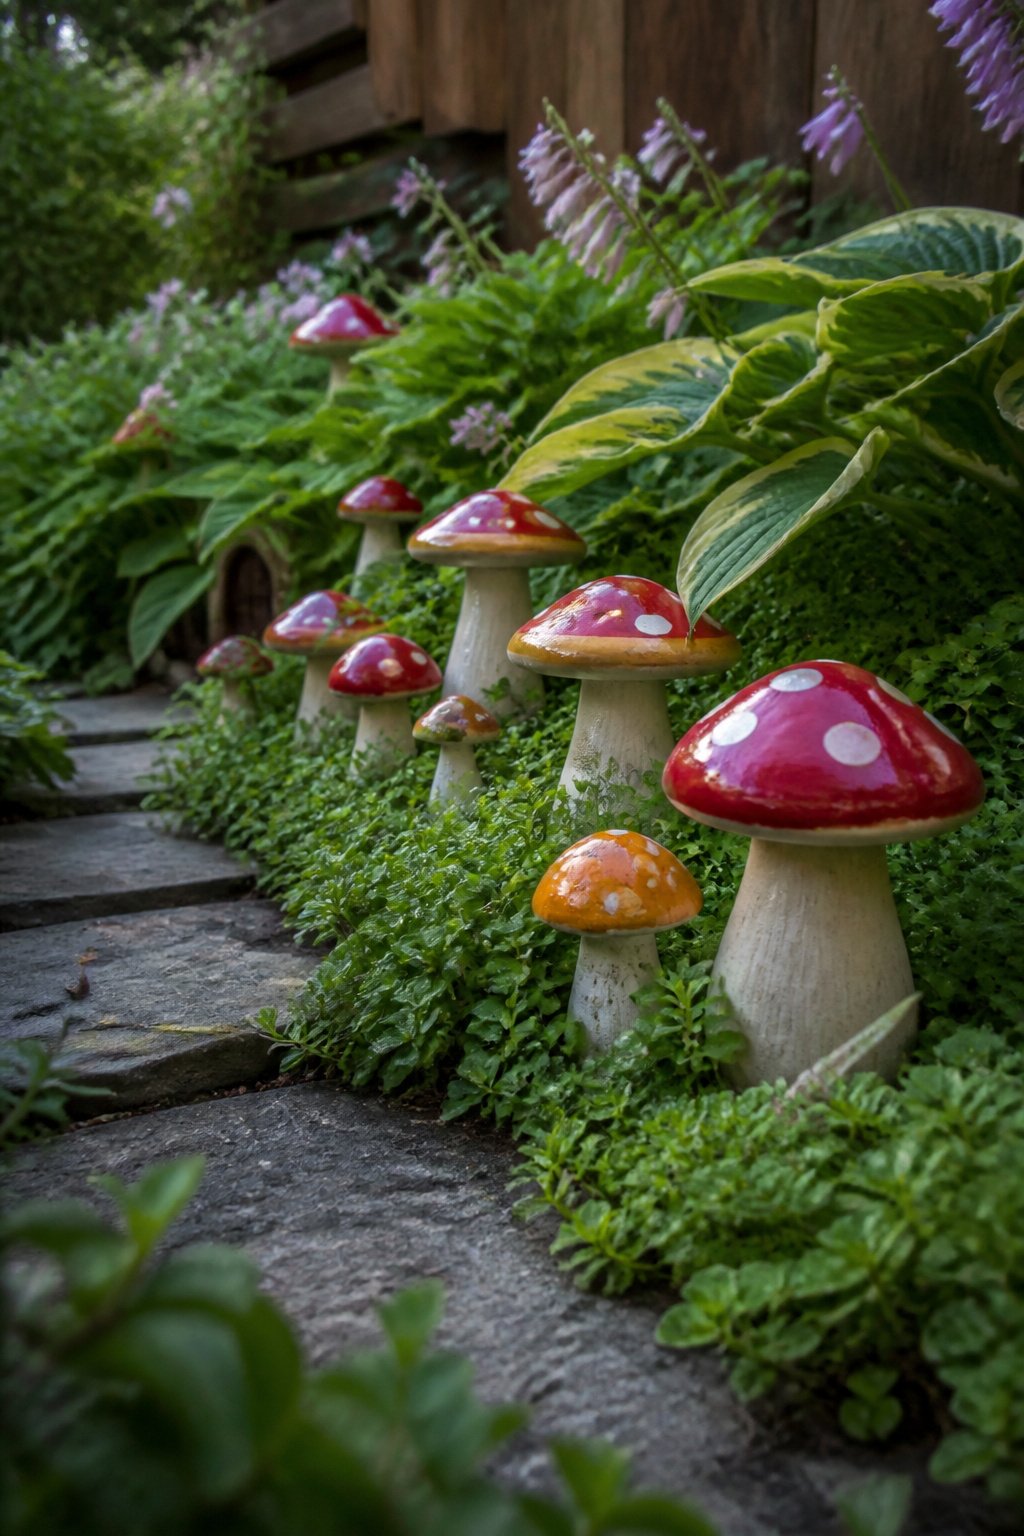
Toadstool figures let you suggest fairy habitation without committing to a full house structure. Painted clay, ceramic, and natural wood mushrooms each read differently in a small space: clay carries handmade warmth, ceramic weathers better through seasons on a patio, and raw wood blends into shade gardens where bright color would jar. The trick is clustering them at odd counts of three or five, tucked at the base of a hosta or half-hidden by thyme, so they look discovered rather than displayed.
Scale matters more than material. A single four-inch mushroom beside a real pebble registers as scenery; the same piece alone on bare soil reads as a toy. I group mine where leaf litter or moss can creep up the stem, letting the plant do the work of integration. LED mushroom lights or glow-in-the-dark finishes earn their keep if you actually sit outside after dark; otherwise, skip the battery upkeep and let ordinary paint do the job.
22. Fairy Garden with a Fire Pit
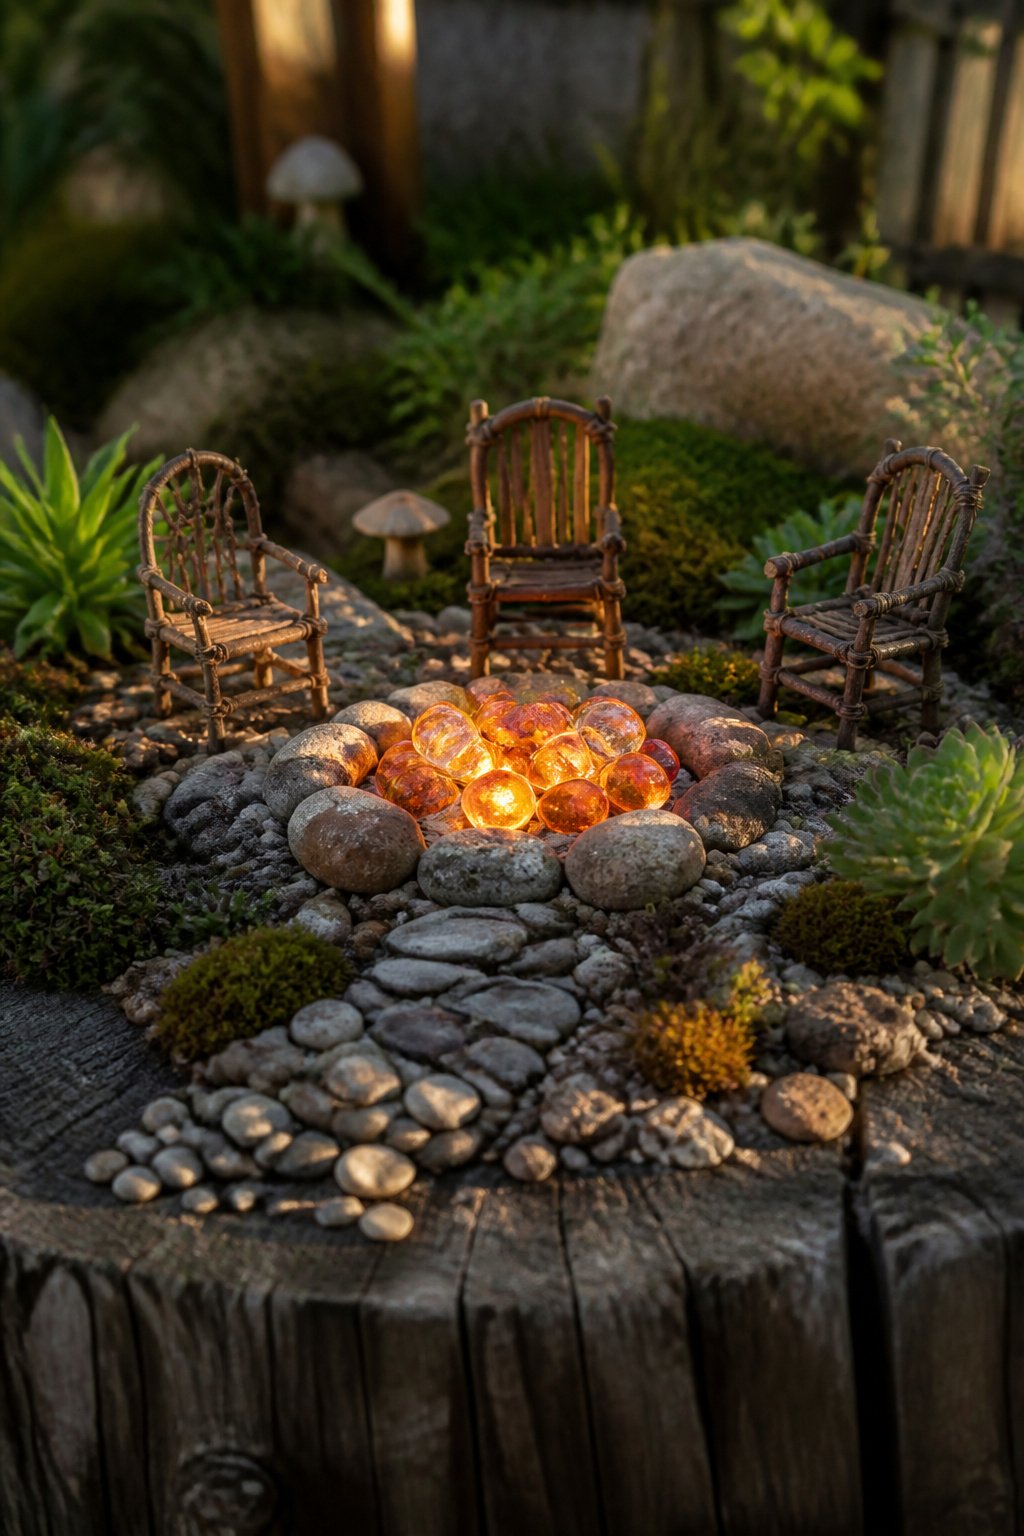
Glass beads piled in a ring make the simplest miniature fire pit, catching light like embers without any heat at all. I tried LED flicker lights first, the kind sold for Halloween pumpkins, and tucked one under amber beads in a shallow saucer. The glow moves just enough to read as fire from a few steps back, and battery lights stay cool enough to sit right against plastic containers or resin fairy houses. Painted stones work too, though flat: coat river rocks in layers of orange and red acrylic, then seal them so the color does not bleed into your soil every time you water.
Any real flame in a small container is a mistake waiting to happen. Tea lights heat the surrounding soil and roots fast, and the wicks on cheap votives flare unpredictably in a breeze. If you must use a real candle, set it in its own metal cup on a bed of sand, never directly on wood or moss, and keep a spray bottle nearby.
A fire pit gives the eye a center to move toward. The tiny figures, the path of pebbles, the bent-wire bench all aim at that glow, the same way a real backyard draws people toward the real thing. Build the rest of your scene around that pull, and the whole pot feels occupied rather than scattered.
23. Seasonal Fairy Gardens
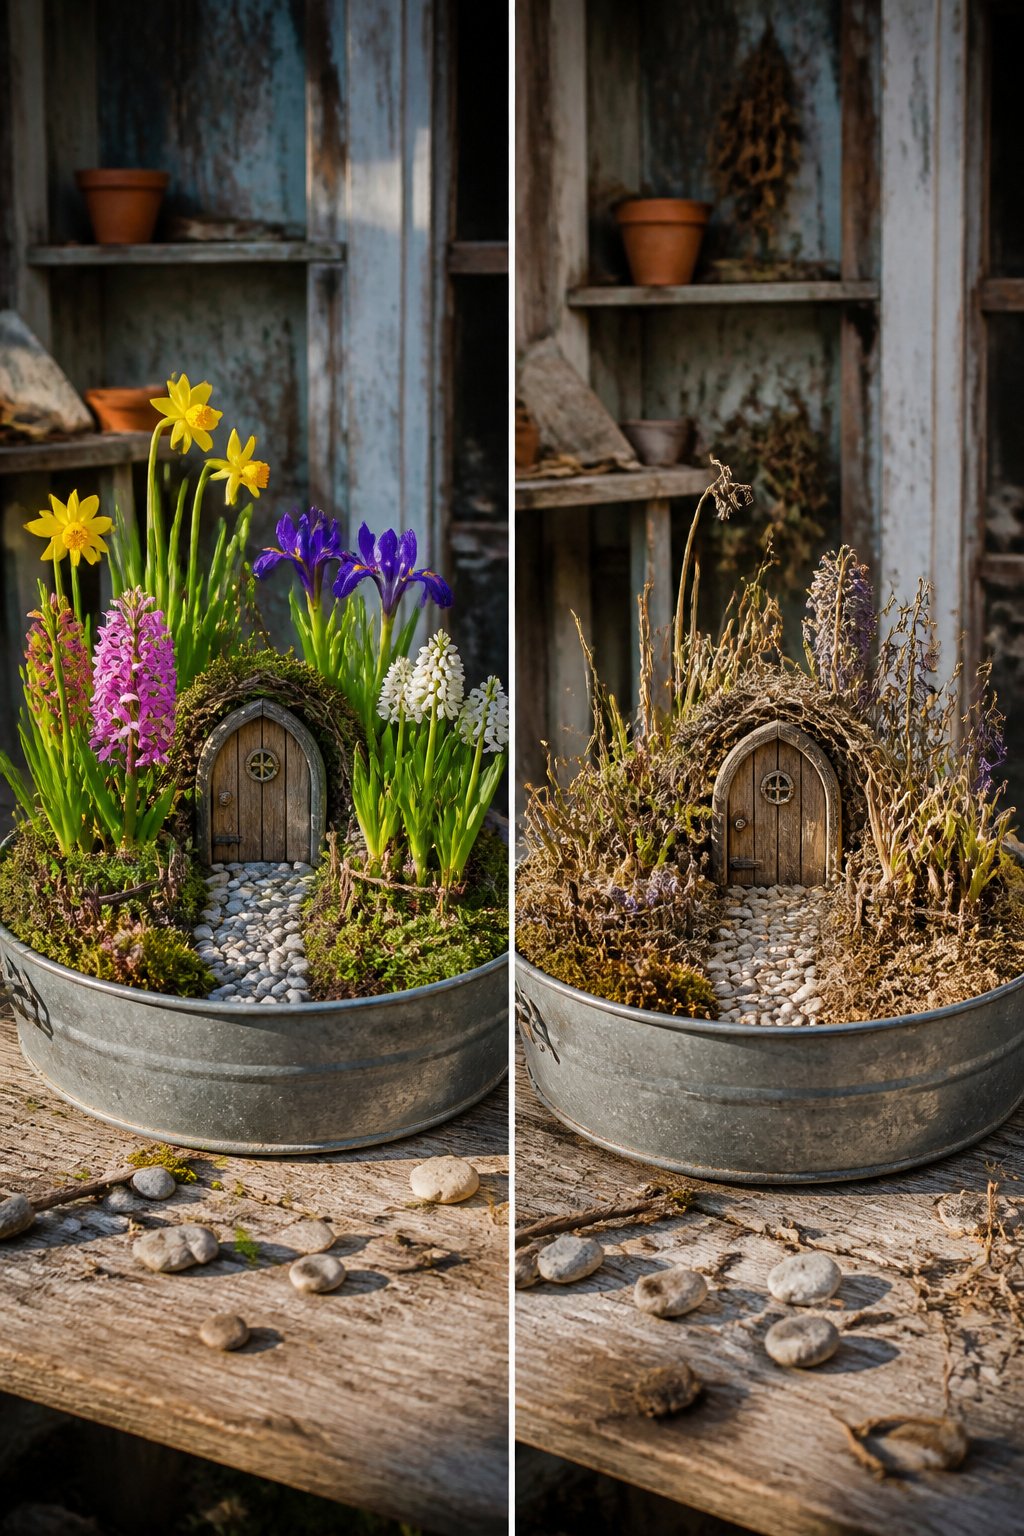
A fairy garden that sits unchanged year-round starts to feel like a knickknack shelf. Rotating the display with the seasons keeps it alive, and the swaps cost almost nothing if you plan them right.
Spring is the moment for forced bulbs in shallow pots: hyacinths, mini daffodils, or iris reticulata tucked around a tiny door or bench. The bulbs go in the ground or into cold storage by late fall, so the March payoff feels almost free. I set mine in a galvanized basin with a gravel path between them, and by April the whole thing smells like a florist’s cooler.
Summer annuals take over in late May. Petunias, marigolds, and miniature daisies handle full sun and fill out fast, which matters because the spring bulbs are spent by then. A single six-pack of annuals replanted into the same container changes the whole scene.
Fall means gourds, dried leaves, and a scattering of seed heads. I lift the summer annuals once they brown, press a few oak leaves into the soil like a red carpet, and set in a miniature pumpkin from the grocery store bin. The look lasts until the first hard freeze.
Winter strips the color back to evergreen cuttings and light. A sprig of boxwood or a tuft of Elijah Blue Fescue holds structure, and a strand of battery lights on a timer runs about six hours after dark. The accessories, the resin furniture and tiny tools, go into a plastic tub in the shed until their season returns. A reader in the Northeast, living where winters mean business, told me she stores everything in one bin and redesigns each spring, which strikes me as the honest way to treat a garden that lives in miniature.
24. Miniature Gnome Gardens

A gnome-only garden reads heavier than the fairy-topped versions you see everywhere. I learned this the hard way when I tried mixing both and the gnomes looked like they’d crashed someone else’s party. Gnomes want browns, rust reds, and deep forest green, not the pastel pinks and baby blues that dominate fairy-gnome combos.
The structures shift too. A gnome garden gets rough timber bridges, stacked stone walls, and maybe a wheelbarrow carved from a chunk of wood. Nothing polished. Mine used a tiny pine-log cabin I found at a yard sale, and the bark still on it mattered more than any paint job I could have added.
Floral elements can disappear completely here. Moss becomes your ground cover, not alyssum or sedum. Lichen-covered rocks stand in for blooming shrubs. This is the move if your balcony catches harsh afternoon sun and every petunia you’ve tried fried by July. The moss and stone look only gets better as it weathers, which is more than I can say for the miniature roses I killed two summers running.
25. Nature Fairy Garden
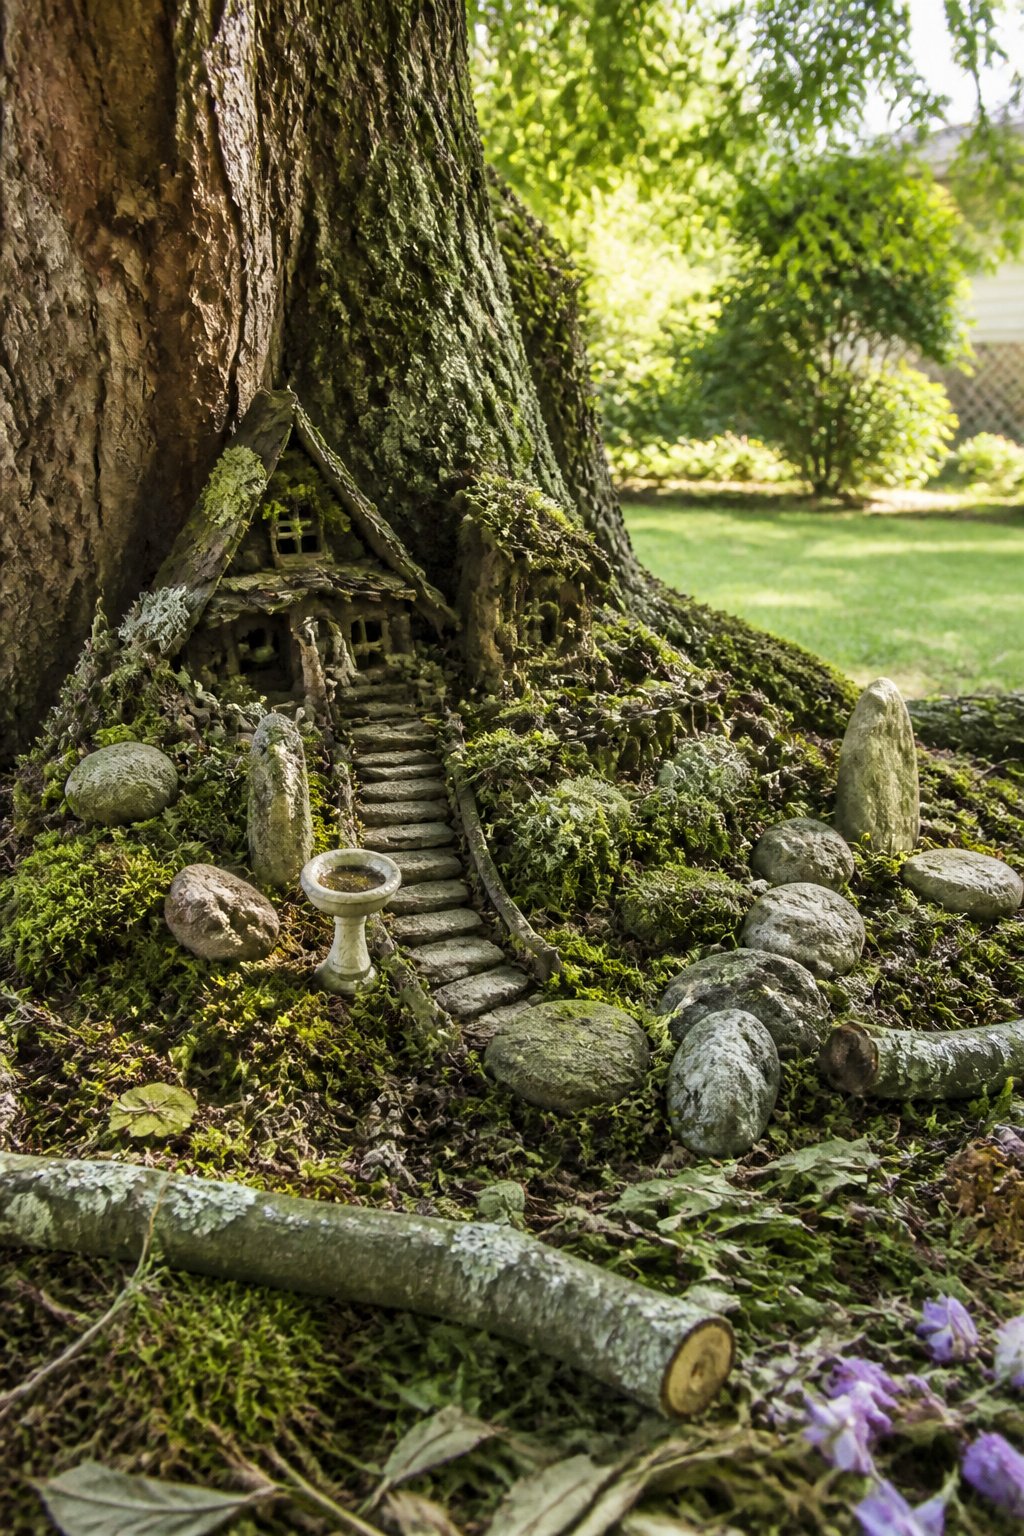
A fairy garden built from whatever the yard already offers costs next to nothing and ages better than anything shipped from a factory. Twigs split into chair legs and table frames, stones pressed into a path, moss lifted from a damp corner to serve as ground cover: these are the materials that read as real because they are. The first time I tried this, I was surprised by how quickly the scene settled in. Lichen-covered bark and pinecones look like something a fairy might actually gather, not like merchandise arranged on dirt.
The plastic doorways and resin benches I see in kits always strike the same false note. They do not fade, which is the problem; they sit there unchanged while the living plants around them cycle through seasons. Natural materials weather, gray, and moss over, so the garden looks more convincing at year two than it did at week one. Found twigs and moss are free, and they improve with neglect.
Succulents such as echeveria, sedum, or sempervivum keep the maintenance low enough that the project does not become a second job. Mixed with pebbles and pinecones, they ground the miniature scene without asking for daily attention. The limit is damp shade: moss wants it, most succulents do not, so the pairing works only where drainage is sharp and sun hits most of the day.
26. Fairy Garden with a Bird Bath
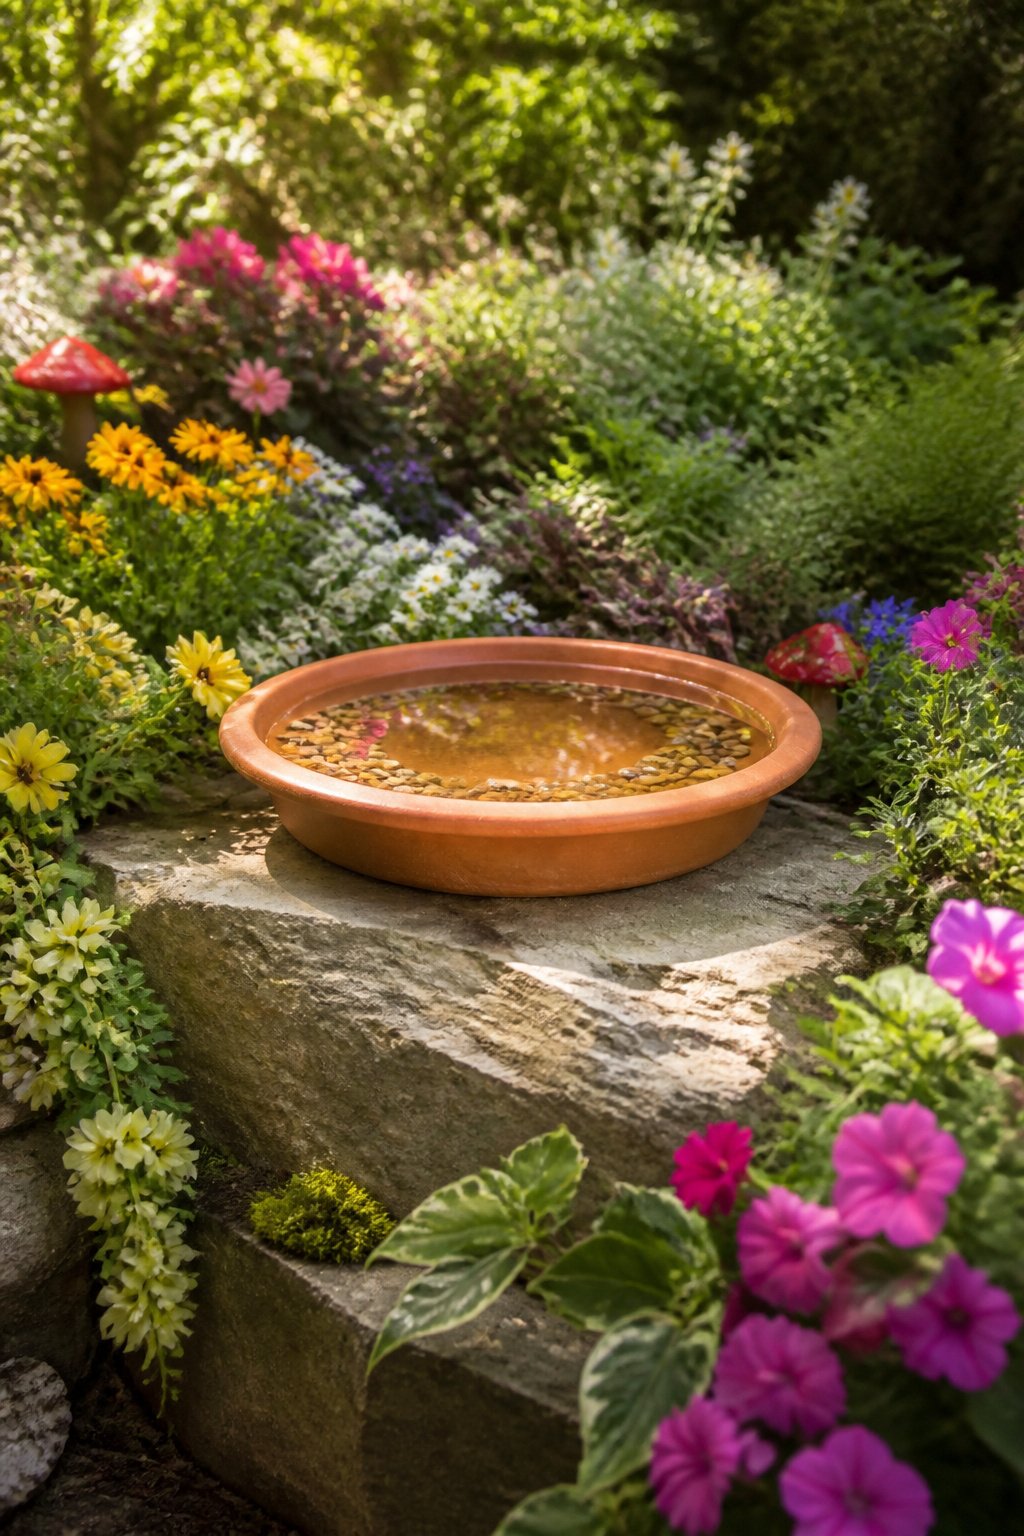
A real bird bath can anchor a fairy garden if you scale the rest of the scene around it, or you can build a fairy-scale version from a shallow terracotta saucer and a stack of flat stones. Either way, the water should stay shallow enough that a spilled thimble would not drown anything, because the small resin figures and mosses around it need to survive real splashing and morning refills.
Pea gravel pressed into the soil at the rim gives insects and actual birds a landing spot, and it keeps mud from creeping into the scene after rain. In my layout, the bird bath sits slightly off-center where two paths meet, and that crossing point became the busiest corner of the whole garden. Fairies placed on nearby stumps or pebble benches all face toward it, which sounds cute but actually helps the eye travel through the container instead of getting stuck on one object.
A glazed ceramic saucer holds water longer than raw terracotta, though raw clay looks softer against moss. I have used both; the glazed one needed refilling half as often in July sun, but the terracotta aged into the scene by August in a way the bright glaze never did.
27. Fairy Garden in a Suitcase
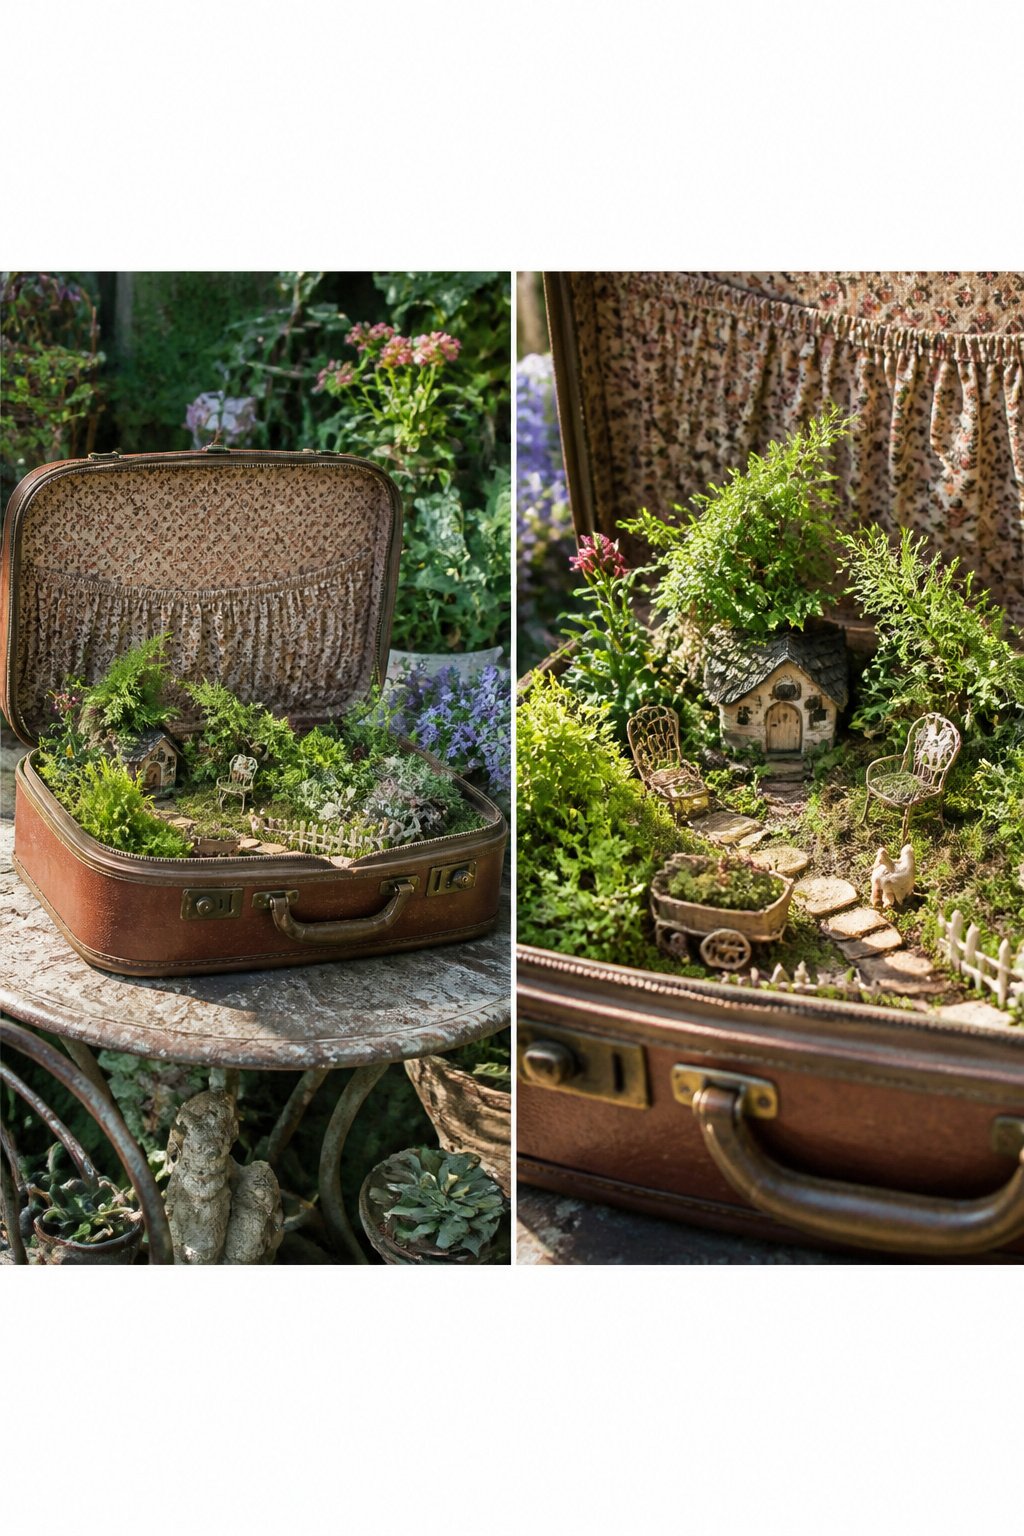
Vintage luggage carries a particular weight, the kind that makes a fairy garden feel less like a craft project and more like a secret. A hard-sided suitcase from the fifties or sixties, the sort with rounded corners and a latch that clicks, becomes a container you can carry onto the porch or set beside the garden bench, then open to reveal something impossible inside.
Drill drainage holes through the bottom interior only, stopping short of the exterior shell so the outside keeps its patina and its story. Line the cavity with heavy plastic sheeting, tucked up the sides like a bathtub, then add your soil and plantings directly on top of that barrier. The plastic keeps the original lining from rotting through and buys you years of use.
The theatrical moment matters more here than with any static pot. A suitcase invites the gesture of unlatching, the pause before the lid lifts, the reveal of moss and tiny furniture packed into a space meant for shoes and folded shirts. Set the angle so the lid stays propped like a backdrop, or remove it entirely and lean it behind as a stage flat. Either way, the garden reads as discovered, not displayed, and that distinction is what separates the idea from the usual container arrangements.
28. Egg Carton Fairy Garden Greenhouse
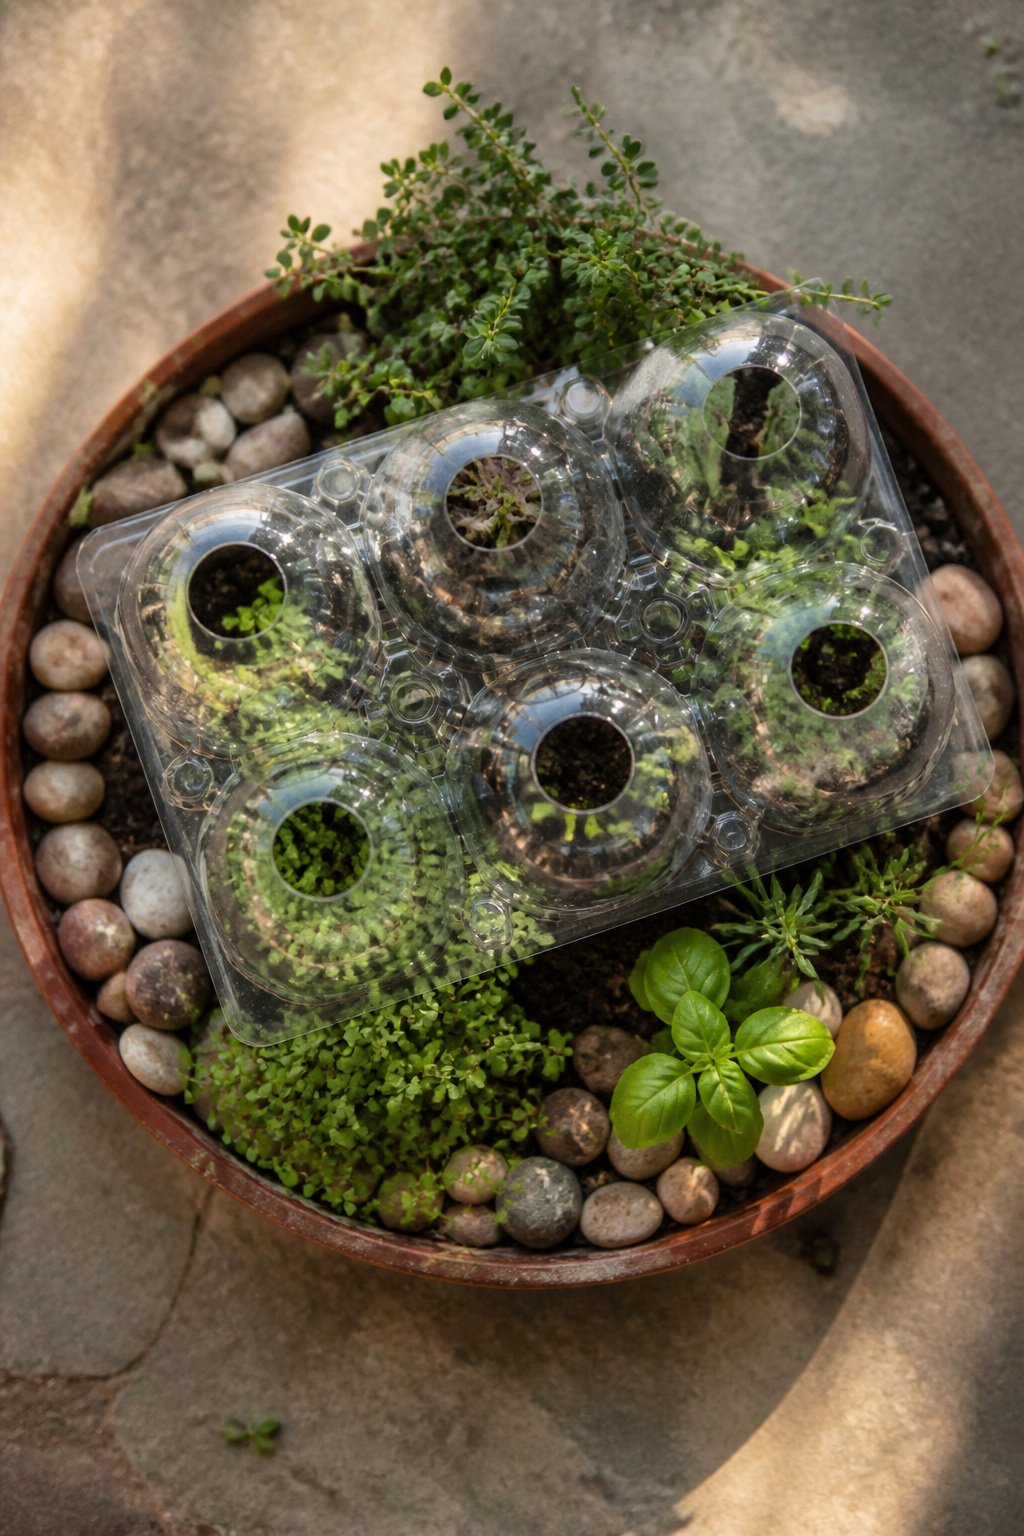
A clear plastic egg carton makes a surprisingly convincing miniature greenhouse once the eggs are gone. I cut the lid free along the hinge, flipped it over, and pressed the pointed centers of each dome into the cups below to create little vents. Without that airflow, seedlings cook by noon even on mild April days. The cups themselves hold seed starting mix fine for a week or two, just long enough to get fairy-scale herbs or baby tears sprouted. Once the plants are up, the whole carton sits inside whatever saucer or shallow pot forms your fairy garden base. The domed lid stays propped at an angle with a twig or a pebble, so the scene looks tended rather than abandoned. I have started lobelia and creeping thyme this way, then dropped the rooted plugs straight into moss between pebble paths. The carton itself goes in the recycling after, or stays if you want a row of identical greenhouses behind a fairy cottage.
29. Toadstool Houses from Clay Pots
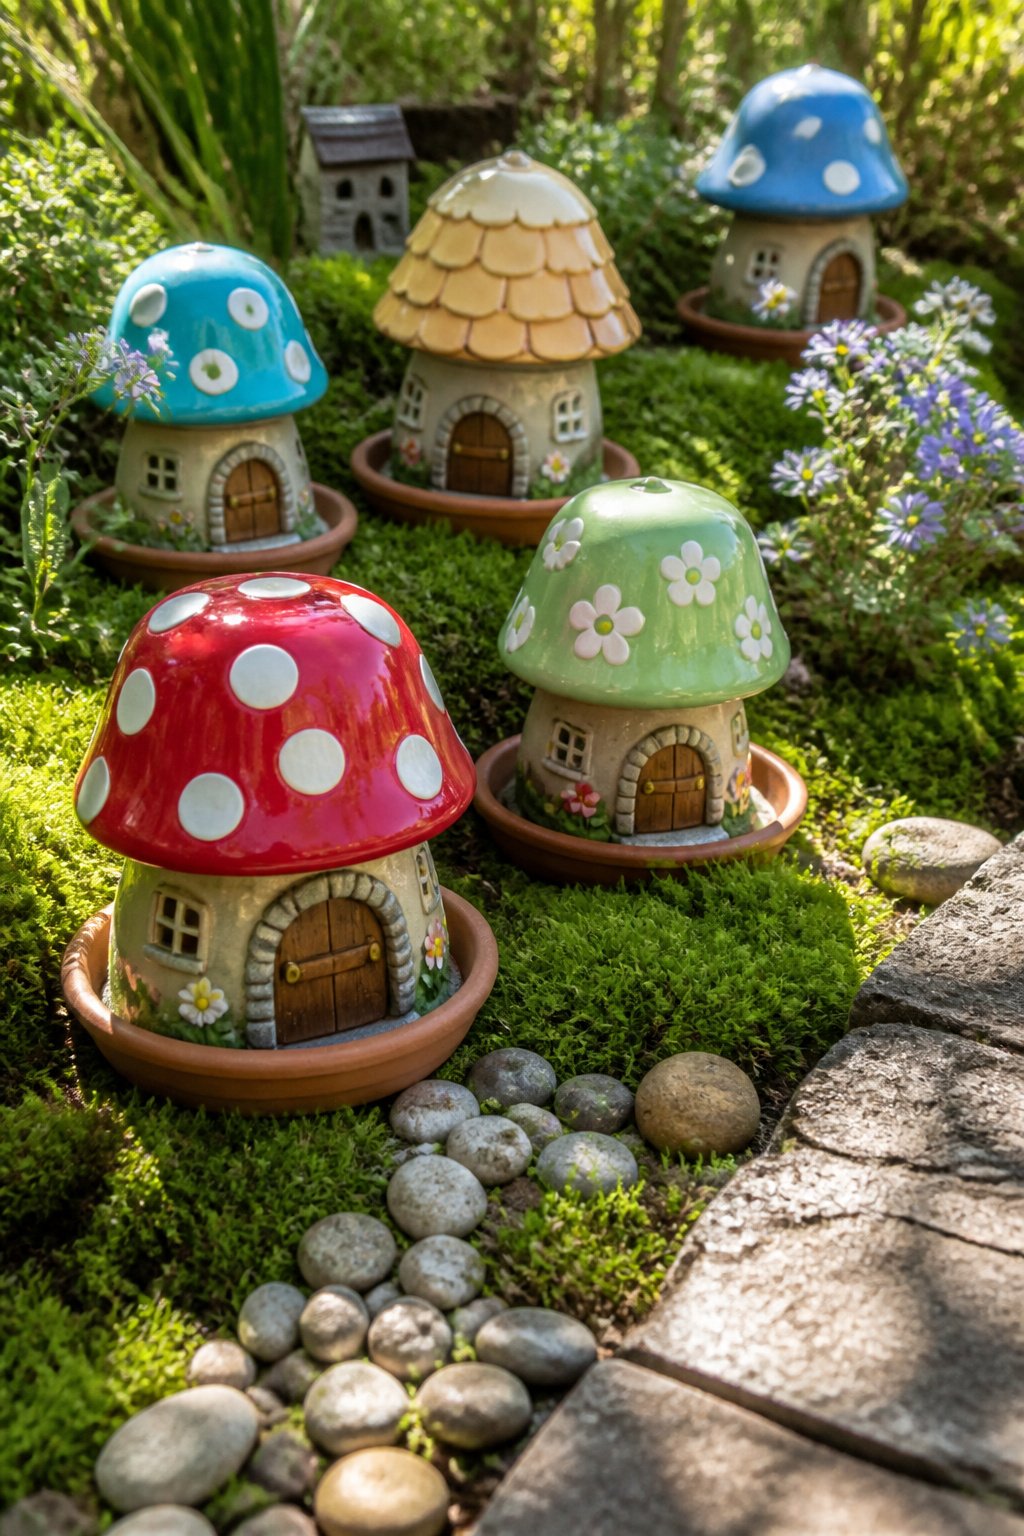
Terracotta pots flip upside-down into surprisingly convincing mushroom caps once the rim sits flush against a saucer base. The saucer matters more than the decoration: a 6-inch pot wobbles on bare soil after the first rain, but glued to its matching saucer it stays put through watering and bumping. I learned that after one clay house tipped and cracked its paint job against a stepping stone.
Acrylic paint goes on fast and bright, but unsealed acrylic peels within a month outside. A matte polyurethane spray over the finished design costs about six dollars and buys a season or two of color before touch-ups. I skip the high-gloss sealers; they read plastic from three feet away and kill the whole fairy-garden illusion of something stumbled upon in moss.
Scale trips people up. A standard craft-store fairy figurine stands roughly three to four inches tall, so a 4-inch pot looks like a respectable cottage, a 6-inch like a town hall, anything bigger like a warehouse beside her. The sweet spot for a single house is 4–5 inches of pot with a 6-inch saucer for a small yard of mulch and one figure. Multiple houses need smaller pots or the scene reads as a parking lot of identical barns rather than a village.
30. DIY Fairy Garden Decor Ideas
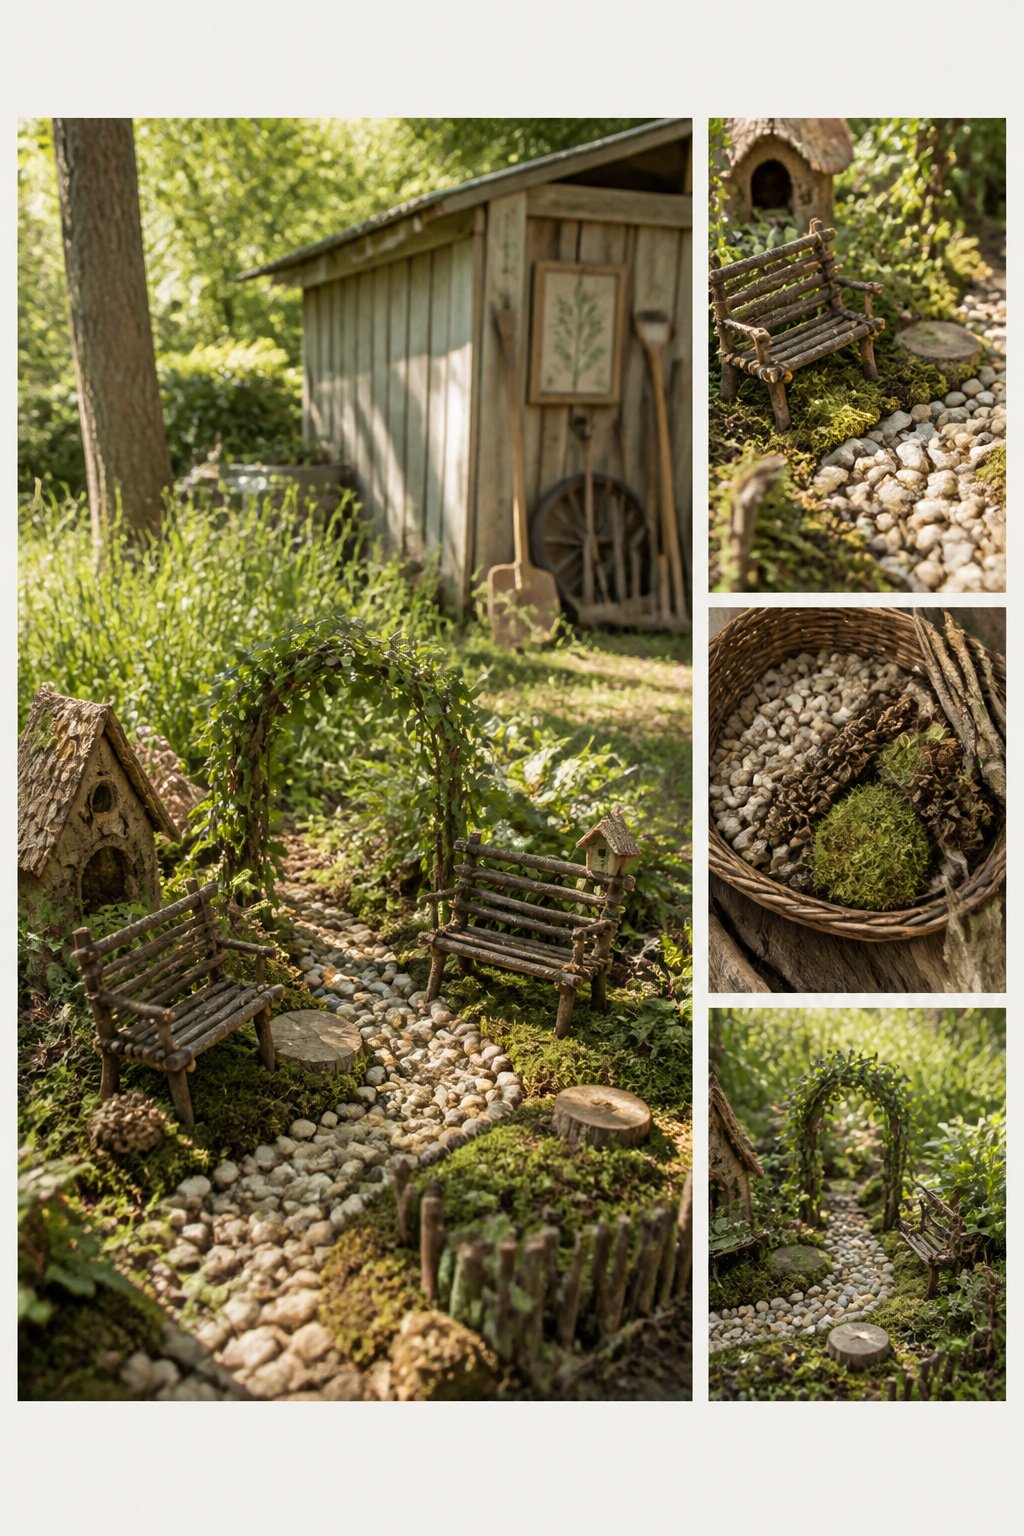
The first fairy garden I built, I spent thirty-two dollars on a resin bench and a ceramic well that cracked before August. That was the year I learned hot glue melts outdoors, and that the money was better spent on plants while the furniture came from the yard.
Twig benches and tables take maybe twenty minutes. Cut green wood while it still bends, lash joints with jute, and the whole thing weathers to gray by fall. Pebble paths need nothing but pressure to stay put; dig them a quarter inch below the soil line so they do not skate around every rain. Acorn caps make believable dishes or birdbaths, held level on a dab of E6000 or wood glue. I have used both, and either survives a full season if the joint stays shaded from standing water.
Popsicle sticks will last one summer outside, no more. Paint them with outdoor acrylic and seal them, and you might stretch it to two. The savings add up fast. My last container fairy garden cost six dollars in glue and paint against forty for store-bought equivalents, and the twig furniture matched the maple overhead in a way no resin could have managed.
31. Fairy Garden with a Miniature Patio
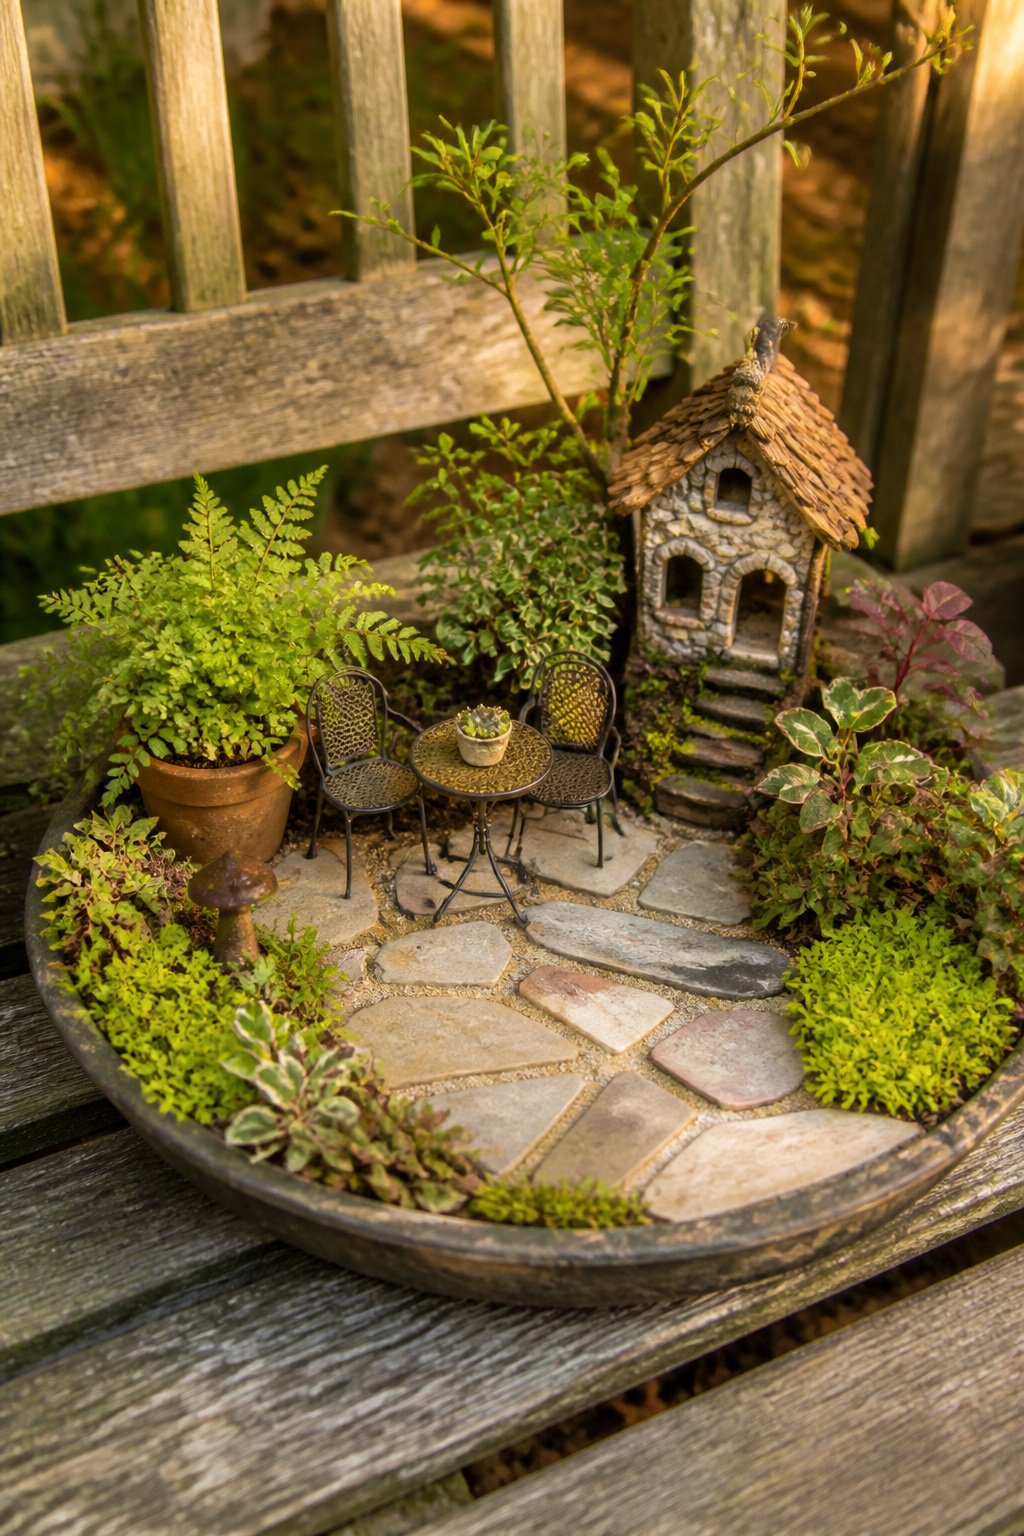
A miniature patio anchors a fairy garden the same way a real one anchors a backyard. I laid flat stones in builder’s sand, tapping each with a rubber mallet until it sat level with its neighbors. Dry-laid patios shift slightly over time, which is actually forgiving in a container that moves; grout locks everything rigid but cracks the first time the pot gets bumped during watering.
The sand base needs to sit half an inch below the rim of your container floor, or the stones will perch on top like loose change instead of reading as installed ground. I learned that the hard way on my first attempt, where the patio looked pasted on rather than built in.
Defining the outdoor room matters more than the material. A two-inch border of darker stone around the edge reads as a threshold. Inside that border, the seating area sits closer to the cottage door; the fire pit or dining spot lands farther out. Without that zoning, the miniatures cluster together and the scene collapses into a pile of toys rather than a lived-in space.
Keep the patio scale consistent. One large flagstone the size of a fairy’s whole body throws off the ratio. Quarter-inch slate chips or broken tile slivers, cut with tile nippers, read as believable paver stones.
32. Fairy Garden with a Tree House
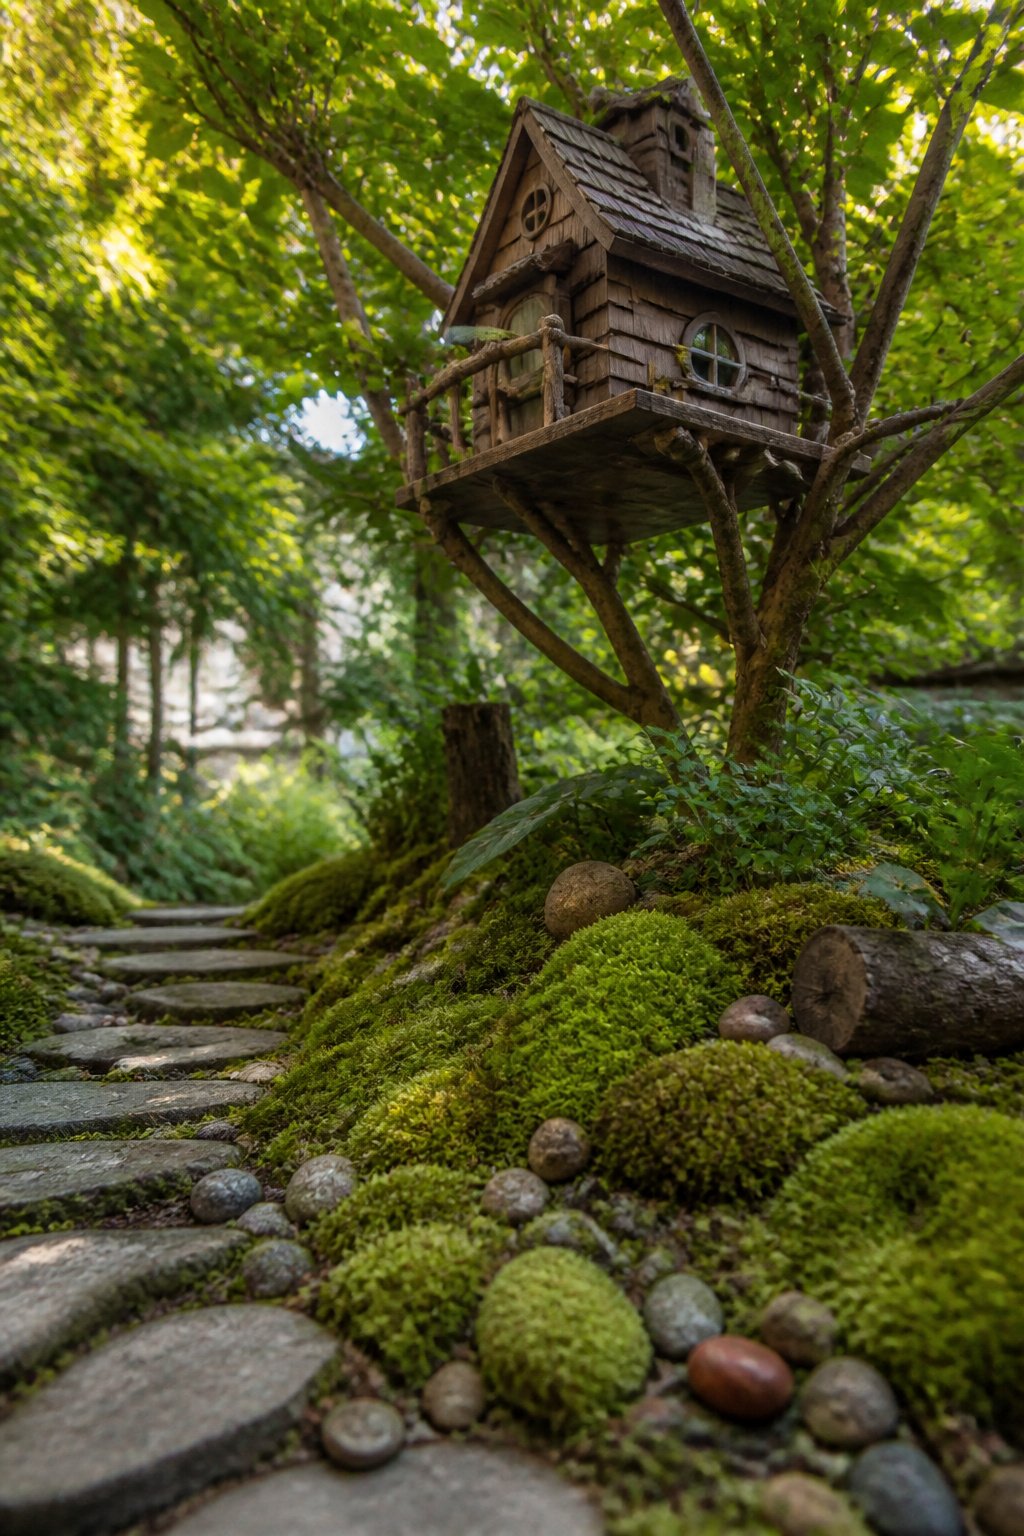
A tree house in a fairy garden only works if it actually sits above something. The first one I tried was a freestanding twig frame glued to a flat stone, and it looked exactly like a birdhouse that fell over. The trick is height that reads as height, not a model lying on the ground.
Small real branches work better than anything built from store-bought dowels. I scout the yard after windstorms for forked twigs that can support a little platform. The branch itself becomes the tree; the house just perches in it. Decaying wood helps here, too. An old log at the base, softened enough to take moss and small rocks, grounds the whole scene so the elevated house does not feel pasted on.
For the canopy effect, I keep lower plants tight and let one thing go vertical. A small fern or baby tears reads as undergrowth; a single moss stick or narrow dwarf conifer behind the branch suggests the taller trunks you cannot actually fit. The fairy house then sits in a middle layer that feels forested without needing a forest.
Twig frames can work, but only if they lean into something real. Pinecones and stir sticks layered against an actual branch look collected. The same sticks standing alone in a pot look like craft projects. My neighbor built a village around a tree trunk using only backyard finds, moss, and a few tiny windows, and the trunk did all the architectural work for her.
33. Fairy Garden with a Wheelbarrow
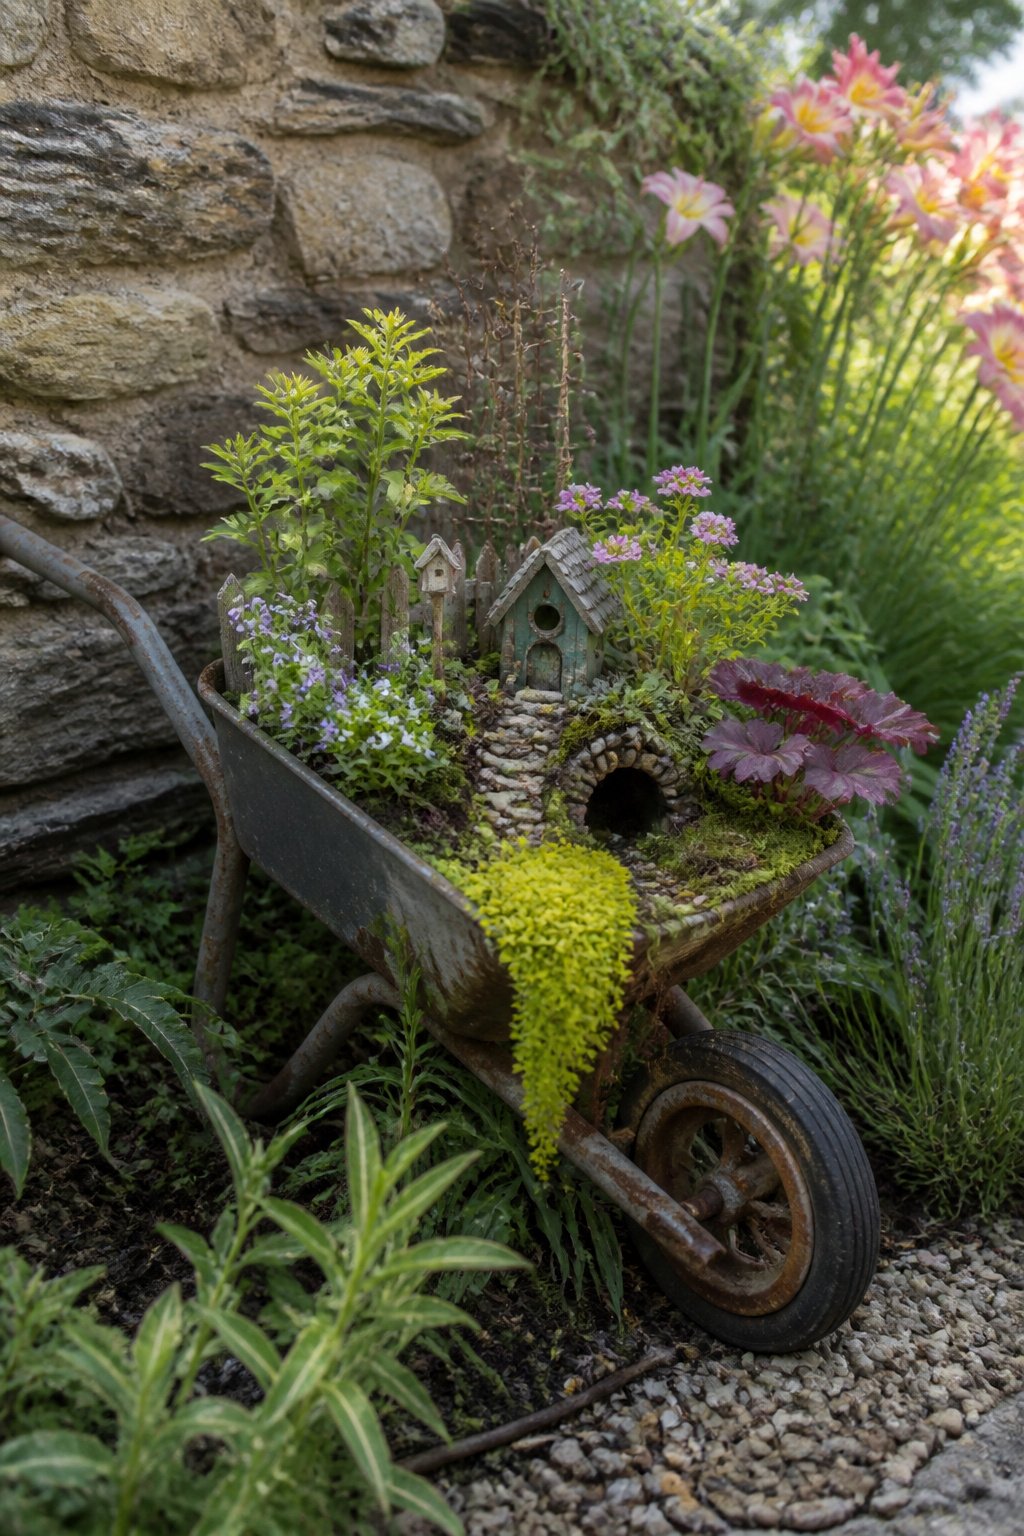
A miniature wheelbarrow turns into a mobile fairy garden faster than most people expect. I found my first one at a thrift store, rust spots and all, and the metal already had that weathered look fairy gardens live for. Metal toy wheelbarrows handle rain better than wood, though the wooden ones smell better and take paint more evenly if you want bright colors.
Drainage matters more than the material. Most toy wheelbarrows come with solid bottoms, so water pools and rots roots within a week. A few holes drilled through the base fix this; just file the edges smooth so nothing snags. I line mine with landscape fabric to keep soil from washing out those holes, then add a thin layer of gravel before the potting mix.
The real payoff is movement. Morning sun hits my patio different than afternoon, and the wheelbarrow rolls where the light goes. Same for display: tuck it among ferns one week, center it on the porch for a party the next. Heavy soil loads make metal the practical choice if you plan to shift it often; wooden ones stay lighter but the handles split if you load them too full.
34. Fairy Garden with a Broken Birdbath
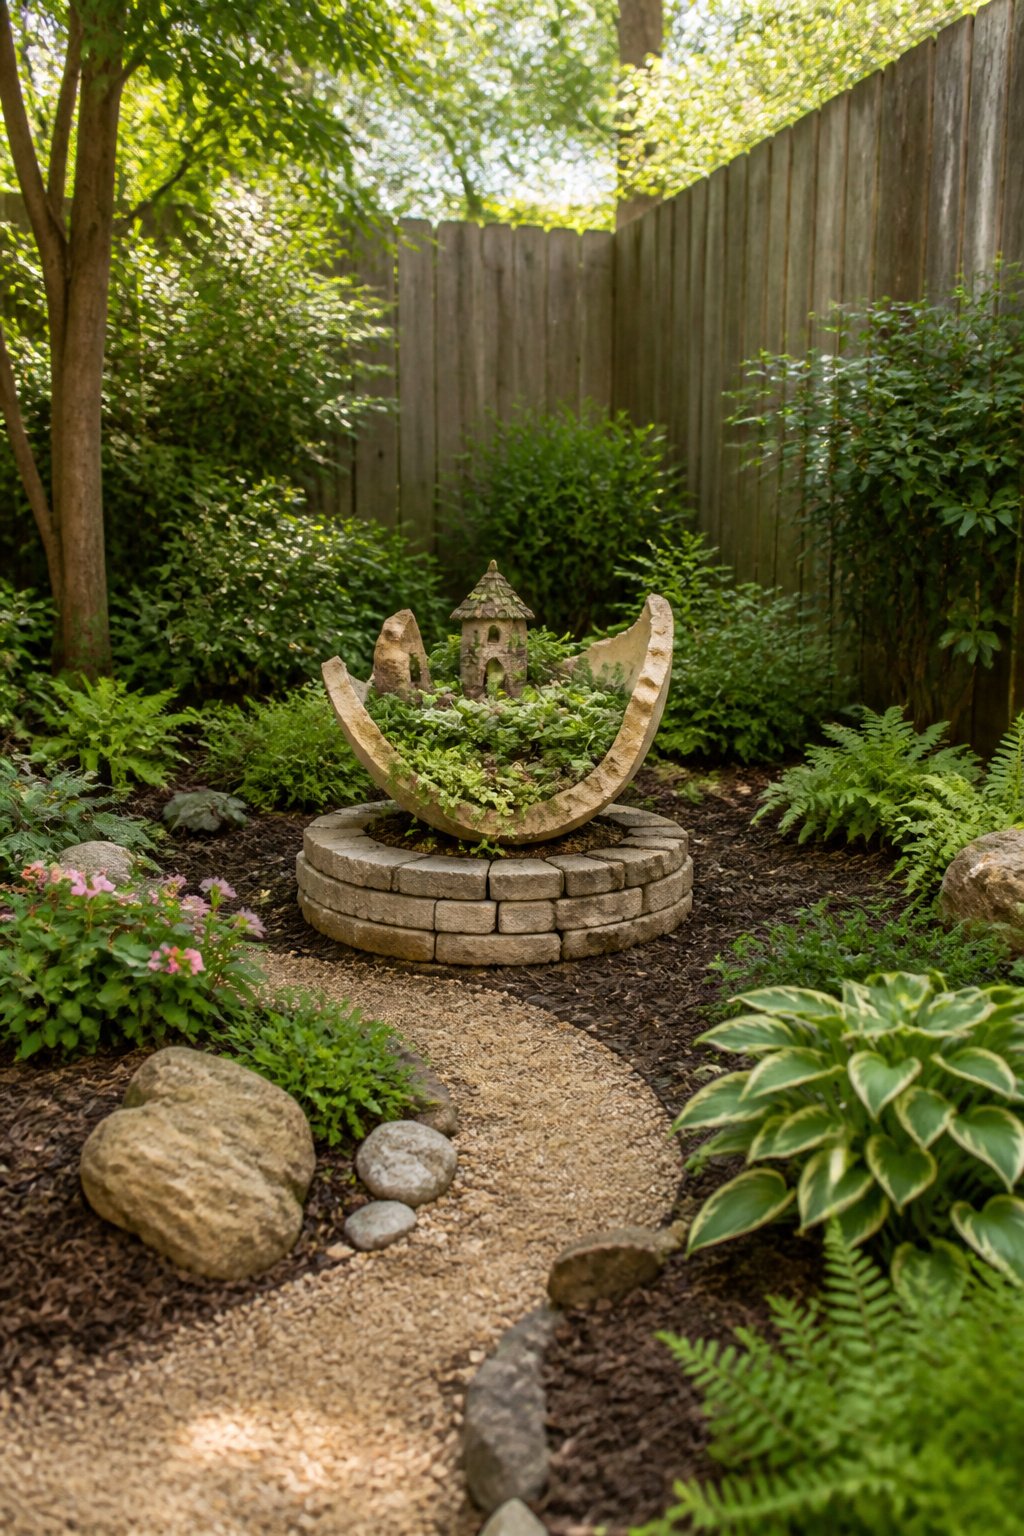
A cracked birdbath sitting by the shed is exactly how my best fairy garden started. The bowl had split clean through after a freeze, but the pedestal still stood level, and that curved ceramic shell turned out to be the most natural topography I’ve worked with.
Setting the base on a paver keeps it from sinking into soft ground. I flipped the bowl so the wider rim became the back wall, packed it with potting soil that drains well but holds structure, and let the slope do the terracing for me. The high curve catches afternoon sun for a dry spot of dwarf sedum; the low pocket where water used to pool stays damp enough for baby tears without any extra watering on my part.
Planting into that curve means roots stay shallower toward the rim and deeper in the center, so a thyme cascade actually looks like it is spilling down a hillside instead of just trailing over an edge. The broken rim itself makes an instant entrance arch if you tuck a bit of moss along the lip.
Add a miniature path with sand or gravel once the plants are in, smooth it with a stick, and the whole thing reads like a garden that was always there, just suddenly very small.
35. Fairy Garden with a Tupperware Container
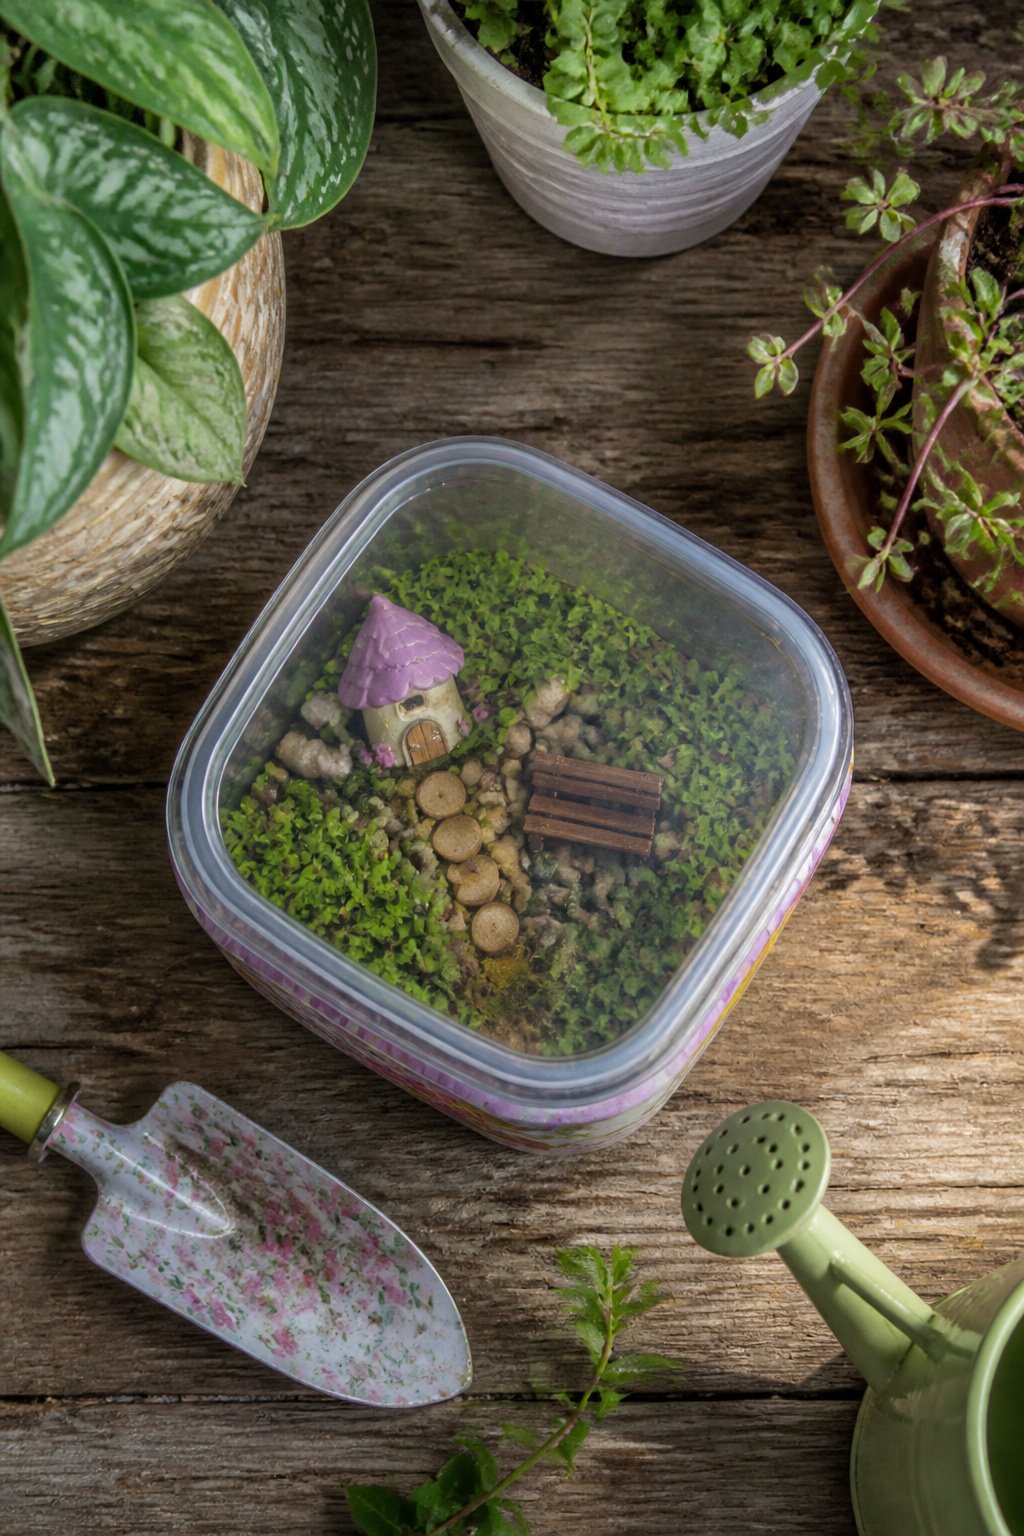
A plastic food storage container makes a surprisingly practical first fairy garden. The tight seal means no leaks on the patio table, and the shallow depth keeps the soil layer thin enough that moss and small ground covers establish fast without staying soggy. I like this route for testing whether the habit sticks before spending thirty or forty dollars on ceramic.
The trick is hiding the plastic. A perimeter of flat stones hot-glued to the outside, or thin wood strips tacked around the rim, turns the thing into something that reads as a planter from across the yard. Popsicle-stick fairy houses and a few river rocks complete the scene without demanding a dedicated budget line.
Start with what you already own. A takeout container or that lidless storage bin in the back of the cabinet works fine. If the sides feel too tall, filler bottles in the bottom lift the soil profile so you are not buying mix you do not need.
36. Fairy Garden with a Rubbermaid Bin
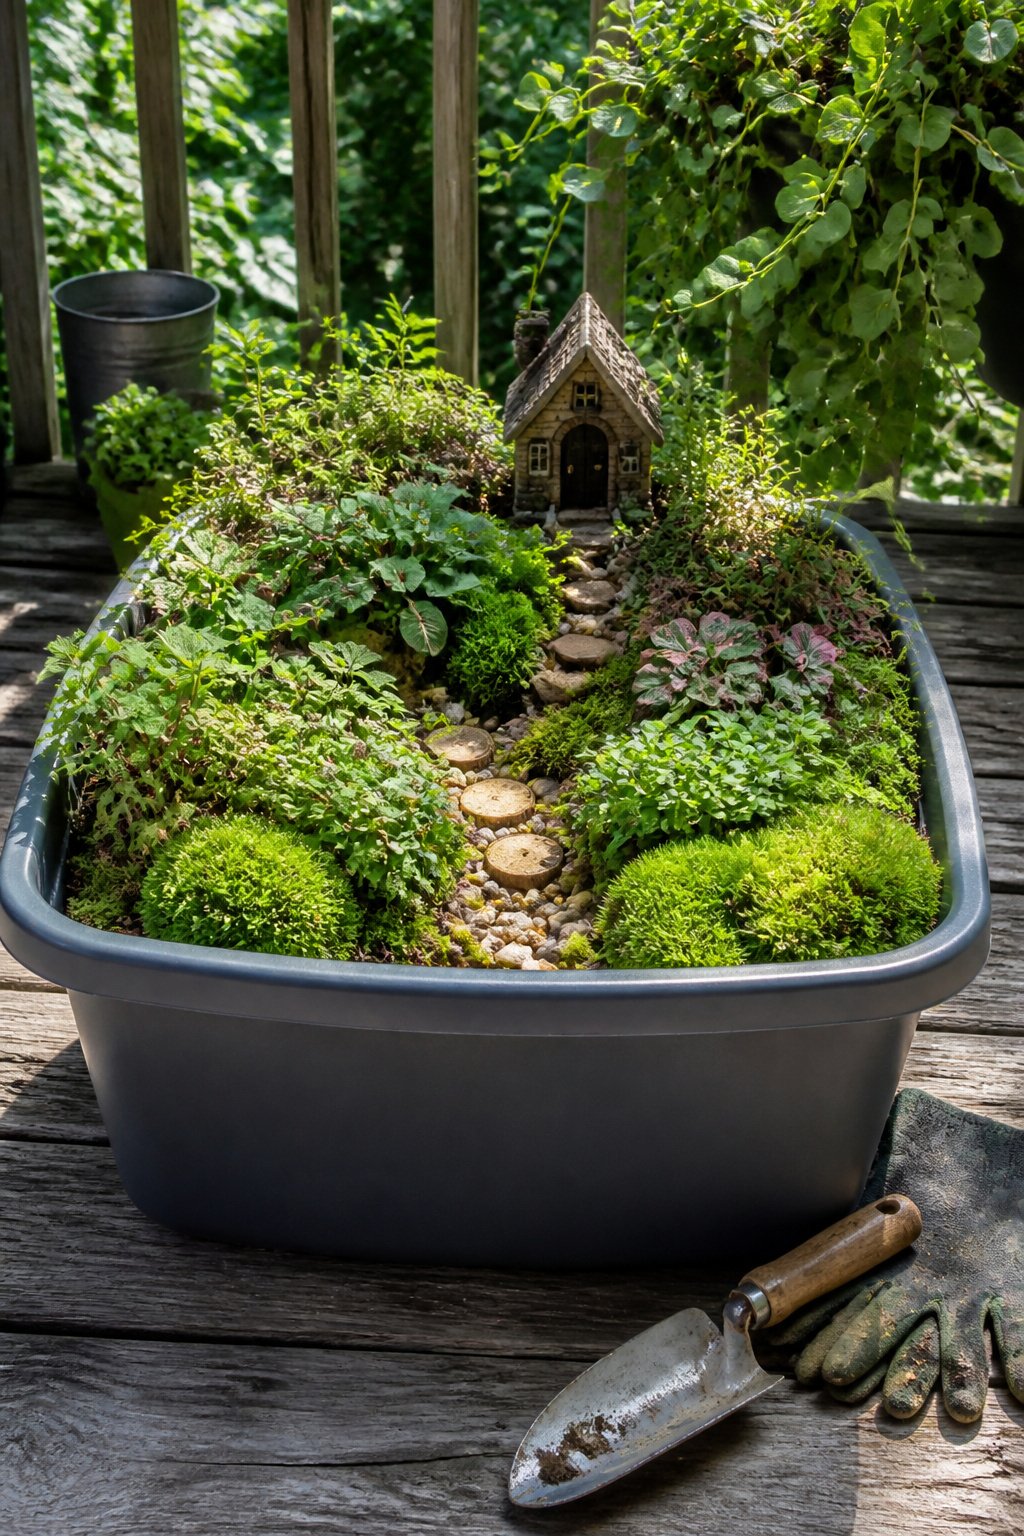
A Rubbermaid storage bin gives you room to build something that actually feels like a world instead of a crowded shelf. The depth matters more than the width. Sixteen inches or more of soil lets you sink a dwarf conifer or a small heuchera without the roots hitting plastic and circling. I learned that the hard way with a shallower tote that looked fine in May and fried by August.
You can zone the space the way you would a real bed: moss and creeping thyme in front where it stays damp, a raised mound of grittier mix toward the back for something that wants drainage, a flat middle stage for whatever miniature scene you are building around. The bin’s own walls do the containing; you are free to play with elevation inside.
Drainage needs real holes, not the dimples that sometimes pass for them. A half-inch bit, six to eight holes across the bottom, plus an inch of coarse rock before the soil goes in. The handles are the overlooked advantage. When a hard freeze shows up two weeks early or a heat wave parks over your balcony, two hands can lug the whole garden under cover without dismantling anything. That mobility is what turns a summer project into a year-round one.
37. Fairy Garden with a Milk Carton

Waxed cardboard milk cartons make surprisingly sturdy fairy garden shells once you cut windows into the sides for peering into the scene. The wax coating buys you a season or two outdoors before the cardboard softens, which is exactly the right lifespan for a child’s first project. Their attention will have moved to something else by then anyway.
For a build that lasts longer, line the inside with a cut-open plastic jug or a sheet of polyethylene. The carton keeps the tidy rectangular shape while the plastic holds moisture away from the cardboard walls. A pair of scissors and some masking tape around the window edges is all the prep you need.
What convinced me, reading through a dozen of these setups, is that the milk carton hits a sweet spot other containers miss. It is free, it is already sitting in your recycling bin, and the peaked roof makes a cottage silhouette without any cutting. Children can paint the outside, press moss onto the roof, and arrange pebbles on the plastic-lined floor while the grown-up handles the window holes. The temporary nature is the point, not a flaw; a six-year-old gets the fun of building something magical without the pressure of keeping it perfect forever.
38. Fairy Garden with a Concrete Block
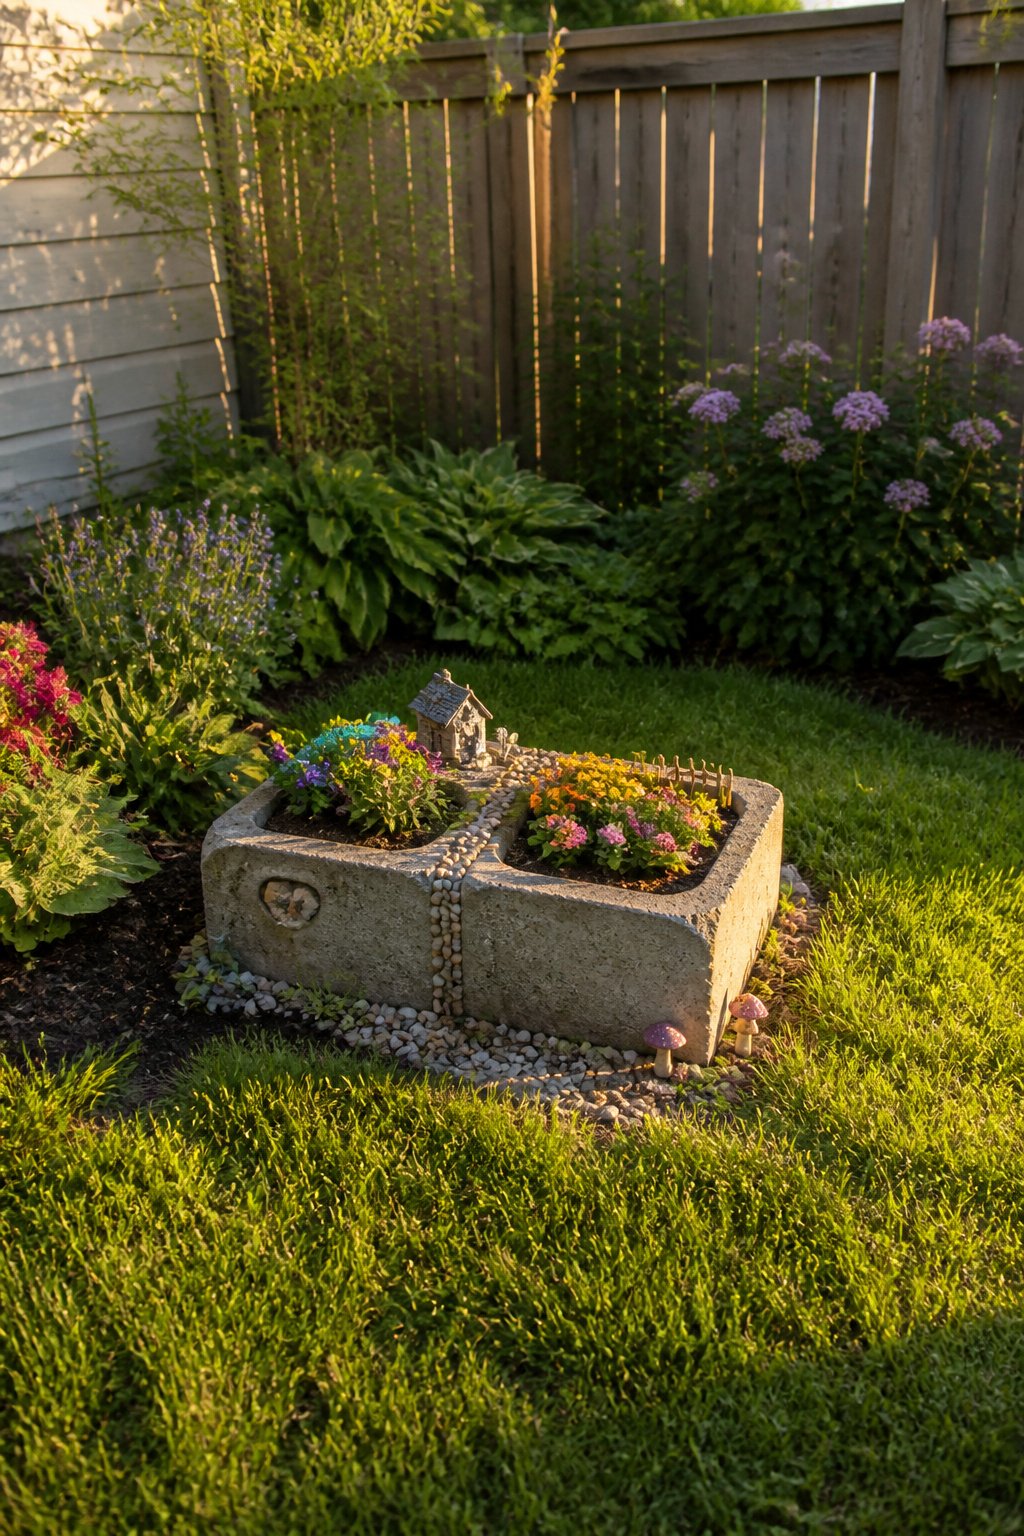
A single cinder block gives you two planting cavities right away, and stacking them multiplies that fast. I fill each hole with potting soil that drains well but still holds its shape when packed, the same mix I’d use for any container that sits outside in rain. The concrete wicks moisture, so the soil choice matters more than in glazed pottery.
Paint or face the exterior if raw gray industrial isn’t the look you’re after. I’ve seen people brush on exterior latex in soft moss greens or cream colors, or glue flat river stone across the visible faces with a slurry of heavy clay soil wetted to a paste. That clay glue sets surprisingly solid once it dries, and it costs nothing if your yard has a patch of the stuff.
Stack blocks with a gap between tiers so water has somewhere to go instead of pooling in the lower cavities. A few inches of space also lets trailing plants spill over the edge and read as separate levels rather than one tall wall of green. Small broken tile or gravel tucked into that drainage gap hides the mechanics from view. The whole structure stays heavy enough that it won’t shift in wind, which is more than I can say for some of the resin fairy houses I’ve tried.
Containers That Work
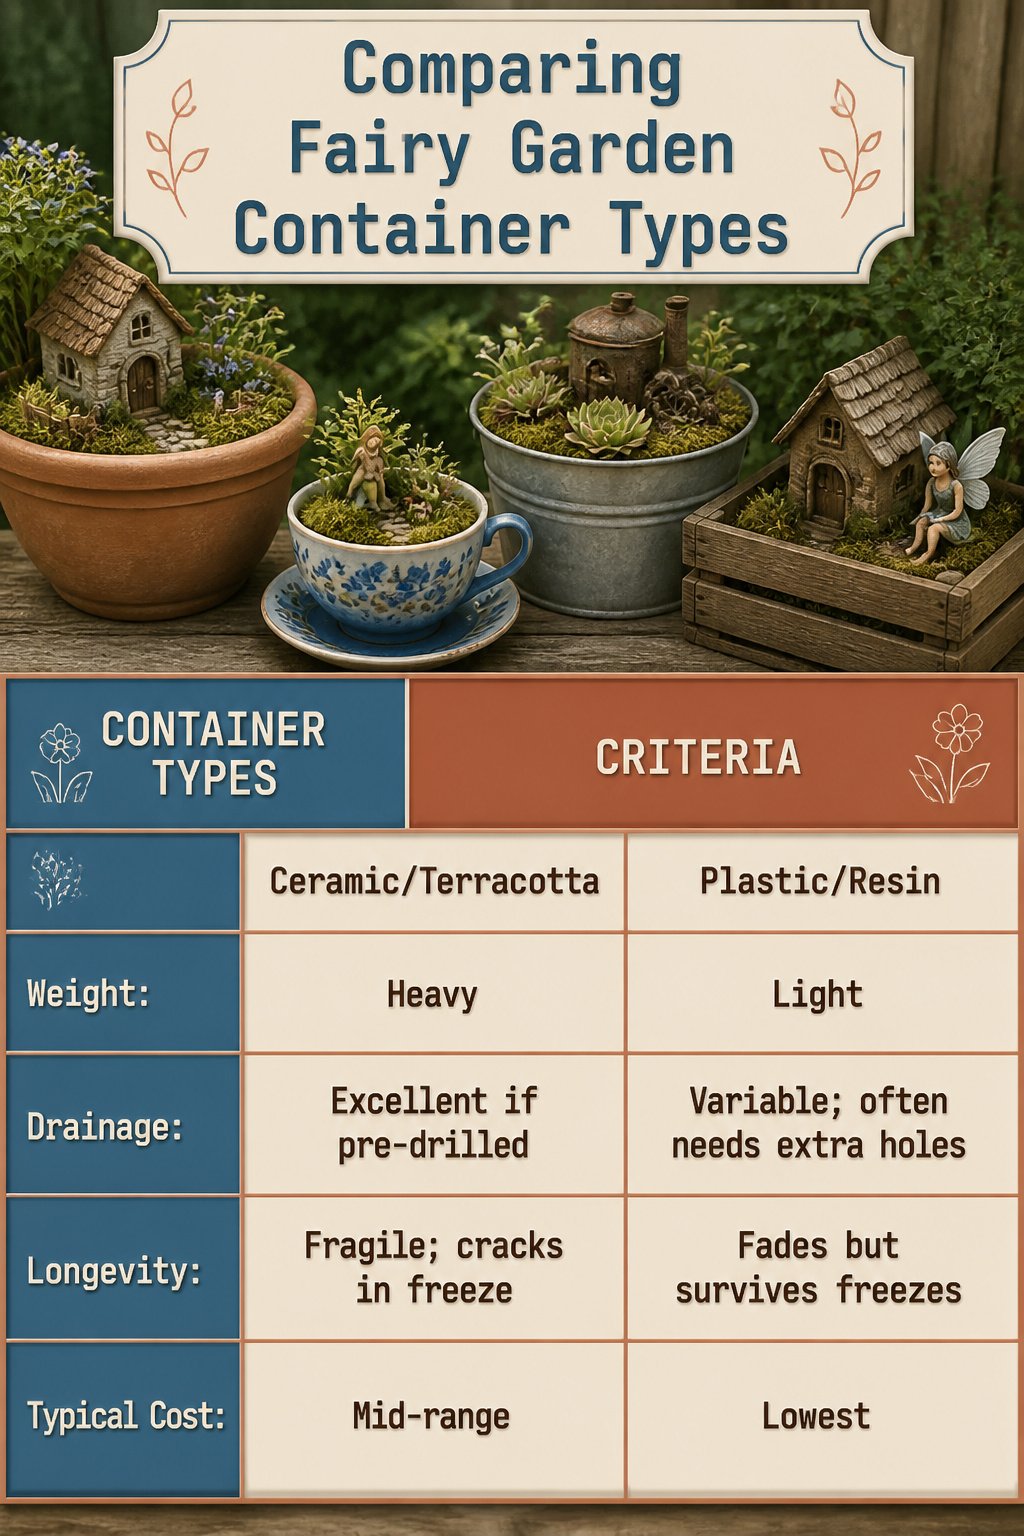
The container you start with sets the whole project in motion before you buy a single plant. Weight matters most if you plan to move the garden between sun and shade, or if you live somewhere frost sends pots indoors for winter. Drainage determines whether you are drilling holes or watching roots rot. Longevity is the difference between a garden that lasts five years and one that cracks in the first freeze.
| Container | Weight | Drainage | Longevity | Typical Cost |
|---|---|---|---|---|
| Ceramic/terracotta | Heavy | Excellent if pre-drilled | Fragile; cracks in freeze | Mid-range |
| Plastic/resin | Light | Variable; often needs extra holes | Fades but survives freezes | Lowest |
| Metal | Moderate | Poor without modification | Rusts eventually; dents | Mid-range |
| Found objects (teacups, boots, crates) | Varies | Usually requires DIY | Single season to decades | Free to low |
Plastic keeps the budget in check and the lifting easy, but a fairy garden in a lightweight pot tips over when a squirrel lands on it. Ceramic gives you scale that reads as permanent, which matters when half the charm is the illusion that tiny houses have always sat there. Found containers, the old drawer or chipped soup tureen, demand the most problem-solving up front and reward it with a story no store pot carries. Metal looks right for industrial or steampunk themes and holds up until the drainage issue catches you; I have seen more drowned hens-and-chicks in galvanized buckets than in any other setup. Match the container to the maintenance you will actually do. A heavy ceramic pot with no drainage holes is a commitment to precise watering, or to a drill, or to starting over in June.
Plants for Sun and Shade
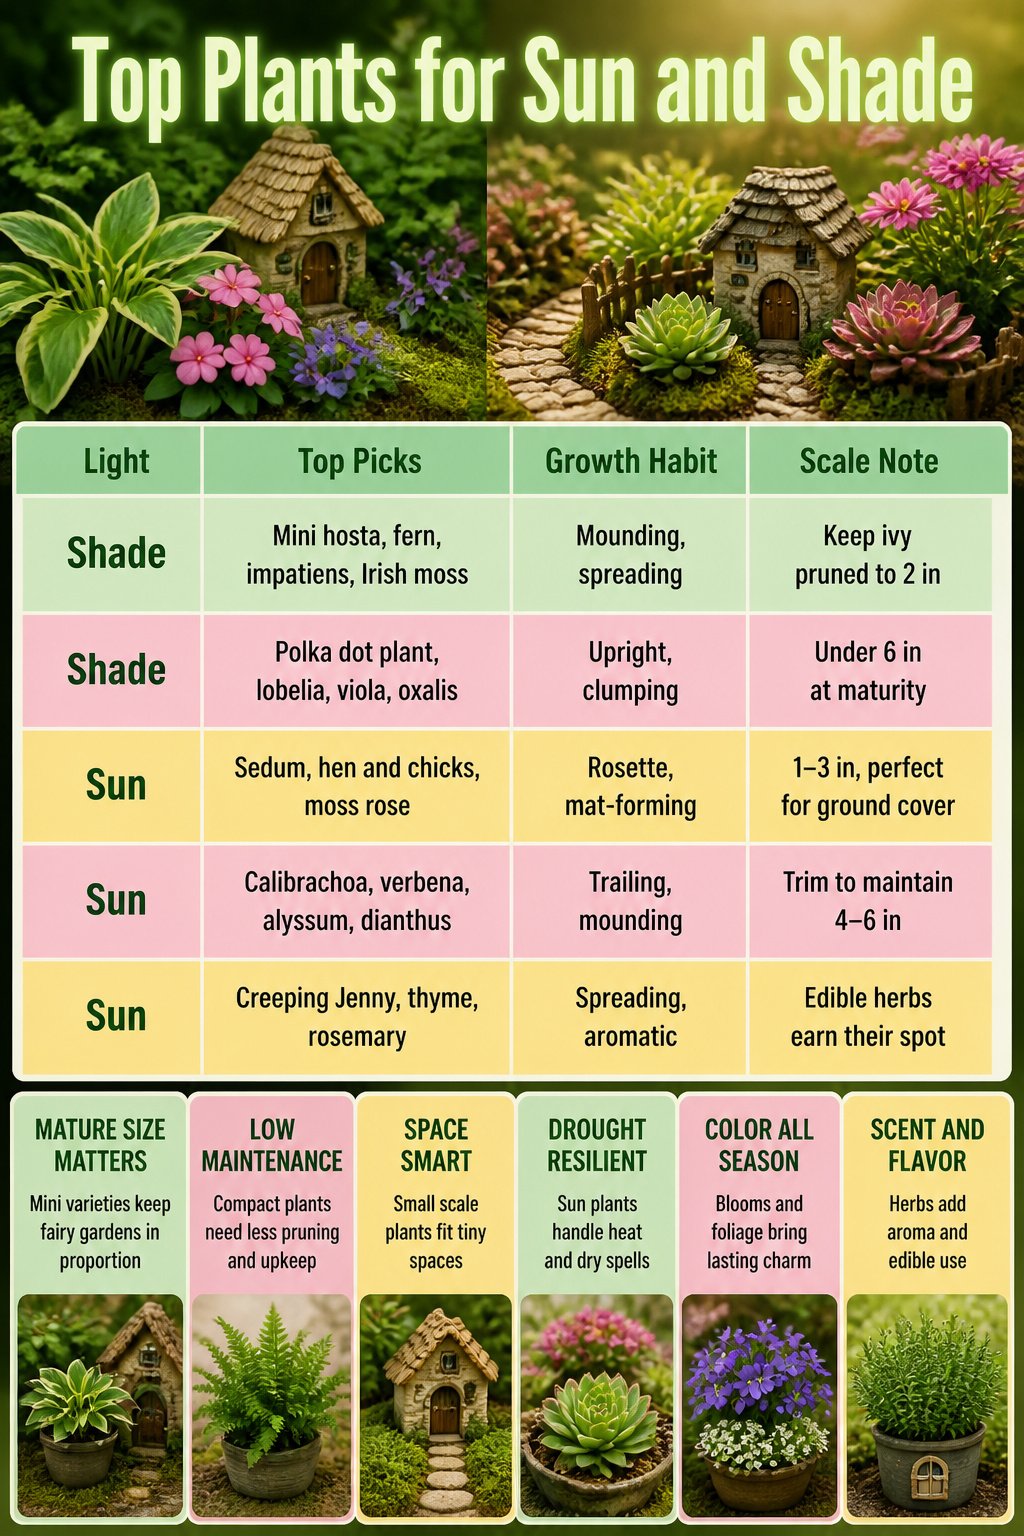
Light decides more than you’d think in a fairy garden. A pot sitting on a sunny balcony needs entirely different plants than one tucked under a porch overhang, and mixing them up means watching your miniature landscape crisp or languish in the first month.
For shaded spots, miniature hostas and ferns give that woodland floor feeling without outgrowing the scale. Irish moss spreads flat like a tiny lawn, while impatiens, lobelia, and viola add spots of color that don’t demand direct sun. Polka dot plant and oxalis bring patterned foliage, and ivy trails nicely over edges if you keep it trimmed.
Sunny containers call for tougher, lower growers. Sedum and hen and chicks stay compact and handle dry spells. Moss rose, calibrachoa, verbena, and alyssum cascade over rims, while creeping Jenny and dianthus fill gaps with color. Herbs like thyme or creeping rosemary add scent and structure.
Mature size matters more in fairy gardens than in regular pots. A standard hosta becomes a tree in this scale, so the miniature varieties stay proportional to houses and pathways.
| Light | Top Picks | Growth Habit | Scale Note |
|---|---|---|---|
| Shade | Mini hosta, fern, impatiens, Irish moss | Mounding, spreading | Keep ivy pruned to 2 in |
| Shade | Polka dot plant, lobelia, viola, oxalis | Upright, clumping | Under 6 in at maturity |
| Sun | Sedum, hen and chicks, moss rose | Rosette, mat-forming | 1–3 in, perfect for ground cover |
| Sun | Calibrachoa, verbena, alyssum, dianthus | Trailing, mounding | Trim to maintain 4–6 in |
| Sun | Creeping Jenny, thyme, rosemary | Spreading, aromatic | Edible herbs earn their spot |
Frequently Asked Questions
What plants are best for fairy gardens?
Small plants with small root masses work best, especially in containers where overcrowding kills the scene fast. Match your choice to the light the spot actually gets: sedums and moss rose for full sun, ferns and moss for shade, succulents with half perlite or coarse sand if you forget to water. The article also mentions creeping thyme, baby tears, woolly thyme, hens and chicks, and creeping Jenny as reliable picks that stay low and read as landscape rather than houseplants dropped in a toy set.
How do you make a fairy garden?
Start with the container sitting in the spot where it will live, then match plants to that light. Drill drainage holes if the container lacks them; damp soil rots roots and ends the project early. Settle the plants first, water them in, then add accessories last so you don’t bury a house under shifted dirt. Two to four accessories with air between them read as a landscape; packed tight reads as clutter.
What are some creative container ideas for fairy gardens?
Broken terracotta pots stack into tiered scenes with the shards as retaining walls. Teacups on windowsills work if you drill a drainage hole with a diamond bit. Old wagons, galvanized tubs, nested bowls, and dollar-store birdhouses all land at usable scales. One source suggests upcycling an old water table for kids; another notes nursery staff often give away cracked outdoor display pots cheap after spring rush.